Table of Contents
Advertisement
Quick Links
Advertisement
Table of Contents

Related Manuals for Visioneer Strobe XP 450


Summary of Contents for Visioneer Strobe XP 450
- Page 1 Visioneer Strobe XP 450 USB Scanner Installation Guide F O R W I N D O W S...
- Page 2 Visioneer's Limited Product Warranty If you find physical defects in the materials or the workmanship used in making the product described in this document, Visioneer will repair or (at its option) replace the product at no charge to you, provided you return it (postage prepaid, with proof of your purchase from the original reseller) during the 3-month period after the date of your original purchase of the product.
-
Page 3: Table Of Contents
What’s in the Box ........1 The Visioneer Strobe XP 450 Scanner ......2 What You Need . - Page 4 Troubleshooting ........53 Uninstalling Your Scanner ....... . 55 Step 1: Uninstalling the Visioneer OneTouch Software .
-
Page 5: Welcome
ELCOME Your Visioneer Strobe XP 450 USB scanner can quickly scan color and black and white documents and place their images on your computer. Warning: Do not plug in the USB cable until after you have installed the software. Carefully follow the steps and sequence described in the installation procedure beginning on page 5. -
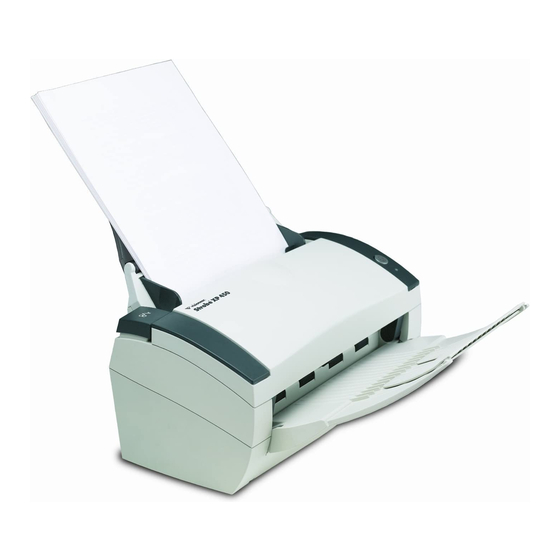
Page 6: The Visioneer Strobe Xp 450 Scanner
Scanner button—Starts scanning using the scan settings button. Status light—Shows the scanner’s status. A flashing green light indicates the scanner is preparing to scan. A steady green light indicates the scanner is ready to scan. Refer to the Troubleshooting section for additional details. -
Page 7: What You Need
Note: The new USB 2.0 ports operate at higher speeds than USB 1.1 ports. If your computer is not equipped with USB 2.0 ports, you can add them with the Visioneer Hi-Speed USB 2.0 PCI Card. Visit the Visioneer web site at www.visioneer.com for ordering information, or contact the dealer where you purchased your Visioneer XP 450 OneTouch USB scanner. -
Page 8: Documentation
OCUMENTATION Your scanner is delivered with the following documentation: Quick Install Card—abbreviated installation instructions. Visioneer Strobe XP 450 Scanner Installation Guide—on the Installation CD; contains detailed installation, scanning, configuration, and maintenance information. ScanSoft PaperPort User’s Guide—on the Installation CD; contains detailed feature and configuration information. -
Page 9: Chapter 1: Installation
To assemble the scanner: 1. Remove all shipping tape from the top and bottom of the scanner. 2. Align the slots on the paper guide with the ridges on the scanner and slide it down until it snaps into place. -
Page 10: Step 2: Connect And Power On The Scanner
N THE CANNER Before installing the software, connect the power supply and power cord, and then turn the power on. To connect your Visioneer Strobe XP 450 scanner: 1. Plug the power supply into the power port on the scanner. -
Page 11: Step 3: Install The Software
2. Plug the power cord into the power supply and into a wall outlet. 3. Turn on the power switch, located on the back of the scanner to the left of the power port. The status light comes on and flashes indicating that the scanner is receiving power. - Page 12 Select Remind me in 7 days and click OK. 10. On the Visioneer License Agreement window, read the license agreement. If you accept the terms, select I Agree, and click Next. 11. On the Visioneer Product Registration window, complete the required information, and then click Register.
-
Page 13: Step 4: Connect The Usb Cable
Connect the USB Cable”. 4: C ONNECT THE The Visioneer Strobe XP 450 scanner connects to any available USB port. Check your computer’s manual for USB port locations. Note: You can connect the scanner to your computer while the computer is running. You do not have to shut down your computer. - Page 14 Note: You can also connect the scanner to a USB port on the computer’s keyboard if it has one, or to a USB hub. If you use a USB hub, it must have its own power supply already plugged into an electrical outlet.
-
Page 15: Chapter 2: Scanning With The Scanner Button
Scanning with the Scanner Button When you press the scanner button, your document is scanned using predefined scan settings and then the image is sent to a software application on your computer. To change scan settings, see “Configuring the Scanner Button” on page 13. - Page 16 3. Load the documents face down, with their tops into the automatic document feeder. 4. Press the button on the scanner. A scan progress window opens and then a thumbnail of the scanned image appears in the destination software. In the following...
-
Page 17: Configuring The Scanner Button
ONFIGURING THE When you first connect your scanner to a computer, the scanner’s OneTouch software is configured to scan in black and white and send the scanned image to the PaperPort desktop. You can change the settings by selecting new options from the Configuration dialog box. - Page 18 The options on the Configuration dialog box are: Select Destination—the list of applications that can open to display the scanned image. To configure the list of available applications, click the Preferences tab at the top of the dialog box and select the desired option.
-
Page 19: Selecting New Settings For The Scanner Button
ETTINGS FOR THE You can select a new destination application, scanning configuration, and image format to use when you press the scanner button. To select new settings for the Scanner Button: 1. From the Select Destination list, select the application where you want scanned images sent. -
Page 20: Creating A New Button Configuration
REATING A UTTON ONFIGURATION You cannot change settings of the preset (default) configurations. To use settings other than those offered by the preset configurations, you must create a new configuration. You can do this either by copying a preset configuration and making the desired changes or by creating a new configuration from scratch. - Page 21 4. Select scan settings for the new configuration. Mode—Select a scanning mode as follows: Black/White to scan in black and white. For example, letters and memos are usually scanned in black and white. Grayscale to scan items such as documents containing drawings or black and white photographs.
- Page 22 AutoCrop—This option lets the scanner automatically determine the size of the item being scanned. For example, if you scan an unusual page size, the scanner will automatically determine the size of the page. DeScreen—Select this option when scanning a picture from a newspaper or magazine article, or other items that contain images with patterns or dots.
-
Page 23: Editing Button Configurations
7. To set the new configuration for use by the scanner button, select the configuration and then click OK. DITING UTTON ONFIGURATIONS You cannot edit the preset button configurations; you can only edit those configurations that you created yourself. To edit a configuration: 1. -
Page 24: Setting Preferences
ETTING REFERENCES You can set general preferences for button and scanner functions. To set preferences: 1. Open the Configuration dialog box and click the Preferences tab. Preferences tab 2. Select button preferences as described below. Show All Destinations—This option selects all the destination application categories. - Page 25 3. Click the General tab to set a temporary folder. Folder for Temporary Images—Click the Folder button and then select a folder for the scanner’s temporary images. During scanning, a temporary file contains scan information about the image. Because temporary image files can sometimes be large, select a folder that has sufficient disk space available.
-
Page 26: Chapter 3: Scanning From Paperport
NSTALLATION UIDE Scanning from PaperPort Instead of using the scanner button, you can scan from the PaperPort software application. Use this method if you want to preview an image and adjust scanning settings prior to scanning. TWAIN S CANNER AND THE TANDARD Your scanner uses the TWAIN standard for scanning. -
Page 27: Load Documents Into The Document Feeder
OCUMENTS INTO THE 1. If you are scanning legal-sized documents, unfold the output tray extension. 2. Adjust the paper guide for the size of paper. Note: Remove any staples or paper clips from the documents before loading them into the automatic document feeder. Staples and paper clips can jam the feed mechanism. -
Page 28: Scanning From Windows 98, Me, 2000, Or Xp
CANNING FROM INDOWS The instructions in this section are for scanning with the TWAIN software on computers running Windows 98, Me, 2000, or XP. If your computer is running Windows Me or XP and you want to use the WIA software, see “Scanning from Windows Me or XP”... - Page 29 Scan pane Opens the Scan Manager 3. From the Scanner drop-down list, select Strobe XP 450. 4. In the “Scan what?” section, choose to scan a Document or Photograph. 5. Click Settings to view and change the format for the scanned item’s file name and the file type.
- Page 30 8. If you want to see what the scanned image will look like before scanning its final image, click the Preview button. The scanner scans a preview of the item and displays it in the Scan Manager. You can now use the options on the Scan Manager to fine-tune the image.
- Page 31 A thumbnail image of the scanned item appears on the PaperPort desktop N THE APER ORT DESKTOP By default, the name of the scanned image is the day, date, and number of scanned items that day. For example, the second item scanned on a day is followed by a (2), the third by a (3) and so on.
-
Page 32: Adjusting The Image With The Scan Manager
Click Scan More Pages to scan additional pages and add them to the stack of items placed on the PaperPort desktop. Click Scan Other Side to reload and scan the other side of previously scanned pages. This option is only available once. Click Done if you are finished scanning. - Page 33 Image Type Resolution Brightness Contrast MAGE From the Image Type drop-down list, select the appropriate image type for the item(s) you’re scanning: Black and White—scans in black and white. The scanning pixels are all the same size and are either black or white. Use this setting for letters, memos, pen and ink drawings, and other black and white material.
- Page 34 fine artwork. Click the Resolution drop-down list and select a resolution. The resolution settings on your Strobe XP 450 scanner range from 100 dpi to 2400 dpi. RIGHTNESS AND...
-
Page 35: Adjusting The Output Size
Brightness refers to the lightness or darkness of the image. Contrast is the range between the darkest and lightest portions of the image. The greater the contrast, the more the difference between the lighter and darker shades in the image. Dark/Light slider—adjusts the brightness of the scan. - Page 36 Click the Preview Auto-Area button to let the Scan Manager automatically determine the size of the item being previewed. For example, if you preview the scan of a small photo, the Scan Manager automatically determines that the scan area is only the edges of the photo.
-
Page 37: Setting The Scan Area
ETTING THE You can manually adjust the output area to scan specific sections of an image. For example, if you’re scanning a photograph and want to focus on one section, manually setting the output size removes the rest of the photograph from the final scanned image. - Page 38 Here’s a sample of a manually selected output area: This is the area manually selected for scanning. ANUALLY ETTING THE The output dimensions at the bottom of the Scan Manager show the Width and Length of the scan area. You can set the area by typing numbers into those boxes.
-
Page 39: Reversing The Image
98, M , 2000, CANNING FROM INDOWS EVERSING THE MAGE The Scan Manager has an Invert button and a Mirror button for reversing the scanned image. Invert Mirror Invert reverses the black and whites or the colors of an image. Mirroring flips the image 180 degrees. -
Page 40: Adjusting Color And Gray Images
Scans of patterns or dots sometimes have a distorted or wavy appearance. The scanner scans the item to compensate for the patterns and dots, and produces a clearer image. The scanning may slow down a bit when this option is selected. - Page 41 final scanned image. HARPEN MAGE Sharpness determines the amount of blur in an image. Your scanner can sharpen an original blurred image by adjusting the blurry edges in sections of the image. To sharpen an image: 1.
-
Page 42: Adjusting Color Settings
CANNER NSTALLATION UIDE EVEL Your scanner can analyze a color image to automatically determine the best settings to match the colors of the original image. Click this button to let the scanner automatically adjust the color settings. Original Image Auto Level Adjusted... - Page 43 IGHLIGHT HADOW EVELS Images have light and dark areas. The highlight is the lightest spot on an image; shadow is the darkest spot. The range of colors between the highlight and shadow determines the range of colors of the image. Use the Highlight/Shadow Levels to extend the original range of colors between the highlight and shadow to reveal more details in the midrange colors.
- Page 44 4. Click Preview to see the effect of the changes on the preview image. 5. Click Reset to reset the levels to their original values. 6. Click OK when the levels are what you want. URVES Like the Highlight/Shadow levels, the Curves feature also adjusts the range of midtone colors on an image.
- Page 45 3. Drag the line up or down to set a new gamma. The input and output values represent values on the horizontal and vertical axes for the new gamma setting. Click the Curve or Line button to see the display as a smooth curve or a line. You can drag the line at multiple points.
- Page 46 4. Click Reset to reset the levels to their original values. 5. Click OK when the levels are what you want. ATURATION IGHTNESS Hue is the color your eyes see as reflected from the image, saturation is the strength or purity of a color and determines whether a color is pale or rich, and lightness is the intensity of the color.
- Page 47 OLOR Color drop-out is the ability of your scanner to automatically remove one color from a scanned item. For example, if you are scanning a letter with a red watermark, you can choose to drop-out the color red (the R Channel) so the scanned letter just shows the text and not the red watermark.
-
Page 48: Adjusting The Scanner's Power Saving Time
15 to a maximum of 180 minutes. To adjust the power down time: 1. Right-click the Visioneer icon on the top-left corner of the Scan Manager desktop and select Set Power Saving from the menu. 2. On the Set Power Saving Time dialog box, enter a value from 15 to 180 minutes. -
Page 49: Scanning From Windows Me Or Xp
ScanSoft PaperPort 9.0, and then click PaperPort. The PaperPort desktop opens. 2. Click the Scan icon on the PaperPort command bar. The Folders pane is replaced by the Scan pane. Scan pane 3. From the Scanner drop-down list, select WIA-Strobe XP 450. E OR... - Page 50 finished. 7. Click the Scan button in the Scan pane. The Scan using Strobe XP 450 window opens. Use this window to select scanning options and start the scanner. 8. Make sure the Paper source value is set to Document Feeder.
- Page 51 Note: If you preview when scanning a stack of documents, the first page of the stack feeds through the ADF for the preview. After adjusting the scanner settings, replace that page on the stack so it is scanned with the rest of the pages.
- Page 52 You can select new settings before you scan an item to fine tune exactly how you want to scan a particular item. To select the scanner settings before you scan: 1. On the Scan using Strobe XP 450 window, click Adjust the quality of the scanned picture. The Advanced Properties dialog box opens.
- Page 53 CANNING FROM INDOWS E OR Brightness and Contrast—Drag the sliders to the right or left to adjust the brightness and contrast of the scanned image. The Contrast setting does not apply to the setting Black and White picture or text. Resolution (DPI)—Click the drop-down list and choose the dots per inch (dpi) of the resolution.
-
Page 54: Chapter 4: Maintenance
To clean the ADF: 1. Wet a cotton swab with some isopropyl alcohol (95%). 2. Press the ADF cover release on the top left of the scanner body to open the automatic document feeder cover. 3. Wipe the feed roller from side to side. Rotate the roller to clean its entire surface. -
Page 55: Clearing Paper Jams
Document Feeder, a warning dialog box opens after a few moments. To clear a paper jam: 1. Press the ADF cover release on the top-left of the scanner body to open the automatic document feeder cover. 2. Remove the jammed paper and close the cover. -
Page 56: Replacing The Adf Pad Assembly
Problems with documents feeding into the ADF is an indication that the pad spring may be wearing out. See the “Visioneer Strobe XP 450 Scanner Parts List” on page 58 for ordering information. To replace the ADF Pad assembly: 1. -
Page 57: Troubleshooting
Did you select another scanning source in the PaperPort Scan Pane? If you use multiple devices with your computer, you may have selected another source for images. Start the PaperPort software and click the Scan icon, and then make sure Strobe XP 450 is selected as the scanner. - Page 58 Problem: What do the different status light conditions mean? The status light indicates the current state of the scanner. Descriptions of the most common patterns are listed below. Contact Visioneer Technical Support if you experience a different blinking pattern. •...
-
Page 59: Uninstalling Your Scanner
NINSTALLING To uninstall the Visioneer Strobe XP 450 scanner, remove the scanner software first, and then remove PaperPort, or other scanner software. 1: U NINSTALLING THE 1. On the Windows taskbar, click Start, point to Settings, and then click Control Panel. -
Page 60: Step 2: Uninstalling The Paperport Software
2: U NINSTALLING THE To uninstall PaperPort 9.0 from Windows 98SE or ME: 1. On the Windows taskbar, click Start, point to Settings, and then click Control Panel. 2. Double-click the Add/Remove Programs icon. 3. On the Add/Remove Programs Properties window, select the Install/Uninstall tab. -
Page 61: Visioneer Strobe Xp 450 Scanner Specifications
Optical resolution Bit depth Maximum item size Minimum item sizes Scan method ADF specifications Scanning Speed Capacity Paper Thickness Light source Interface Scanner dimensions Height Width Length Weight Operating temperature Relative humidity Power supply Input voltage/frequency Output voltage/watt Power consumption Safety and agency certifications... -
Page 62: Visioneer Strobe Xp 450 Scanner Parts List
XP 450 S ISIONEER TROBE Please use the following part names and numbers when ordering replacements for your scanner. Part Name Paper Guide Output Tray ADF Pad AC Power Cord Power Supply CANNER ARTS Part Number 57-0101-000 57-0102-000 57-0100-000 35-0071-000... -
Page 63: Index
I N D E X Numerics 24-bit color 29, 43 8-bit gray 29, 43 adjust image 28 AutoCrop cropping images 18 automatic color adjustment 38 AutoScan 11 configuring 13 bit depth 57 black and white 29 brightness 30 brightness slider 30 other software 10 CD-ROM drive 3 color adjustment 36... - Page 64 PaperPort desktop 27 preview 26 small item 31 scan area automatic setting 31 manual setting 33 Scan Manager scan options 28 scanner components 2 connecting 6 troubleshooting 53 uninstall 55 scanning AutoScan 11 from PaperPort 22 Windows 98, Me, 2000, or XP 24...