Visioneer Strobe XP 200 Installation Manual
Usb scanner
Hide thumbs
Also See for Strobe XP 200:
- Installation manual (52 pages) ,
- Datasheet (2 pages) ,
- User manual (168 pages)
Table of Contents
Advertisement
Quick Links
Advertisement
Table of Contents

Related Manuals for Visioneer Strobe XP 200


Summary of Contents for Visioneer Strobe XP 200
- Page 1 Visioneer Strobe XP 200 USB Scanner Installation Guide F O R W I N D O W S...
- Page 2 Visioneer's Limited Product Warranty If you find physical defects in the materials or the workmanship used in making the product described in this document, Visioneer will repair or (at its option) replace the product at no charge to you, provided you return it (postage prepaid, with proof of your purchase from the original reseller) during the 3-month period after the date of your original purchase of the product.
-
Page 3: Table Of Contents
What’s in the Box ........1 The Visioneer Strobe XP 200 Scanner ......2 What You Need . - Page 4 Step 2: Uninstalling the PaperPort Software ....40 Visioneer Strobe XP 200 Scanner Specifications ....41...
-
Page 5: Welcome
ELCOME Congratulations on purchasing your Visioneer Strobe XP 200 USB scanner. With your scanner, you can quickly scan color and black and white documents to place their electronic images on your computer. ’ S IN THE Before starting the installation, check the contents of the box to make sure that all parts are included. -
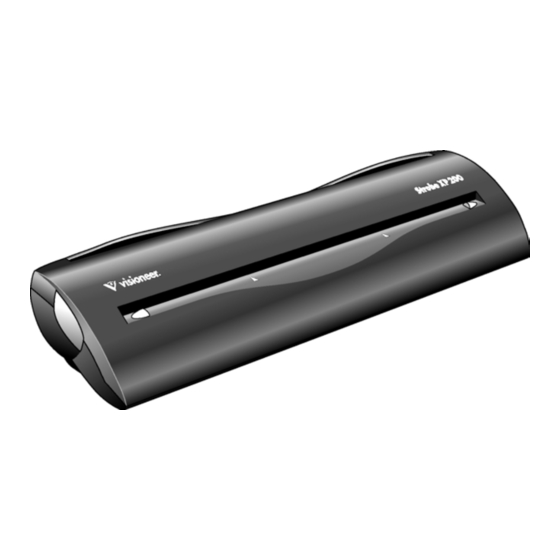
Page 6: The Visioneer Strobe Xp 200 Scanner
XP 200 S ISIONEER TROBE CANNER NSTALLATION UIDE XP 200 S ISIONEER TROBE CANNER Scanner button Alignment arrow Alignment arrow Page feed Paper return Paper return icons USB port Scanner button—Opens a dialog box used to adjust scanner settings or cancel an in- process scan. -
Page 7: What You Need
Panel, double-click Display, and then click the Settings tab. OCUMENTATION Your scanner is delivered with the following documentation: Quick Install Card—abbreviated installation instructions. ■ Visioneer Strobe XP 200 Scanner Installation Guide—detailed ■ installation, scanning, configuration, and maintenance information. Getting Started Guide—simplified installation instructions. ■... -
Page 8: Chapter 1: Installing
Installing Installation is a quick, three-step process: Install the software ■ Connect and calibrate the scanner ■ Print guides and install other software from the CD ■ 1: I NSTALL THE Note: You must install the software before connecting the scanner to your computer. - Page 9 Click Remind me in 7 days, and then click OK in response to ■ the message window. 9. On the Visioneer License Agreement dialog box, read the license agreement. If you accept the terms, select I agree, and click Next. 10. On the Welcome window, click Next to start the installation.
-
Page 10: Step 2: Connect And Calibrate The Scanner
Connect and Calibrate the Scanner”. 2: C ONNECT AND The Visioneer Strobe XP 200 scanner connects to any available USB port. Check your computer’s manual for USB port locations. Note: You can connect the scanner to your computer while the computer is running. - Page 11 The USB symbol identifies the location of the USB port on your computer. If the plug does not attach easily, make sure that you are plugging it in correctly. Do not force the plug into the connection. Note: You can also connect the scanner to a USB port on the computer’s keyboard if it has one, or to a USB hub.
-
Page 12: The Scanner Icon
2. Insert the calibration paper into the page feed, face up. The scanner grabs the paper and feeds it through the scanner. When calibration is finished, PaperPort completes its installation. 3. In the Install Completed window, click Finish. 4. Click the Finish button on the Connect Scanner window. 5. - Page 13 To open a dialog box to view and edit scanner settings: 1. Right-click the Scanner icon, and then select Configure from the shortcut menu. The OneTouch Configuration dialog box opens, showing the current settings for the scanner’s AutoScan feature. For detailed information on the dialog box and customizing scanner settings, see “Configuring the AutoScan Feature”...
-
Page 14: Step 3: Print Guides And Install Other Software
3: P RINT UIDES AND You can now install the other software from the CD. 1. After your computer and Windows restart, re-insert the CD into the CD-ROM drive. 2. On the Installation screen, click Scanner Readme File, Scanner Installation Guide, PaperPort Installation Guide, or Additional Software and Guides. -
Page 15: Chapter 2: Scanning
Scanning This section describes how to scan with your Strobe XP 200 scanner. There are two methods available for scanning documents, you can use the scanner’s AutoScan feature or scan from the PaperPort software. Both methods scan equally well, so use the one with appropriate options for the item you are scanning. -
Page 16: Scanner Settings
CANNER ETTINGS The Strobe XP 200 Properties window contains advanced settings that apply to the scanner itself; regardless of the Windows operating system, or if you scan using the scanner button or the PaperPort software. - Page 17 14 inches. Page skew detection—When page skew detection is enabled, sensors in the scanner detect when a document is not correctly aligned and then eject the document. 4. Click OK to save settings and close the Strobe XP 200 Properties window.
-
Page 18: Scanning Using The Autoscan Feature
CANNING USING THE When you insert an item into the scanner, it is automatically scanned and the image is sent to a software application on your computer. To scan using AutoScan: 1. Align a document between the alignment arrows and insert it, face up, into the paper feed slot. -
Page 19: Configuring The Autoscan Feature
ONFIGURING THE When you first connect your scanner to a computer, the scanner’s OneTouch software configures the AutoScan feature to scan in black and white and send the scanned image to the PaperPort desktop. You can change the AutoScan settings by selecting new options from the Configuration dialog box. -
Page 20: About The Configuration Dialog Box
BOUT THE The Configuration dialog box shows the current settings for AutoScan. For example, the following figure shows the settings pre-selected when you first receive your scanner. AutoScan is set to scan the item with the configuration named Scan Document and then open the PaperPort desktop to display the scanned image. - Page 21 Select Configuration—This is the list of available AutoScan configurations. The configuration settings include: color, black and white, or grayscale, resolution in dots per inch (dpi), page size, contrast, and brightness. To see a selected configuration’s settings, click its icon. Click the icon again to close the detailed information. Click the icon of a selected configuration and show its settings.
-
Page 22: Selecting New Settings For Autoscan
ELECTING ETTINGS FOR You can select a new destination application, scanning configuration, and image format to set the AutoScan feature with your scanning preferences. To select new settings for AutoScan: 1. From the Select Destination list, select the application where you want scanned images sent. -
Page 23: Creating A New Autoscan Configuration
REATING A You cannot change settings of the preset (default) configurations. To use AutoScan with settings other than those offered by the preset configurations, you must create a new configuration. You can do this either by copying a preset configuration and making the desired changes or by creating a new configuration from scratch. - Page 24 4. Select scan settings for the new configuration. Mode—Select Black/White to scan in black and white. For example, letters and memos are usually scanned in black and white. Select Grayscale to scan items such as documents containing drawings or black and white photographs. The scanning produces an image in varying shades of gray.
-
Page 25: Editing Autoscan Configurations
DeScreen—Select this option when scanning a picture from a newspaper or magazine article, or other items that contain images with patterns or dots. These patterns and dots sometimes cause a wavy appearance for which the Descreen option can compensate. The following example shows the effect of descreening a scanned image from a magazine article. -
Page 26: Setting Preferences
XP 200 S ISIONEER TROBE CANNER NSTALLATION UIDE 4. Edit the settings as required and click OK. 5. Click OK to close the Configuration dialog box. ETTING REFERENCES You can set preferences for the Select Destination list and whether or not to display a Scan Progress window. - Page 27 2. On the OneTouch Preferences dialog box, select desired preferences as described below. Show All Destinations—Select this option to automatically select all the destination application categories. The list of destination applications on the Configuration dialog box will include all the applications on your computer that fall into these categories.
-
Page 28: Scanning From The Paperport Software
XP 200 S ISIONEER TROBE CANNER NSTALLATION UIDE CANNING FROM THE APER OFTWARE Instead of using the AutoScan feature, you can scan from the PaperPort software application. This is particularly helpful when you’re using PaperPort to file and save scanned items or if you want to preview an image and adjust scanning settings prior to scanning. -
Page 29: Scanning From A Computer Running Windows 98
CANNING FROM A OMPUTER The instructions in this section are for computers running Windows 98, Me, or 2000. If your computer is running Windows XP, see “Scanning from a Computer Running Windows XP” on page 30. To scan an item from PaperPort: 1. - Page 30 Scan pane Click the Scan button to open the Scan Manager 3. From the Scanner drop-down list, select Visioneer Scan Manager. 4. In the “Scan what?” section, choose to scan a Document or Photograph. 5. Click Settings to view, and optionally change, the format for the scanned item’s file name and the file type.
- Page 31 7. On the left side of the Visioneer Scan Manager, select a profile from the Scan Setup panel. For example, select Color Configurations and then select Custom to scan with the preset Custom scan settings. The configuration settings appear as a list. Click the + (plus) sign to see the full list.
- Page 32 8. Adjust settings by checking options and setting new values on the right-hand side of the Visioneer Scan Manager. The changes appear in the Scan Setup pane on the left. Auto Trim—This option automatically eliminates areas outside the edges of a document. Select Auto Trim if the document you’re scanning is smaller than a full-size page.
- Page 33 Visioneer Scan Manager. However you can create new profiles and save them in the Scan Setup list for future use. To create a new profile: 1. On the Visioneer Scan Manager, select one of the three Custom profiles from the Scan Setup list (for example, Black&White Configurations>Custom).
-
Page 34: Scanning From A Computer Running Windows Xp
CANNING FROM A OMPUTER The instructions in this section are for computers running Windows XP. If your computer is running another version of Windows, see “Scanning from a Computer Running Windows 98, Me, or 2000” on page 25. To scan an item: 1. - Page 35 5. Click Settings to view, and optionally change, the format for the scanned item’s file name and the file type. 6. Click the Scan button in the Scan pane. The Scan using Strobe XP 200 window opens. Use this window to select scanning options and start the scanner.
- Page 36 7. Click the button most appropriate for the item you’re scanning. To scan with the Custom Settings option see the next section, “Fine Tuning Your Scans”. 8. Align the document between the alignment arrows and insert it, face up, into the paper feed. 9.
- Page 37 1. On the Scan using Strobe XP 200 window, click Adjust the quality of the scanned picture. The Advanced Properties dialog box opens. 2. Select the options for scanning. Brightness and Contrast—Drag the sliders to the right or left to adjust the brightness and contrast of the scanned image.
-
Page 38: Chapter 3: Maintenance
XP 200 S ISIONEER TROBE CANNER NSTALLATION UIDE Maintenance This chapter contains information on recalibrating, troubleshooting, cleaning, uninstalling, and scanner specifications. ECALIBRATING CANNER You calibrated your scanner during installation, but after many hours of use you may find that scanned images may not be a sharp and clear as when you began using the scanner. - Page 39 3. On the Scanners and Cameras Properties window, make sure the Strobe XP 200 scanner is selected, and then click Properties. 4. On the Strobe XP 200 Properties window, select the Advanced tab. 5. Click Calibrate on the Strobe XP 200 Properties window.
- Page 40 3. On the Scanners and Cameras window, right-click the Strobe XP 200 icon and select Calibrate from the menu. 4. Insert the calibration paper face up into the scanner, and then click OK to start the calibration. 5. When finished, click OK to acknowledge and close the message.
-
Page 41: Troubleshooting
Please see the technical support card that you received with your scanner for technical assistance telephone numbers. Also visit our web site at www.visioneer.com for additional technical information. Problem: The scanner icon disappeared from the Windows taskbar. - Page 42 Pane? If you use multiple devices with your computer, you may have selected another source for images. Start the PaperPort software and click the Scan icon and then make sure Strobe XP 200 is selected as the scanner. Problem: During installation I got the error message: PaperPort Installation is not complete.
-
Page 43: Uninstalling Your Scanner
NINSTALLING To uninstall the Visioneer Strobe XP 200 scanner, remove the scanner software first, and then remove PaperPort, or other scanner software. 1: U NINSTALLING THE 1. On the Windows taskbar, click Start, point to Settings, and then click Control Panel. -
Page 44: Step 2: Uninstalling The Paperport Software
Next. 5. If the Remove Shared Files window opens, select No to All. Important: Visioneer recommends choosing No to All. Removing shared files could cause other applications not to run correctly. The PaperPort software is removed. A message appears offering to keep or remove your scanned image files stored on the computer. -
Page 45: Visioneer Strobe Xp 200 Scanner Specifications
XP 200 S ISIONEER TROBE Optical resolution Bit Depth Output Bit Depth Scan Method Interface Scanner dimensions Height Width Length Weight Operating temperature Relative humidity Safety and agency certifications UL, FCC Class B, Hardware warranty CANNER PECIFICATIONS 600 dpi 48-bit color (internal, 16-bit a/d converter recognition, over 68 billion colors) 16-bit gray (internal, 4096 shades of gray) 24-bit color, 8-bit grayscale, 1-bit black and... - Page 46 XP 200 S ISIONEER TROBE CANNER NSTALLATION UIDE...
- Page 47 PaperPort 24 Windows 98, Me, 2000 25 Windows XP 30 setup 4 specifications 41 computer 3 monitor 3 system requirements 3 troubleshooting 37 Twain standard 24 uninstall 39 Visioneer Scan Manager 27 new profile 29 WIA standard 24 NDEX...
- Page 48 NDEX...