Visioneer STROBE XP 300 User Manual
For windows
Hide thumbs
Also See for STROBE XP 300:
- User manual (136 pages) ,
- Datasheet (2 pages) ,
- User manual (166 pages)
Table of Contents
Advertisement
Advertisement
Table of Contents

Related Manuals for Visioneer STROBE XP 300


Summary of Contents for Visioneer STROBE XP 300
- Page 1 Visioneer ® Strobe XP 300 User's Guide for Windows...
- Page 2 Visioneer Strobe XP 300 USB Scanner User’s Guide F O R W I N D O W S...
- Page 3 Reproduction, adaptation, or translation without prior written permission is prohibited, except as allowed under the copyright laws. The Visioneer brand name and logo are registered trademarks of Visioneer, Inc. The PaperPort brand name and logo and the OmniPage Pro brand name are registered trademarks of Nuance Communications, Inc.
-
Page 4: Table Of Contents
Set Up Your Scanner ........21 Strobe XP 300 Stand ....... . . 21 Scanning on the Go . - Page 5 ABLE OF ONTENTS Selecting New OneTouch Scan Settings ..... 38 Setting Destination Application Properties ....40 Selecting Options for the OneTouch Properties Window .
- Page 6 Visioneer Strobe XP 300 Scanner Specifications ....124 Visioneer Scanner Parts List ......125 Index .
- Page 7 ABLE OF ONTENTS...
-
Page 8: Welcome
Welcome Congratulations on purchasing your Visioneer Strobe XP 300 scanner. With your scanner, you can quickly scan color and black-and-white documents and place their electronic images on your computer. ’ —V XP 300 S IN THE ISIONEER TROBE Please check the contents of the box to make sure that all parts are included. -
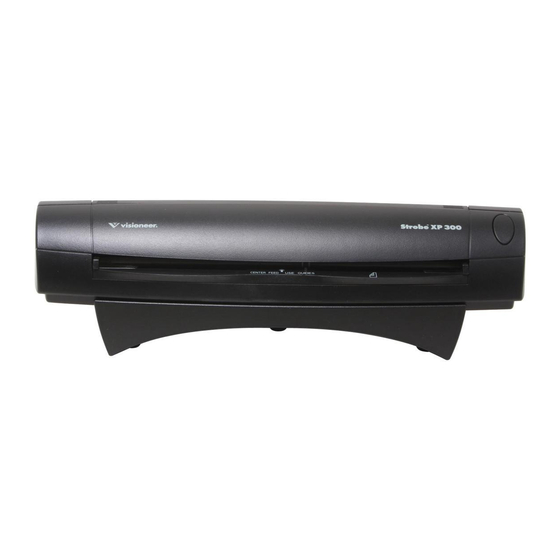
Page 9: The Visioneer Strobe Xp 300 Scanner
XP 300 S ’ ISIONEER TROBE CANNER UIDE XP 300 S ISIONEER TROBE CANNER Scanner Button Paper Guide Page Feed Paper Guide Power Port USB Port Scanner Button—If a OneTouch scan is in progress, cancels the scan and the paper comes out of the scanner. -
Page 10: What You Need
■ OCUMENTATION Your scanner is delivered with the following documentation: Quick Install Card—Abbreviated installation instructions. ■ Visioneer Scanner User’s Guide—On the Installation CD; contains ■ detailed installation, scanning, configuration, and maintenance information. ScanSoft PaperPort User’s Guide—On the Installation CD; contains ■... -
Page 11: Installing
■ to remove its driver programs first before beginning the installation of your Visioneer Strobe XP scanner. Please see “How to Uninstall Your Scanner” on page 122 for basic instructions, or see the User’s Guide that you received with your other scanner for specific instructions. -
Page 12: Step 1: Install The Software
1: I NSTALL THE OFTWARE 1: I NSTALL THE OFTWARE The Installation CD contains all the driver software and scanning software to use your scanner. To install the software: 1. Start Microsoft Windows and make sure no other applications are running. - Page 13 XP 300 S ’ ISIONEER TROBE CANNER UIDE 3. On the Installation Menu, select Install Products. 4. Make sure the boxes for Nuance PaperPort® and Scanner Driver are checked. If you also want to install the additional software provided with your scanner, select the other programs you would like to install.
- Page 14 1: I NSTALL THE OFTWARE The PaperPort software installation will start first. 1. The Select Language window opens for the PaperPort software. Click the drop-down menu arrow and select the language you want to use. Click OK. The first PaperPort Installation window opens. 2.
- Page 15 The Welcome to the OneTouch 4.0 Setup Wizard opens. 1. Click Next. 2. On the Visioneer License Agreement window, read the license agreement. If you accept the terms, select I Agree. If you choose not to accept the license agreement, the installation will terminate and the scanner driver will not be installed.
- Page 16 1: I NSTALL THE OFTWARE 4. The next window lists the choices of the drivers that you can install for your scanner. 5. Select the option you want then click Next. OneTouch 4.0 Scan Environment + TWAIN Driver—This is the ■...
- Page 17 XP 300 S ’ ISIONEER TROBE CANNER UIDE 6. A window opens with image quality samples asking you to select an image for your Color Space setting. The Color Space setting sets the gamma value for the scanner so scanned items look good on your monitor. Gamma controls the brightness of the midtones of colors.
- Page 18 1: I NSTALL THE OFTWARE 9. STOP when you see the “Complete the installation by connecting your hardware” window. Do NOT click OK yet. Leave the window open and proceed to “Step 2: Connect and Calibrate the Scanner” on page 12. Note: If you want to see more information about your scanner and a quick explanation of how to use the OneTouch features, click the More button on the window.
-
Page 19: Step 2: Connect And Calibrate The Scanner
ONNECT AND ALIBRATE THE CANNER Your Visioneer scanner connects to any available USB port. Check your computer’s manual for USB port locations. Note: You can connect the scanner to your computer while the computer is running. You do not have to shut down your computer. -
Page 20: Calibrate The Scanner
2: C ONNECT AND ALIBRATE THE CANNER Your computer recognizes that a scanner has been plugged into the USB port and automatically configures its driver database with the appropriate software to run the scanner. ALIBRATE THE CANNER 1. The Calibration window opens. 2. - Page 21 XP 300 S ’ ISIONEER TROBE CANNER UIDE Note: If the page does not back out of the scanner, the calibration may not have finished properly. Remove the page and complete the installation of your scanner, then see the section, “Recalibrating or Cleaning Your Scanner”...
- Page 22 2: C ONNECT AND ALIBRATE THE CANNER 5. When you are certain that the software has completely loaded, return to the “Complete the installation by connecting your hardware” window and click OK to complete the installation process. You can also click More to see a quick overview about accessing and navigating the OneTouch Button Panel.
- Page 23 XP 300 S ’ ISIONEER TROBE CANNER UIDE 6. Click Close on the OneTouch 4.0 Installation complete window. 7. You can now install the additional applications you received with your scanner.
-
Page 24: Additional Applications For Your Scanner
2: C ONNECT AND ALIBRATE THE CANNER DDITIONAL PPLICATIONS FOR CANNER Your scanner includes free, additional applications on the installation To install the additional applications: 1. Return to the Installation window and select the additional applications you want to install on your computer. 2. -
Page 25: View The User Guides
To view the user guides available for your scanner and the software provided with your scanner. 1. Return to the installation Disc 1 Main Menu. 2. On the Main Menu, click User Guides. The Visioneer User Guides window opens. Use this window to view and save the User Guides you want. - Page 26 Scanner Readme file has late-breaking news about your scanner. 3. When you’re finished, click Main Menu to return to the main Visioneer Installation window and click Exit. That’s it! Installation is finished and your Visioneer scanner is ready to scan.
-
Page 27: Step 3: Register Your Scanner
XP 300 S ’ ISIONEER TROBE CANNER UIDE 3: R EGISTER CANNER Registering your scanner is important as it provides you with access to our free telephone support service. Registration also gives you free access to software updates for your scanner. To register your scanner: 1. -
Page 28: Set Up Your Scanner
CANNER CANNER XP 300 S TROBE TAND Your scanner is designed to fit within easy reach of your keyboard. The stand that comes with the scanner is specifically designed so the scanner easily fits between your computer keyboard and monitor. Place the scanner on its stand so the lip on the stand fits into the ■... -
Page 29: Scanning On The Go
Connect the scanner to your laptop with the USB cable. The scanner ■ will draw its power from the laptop battery. The Strobe XP 300 also connects to a power outlet. If the laptop ■ battery is low, or if electric power is available, use the AC Power... -
Page 30: Configure The Strobe Xp 300 Ac Power Adapter
TROBE OWER DAPTER The Strobe XP 300 AC Power Adapter can be configured to operate with a variety of electric outlet plug configurations that are used in various countries. The three plug adapters that you received with your scanner are interchangeable on the AC Power Adapter. -
Page 31: Scanning Basics
Misuse as described here will void your scanner’s warranty. The Strobe XP 300 scanner is a duplex scanner, this means that it can scan both sides of the page at the same time. To scan a single side of the page, insert the page face down. -
Page 32: Scanning Photos And Thin Paper Items
CANNING HOTOS AND APER TEMS The two transparent sleeves for the Strobe XP 300 scanner are specifically designed for scanning thin paper items, such as credit card receipts, newspaper articles, and retail receipts, especially when using duplex (two-sided) scanning. Generally you should use the transparent sleeves for paper items on paper stock that is less than 20-lb. -
Page 33: Scanning
Scanning If you selected the recommended Full Install option for your scanner’s driver you have several different options to scan with your Visioneer scanner. Each method scans equally well, so use the one with appropriate options for the item you are scanning. -
Page 34: Scan Using Autolaunch
SING AUNCH SING AUNCH When you insert an item into the scanner, it is automatically scanned and the image is sent to a software application on your computer. To scan using AutoLaunch: 1. Align a document with the Paper Guides and insert it into the paper feed slot. -
Page 35: Check The Scan Settings Before Scanning With Autolaunch
XP 300 S ’ ISIONEER TROBE CANNER UIDE HECK THE ETTINGS EFORE CANNING WITH AUNCH Press the button on the top of the scanner. Note: You can also check the scan settings before scanning by clicking the OneTouch icon, and then right-clicking on the PaperIn icon. See “Scan from the OneTouch Panel”... -
Page 36: Turn Autolaunch Off/On
SING AUNCH AUNCH In some instances, you may not want to use the scanner’s AutoLaunch technology. In that case, you can turn it off so the scanner will not automatically scan when you insert a document. Then, you can use the TWAIN interface, or some other application’s interface for scanning. - Page 37 TROBE CANNER UIDE 3. Click the Properties button. The Device Configuration Properties window for the Visioneer Strobe XP opens. 4. Uncheck the option, Enable the generation of events when paper is inserted into the scanner. This turns off the AutoLaunch feature.
-
Page 38: Scan From The Onetouch Panel
CAN FROM THE OUCH ANEL CAN FROM THE OUCH ANEL You can also scan from the computer screen using the OneTouch panel. 1. Press the button on the top of the scanner, or click the OneTouch icon. The OneTouch Icon If you click the OneTouch icon, If you press the scanner button, the PaperIn panel appears. - Page 39 XP 300 S ’ ISIONEER TROBE CANNER UIDE 2. When you’re ready to scan, align a document between the Paper Guides, and insert the document into the paper feed slot. Insert face down to scan a single side. To scan both sides, either side can be face up.
-
Page 40: Using The Onetouch Panel
CAN FROM THE OUCH ANEL SING THE OUCH ANEL The OneTouch panel is also your on-screen set of controls for the scanner. The OneTouch panel shows information about the scanner and its settings. 1. To open the OneTouch panel, press the button on the top of the scanner, or click the OneTouch icon. - Page 41 XP 300 S ’ ISIONEER TROBE CANNER UIDE 3. To navigate through the panel’s three views, click the green arrows at the top of the panel. Click these arrows to navigate through the panel’s three views. The PaperIn View The Hardware View The Detail View The PaperIn View reminds you to insert paper before scanning ■...
-
Page 42: The Onetouch Properties Window
(and other OneTouch windows and dialog boxes) may be “greyed out” and are not available. Greyed out options are not appropriate for your Visioneer Strobe XP scanner. To use the OneTouch Properties window: 1. Open the OneTouch Properties window by either of the following... - Page 43 XP 300 S ’ ISIONEER TROBE CANNER UIDE The OneTouch Properties window opens and shows the current options selected for your scanner. The description on the OneTouch panel shows which options you selected on the window. In this example: The Destination Application is PaperPort The Format for the scanned item will be PDF The Configuration being used for scanning is US Legal Document...
- Page 44 OUCH ROPERTIES INDOW Click the icon of a selected configuration to view its settings. The icons next to each scan configuration indicate the scanning mode. Color Black and White GrayScale Configure Before Scan Note: Use Configure Before Scan if you want to set the scanning mode manually before scanning.
-
Page 45: Selecting New Onetouch Scan Settings
XP 300 S ’ ISIONEER TROBE CANNER UIDE ELECTING OUCH ETTINGS The OneTouch settings consist of a Destination Application, a Scan Configuration, and a Document Format. The OneTouch Properties window is where you select these three elements. Select a format for the scanned image Select a software application... - Page 46 ELECTING OUCH ETTINGS 2. From the Select Configuration list, select a scan configuration. The scan configuration list is preset for the application you select in the Select Destination list. If you select a different application, the configurations are for that application. However, you can create your own scan configurations as well.
-
Page 47: Setting Destination Application Properties
XP 300 S ’ ISIONEER TROBE CANNER UIDE ETTING ESTINATION PPLICATION ROPERTIES The different types of Destination Applications have various properties that you can select. 1. On the OneTouch Properties window, click a Destination Application. 2. Click the Properties button. Click a Destination Application Click the Properties... - Page 48 ELECTING OUCH ETTINGS APER ROPERTIES These properties apply to PaperPort, and are for designating the folder to receive your scanned items. 1. Select the PaperPort folder where you want the file of the scanned image to be located. 2. Click OK. 3.
- Page 49 XP 300 S ’ ISIONEER TROBE CANNER UIDE OCUMENTS ROPERTIES ® These properties apply to Microsoft Word, Microsoft Excel , Adobe Acrobat Reader, and the other applications indicated by their icons in the list. The properties apply to the OCR settings for the applications. 1.
- Page 50 ELECTING OUCH ETTINGS 2. To add another application to the list, click the Add Application button. The Add Text Based Link dialog box appears. 3. Click Browse to find the application you want to add to the list. When you select the application using the Browse button, steps 1 and 2 on the dialog box are automatically filled in, and the application icon appears in step 3.
- Page 51 XP 300 S ’ ISIONEER TROBE CANNER UIDE 7. Click OK or Apply on the OneTouch Properties window. 8. Click Refresh on the OneTouch Properties window. MAGE OCUMENTS ROPERTIES These properties apply to Microsoft Paint and other image processing applications, including ScanSoft OmniPage Pro. 1.
- Page 52 ELECTING OUCH ETTINGS 2. To add another application to the list, click the Add Application button. See the steps on page 43 to add an application to the list. 3. Click OK. 4. Click OK or Apply on the OneTouch Properties window. 5.
- Page 53 XP 300 S ’ ISIONEER TROBE CANNER UIDE 1. Click the Storage Layout options you want. All documents are in the root—The scanned documents are saved in the root of the folder specified in the Storage Location. Documents are put into folders by month, week, or type—Folders are created based on your selection (month, week, or type) and the scanned documents are saved in those folders.
- Page 54 ELECTING OUCH ETTINGS ROPERTIES These properties apply to email applications so you can specify the folder for documents that you will attach to an email message. ® Microsoft Outlook will accept direct attachment of documents to a blank email message as soon as scanning is finished, but other email applications do not.
- Page 55 XP 300 S ’ ISIONEER TROBE CANNER UIDE 3. If you need to change your email client, or any other internet options, click the Internet Options button. The Windows Internet Options Control Panel opens. Click the Programs tab and choose a new email client from the Email list. These are the standard Windows Internet options.
- Page 56 ELECTING OUCH ETTINGS ELECTING ORMAT PTIONS The Page Format options that you select determines the file format of the scanned document. Appropriate page format options and file types are available for the type of Destination Application selected. The available file types depend on the type of scanner you purchased. The available options are for images and text.
- Page 57 XP 300 S ’ ISIONEER TROBE CANNER UIDE MAGE ORMATS Select an image file format for photos, artwork or other documents that you want to save as images. BMP and TIFF are standard image file formats generally used if you want to do additional image processing, such as photo touch-up or color correction.
- Page 58 ELECTING OUCH ETTINGS 3. Choose the file size/image quality option for your scanned images. Minimize Size—Smallest file size, lowest image quality. Normal—Medium file size, some loss of image quality. Maximum Quality—Largest file size, no loss of image quality. Your selection pertains only to the Destination Application currently selected on the OneTouch Properties window.
- Page 59 XP 300 S ’ ISIONEER TROBE CANNER UIDE As you select Destination Applications that are text applications, the text format icon changes to match the file type of the application. In some cases, the Destination Application supports several file types, and you can right-click on the icon to choose the particular file type for that application.
- Page 60 ELECTING OUCH ETTINGS Rich Text Format—The .rtf file format. Text that retains formatting when converted. Available with Microsoft Wordpad and Word. Word Document—The .doc file format used by Microsoft Word. Comma Delimited—The .csv file format; used for database or spreadsheet data with fields separated by commas. When the document is converted into editable text by the OCR software, the fields are maintained so you can copy and paste them to a database or spreadsheet application.
-
Page 61: Selecting Options For The Onetouch Properties Window
XP 300 S ’ ISIONEER TROBE CANNER UIDE ELECTING PTIONS FOR THE OUCH ROPERTIES INDOW The OneTouch Options determine the types of Destination Applications available on the window, as well as the location of the files of your scanned items. 1. - Page 62 ELECTING OUCH ETTINGS Document Management includes PaperPort and other ■ applications for processing and keeping track of your scanned documents. Image Editors include Microsoft Paint and other drawing and ■ graphics applications. Text Editors include Microsoft Word and WordPad, Microsoft ■...
- Page 63 XP 300 S ’ ISIONEER TROBE CANNER UIDE Create copies of scanned documents—Sometimes the image of a scanned document is only saved as a temporary file until its Destination Application is finished using it. In those cases you may want an additional, permanent copy saved on your hard drive. For example, if you scan a picture to an email application, the scanned image is saved as a temporary file, then attached to the email, and the email is sent.
- Page 64 ELECTING OUCH ETTINGS you use the OneTouch 4.0 Burn to CD feature, the location is where scanned documents are stored before they are burned onto the CD. Click the Browse button and find the folder for the copies. Select the grouping option for the documents. Group by type arranges the scanned documents by the type of file, such as .doc or .jpg.
-
Page 65: Creating A New Scan Configuration
XP 300 S ’ ISIONEER TROBE CANNER UIDE REATING A ONFIGURATION The scan configurations are where you select the scanning resolution, brightness, mode (color, black&white, or grayscale), and a number of other settings. The Scan Configurations The Lock Icon Click New to create a new Scan Configuration Note the lock icon on the preset configurations. - Page 66 ELECTING OUCH ETTINGS text editing applications. Thus, you can create specific sets of scan configurations for specific functions and they appear only when appropriate. 3. Click the New button. If you want to start from the settings of another configuration, select the configuration, then click the Copy button.
- Page 67 XP 300 S ’ ISIONEER TROBE CANNER UIDE 5. Select scan settings for the new scan configuration. Mode—Select a scanning mode: Black&White to scan in black and white. For example, letters ■ and memos are usually scanned in black and white. This scan mode produces the smallest file size.
- Page 68 ELECTING OUCH ETTINGS 7. Click the Page Settings tab to select page settings. Click to toggle between inches and centimeters. Size—Click Standard, click the menu arrow and choose a page size from the list, or click Custom and enter the horizontal and vertical page dimensions in the boxes.
- Page 69 XP 300 S ’ ISIONEER TROBE CANNER UIDE Note: Also make sure to set the page size larger than the item that you’re scanning so the Autocrop process will have sufficient room on the page to crop the image properly. Reduce Moire Patterns—Moire patterns are wavy, rippled lines ■...
- Page 70 ELECTING OUCH ETTINGS Duplex—Scan both sides of the page if your scanner has this ■ capability. If this option is not selected, the scanner will only scan the side of the page facing down when you insert it into the scanner.
- Page 71 XP 300 S ’ ISIONEER TROBE CANNER UIDE 9. Drag the sliders to the left and right to change the color settings. As you do, the image changes to show the effects of the new settings. 10. Click OK to save the new configuration. It will now appear in the list of Scan Configurations on the OneTouch Properties window for the appropriate Destination applications.
-
Page 72: The Device Settings Tab
ELECTING OUCH ETTINGS EVICE ETTINGS A Device Settings tab appears on the Scan Configurations dialog box when your selected Destination Application sends the scanned image to a printer, fax application, or other device. You use the options on the Device Settings tab to select settings for the device. To select Device Settings: 1. -
Page 73: The Storage Options Tab (Archive)
XP 300 S ’ ISIONEER TROBE CANNER UIDE Collate copies—If you’re printing more than one page, collate the copies. Enter the number of copies in the Copies box. Advanced—Click to see additional settings for the device. The dialog that appears is specific to the device. For example, if the device is your printer, the dialog box is your printer’s setup settings. - Page 74 ELECTING OUCH ETTINGS 2. Click the Storage Layout options you want. All documents are in the root—The scanned documents are saved in the root of the folder specified in the Storage Location. Documents are put into folders by month, week, or type—Folders are created based on your selection (month, week, or type) and the scanned documents are saved in those folders.
-
Page 75: Editing Or Deleting Scan Configurations
XP 300 S ’ ISIONEER TROBE CANNER UIDE DITING OR ELETING ONFIGURATIONS Note: The original scan configurations listed on the OneTouch Properties window should not be edited or deleted in case you need to return the scanner and OneTouch software to their factory settings. Editing or deleting should only be for those scan configurations that you created yourself. - Page 76 ELECTING OUCH ETTINGS If you manually locked a scan configuration, it must first be unlocked before you can edit or delete it. Click the Lock icon to unlock the configuration. Clicking it toggles between locking and unlocking the configuration. Click the Lock icon to toggle between locked and unlocked.
-
Page 77: Configure Before Scan
XP 300 S ’ ISIONEER TROBE CANNER UIDE ONFIGURE EFORE Choosing Configure Before Scan simply opens a scanning interface when you insert a piece of paper or click a scan button. You can then use that interface to change the Resolution, Scan Mode, and other settings. When you scan, the scanned image will still be sent as the file type and to the same Destination Application already selected in the OneTouch Properties window for that button. - Page 78 ELECTING OUCH ETTINGS SING ONFIGURE EFORE 1. Insert the document into the scanner’s paper feed slot. 2. The TWAIN interface will open. 3. Choose the scan settings applicable to your document. 4. Click on the Scan button in the TWAIN interface. 5.
- Page 79 XP 300 S ’ ISIONEER TROBE CANNER UIDE 4. Click on the Scan button in the TWAIN interface. 5. When scanning is finished. Insert the next page in your document. 6. Click on the Scan button in the TWAIN interface. 7.
- Page 80 ELECTING OUCH ETTINGS For instance, if the Scanning Mode is Black & White but your documents are in color, choose Yes to delete any scanned pages, then select the correct Scanning Mode and restart the scanning. No—scanning stops, but all pages scanned in this batch up to ■...
-
Page 81: Scanning With Optical Character Recognition (Ocr)
The OneTouch OmniPage Module or the OmniPage Pro software must be installed on your computer in order to use the OCR options with the OneTouch 4.0 software and your Strobe XP 300 scanner. OneTouch 4.0 and OmniPage work together to combine scanning with OCR processing into one integrated step. - Page 82 ELECTING OUCH ETTINGS To scan with OCR: 1. Select a Destination Application that has one of the Text formats (TEXT, RTF, XLS, HTML, CSV, DOC, sPDF, nPDF). 2. Scan the document. Your scanned pages appear in the Destination Application with their text ready for editing and other text processing.
-
Page 83: Scanning With Spdf Or Npdf And Searching For Text
XP 300 S ’ ISIONEER TROBE CANNER UIDE CANNING WITH S OR N EARCHING FOR The searchable PDF (sPDF) and Normal PDF (nPDF) are special forms of an Adobe PDF file. sPDF and nPDF are only available as page format options if you have the OneTouch OmniPage Module or the OmniPage Pro Software installed on your computer. - Page 84 ELECTING OUCH ETTINGS 6. Choose a Scan Configuration. 7. Click Apply or OK. Now when you scan with that Destination Application selected, the scanned document will be in the sPDF or nPDF format that was selected for it. 8. To search for the text, open Adobe Acrobat Reader or Adobe Acrobat.
-
Page 85: Scan And Burn To Acd
URN TO A If you have a CD burner attached to your computer, you can scan directly from your Visioneer scanner onto a CD. This feature is available only on computers running Windows XP or Windows Vista. To scan and burn to a CD: 1. - Page 86 ELECTING OUCH ETTINGS 6. Start scanning a page. When scanning is finished, a bubble message on the screen tells you that files are waiting to be burned to the CD. 7. On the OneTouch window, make sure that the Burn to CD Destination Application is still selected and click the Properties button.
-
Page 87: Scanning With Event Forwarding
XP 300 S ’ ISIONEER TROBE CANNER UIDE CANNING WITH VENT ORWARDING If you want to specify an application to use for scanning at the start of the process, you can use event forwarding. The scanner will feed in the first page, but will then stop until you select the application to use. - Page 88 ELECTING OUCH ETTINGS 5. Start scanning a page. A dialog box appears for you to select the application to use for scanning. 6. Select the application in the box and click OK. Now the application you selected opens and you can continue the scanning from that application’s TWAIN interface.
-
Page 89: Creating An Html Web Page From Your Scanned Documents
XP 300 S ’ ISIONEER TROBE CANNER UIDE HTML W REATING AN AGE FROM CANNED OCUMENTS If you scan a document, whether a single page or multiple pages, you can have the pages converted directly to HTML formatted pages for posting directly to your web site. - Page 90 ELECTING OUCH ETTINGS 6. Now scan the image from the OneTouch Button Panel. When scanning is finished, the document is first converted to editable text using the OCR process, then is converted into an HTML format. Microsoft Internet Explorer then opens showing your converted page.
-
Page 91: Transferring Scanned Documents To Storage
XP 300 S ’ ISIONEER TROBE CANNER UIDE RANSFERRING CANNED OCUMENTS TO TORAGE With the Transfer to Storage scanning process, you can scan documents and save them in a folder in one step. The process is ideal for archiving documents without having to manually save or process them in any other way. - Page 92 ELECTING OUCH ETTINGS 5. Click Apply or OK. Your scanned pages are stored in the location that you specified on the OneTouch 4.0 Link Properties window. Your scanned documents will be stored at this location.
-
Page 93: Scanning To Multiple Folders
XP 300 S ’ ISIONEER TROBE CANNER UIDE CANNING TO ULTIPLE OLDERS When archiving documents with the Transfer to Storage option, you can scan them to multiple folders. For example, one folder might be for “Business Receipts,” a second folder might be for “Personal Receipts,” and a third folder might be for “Annual Receipts.”... - Page 94 ELECTING OUCH ETTINGS 5. Click the Scan Settings, Page Settings, and Advanced Settings tabs, and select the settings you want. To help you remember which folder it is, give the new configuration a name that indicates the folder name, such as “Storage for Business Receipts.”...
- Page 95 XP 300 S ’ ISIONEER TROBE CANNER UIDE 9. Click OK. The selected folder will now be set as the Storage Location, such as “Business Receipts.” 10. Click Apply. The new configuration is now listed as a Transfer to Storage configuration. 11.
- Page 96 ELECTING OUCH ETTINGS 12. Make sure to designate separate folders as the Storage Locations for the new configurations. You will now have multiple configurations set up for the Transfer to Storage destination, and each configuration scans documents to separate folders. The new configurations apply to the Transfer to Storage Destination...
-
Page 97: To Transfer Documents To A Server Or Mapped Drive
XP 300 S ’ ISIONEER TROBE CANNER UIDE 5. Scan the documents you want to store in multiple storage folders. The documents are scanned to the folder specified for the configuration. 6. When scanning is finished, select the other configuration you created for storage. - Page 98 ELECTING OUCH ETTINGS 2. Select a storage location on the mapped drive or server for the scanned documents. Servers and mapped drives are represented by an icon that indicates its network connection. Select a mapped drive or server as indicated by the icon.
-
Page 99: Check The Hardware And Select Device Settings
You can also click the scanner icon at the top of the OneTouch Button Panel. The Hardware icon If the Hardware View of the panel is open you can also right-click on the Visioneer Strobe XP icon. The Hardware Properties dialog box appears and shows information about your Visioneer Strobe XP scanner. - Page 100 ELECTING OUCH ETTINGS 2. Click the Properties button. The Device Configuration Properties window opens. You use this window to select new device settings for you scanner.
- Page 101 XP 300 S ’ ISIONEER TROBE CANNER UIDE The Interface information refers to the USB port where your scanner is connected. The scanner automatically detects the type of USB port and displays the information here. The example above shows a scanner connected a USB 2.0 High Speed port.
-
Page 102: Scanning From Twain Software
TWAIN S CANNING FROM OFTWARE TWAIN S CANNING FROM OFTWARE You can scan from any TWAIN scanning application instead of scanning using the OneTouch AutoLaunch feature or the OneTouch Button Panel. TWAIN S BOUT THE TANDARD Your scanner uses the TWAIN interface to scan photographs and documents. -
Page 103: Accessing The Twain Interface
XP 300 S ’ ISIONEER TROBE CANNER UIDE TWAIN I CCESSING THE NTERFACE As previously stated, you can access the TWAIN interface from any TWAIN compliant scanning application. You can configure any of your OneTouch buttons to automatically open the TWAIN interface when you press a button on the scanner. - Page 104 TWAIN S CANNING FROM OFTWARE 6. The TWAIN interface will now open. Note: If you choose to use OneTouch Configure Before Scan for scanning from the TWAIN interface, the final image will be sent to the destination application set for that button. Please see “Setting Destination Application Properties”...
-
Page 105: Twain Interface
XP 300 S ’ ISIONEER TROBE CANNER UIDE TWAIN I PENING THE NTERFACE FROM APER The instructions in this section are for scanning with your scanner’s TWAIN interface. To scan an item using PaperPort: 1. On the Windows taskbar, click Start, point to Programs, point to ScanSoft PaperPort, and then click PaperPort. - Page 106 105 to setup your computer. 3. From the PaperPort scanner selection window, choose the TWAIN: Visioneer Strobe XP 300 scanner. 4. Click the Scan button on the Scan pane. Note: Please wait a few moments for your selection from the drop- down list to become active.
-
Page 107: Scanning From The Twain Interface
ROM THE NTERFACE The TWAIN interface allows you to modify the scan settings for your document. The options on the Visioneer Strobe XP TWAIN interface are: Mode—Select a scanning mode: ■ Black&White to scan in black and white. The scanning pixels are all the same size and are either black or white. - Page 108 TWAIN S CANNING FROM OFTWARE Resolution—Drag the slider to the right or left to adjust the dots ■ per inch (dpi) of the resolution. The maximum resolution is 600 dpi; the minimum is 75 dpi. This option determines the amount of detail you can see in the scanned image.
- Page 109 XP 300 S ’ ISIONEER TROBE CANNER UIDE AutoCrop to Length—Select this option to let the scanner ■ automatically crop the scanned document from the top to the bottom edge of the page, affecting only the length of the document. The width of the scan area is not affected. The scan width is determined by the chosen page size.
- Page 110 TWAIN interface on the left hand side. The Define page size option cannot be used with AutoCrop to Length or AutoCrop to Original options. AutoScan on document insertion—Your Visioneer scanner ■ includes AutoLaunch technology that senses when an item is inserted into the paper feed and starts scanning immediately.
- Page 111 XP 300 S ’ ISIONEER TROBE CANNER UIDE 1. When you’re ready to scan, align the document between the Paper Guides if your scanner has them, and insert the document into the paper feed. To scan a single side, insert the page face down. 2.
-
Page 112: Getting Help With The Paperport Software
TWAIN S CANNING FROM OFTWARE N THE APER ORT DESKTOP Unless you changed it with the Settings option, the name of the scanned image is the day, date, and number of scanned items that day. For example, the second item scanned on a day is followed by a (2), the third by a (3) and so on. -
Page 113: Setting Up Your Scanner To Work With Paperport
APER When you selected a scanning option from the Scanner drop-down list, such as TWAIN: Visioneer Strobe XP, the Scan button at the bottom of the panel should become active after approximately 5 to 10 seconds. If it doesn’t, you need to set up your scanner to work with the selected option. - Page 114 APER To set up your scanner: 1. From the Scanner drop-down list, select one of the options, such as TWAIN: Visioneer Strobe XP. 2. Click the Setup button. A window opens to begin the setup process. 3. Click Yes then click Next.
- Page 115 XP 300 S ’ ISIONEER TROBE CANNER UIDE 4. Click Yes (recommended) then click Next. The next window is for checking the connection between your scanner and the computer. 5. Click Next. After the Setup Wizard checks the connections, the next window is displayed.
- Page 116 ETTING CANNER TO ORK WITH APER 6. Click Next. The TWAIN Interface opens. Note: If you are setting up the scanner for the WIA scanning options, the WIA interface opens instead. 7. Insert a page into the scanner and the Scan button on the TWAIN Interface will become active.
- Page 117 XP 300 S ’ ISIONEER TROBE CANNER UIDE 8. Click the Scan button. The Setup Wizard runs the scan test. A message window opens that says “Basic scan test passed.” 9. Click Next on the message window. The final Setup window opens to let you know the setup process is finished.
-
Page 118: Scanning From The Wia Interface
WIA I CANNING FROM THE NTERFACE WIA I CANNING FROM THE NTERFACE The instructions in this section are for scanning using WIA on computers running Windows XP or Windows Vista. If your computer is running an earlier version of Windows, it cannot use WIA to scan. See “Scanning from TWAIN Software”... - Page 119 TROBE CANNER UIDE The Scan using Visioneer Strobe XP window opens. Use this window to select scanning options and start the scanner. 3. Click the button most appropriate for the item you’re scanning. To scan with the Custom Settings option see the next section, “Fine Tuning Your Scans”.
- Page 120 You can select new settings before you scan an item to fine tune exactly how you want to scan a particular item. To select the scanner settings before you scan: 1. On the Scan using Visioneer Strobe XP window, click Adjust the quality of the scanned picture. The Advanced Properties dialog box opens.
- Page 121 XP 300 S ’ ISIONEER TROBE CANNER UIDE 2. Select the options for scanning. Brightness and Contrast—Drag the sliders to the right or left to adjust the brightness and contrast of the scanned image. The Contrast setting does not apply to the setting Black and White picture or text.
-
Page 122: Maintenance
ECALIBRATING OR LEANING CANNER Maintenance This chapter contains information on recalibrating, troubleshooting, cleaning, uninstalling, and scanner specifications. ECALIBRATING OR LEANING CANNER You calibrated your scanner during installation, but after many hours of use you may find that scanned images may not be a sharp and clear as when you began using the scanner. - Page 123 XP 300 S ’ ISIONEER TROBE CANNER UIDE 2. Use any of the following methods to start the recalibration or cleaning: Right-click on the OneTouch icon in the Windows Notification ■ Area (at the bottom right corner of the screen) and choose Show Hardware from the pop-up menu.
- Page 124 ECALIBRATING OR LEANING CANNER 3. When the Hardware Properties window appears, click the Properties button The Device Configuration Properties window opens and shows the Device Settings. Note that the “Last calibrated” date is red, indicating that calibration is now due.
- Page 125 XP 300 S ’ ISIONEER TROBE CANNER UIDE 4. To recalibrate the scanner, click the Calibrate button. To clean the scanner, click the Clean button. A message appears for you to insert the calibration or cleaning page. This sample shows the message for inserting the calibration page. The message for inserting the cleaning page is similar.
- Page 126 ECALIBRATING OR LEANING CANNER 7. Close the Device Configuration Properties window, and remove the calibration paper, or cleaning paper and replace it in its plastic bag. Note: Do not discard the cleaning paper. You can use it several times. If additional cleaning is necessary, add a few drops of Isopropyl alcohol (rubbing alcohol) to the cleaning paper and use it again.
-
Page 127: Troubleshooting
Did you select another scanning source in the PaperPort Scan Pane? If you use multiple devices with your computer, you may have selected another source for images. Start the PaperPort software and click the Scan icon and then make sure Visioneer Strobe XP is selected as the scanner. - Page 128 They are interfering with the installation and OneTouch options, and you need to remove those other drivers and re-install your Visioneer Strobe XP scanner. Please see the documentation that you received with the other scanner for the steps to remove its driver programs.
-
Page 129: How To Uninstall Your Scanner
TROBE CANNER UIDE OW TO NINSTALL CANNER To uninstall the scanner, remove the Visioneer Strobe XP 300 software, the PaperPort software, or other scanner software provided with your scanner. NINSTALLING THE OUCH OFTWARE 1. Open the Windows Control Panel from your start menu. -
Page 130: To Install Another Driver
NSTALL NOTHER RIVER NSTALL NOTHER RIVER Before you can install another driver for your scanner, you must remove the currently installed driver first. Then the new driver can be installed. 1. Uninstall the OneTouch 4.0 driver. a. Open the Windows Control Panel. b. -
Page 131: Visioneer Strobe Xp 300 Scanner Specifications
XP 300 S ’ ISIONEER TROBE CANNER UIDE XP 300 S ISIONEER TROBE CANNER PECIFICATIONS Optical resolution 600 dpi Bit Depth 48-bit color (internal, 16-bit a/d converter recognition, over 68 billion colors) 16-bit gray (internal, 4096 shades of gray) Output Bit Depth 24-bit color, 8-bit grayscale, 1-bit black and white Scan Method... -
Page 132: Visioneer Scanner Parts List
ISIONEER CANNER ARTS ISIONEER CANNER ARTS Please use the following part names and part numbers when ordering replacements for your scanner. Visit our web site at www.visioneer.com to order replacement parts. Part Part Name Part Number Calibration Sheet and 05-0679-000... - Page 133 XP 300 S ’ ISIONEER TROBE CANNER UIDE US Clip, RPA 10, D2 37-0073-000 Plinth, Scanner Mounting 85-0237-000 Stand Carrying Bag 88-0489-000...
-
Page 134: Index
NDEX I N D E X dots per inch (dpi) 114 eMail 55 advanced settings 63 eMail Properties 47 aspect ratio 65 Excel Spreadsheet 53 Autocrop to Length 102 Autocrop to Original 61, 101 Fax and Print 55 AutoLaunch 26 file format 52 AutoRotate image 65 file storage location 85... - Page 135 NDEX PaperPort desktop 105 Scan Configuration 38 Microsoft Internet Explorer 83 scan with event forwarding 80 Microsoft Outlook 47 scanner Moire Patterns 62, 102 recalibration 115 monitor 3 specifications 124 troubleshooting 120 scanning Normal PDF 53, 76 AutoScan 27 nPDF 53, 76 Windows Image Acquisition (WIA) 111 Searchable PDF 53, 76 OCR 51...
- Page 136 NDEX adjust picture quality 113 Windows XP 111 Windows Word Document 53 2000 3 Vista 4 xls file format 53 XP 3...
- Page 137 NDEX...
- Page 138 Copyright © 2007 Visioneer, Inc. 05-0626-100...