
Related Manuals for Kargo Master 4A824


Summary of Contents for Kargo Master 4A824
- Page 1 Instruction Guide 4A824 Kargo Master Rancho Cordova, CA 95742 800-343-7486 CustomerService@KargoMaster.com 20201215R1 DATE: ________________...
-
Page 2: Table Of Contents
Step 4 – Install Rack to Vehicle ......................... 6 Before You Begin Read all instructions prior to assembling or installing any Kargo Master product. Always locate your installation locations prior to performing any work. ENSURE SAFETY WHILE INSTALLING ONTO VEHICLE. -
Page 3: Parts
Instructions – 4A824 Parts Hardware For Technical Support Call: 800-343-7486 Monday-Friday 7AM - 4 PM (PST) Page 2... -
Page 4: Step 1 - Assemble Foot Assemblies
Instructions – 4A824 DO NOT EXCEED MANUFACTURERS WEIGHT CAPACITY FOR ROOF. Step 1 – Assemble Foot Assemblies Insert gutter clamp through the gutter foot rectangular slots as shown. LOOSELY bolt the gutter clamp to the gutter foot using a 5/16” x 1-1/4” carriage bolt, 5/16” flat washer, and 5/16”... -
Page 5: Step 2 - Attach Foot Assemblies
Instructions – 4A824 Step 2 – Attach Foot Assemblies Using a 5/16”-18 x 1” hex head bolt, 5/16” lock washer, and 5/16” flat washer, loosely bolt a mounting plate to a foot assembly. The press nuts on the mounting plate face up. DO NOT TIGHTEN. -
Page 6: Step 3 - Attach End Stops
Instructions – 4A824 Step 3 – Attach End Stops Using a 5/16”-18 x 1” hex head bolt, 5/16” lock washer, and 5/16” flat washer, loosely bolt a slider plate to an end stop. The press nuts on the slider plate face up. DO NOT TIGHTEN. -
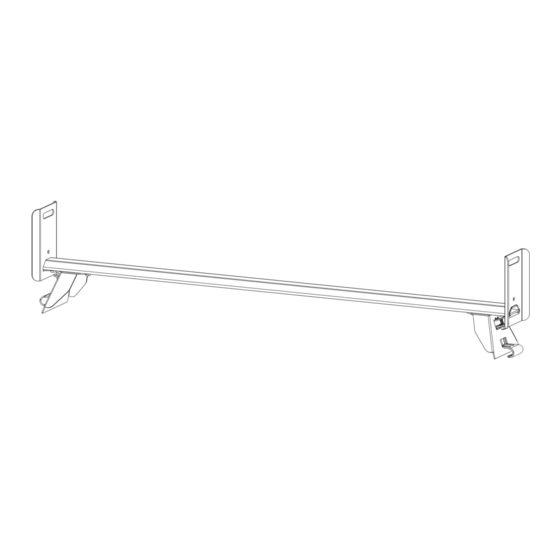
Page 7: Step 4 - Install Rack To Vehicle
Instructions – 4A824 Step 4 – Install Rack to Vehicle Set crossbar assembly on vehicle. Be sure feet are inside rain channel on roof and clips are outside vehicles roof rain gutter. Center feet and rack to vehicle.