
Related Manuals for Kargo Master 4A97L-Rev 1


Summary of Contents for Kargo Master 4A97L-Rev 1
- Page 1 Instruction Guide 4A97L-Rev 1 Kargo Master Rancho Cordova, CA 95742 800-343-7486 CustomerService@KargoMaster.com DATE: ______________...
-
Page 2: Table Of Contents
Instructions – 4A97L *PLEASE READ ALL INSTRUCTIONS AND WARNINGS PRIOR TO ASSEMBLING, INSTALLING, AND USING THIS PRODUCT* Warning Always check for wires, fuel tanks and lines, brake lines and other important vehicle functionality items prior to drilling and installing all products. Tools Needed 13mm Socket and Wrench 10mm Socket and Wrench... -
Page 3: Parts List
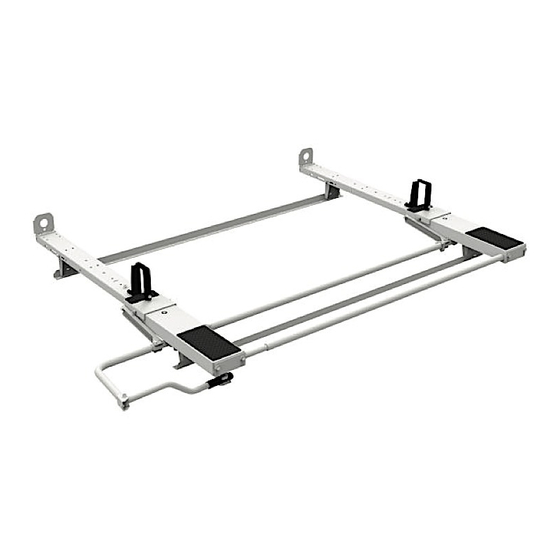
Instructions – 4A97L Parts For Technical Support Call: 800-343-7486 Monday-Friday 7AM - 4 PM (PST) Page 2... - Page 4 Instructions – 4A97L Parts Con’t For Technical Support Call: 800-343-7486 Monday-Friday 7AM - 4 PM (PST) Page 3...
-
Page 5: Hardware
Instructions – 4A97L Hardware (1 of 2) For Technical Support Call: 800-343-7486 Monday-Friday 7AM - 4 PM (PST) Page 4... - Page 6 Instructions – 4A97L Hardware (2 of 2) For Technical Support Call: 800-343-7486 Monday-Friday 7AM - 4 PM (PST) Page 5...
-
Page 7: Promaster City
Instructions – 4A97L DO NOT EXCEED MANUFACTURERS WEIGHT CAPACITY FOR ROOF Promaster City Installation • Locate 6 mounting locations shown on roof of van. • Install “Top Rail” as shown using M6x20mm bolts with lock washers and flat washers. • In most installs, the rail upright is to the outside of the van. -
Page 8: Nv200/City Express
Instructions – 4A97L DO NOT EXCEED MANUFACTURERS WEIGHT CAPACITY FOR ROOF NV200/City Express Installation • Locate 4 mounting locations shown on roof of van. • Install “Top Rail” as shown using M8x30mm bolts with lock washers and flat washers. • In most installs, the rail upright is to the outside of the van. -
Page 9: Transit Connect
Instructions – 4A97L DO NOT EXCEED MANUFACTURERS WEIGHT CAPACITY FOR ROOF Transit Connect Installation • Locate 4 mounting locations shown on roof of van. • Be sure to put rubber washer between the “Top Rail” and the roof to ensure sealing. •... -
Page 10: Step 1 - Assembly Of Foot
Instructions – 4A97L Assembly Instructions Step 1 – Assembly of Foot • Measure width between previously installed rails. • On the cross bows, use the slots that correspond to the measured distance between rails. • Bolt feet to bows as shown, DO NOT TIGHTEN at this point. •... -
Page 11: Step 2 - Determine Bows And Mount Pan Hooks
Instructions – 4A97L Step 2 – Determine Bows and Mount Pan Hooks Determine front and rear bow. The rear bow will have a dampening mechanism attached. Front Bow Rear Bow • Bolt pan hooks to the exposed end of each bow. •... -
Page 12: Step 3 - Mount To Rails
Instructions – 4A97L Step 3 – Mount to Rails • Place both bows on top of installed rails. • Be sure to place the front bow at the front of the vehicle. • Bolt feet to rails using 5/16” x 1” carriage bolts, 5/16” flat washers and 5/16” nyloc nuts. •... -
Page 13: Step 4 - Install Torque Tube
Instructions – 4A97L Step 4 – Install Torque Tube • Install torque tube to front pan assembly using 1/4" x 1” hex heads, 1/4" flat washers and 1/4" nyloc nuts. *Front bow shown* *Rear bow shown below* TIGHTEN all 6 bolts. For Technical Support Call: 800-343-7486 Monday-Friday 7AM - 4 PM (PST) Page 12... -
Page 14: Step 5 - Install End Tube
Instructions – 4A97L Step 5 – Install End Tube • Install end tube to the end of each bows pan assembly using 3/8" x 3/4” hex heads, 3/8” lock washers and 3/8” flat washers. TIGHTEN *Front bow shown below* For Technical Support Call: 800-343-7486 Monday-Friday 7AM - 4 PM (PST) Page 13... -
Page 15: Step 6 - Install Latch
Instructions – 4A97L Step 6 – Install Latch • Move rear pan assembly out of the way to expose the end of the crossmember. • Bolt through the middle set of square holes as shown. • Bolt latch assembly to end of crossmember using 5/16”... -
Page 16: Step 8 - Ladder Stop
Instructions – 4A97L Step 8 – Install Ladder Stop • Use a 3/8” x 1” hex head bolt, two 3/8” flat washers and a 3/8” nyloc nut to attach the ladder stop on the front bow. Be sure to place the tab on the ladder stop into the slot on the bow. •... -
Page 17: Step 9 - Assemble Ladder Hook
Instructions – 4A97L Step 9 – Assemble Ladder Hooks • Bolt ladder hook assembly to ladder hook weldment as shown. • Use a 1/4" x 1" hex head, a 1/4" split lock washer and a 1/4" flat washer. This can be adjusted later. -
Page 18: Step 10 - Install Ladder Hook
Instructions – 4A97L Step 10 – Install Ladder Hooks • Using the hardware and installed pem studs on both bows, loosen nuts and slide ladder hook assembly into place. TIGHTEN GO BACK AND ENSURE ALL HARDWARE IS TIGHT Your installation is now complete. For Technical Support Call: 800-343-7486 Monday-Friday 7AM - 4 PM (PST) Page 17...