Table of Contents
Advertisement
Quick Links
Advertisement
Table of Contents

Related Manuals for SonicWALL TELE3 TZ


Summary of Contents for SonicWALL TELE3 TZ
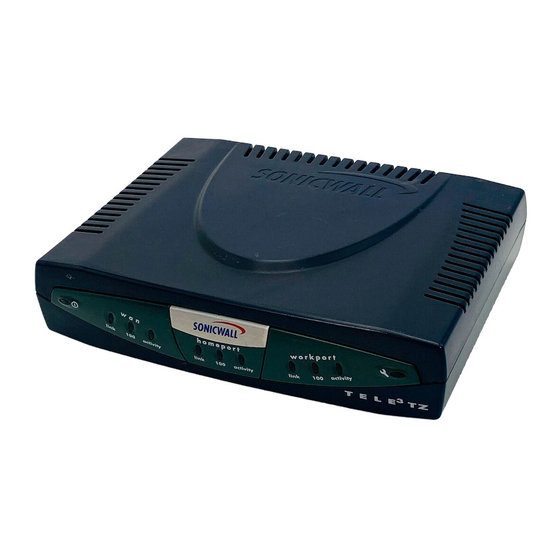
- Page 1 SONICWALL The Telecommuter's Getting Started Guide...
-
Page 2: Table Of Contents
Setting Up Your Management Station ..........13 Logging into the SonicWALL ...............15 The Installation Wizard ..............16 Configuring Computers on the WorkPort ..........17 3 Configuring the SonicWALL HomePort ........19 HomePort in NAT Mode ..............19 HomePort in Standard Mode ..............20 Configuring Printers on the HomePort ..........20 Configuring Your Computer on the HomePort ........21... - Page 3 Security policy ...................26 Destination Networks .................26 Advanced Settings ................26 Testing Your VPN Tunnel ..............26 DHCP Over VPN ................27 WorkPort IP Addresses ..............27 WorkPort Device Configuration ............28 DHCP Status ..................28 Page 2...
-
Page 4: Introduction
The TELE3 TZ and TELE3 TZX Getting Started Guide covers initial installation instructions for the TELE3 TZ and TELE3 TZX. The following is an overview of the network layout of your TELE3 TZ and TELE3 TZX, your work computer, and your home computer. -
Page 5: Inspecting The Package
One SonicWALL Telecommuter’s Getting Started Guide • One Companion CD If an item is missing from the package, you can contact SonicWALL, Inc. by phone at (408) 752-7819 or submit a Web Support Form at <http://techsupport.sonicwall.com/ swtech.html>. Here are a few helpful guidelines for installing the SonicWALL appliance. -
Page 6: Internet Service Provider (Isp) Information
Internet Service Provider (ISP) Information To install your SonicWALL Internet Security appliance and connect to the Internet, you need the following IP addressing information from your ISP. You can also enter this information in the section “Network Addressing Information” on page 12. -
Page 7: Sonicwall Configuration Overview
This is the default IP address of the SonicWALL. SonicWALL Configuration 3. Use the Wizard to configure the SonicWALL with the information from your ISP. If you have a single IP address assigned to you, enter it into the SonicWALL WAN IP Address field. -
Page 8: Vpn Security Association Configuration
7. Open your Web browser and attempt to access a Web site on the Internet. If you can access a Web site, you’ve successfully completed the configuration of your work computer and the TELE3 TZ or TELE3 SP. If you cannot access the Internet, recheck the IP settings of your computer and your SonicWALL. - Page 9 Page 8 Introduction...
-
Page 10: Quick Start Installation
SonicWALL TELE3 TZ and TELE3 TZX Installation Guide. The TELE3 TZ has a WorkPort, a HomePort, and a WAN port. This section gets you connected to the Internet using the HomePort and the WAN port. The VPN Security Association configuration section connects your SonicWALL TELE3 TZ to the corporate network. -
Page 11: Check Package Contents
Two Crossover cables (labeled “Crossover”) • One 5 Volt DC power supply (not pictured) • One Power cord If any items are missing from your package, contact SonicWALL, Inc. Web: <http://www.sonicwall.com/support/> Phone: (408) 745-9600 SonicWALL TELE3 TZ and TELE3 TZX Guides... -
Page 12: Installing The Sonicwall
DSL modem, or Internet router. Apply Power to the TELE3 TZ Attach the power supply to the power cord. Plug the power input into the SonicWALL and the other end into a power outlet. -
Page 13: Check Link Leds
The SonicWALL Test LED stays lit when the SonicWALL is powered on initially. It stays lit while the SonicWALL performs a series of diagnostic tests. After verifying the Link LEDs, power off the TELE3 TZ or TELE3 TZX for a few seconds, then power it up again to cycle the TELE3 TZ or TELE3 TZX. -
Page 14: Setting Up Your Management Station
Setting Up Your Management Station You can manage your SonicWALL from any computer connected to your WorkPort. This computer is called the Management Station and is the computer used to access the SonicWALL Management interface. Contacting the SonicWALL from your WorkPort PC The SonicWALL is preconfigured with the IP address 192.168.168.168. - Page 15 Configure TCP/IP Settings on Your WorkPort Computer Configure your WorkPort computer IP address, subnet mask, and gateway IP address. If the Management station is running Windows 2000, do the following: Note: Consult your operating system manuals for specific instructions on configuring network settings.
-
Page 16: Logging Into The Sonicwall
Location or Address field at the top of your browser and press Enter on your keyboard. Your Web browser must support JAVA and HTTP uploads in order to fully manage the SonicWALL. Internet Explorer 5.0 or higher, as well as Netscape Navigator 4.0 or higher, are recommended. →... -
Page 17: The Installation Wizard
Note: Once you have completed the Installation Wizard and restarted your SonicWALL, you can manage the SonicWALL by entering the WorkPort IP address of the SonicWALL into a Web browser. You must log into the SonicWALL with the User Name “admin” and the Password that you defined in the Installation Wizard. -
Page 18: Configuring Computers On The Workport
After the SonicWALL has restarted, change the network settings on the computers on the WorkPort. Each computer must be configured to get its IP address dynamically. On a Windows 2000 computer, do the following: 1. - Page 19 WorkPort. After the SonicWALL has restarted, change the network settings on the computers located on the WorkPort. Configure each computer with a static IP address from the range displayed in your configuration instructions.
-
Page 20: Configuring The Sonicwall Homeport
After configuring your work computer on the WorkPort, you must configure your home computer to be on the same subnet as the HomePort. Once you configure your home computer on the HomePort, you can access the Internet through the TELE3 TZ or TELE3 TZX. HomePort in NAT Mode Using HomePort in NAT mode allows you to use a single, public IP address for all traffic on the network. -
Page 21: Homeport In Standard Mode
WAN IP address, you can configure the HomePort in the following manner: 1. Log into the Management interface from the WorkPort PC using a Web browser and the WorkPort IP address configured for the TELE3 TZ or TELE3 TZX. 2. Click Advanced, and then HomePort. -
Page 22: Configuring Your Computer On The Homeport
Configuring Your Computer on the HomePort To access the Internet through the TELE3 TZ or TELE3 TZX on your home computer, you must change the network configuration of your home computer, and configure it to be on the same subnet (network) as the HomePort. Use the instructions below to configure the TCP/IP settings on your home computer. - Page 23 5. Click OK. It may be necessary to restart your computer to allow the computer settings to take effect. After the computer is up, test your Internet connection by opening your Web browser and accessing pages on the Internet. Page 22...
-
Page 24: Vpn Security Association Configuration
Corporate WAN IP Address Phase 1 DH Group Type _______________________________ ________________________________ SA Lifetime value Phase 1 Encryption/Authentication Type _________________ ________________________________ Phase 2 Encryption/Authentication Type Shared Secret ________________________________ ________________________________ Destination Network IP Address Destination Subnet Mask ________________________________ ________________________________ SonicWALL Installation Guide Page 23... - Page 25 Manual Key Network Information Security Association Name Corporate WAN IP Address ________________________________ _______________________________ Incoming SPI Outgoing SPI ________________________________ ________________________________ Encryption Method Encryption Key ________________________________ ________________________________ Authentication Key Beginning Destination Network Range ________________________________ ________________________________ Ending Destination Network Range Destination Network IP Address ________________________________ ________________________________ Destination Subnet Mask...
-
Page 26: Configuring A Vpn Sa Using Ike And Preshared Secret
Configuring a VPN SA Using IKE and Preshared Secret If your network administrator has provided you with the information to create a VPN SA using IKE and a pre-shared secret, use the instructions below to configure your TELE3 TZ or TELE3 TZX to connect to the corporate network. -
Page 27: Configuring A Vpn Sa Using Ike And Manual Key
Configuring a VPN SA Using IKE and Manual Key If your network administrator has provided you with the information to create a VPN SA using IKE and Manual Key, use the instructions below to configure your TELE3 TZ or TELE3 TZX to connect to the corporate network. -
Page 28: Dhcp Over Vpn
DHCP Over VPN Your network administrator may ask you to enable DHCP over VPN on your TELE3 TZ or TELE3 TZX. Obtaining your IP address dynamically from a DHCP server on the corporate network allows your administrator to configure groups of telecommuters on the same subnet. The... -
Page 29: Workport Device Configuration
5.Enable Block traffic through tunnel when IP spoof detected if your network administrator asks you to enable the service. 6.Enable the Obtain temporary lease from local DHCP server if tunnel is down check box if your administrator asks you to enable the service. Enter the number of minutes for the temporary lease in the Temporary Lease Time box. - Page 30 SonicWALL, Inc. 1160 Bordeaux Drive Sunnyvale, CA 94089-1209 Tel: (408) 745-9600 Fax: (408) 745-9300 E-mail: info@sonicwall.com Part# 232-00011-01 Web: www.sonicwall.com Rev. A 08/02...