Table of Contents
Advertisement
Quick Links
Advertisement
Table of Contents

Related Manuals for Hyundai HSO20305-A


Summary of Contents for Hyundai HSO20305-A
- Page 1 MITRE SAW HSO20305-A ORIGINAL INSTRUCTIONS...
-
Page 2: Table Of Contents
CAUTION: Read the instructions before using the machine! CONTENTS 1. SAFETY INSTRUCTIONS 2. TECHNICAL DETAILS 3. PRODUCT DESCRIPTION 4. SCOPE OF DELIVERY 5. INTENDED USE 6. BEFORE STARTING THE EQUIPMENT 7. ATTACHMENT AND OPERATION 8. TRANSPORT 9. MAINTENANCE 10. STORAGE 11. -
Page 3: Safety Instructions
1. SAFETY INSTRUCTIONS 1.1 GENERAL POWER TOOL SAFETY WARNINGS WARNING Read all safety warnings, instructions, illustrations and specifications provided with this power tool. Failure to follow all instructions listed below may result in electric shock, fire and/or serious injury. Save all warnings and instructions for future reference. The term "power tool"... - Page 4 4) Power tool use and care a) Do not force the power tool. Use the correct power tool for your application. The correct power tool will do the job better and safer at the rate for which it was designed. b) Do not use the power tool if the switch does not turn it on and off.
- Page 5 and may cause binding on the spinning saw blade while cutting. There should be no nails or foreign objects in the workpiece. h) Do not use the saw until the table is clear of all tools, wood scraps, etc., except for the workpiece.
- Page 6 Ensure that users of this tool have received professional training and know how to set and use this tool. Do not use the saw to cut firewood Remove all stumbling blocks from the work area. Report or record any defects as soon as possible, including the guards and the saw blade. Install the saw as much as possible on a work stand.
- Page 7 Use blades that are properly sharpened and do not exceed the maximum rated speed. Do not pick up debris from the cutting area until the blade guard closes and the saw is completely stopped. Attach the miter saw to a workbench if possible. When cutting a long piece that extends far beyond the width of the table, supports should be used to support the ends of the workpiece at the same height as the cutting table.
- Page 8 Use blades that are properly sharpened and do not exceed the maximum rated speed. Do not pick up debris from the cutting area until the blade guard closes and the saw comes to a complete stop. Attach the miter saw to a workbench if possible. When cutting a long piece that extends far beyond the width of the table, supports must be used to support the ends of the workpiece at the same height as the cutting table.
- Page 9 2. TECHNICAL DATA Model HSO20305-A 220-240 V˜ 50 Hz Mains voltage/ frequency Power S1 1800W S6 40% 2000W Speed 3800/min Type Single Phase Blade size Ø305 x Ø 30 x 40TX2.8 mm Tilting swing arm 45° G/D Swivel base 45° G/D...
-
Page 10: Product Description
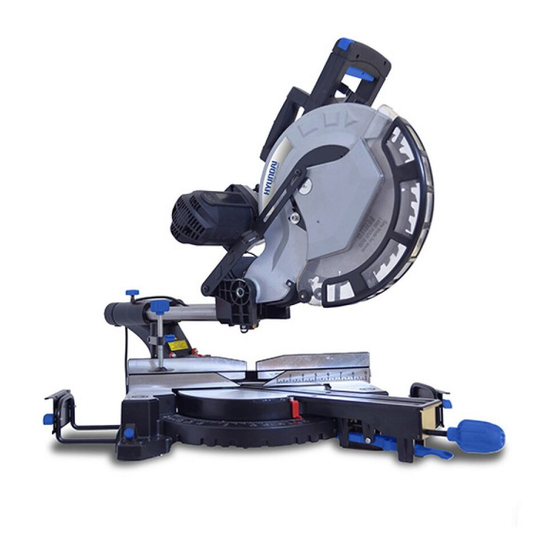
3. PRODUCT DESCRIPTION (Fig. 1 - 17) - Page 17 1. Handle 22. Locking screw 2. ON/OFF switch 22a Safety bolt 3. Lock switch 23. Locking screw for drag guide 4. Saw shaft lock 24. Fastening bolt 5. Machine head 25. Drag guide 6. Movable blade guard 26. Screw for cutting depth limiter 7.
-
Page 18: Scope Of Delivery
4. SCOPE OF DELIVERY Drag, crosscut and mitre Saw 1 x Clamping device (8) 2 x Workpiece support (9) Sawdust bag (21) Hexagonal key (c) Operating manual 5. INTENDED USE The crosscut, drag and mitre saw is designed to crosscut wood and plastic respective of the machine’s size. The saw is not designed for cutting firewood. -
Page 19: Before Starting The Equipment
6. BEFORE STARTING THE EQUIPMENT Open the packaging and remove the device carefully. Remove the packaging material as well as the packaging and transport bracing (if available). Check that the delivery is complete. Check the device and accessory parts for transport damage. ... - Page 20 Slacken the counter nut (d). Adjust the adjusting screw (30) until the angle between the saw blade (7) and rotary table (16) is 90° . Retighten the counter nut (d) to secure this setting. Subsequently check the position of the angle indicator. If necessary loosen the pointer (20) using a Philips screwdriver, set to position 0°...
- Page 21 The crosscut saw can be used to make crosscuts of 0° -45° to the left and 0° -45° to the right in relation to the stop rail. Attention! For bevel cuts (inclined saw head), the moveable stop rail (28) must be fixed in the outer position. ...
- Page 22 7.8 LIMITING THE CUTTING DEPTH (FIG. 3) The cutting depth can be infinitely adjusted using the screw (26). To do this loosen the knurled nut on the screw (26). Turn the screw (26) in or out to set the required cutting depth. Then re-tighten the knurled nut on the screw (26).
-
Page 23: Transport
8. TRANSPORT (Fig. 1, 2) Tighten the set screw (26) in order to lock the rotary table (16) Press the machine head (5) downwards and secure with the safety pin (24). The saw is now locked in its bottom position. -
Page 24: Disposal And Recycling
Damaged electrical connection cable. The insulation on electrical connection cables is often damaged. This may have the following causes: Passage points, where connection cables are passed through windows or doors. Kinks where the connection cable has been improperly fastened or routed. ... - Page 25 13. TROUBLESHOOTING Fault Possible cause Remedy Motor does not work Motor, cable or plug defective, Arrange for inspection of the fuses burnt machine by a specialist. Never repair the motor yourself. Danger! Check fuses and replace as necessary The motor starts up slowly and Voltage too low, coils damaged, Contact the utility provider to does not reach operating speed.
-
Page 26: Declaration Of Conformity
Phone: +33 (0) 5.34.508.508 Fax: +33(0) 5.34.508.509 Declares that the machinery designated below: MITER SAW HSO20305-A Serial number: 20210843599-20210843748 Complies with the provisions of the Directive “Machinery” 2006/42/EC and national laws transposing it: Also complies with the following European directives:... -
Page 27: Warranty
15. WARRANTY The manufacturer guarantees the product against defects in material and workmanship for a period of 2 years from the date of the original purchase. The warranty only applies if the product is for household use. The warranty does not cover breakdowns due to normal wear and tear. The manufacturer agrees to replace parts identified as defective by the designated distributor. -
Page 28: Product Failure
16. PRODUCT FAILURE WHAT TO DO IF MY MACHINE BREAKS DOWN? If you bought your product in a store: • Empty the fuel tank. • Make sure that your machine is complete with all accessories supplied, and clean! If this is not the case, the repairer will refuse the machine. -
Page 29: Warranty Exclusions
17. WARRANTY EXCLUSIONS THE WARRANTY DOES NOT COVER: • Start-up and setting up of the product. • Damage resulting from normal wear and tear of the product. • Damage resulting from improper use of the product. • Damage resulting from assembly or start-up not in accordance with the user manual. •...