Table of Contents
Advertisement
Quick Links
Advertisement
Table of Contents

Related Manuals for Hyundai HSO14210


Summary of Contents for Hyundai HSO14210
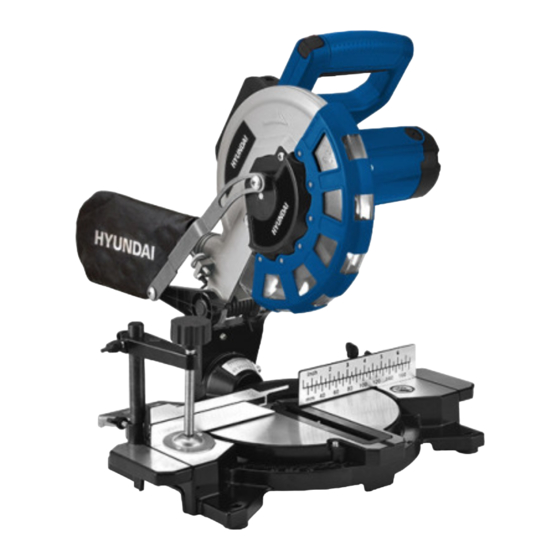
- Page 1 MITER SAW HSO14210 WARNING: Read thoroughly the instruction manual before use.
-
Page 2: Table Of Contents
CONTENTS 1. SAFETY INSTRUCTIONS............................ 3 2. TECHNICAL DATA..............................8 3. PRODUCT DESCRIPTION...........................9 4. INTENDED USE..............................12 5. BEFORE STARTING THE EQUIPMENT......................13 6. ATTACHMENT AND OPERATION........................14 7. TRANSPORT................................17 8. MAINTENANCE ..............................17 9. STORAGE................................17 10. ELECTRICAL CONNECTION......................... 18 11. TROUBLESHOOTING............................19 12. -
Page 3: Safety Instructions
1. SAFETY INSTRUCTIONS 1.1 GENERAL POWER TOOL SAFETY WARNINGS WARNING! Read all safety warnings, instructions, illustrations and specifications provided with this power tool. Failure to follow all instructions listed below may result in electric shock, fire and/or seriousinjury. Save all warnings and instructions for future reference. The term "power tool"... - Page 4 b) Do not use the power tool if the switch does not turn it on and off. Any power tool that cannot be controlled with the switch is dangerous and must be repaired. c) Disconnect the plug from the power source and/or remove the battery pack, if detachable, from the power tool before making any adjustments, changing accessories, or storing power tools.
- Page 5 guarding system. Without turning the tool “ON” and with no workpiece on the table, move the saw blade through a complete simulated cut to assure there will be no interference or danger of cutting the fence. NOTE: the phrase “bevel or” does not apply for saws without bevel adjustment. Provide adequate support such as table extensions, saw horses, etc.
- Page 6 - When you want to pause, turn off the power and wait for the saw to stop completely before leaving the work area. - Periodically check that all fasteners, screws, bolts and nuts are properly tightened. - Do not put materials or equipment above the saw to prevent the possibility of an unfortunate fall. - Use the saw to cut parts that are insulated from electricity.
- Page 7 Fracture of the blade. Ejection of debris from the machined part. Hearing damage if you do not wear ear protection. Projection of wood chips that are harmful to health when the tool is used in a poorly sealed room. ...
-
Page 8: Technical Data
Please recycle where facilities exist. Check with your local authority or retailer for recycling advice. In accordance with essential applicable safety standards of European directives Do no touch 2. TECHNICAL DATA Model HSO14210 Mains voltage/ frequency 220-240 V~50 Hz Power S1:1400W; S6(25%)1700W Speed... -
Page 9: Product Description
3. PRODUCT DESCRIPTION... -
Page 12: Intended Use
Handle Pointer ON/OFF switch Set screw Lock switch Locking bolt Machine head Screw for cutting depth limiting Moving saw blade guard Stop for cutting depth limiting Saw blade Adjusting screw (90°) Clamping device Adjusting screw (45°) Workpiece support Flange screw Table insert Outer flange Set screw for rotary table... -
Page 13: Before Starting The Equipment
To use the equipment properly you must also observe the safety information, the assembly instructions and the operating instructions to be found in this manual. All persons who use and service the equipment have to be acquainted with this manual and must be informed about the equipment’s potential hazards. -
Page 14: Attachment And Operation
6. ATTACHMENT AND OPERATION 6.1 ATTACHING THE MITRE SAW (FIG.1/2/4/5) In order to adjust the rotary table (13), loosen the set screw (10) approximately 2 turns. Turn the rotary table (13) and pointer (11) to the desired angle measurement on the scale (12) and use ... - Page 15 6.4 CROSSCUT 90° AND TURNTABLE 0° - 45° (FIG. 1/7/8) The mitre saw can be used to make crosscuts of 0°-45° to the left and 0°-45° to the right in relation to the stop rail. Important! For 90° crosscuts, the moveable stop rail (16a) must be fixed in the inner position. Open the set screw (16b) for the moveable stop rail (16a) and push the moveable stop rail (16a) in- ...
- Page 16 Fix the rotary table (13) in the 0° position. Loosen the set screw (20) and use the handle (1) to angle the machine head (4) to the left, until the pointer (19) indicates the desired angle measurement on the scale (18). Re-tighten the set screw (20).
-
Page 17: Transport
Fold the saw blade guard (5) upwards until the saw blade guard (5) is above the flange screw (26). With one hand insert the Allen key (C) in the flange screw (27). Hold the Allen key (C) and slowly close the saw blade guard (5) until it touches the Allen key (C). ... -
Page 18: Electrical Connection
10. ELECTRICAL CONNECTION The electrical motor installed is connected and ready for operation. The connection complies with the applicable VDE and DIN provisions. The customer‘s mains connection as well as the extension cable used must also comply with these regulations. The product meets the requirements of EN 61000- 3-11 and is subject to special connection conditions. -
Page 19: Troubleshooting
11. TROUBLESHOOTING PROBLEMS POSSIBLE CAUSES SOLUTIONS The motor does not start 1. Under voltage 1. Check the connections and the mains voltage. 2. Poor connection 1. Short circuit in the socket 1. Check the plugs The motor does not start and disconnects 2. -
Page 20: Disposal And Recycling
Phone: +33 (0) 5.34.508.508 Fax: +33 (0) 5.34.508.509 Declares that the machinery designated below: MITER SAW Model: HSO14210 Serial number: 20220530958-20220531157 Complies with the provisions of the Directive “Machinery” 2006/42/EC and national laws transposing it: Also complies with the following European directives:... -
Page 21: Warranty
14. WARRANTY WARRANTY The manufacturer guarantees the product against defects in material and workmanship for a period of 2 years from the date of the original purchase. The warranty only applies if the product is for household use. The warranty does not cover breakdowns due to normal wear and tear. The manufacturer agrees to replace parts identified as defective by the designated distributor. -
Page 22: Product Failure
15. PRODUCT FAILURE WHAT TO DO IF MY MACHINE BREAKS DOWN? If you bought your product in a store: a) Empty the fuel tank if your product has one. b) Make sure that your machine is complete with all accessories supplied, and clean! If this is not the case, the repairer will refuse the machine. -
Page 23: Warranty Exclusions
16. WARRANTY EXCLUSIONS THE WARRANTY DOES NOT COVER: • Start-up and setting up of the product. • Damage resulting from normal wear and tear of the product. • Damage resulting from improper use of the product. • Damage resulting from assembly or start-up not in accordance with the user manual. •...