Table of Contents
Advertisement
Quick Links
Advertisement
Table of Contents

Related Manuals for Siemens Healthineers Atellica VTLi


Summary of Contents for Siemens Healthineers Atellica VTLi
- Page 1 User Guide...
- Page 2 No part of this user guide or the products it describes may be reproduced by any means or in any form without prior consent in writing from Siemens Healthcare Diagnostics. The information in this user guide was correct at the time of printing. However, Siemens Healthcare Diagnostics continues to improve products and reserves the right to change specifications, equipment, and maintenance procedures at any time without notice.
- Page 3 Atellica® VTLi Immunoassay Analyzer User Guide...
-
Page 5: Table Of Contents
Contents Chapter 1 Exploring the Analyzer Selecting the sample type About this User Guide Adding the patient sample Viewing results and result details Intended use Removing a cartridge Summary and Explanation Finishing a test General warnings and precautions Performing successive tests Cleaning the analyzer Working with Patient Test Results VTLi system... - Page 7 CHAPTER 1 Exploring the Atellica VTLi Immunoassay Analyzer...
-
Page 8: About This User Guide
For more information, see Safety Information, on page 14. Cleaning the analyzer You should clean the analyzer using the Siemens Healthineers recommended cleaning guidelines. For more information, see Cleaning and disinfection, on page 33. -
Page 9: Getting To Know The Atellica Vtli System
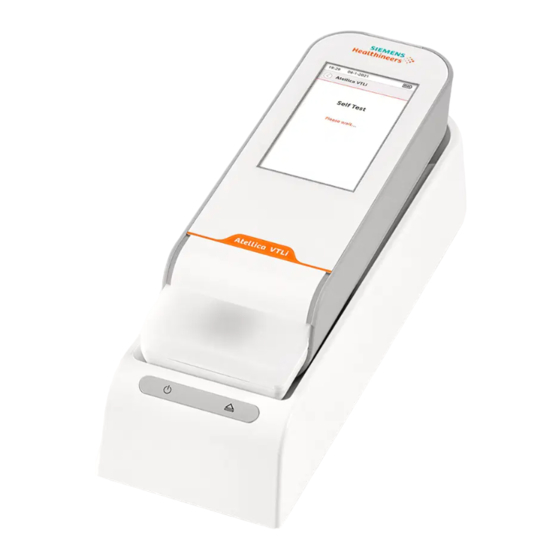
Chapter 1 - Exploring the Atellica VTLi Immunoassay Analyzer Getting to know the Atellica VTLi system The Atellica VTLI system consists of the following components: ‒ Analyzer ‒ Docking station ‒ Service software ‒ Test cartridges VTLi Immunoassay analyzer The analyzer is a handheld point of care device that performs a test on a sample. After inserting a new, unused cartridge into the analyzer, the analyzer instructs the user to apply the sample at the appropriate time. -
Page 10: Service Software
‒ Siemens Healthineers recommends using Windows NTP to implement the CT profile. The service PC should have this solution installed/enabled. ‒ VPN connections are advised for remote service for Siemens Healthineers remote Service (and middleware software remote service). - Page 11 Chapter 1 - Exploring the Atellica VTLi Immunoassay Analyzer INSTRUCTIONS 1. Carefully open the shipping box and remove the documentation pack from the top foam insert. User documentation (User Guide, Quick Reference Guide) Analyzer, Docking Station Power supply, battery, power cords, torx screwdriver Inner box with: Power supply, battery, power cords, torx screwdriver...
-
Page 12: Identifying The Analyzer Controls
Chapter 1 - Exploring the Atellica VTLi Immunoassay Analyzer Identifying the analyzer controls Side view Barcode scanner Battery cover On/Off button Reset button Top view Cartridge insertion area Cartridge slot Analyzer cover Analyzer screen... -
Page 13: Identifying The Docking Station Controls
Chapter 1 - Exploring the Atellica VTLi Immunoassay Analyzer Identifying the docking station controls Back view (connection ports) Not used Network connection Power supply adapter connection Top view Analyzer connection socket Cooling fan Don’t insert objects or spill fluids into the cooling fan area to avoid malfunction of the cooling system. -
Page 14: Connecting The Docking Station
Chapter 1 - Exploring the Atellica VTLi Immunoassay Analyzer Connecting the docking station INSTRUCTIONS 1. Connect one end of the Ethernet cable to the docking station, and the other end either to a port on the local network or directly to the PC. 2. -
Page 15: Configuring The Analyzer
Chapter 1 - Exploring the Atellica VTLi Immunoassay Analyzer Configuring the analyzer The final step in setting up the analyzer is to use the Service software to configure analyzer connectivity, users, and tests and workflow options. Refer to the Atellica VTLi Immunoassay Analyzer Advanced User Guide for complete instructions on installing and using the Service software. -
Page 16: Exploring The User Interface
Chapter 1 - Exploring the Atellica VTLi Immunoassay Analyzer Docking station status indicators The indicators on the docking station a visual operational status. Status Indicators The analyzer is docked correctly. The analyzer is not docked or not docked correctly. Try docking the analyzer again. Press the analyzer gently after docking to help secure the connection. -
Page 17: Common Icons And Buttons
Chapter 1 - Exploring the Atellica VTLi Immunoassay Analyzer Test result screen 12:23AM 05/25/2019 Patient Test Result 123456789 HScTnl 12:45 PM Sample identification bar - contains patient information for a patient test or information about the quality control (QC) for a QC test Test information bar - displays the: ‒... -
Page 18: Entering Information
Chapter 1 - Exploring the Atellica VTLi Immunoassay Analyzer Icons and Buttons The analyzer is connected to the LAN network, but there is currently no data transfer. Quality control lot status indicator. All lots are up-to-date. The analyzer is connected to the wireless network, but there is currently no data transfer. -
Page 19: Using The On-Screen Keyboard
Chapter 1 - Exploring the Atellica VTLi Immunoassay Analyzer Using the on-screen keyboard The on-screen keyboard is another way you can enter information. INSTRUCTIONS 1. Tap ‘ PQRS WXYZ a...z A...Z a...z A...Z 2. Do one of the following: a..z ‒... -
Page 20: Learning More About The Atellica Vlti Analyzer
Advanced User Guide Refer to the Atellica VLTi Immunoassay Analyzer Advanced User Guide for additional configuration settings. The guide is located on the Siemens Healthineers Document Library at: https://doclib.siemens-healthineers.com/home Quick Start Guide Graphical reference guide provides quick details on performing patient and quality control tests. -
Page 21: References
Chapter 1 - Exploring the Atellica VTLi Immunoassay Analyzer References Centers for Disease Control. Update: Universal precautions for prevention of transmission of human immunodeficiency virus, hepatitis B virus and other bloodborne pathogens in healthcare settings. 1988. MMWR, 37:377-382, 387, 388. Clinical and Laboratory Standards Institute (formerly NCCLS). - Page 22 Chapter 1 - Exploring the Atellica VTLi Immunoassay Analyzer...
- Page 23 CHAPTER 2 Testing Patient Samples...
-
Page 24: General Warnings And Precautions
Chapter 2 - Testing Patient Samples General Warnings and precautions ‒ Only store the patient sample at the prescribed storage conditions and time. ‒ Keep the reagent cartridges stored at the correct temperature. ‒ Carefully follow the instructions and procedures described in the Instructions for Use that came with the reagent cartridges. -
Page 25: Collecting A Sample
Chapter 2 - Testing Patient Samples Do not touch the filter or hold the transparent area of the cartridge. Collecting a sample The following specimen types have been tested for use with the Atellica VTLi Immunoassay analyzer: ‒ Venous whole blood or plasma. ‒... -
Page 26: Basic Test Workflow
Chapter 2 - Testing Patient Samples Basic test workflow • (Optional) Scan your User ID • Scan or enter the Patient ID • Open reagent cartridge pouch • Insert reagent cartridge into analyzer • Select the sample type • Add the patient sample to the reagent cartridge •... -
Page 27: Selecting The Sample Type
Chapter 2 - Testing Patient Samples 4. Position the reagent cartridge horizontally in front of the cartridge slot and press and slide the reagent cartridge straight into the cartridge slot until it clicks. The analyzer automatically validates the reagent cartridge, using the information stored in the cartridge RFID tag. -
Page 28: Viewing Results And Result Details
Chapter 2 - Testing Patient Samples 3. Close the cartridge lid as soon as the sample is added, and then close the analyzer cover. When the analyzer detects the sample, it automatically begins the analysis. The analyzer cover must be kept closed during analysis. If the cover is opened, the analyzer cancels the current test. -
Page 29: Finishing A Test
Chapter 2 - Testing Patient Samples Close the analyzer cover after each use to protect it from dust and other foreign particles and substances. Finishing a test (Finish screen) INSTRUCTIONS 1. Tap Finish. The analyzer displays a confirmation message. 2. Do one of the following: ‒... -
Page 30: Filtering Test Results
Chapter 2 - Testing Patient Samples ‒ To review test results for a specific patient and view test details: Tap a patient result on the Results Review screen. Then tap the test result itself for additional details such as test date, Lot ID, and expiry date. Default ‒... -
Page 31: Chapter 3 Performing Quality Control
CHAPTER 3 Performing Quality Control... -
Page 32: About Quality Control
Refer to the quality control material package insert for proper handling and preparation instructions. Siemens Healthineers recommends you run a quality control test: ‒ when you deploy a new Atellica VTLi Immunoassay analyzer for testing ‒ at regular intervals determined by your hospital or laboratory regulations ‒... - Page 33 Chapter 3 - Performing Quality Control 2. Tap the test lot you want to perform a QC test. Log Off Cartridge lots are color coded for quick visual status indication. Green means lot is ready to use. Yellow means lot is about to expire. Red means a lot requires a successful QC test to be used.
-
Page 34: Working With Qc Test Results
Chapter 3 - Performing Quality Control 8. After analysis, the analyzer displays the result as a quantitative value along with Pass or Fail. 9:11 AM 30-03-2020 QC Test Result Patient 123456789 HScTnl 9:11 AM Result Pass cTnI 39.1 pg / ml Repeat Finish 9. -
Page 35: Adding New Qc Lots
Chapter 3 - Performing Quality Control ‒ Tap User to select results from a specific user. Tap the user from the list, or select Any User to see all user results. ‒ Tap Cartridge Type to select results for a specific cartridge type. Tap a cartridge type from the list, or select Any Cartridge to see all cartridge results. - Page 36 Chapter 3 - Performing Quality Control...
- Page 37 CHAPTER 4 Troubleshooting and Maintenance...
-
Page 38: Analyzer Messages And Troubleshooting
Chapter 4 - Troubleshooting and Maintenance Analyzer messages and troubleshooting The Atellica VTLi Immunoassay Analyzer displays messages to let you know of issues or errors. Messages typically explain the event, provide possible causes, and offer possible solutions. Details An error code also displays on the screen. For a complete listing of errors, see the Atellica VTLi Advanced User Guide. -
Page 39: Maintenance
Cleaning the Atellica VLTi Immunoassay Analyzer Regular cleaning The analyzer and docking station require regular cleaning. Siemens Healthineers recommends you clean the analyzer (i.e., touch screen and the opening for cartridge insertion) frequently to remove dust, finger prints, and other etc. In addition, the outer surfaces should be cleaned. - Page 40 Chapter 4 - Troubleshooting and Maintenance Clean the analyzer at least every week and the docking station (including accessories) at least every month. Always allow sufficient incubation time for decontamination. Cleaning the analyzer outer surfaces INSTRUCTIONS 1. Clean the analyzer outer surfaces with a cloth or wipe, dampened with one of the following: ‒...
- Page 41 Chapter 4 - Troubleshooting and Maintenance ‒ 70% ethanol alcohol ‒ Antibacterial soap and water Do not allow liquid to drip into the analyzer insertion area. 2. Allow enough time after cleaning for the equipment to dry completely. Cleaning the analyzer cartridge slot Clean the cartridge slot by blowing compressed dry air or nitrogen (for example, with a compressed invertible gas duster can) inside the slot.
-
Page 42: Disinfecting The Atellica Vlti Analyzer
Chapter 4 - Troubleshooting and Maintenance Disinfecting the Atellica VLTi Immunoassay Analyzer Disinfection is needed whenever the system needs to be shipped and/or serviced. Always clean the system before disinfecting it. Never use corrosive or sterilizing agents. If you are not sure about the properties of a disinfecting agent, do not use it. - Page 43 Chapter 4 - Troubleshooting and Maintenance Replacing the Atellica VLTi Immunoassay Analyzer battery For continued optimal operation, the battery must be replaced when its capacity is reduced INSTRUCTIONS 1. On the back of the analyzer, locate the small screw holding the battery cover in place. 2.
-
Page 44: Displaying Analyzer Information
Chapter 4 - Troubleshooting and Maintenance Displaying analyzer information You can view the current serial number and firmware versions for the analyzer. INSTRUCTIONS 1. Tap > Analyzer Info. BloodAnalyzer Serial ID: 12345678 Software 2.0.4.0 Fireware: 2.5.2 Hardware: 1.1.0 2. Tap to return to the Menu screen. -
Page 45: Orderable Supplies
Chapter 4 - Troubleshooting and Maintenance Orderable Supplies Part numbers subject to change without notice. Part Number Description 11555586 Atellica VTLi Analyzer Starter Kit (English, German, French, Italian, Dutch) 11555587 Atellica VTLi Analyzer Starter Kit (Swedish, Danish, Norwegian, Finnish) 11555588 Atellica VTLi Analyzer Starter Kit (Spanish, Portuguese EU) 11555604 Atellica VTLi Immunoassay Analyzer Power Adapters... - Page 46 Chapter 4 - Troubleshooting and Maintenance...
-
Page 47: Appendix A Specifications
APPENDIX A Specifications... -
Page 48: Technical Specifications
Appendix A - Specifications Technical Specifications This section summarizes the design specifications for the Atellica VTLi Immunoassay Analyzer and docking station. Specifications Analyzer Length 25cm Analyzer Height approximately 5.2cm Analyzer Width 8.5cm Analyzer Weight (with battery) approximately 780g Analyzer Weight (without battery) approximately 580g Display Color LCD touch screen with back light... -
Page 49: Electromagnetic Compatibility (Emc)
This technical information is not part of the operator guide, and is intended for the information technology or security professional. Security White Paper and MDS2 can be found at siemens-healthineers.com/poc or contact your local technical service provider. -
Page 50: Technical Assistance
If you require further information about training in the use of this product, contact your local Siemens Healthineers representative. -
Page 51: Appendix B Symbols
APPENDIX B Symbols and Glossary... - Page 52 Appendix B - Symbols and Glossary Symbols This section describes the symbols that can display in the Atellica VTLi Immunoassay Analyzer documentation, on the analyzer, or the device packaging and labeling. The symbols on the analyzer provide you with the location of certain components, with warnings for proper operation.
-
Page 53: Glossary
Appendix B - Symbols and Glossary Symbols Product batch code. Indicates that the instrument is safety tested by TUV SUD, a national certification body, S S D D for conformity to global markets, including Canada, US, and EU. Device for near patient testing. Wifi Symbols Australia New Zealand... -
Page 54: Abbreviations
Appendix B - Symbols and Glossary Term Description service software The service software allows you to manage and configure one or more analyzers and exchange anonymized service-related data. Abbreviations Term Description Consistent time integration profile DHCP Dynamic Host Configuration Protocol Domain Name System Electromagnetic compatibility Electromagnetic fields... - Page 55 APPENDIX C Theory of Operations...
-
Page 56: Overview
Appendix C - Theory of Operations Overview The Atellica VTLi Immunoassay Analyzer uses Magnotech® technology. Magnotech is a biosensor technology that uses magnetic nanoparticles to measure picomolar concentrations of target substances in the sample in a matter of minutes. The test is integrated in the cartridge. A cartridge is disposable and can only be used once. When the cartridge is inserted in the handheld analyzer, the cartridge fills automatically after applying a few droplets of the sample. - Page 57 Appendix C - Theory of Operations...
- Page 58 Appendix C - Theory of Operations...
- Page 59 Revision History Rev. C Chapter/Appendix Description of Change Table of content Added headings “Summary and Explanation”, “Materials Provided”, “Special Materials Required (Not Provided)”. Chapter 1 - Exploring the Atellica VTLi Added section “Summary and immunoassay Analyzer Explanation”, “Materials Provided” and “Special Materials Required (Not Provided)”.
- Page 60 Revision History...
-
Page 61: Index
Index charge level icons, 11 installing, 8 Box contents, 4 Buttons, 11–12 Add Sample screen, 21 Caution Advanced User Guide, 14 electromagnetic, 4 Analyzer Cleaning basic test workflow, 20 analyzer, 33–36 cleaning, 33–36 docking station, 35–36 configuring, 9 Collecting a sample, 19 controls, 6 Connectivity settings, 38 disinfecting, 36... - Page 62 clean docking station, 35–36 display analyzer information, 38 Navigation bar, 10 dock the analyzer, 9 filter test results, 24, 28 Patient test finish a test, 23 adding patient sample, 21 insert reagent cartridge, 20 collecting a sample, 19 open reagent cartridge, 18 finishing, 23 power on and off, 9 general warnings and precautions, 18...
- Page 63 Select Sample Type screen, 21 Serial number, 38 Undocking, 9 Service software, 4 Unpacking information, 5–6 Status bar, 10 User guide Steps to about, 2 add patient sample, 21 symbols, 2 clean docking station, 35–36 User interface, 10–13 display analyzer information, 38 dock the analyzer, 9 Viewing patient test results, 22 filter test results, 24, 28...