Table of Contents
Advertisement
Quick Links
BEGINNERS SAFETY MANUAL FOR
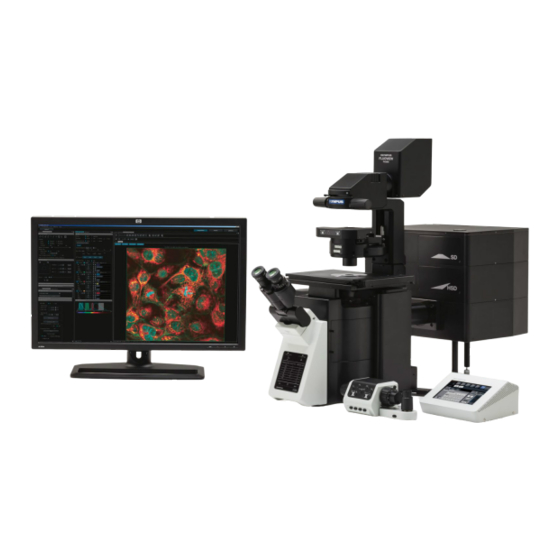
OLYMPUS FV3000 CONFOCAL (#02-20)
Produced by Shaalini, Graham Wright, Fiona Chia, Cris Barzaghi, Melvin
1. Safety Guidelines ................................................................................................................... 2
1.1 Lasers ............................................................................................................................... 2
1.2 Immersion Oil ................................................................................................................... 2
1.3 Metal Halide Lamps (MHL) .............................................................................................. 2
2. Training .................................................................................................................................. 3
2.1 To arrange a training session: .......................................................................................... 3
3. Online Booking and System Access........................................................................................ 4
3.1 Acknowledgements .......................................................................................................... 5
4. Operation Procedures ............................................................................................................ 5
4.1 Switching ON Protocol ..................................................................................................... 5
4.2 Objective lens ................................................................................................................... 6
4.2 Software Initiation ........................................................................................................... 7
4.3 Setting up directory to save images ................................................................................ 8
4.4 Laser Configuration Settings ............................................................................................ 9
4.5 Using the LSM Imaging Tab ............................................................................................ 10
4.6 Image Adjustments - Setting the Gain and Offset properly.......................................... 11
4.7 How to do a Z stack for a 3D Image (xyz) ....................................................................... 11
4.8 For Time-lapse (xyzt) ...................................................................................................... 12
4.9 Reuse previous settings and export images .................................................................. 12
4.10 Switching OFF Protocol ................................................................................................ 13
5. Troubleshooting ................................................................................................................... 14
Last updated on Mar 2022
Advertisement
Table of Contents

Related Manuals for Olympus FV3000


Summary of Contents for Olympus FV3000
-
Page 1: Table Of Contents
BEGINNERS SAFETY MANUAL FOR OLYMPUS FV3000 CONFOCAL (#02-20) Produced by Shaalini, Graham Wright, Fiona Chia, Cris Barzaghi, Melvin 1. Safety Guidelines ........................2 1.1 Lasers ..........................2 1.2 Immersion Oil ........................2 1.3 Metal Halide Lamps (MHL) ....................2 2. Training ..........................3 2.1 To arrange a training session: .................. -
Page 2: Safety Guidelines
1. Safety Guidelines Please adhere to the safety guidelines for your own safety and health. When in doubt, always approach the bioimaging facility for assistance. 1.1 Lasers Lasers in the confocal facility are class 3 lasers. This means that the lasers are strong enough to cause serious damage to your eyes, including temporary to permanent blindness. -
Page 3: Training
of 30 minutes to allow sufficient time for it to warm up and run properly. The lamp has an enforced cooldown of 300 seconds (5 minutes) after shutdown where the lamp cannot be switched on until the 300 seconds is up. •... -
Page 4: Online Booking And System Access
3. Online Booking and System Access • Booking of all Light microscopes prior to use is COMPULSORY through microscopy resource booking via TLL intranet https://intranet.tll.org.sg/App/tll_intranet/booking_searches • Users are only allowed to book the confocal system that they have received training on. -
Page 5: Acknowledgements
1st offence A warning will be issued along with the reminder of the rules. 2nd offence A second warning will be issued and your respective PI will be notified. 3rd offence Banned from using any of the facility’s microscope for 2 weeks. 3.1 Acknowledgements If you use the TLL Microscopy and Imaging facility and/or have been trained or assisted any of the bioimaging facility members in your research, then this should be acknowledged... -
Page 6: Objective Lens
(j) Load the FV31S-SW software and check if the model is “OLYMPUS IX3-SSU”. Then click OK. Wait for complete initialization and DO NOT move any components on the microscope during the initialization process. a. If you are starting it at the morning of the first day of the week, check that the turret is set to 10x objective or lower, then click “YES”. -
Page 7: Software Initiation
4.2 Software Initiation Wait for complete initialization of microscope and Windows after logging in with your TLL username and password. Double click on: (A) The HW configuration screen will appear: Select Enable XY stage control Click on OK and wait for complete initialization. Do not move anything on the microscope during the initialization process. -
Page 8: Setting Up Directory To Save Images
4.3 Setting up directory to save images If this is your first time using the FV3000, you need to change your default folder away from the Fluoview software default, which is in the C: drive. • Go to Configuration → Preference tab → File/Folder •... -
Page 9: Laser Configuration Settings
4.4 Laser Configuration Settings Under PMT Setting tab, click on Dye and Detector. A list of commercially available dyes along with its excitation and emission values are available for selection. 1. Choose the appropriate dye. 2. Select Add. 3. It will immediately be reflected under phase 1 where each dye will be allocated to its respective channel. -
Page 10: Using The Lsm Imaging Tab
1× gives a brighter image while making the optical slice thicker, while decreasing the size of the Airy Disk from 1× gives a darker image while not making the optical slice thinner. 4.5 Using the LSM Imaging Tab Under Scan Settings tab, in which you can set the parameters for your imaging: •... -
Page 11: Image Adjustments - Setting The Gain And Offset Properly
There’s no general rule: these adjustments mainly depend on your sample. 4.6 Image Adjustments – Setting the Gain and Offset properly Check image saturation level by clicking Hi-Lo icon. The image will change color to show red and blue pixels. Blue indicates that the signal in a given pixel is black, with a value of 0. -
Page 12: For Time-Lapse (Xyzt)
6. Click the LSM Start button to begin the series. 4.8 For Time-lapse (xyzt) • Under Series: ON both Z and Time. • Register Z stack before registering Timelapse. • LSM Total: indicates the total time it would take to complete your imaging according to your Timelapse settings. -
Page 13: Switching Off Protocol
• Export Images: ➢ Right click on the image and then export. An Export windows will pop up. ➢ Select your directory where you would like to save your TIFF images into. ➢ Save as type: TIFF (*.tif, *.tiff) ➢ Under Output format, select RGB Color with merge and 24bit Full color. -
Page 14: Troubleshooting
5. Troubleshooting Issue Explanation & Remedial steps No laser emission Check: • Laser emission switches (7, 7A, 8, 8A) for the appropriate lasers are on. • On the laser switch box (7A, 8A), the key to the laser is turned to the ON position. - Page 15 • Pinhole: Auto. When set to manual mode it may default to the smallest size which will make the signal very dark. Control panel This is a feature by Olympus to allow a fully dark room during imaging switches off when that can be switched on/off when needed.
- Page 16 Startup popup Connection between computer and the microscope was broken on the error code: computer side and cannot be recovered. Restart computer terminal. TPC_LOGIN_ERROR Startup popup error code: LAST_OPERATION_ NONCOMPLETED The last user did not shut down the program properly, or the program encountered a fatal error during the previous session and the last user closed their session without restarting the program.