Table of Contents
Advertisement
Quick Links
Advertisement
Table of Contents
Troubleshooting

Related Manuals for Xerox Versant 3100 Press


Summary of Contents for Xerox Versant 3100 Press
- Page 1 Book Version 1.0 February 2017 702P04567 ® ® Xerox Versant 3100 Press User Guide...
- Page 2 ® ® ® ©2017 Xerox Corporation. All rights reserved. Xerox , Xerox and Design , FreeFlow ® ® ® SquareFold , CentreWare and Versant are trademarks of Xerox Corporation in the United States and/or other countries. ® ® ® Adobe is a registered trademarks of Adobe Systems, Inc.
-
Page 3: Table Of Contents
Power Saver Mode....................2-10 Low Power Mode..................2-11 Sleep Mode....................2-11 Exiting Power Saver Mode..............2-11 Getting Help........................2-11 Help on the Xerox Web Site................2-11 Stock Library Manager Online Help..............2-11 Customer Diagnostic Tool................2-12 Print Server Customer Documentation............2-12 3 Print Job Submission................3-1 Information to Know Before Printing a Job..............3-1 How to Submit a Print Job....................3-2... - Page 4 Paper Tray Information for Trays 6 and 7........5-6 Paper Tray Information for Tray 5 (Bypass)........5-7 Press Productivity Information ................5-7 Productivity Information for Trays 1, 2, 3, 6, and 7.....5-8 Productivity Information for Tray 5 (Bypass)......5-10 Loading Paper........................5-11 ® ® Xerox Versant 3100 Press User Guide...
- Page 5 Loading Envelopes in Trays 6 and 7 with the Postcard Bracket....................5-33 Loading Envelopes in Trays 6 and 7 with the Optional Envelope Support Kit..............5-35 Loading Envelopes in Tray 5 (Bypass)..........5-37 Loading Media in Optional Devices................5-38 ® ® Xerox Versant 3100 Press User Guide...
- Page 6 Replacing the Pressure Roll Assembly..........6-34 Replacing the Pressure Roll Cleaning Pad Assembly....6-35 Installing the Fuser Assembly............6-35 Extending Fuser Life with Multiple Fusers..........6-38 Preventing Fuser Damage..............6-38 Fuser Paper Width Information............6-38 Changing the Fuser Width ID ............6-39 ® ® Xerox Versant 3100 Press User Guide...
- Page 7 OHCF (Trays 6 and 7) Paper Jams at Lever 1d and Knob 1c......................7-42 Fault Information......................7-43 Obtaining Fault Information from the Press Touch Screen....7-44 Fault Messages.....................7-45 Troubleshooting Help......................7-46 Locating the Press Serial Number..............7-46 Calling for Service....................7-46 8 Specifications..................8-1 Performance Specifications.....................8-2 Environmental Specifications..................8-2 ® ® Xerox Versant 3100 Press User Guide...
- Page 8 Table of Contents ® ® Xerox Versant 3100 Press User Guide...
-
Page 9: Product Symbols
This symbol indicates a laser is being used and alerts the user to refer to the appropriate safety information. Pinch Hazard This warning symbol alerts users to areas where there is the possibility of personal injury. Lock Unlock Xerox ® Versant ® 3100 Press User Guide... - Page 10 This symbol indicates usage only in premises that have a service current capacity equal to or greater than 100 Amps per phase. Ground / Common / Earth Terminal Local Area Network Universal Serial Bus ® ® Xerox Versant 3100 Press User Guide...
- Page 11 Strip Do Not Use Open Envelopes Do Not Use Folded, Creased, Curled, or Wrinkled Paper Do Not Use Ink Jet Paper Tray Guides Must Touch Media Load Postcards in the Indicated Direction ® ® Xerox Versant 3100 Press User Guide...
- Page 12 • For more information about collection and recycling, please contact your local municip- ality, your waste disposal service, or the point of sale where you purchased the items. ® ® Xerox Versant 3100 Press User Guide...
-
Page 13: Getting Started
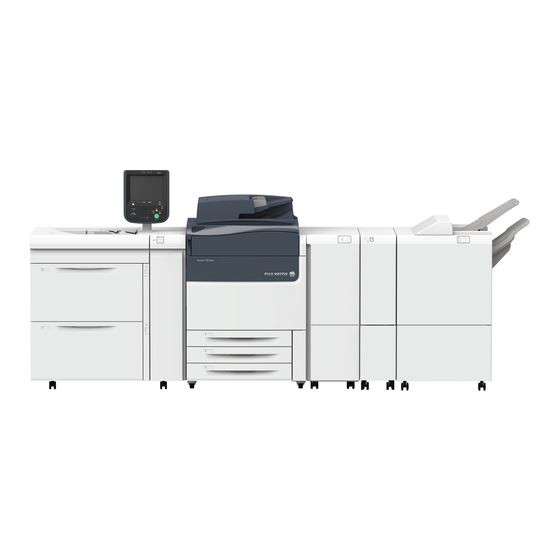
Getting Started ® ® The Xerox Versant 3100 Press is a full color / black and white, auto-duplex press that operates at a speed of 100 prints per minute (when printing on 8.5 x 11 inch / A4 paper). The system configuration consists of the Advanced High Capacity Feeder (Trays 6 and 7), the print engine with internal feeding trays (Trays 1-3), and an embedded Control Panel and touch screen (the user interface). -
Page 14: Press Components
1. Press the Machine Status button on the press control panel. 2. From the Machine Status screen, ensure that the Machine Information tab is displayed. The press serial number is displayed under General Information. ® ® Xerox Versant 3100 Press User Guide... -
Page 15: Advanced High Capacity Feeder (Trays 6 And 7)
The following illustrations show the Trays 6 and 7 with and without the optional Tray 5 (Bypass). Trays 6 and 7 without Trays 6 and 7 with the optional Tray 5 the optional Tray 5 ® ® Xerox Versant 3100 Press User Guide... -
Page 16: Trays 6/7 Components
Use to check the progress of active jobs and detailed in- formation about completed jobs or pending jobs. This area also allows you to delete a job (cancel printing) and to pause jobs. ® ® Xerox Versant 3100 Press User Guide... - Page 17 Customer Service Engineer during diagnostic routine pro- cedures. Press Status Lights The three indicator lights that identify: data transmission in progress, the press is experiencing an error, and main power is on. ® ® Xerox Versant 3100 Press User Guide...
-
Page 18: Status Lights
This is a steady orange light indicating the press is experi- encing faults and / or errors. Data Transmission This is a flashing green light indicating that the transmis- Status LED sion of an incoming print job is in process. ® ® Xerox Versant 3100 Press User Guide... -
Page 19: Logon
2. Select the desired language from the list and select Save. The language on the screen changes to the new language and closes the Language window. 3. Select the Cancel button to return to the main screen. ® ® Xerox Versant 3100 Press User Guide... -
Page 20: Full System Configuration
Full system configurations will vary depending on which optional devices are attached to the press. For detailed information on optional devices, refer to the Optional Devices ® ® Guide for Xerox Versant 3100 Press. The following illustration shows an example of a full system configuration with optional devices attached;... -
Page 21: Circuit Breaker Switch
Before switching off the press, ensure that it is not in Power Saver Mode. This switch is used mainly by the Xerox Service Representative when servicing the press. In rare troubleshooting situations, you may be directed to power off the press with this switch. -
Page 22: Power On / Off The Press
• Low Power Mode is set to 1 minute. • Sleep Mode is set to 10 minutes. • Sleep Mode activates after 10 minutes of total inactivity and not 10 minutes after the Low Power Mode begins. ® ® 2-10 Xerox Versant 3100 Press User Guide... -
Page 23: Low Power Mode
Getting Help Help on the Xerox Web Site For technical product support, Xerox supplies, customer documentation, and answers to frequently-asked questions, go to www.xerox.com. You will find the latest documentation and the knowledge base under Support & Drivers. Use the Contact link for specific contact information / telephone numbers in your area. -
Page 24: Customer Diagnostic Tool
• The FreeFlow Print Server features are documented in the Online Help system from the Help menu shown on the main print server window. Additional FreeFlow Print Server user documentation can be found at www.xerox.com. • The EX Print Server Help menu on the Command WorkStation window is designed to provide information on specific work flows when using the Command WorkStation. -
Page 25: Print Job Submission
Note For complete information on the Stock Library Manager and on how to set up your stock and paper tray settings for the print job, refer to the Online Help in the Stock Library Manager. Xerox ® Versant ® 3100 Press... -
Page 26: How To Submit A Print Job
Note Make sure the appropriate print drivers have been installed on your computer. Refer to your print driver documentation or the Xerox web site for more information on how to download or install print drivers. • At any remote workstation, using a Hot Folders application to submit the document file to the print server. -
Page 27: Printing From The Freeflow Print Server
6. Select Import. 7. Select the desired queue such as Process and Hold or Print and Hold. The job is sent to the selected queue or to the press for immediate printing. ® ® Xerox Versant 3100 Press User Guide... -
Page 28: Information About Printing On Tabs
• Always use a complete set or bank or tabs in the paper tray. • If staple or punch finishing, use trays 5, 6, 7, 8, 9, or T1 (Inserter). ® ® Xerox Versant 3100 Press User Guide... -
Page 29: Printing Tabs From The Print Server
4. Once all settings are made, select Print. The press prints the complete set of tabs with the body pages defined. Any extra tabs not used in the job are sent to the output tray. ® ® Xerox Versant 3100 Press User Guide... - Page 30 Print Job Submission ® ® Xerox Versant 3100 Press User Guide...
-
Page 31: Job / Machine Status
1. Press the Job Status button on the control panel. 2. Select the Active Jobs tab. 3. From the displayed list, select the applicable job to view. Use the up or down buttons to navigate the list. Xerox ® Versant ®... -
Page 32: Completed Jobs Tab
This area also allows you to print reports and view details that apply to billing impressions. Machine Serial Number Software Version Current System Software Print Reports IP Address and Host Name Maintenance Assistant Machine Configuration Overwrite Hard Disk ® ® Xerox Versant 3100 Press User Guide... -
Page 33: Machine Serial Number
Job / Machine Status Machine Serial Number The Machine Serial Number is displayed in the General Information area on the Machine Information tab. Use this number when calling Xerox for technical information or assistance. Current System Software The version of the system software that is currently installed on the press is displayed under the Current System Software title. -
Page 34: Maintenance Assistant
Note This Auditron Report / Meter Report is not applicable to a print-only system. Maintenance Assistant Select the Maintenance Assistant button to send the Xerox Remote Print Services diagnostic information on the press to Xerox Support. Overwrite Hard Disk The Overwrite Hard Disk feature is a standard data security function on the system. It prevents the document image and registered data that is recorded on the press hard disk from being illegally retrieved or removed. -
Page 35: Billing Information Tab
145 sq. in. / 935 sq. cm. Note This meter / counter is NOT added to the Total Impressions meter/counter since it is already added to the Black Impressions meter / counter. ® ® Xerox Versant 3100 Press User Guide... -
Page 36: Billing Impression Mode
The Billing Impression Mode defines how the press tracks and records impressions made on large-size paper such as A3 or tabloid. The type of Billing Impression Mode used by your press is set during system installation. A Xerox Sales Representative can confirm the Billing Impression Mode applicable for your press. - Page 37 All Usage Counters This view provides a complete total of all the counters, including the totals from the Impression Counters and Sheet Counters. Update Button Select this button to refresh and update the counts. ® ® Xerox Versant 3100 Press User Guide...
- Page 38 Job / Machine Status ® ® Xerox Versant 3100 Press User Guide...
-
Page 39: Paper And Media
Refer to the System Administration Guide for information on how to enable this feature and prioritize the order of trays to search on and use. Xerox ® Versant ®... -
Page 40: General Paper Loading Guidelines
• Envelopes with windows, metal clasps, side seams, or adhesives with release strips • Padded envelopes Note In addition to the above list, there may be other media that is not recommended or supported. For details, please contact your local Xerox representative. ® ® Xerox... -
Page 41: Paper / Media Storage Guidelines
3.86 x 5.75 in. / 98 x 146 mm 13 x 19.2 in. / 330.2 x 488 mm Trays 6 and 7 3.86 x 5.75 in. / 98 x 146 mm 13 x 19.2 in. / 330.2 x 488 mm ® ® Xerox Versant 3100 Press User Guide... -
Page 42: Paper Specifications For All Trays
Note Always refer to the Recommended Media List (RML) for a comprehensive list of supported media. The RML can be accessed from the Stock Library Manager application, and can also be downloaded from http://www.xerox.com/. Paper Type Paper Size Feed Direc-... -
Page 43: Paper Tray Information
• Paper weight range of 18 lb. Bond to 95 lb. Cover (64 gsm to 256 gsm) • Paper sizes starting at 5.51 x 7.17 in. / 140 x 182 mm to a maximum of 13 x 19.2 in. / 330.2 x 488 mm ® ® Xerox Versant 3100 Press User Guide... -
Page 44: Paper Tray Information For Trays 6 And 7
This keeps the stack level for feeding and enables more envelopes to be fed from the tray. ® ® Xerox Versant 3100 Press User Guide... -
Page 45: Paper Tray Information For Tray 5 (Bypass)
Process and print speed is based on 1-Sided / 2-Sided mode, paper type, paper weight, paper size, and feeding tray. Note The references to Bond and Cover weight ranges are approximations based on conversion to the nearest standard paper weight and type. ® ® Xerox Versant 3100 Press User Guide... -
Page 46: Productivity Information For Trays 1, 2, 3, 6, And 7
130 lb. Cover 8.5 x 11 in. / 8.5 x 14 in. / 11 x 17 in. / 12 x 18 in. / SRA3 13 x 19.2 in. / 330.2 x 488 ® ® Xerox Versant 3100 Press User Guide... - Page 47 8.5 x 11 in. / 106 – 176 gsm Tab Stock – 8.5 x 11 in. / 177 – 256 gsm Tab Stock – 8.5 x 11 in. / 257 – 300 gsm Tab Stock ® ® Xerox Versant 3100 Press User Guide...
-
Page 48: Productivity Information For Tray 5 (Bypass)
130 lb. Cover 8.5 x 11 in. / 8.5 x 14 in. / 11 x 17 in. / 12 x 18 in. / SRA3 13 x 19.2 in. / 330.2 x 488 ® ® 5-10 Xerox Versant 3100 Press User Guide... -
Page 49: Loading Paper
Paper can be loaded either in the LEF / portrait or SEF / landscape direction. 7. Adjust the paper guides by pressing in the guide releases and carefully moving the guides until they lightly touch the edges of the material in the tray. ® ® Xerox Versant 3100 Press 5-11 User Guide... - Page 50 3. Open the ream of paper with the seam side facing up. 4. Fan the sheets before loading them into the tray. 5. Extend the paper guides outward until they stop. ® ® 5-12 Xerox Versant 3100 Press User Guide...
-
Page 51: Loading Paper In Tray 5 (Bypass)
4. Fan the sheets before loading them into the tray. 5. Insert the paper or media into the tray until it stops. 6. Adjust the paper guides so that they touch the edges of the stack. ® ® Xerox Versant 3100 Press 5-13 User Guide... -
Page 52: Matching The Tray And Stock Information
• On the print server • On both the Stock Library Manager and the print server • On the Stock Library Manager, the print server, and possibly on the press User Interface ® ® 5-14 Xerox Versant 3100 Press User Guide... -
Page 53: Paper Feed Performance In Trays 6 And 7
The paper-feed adjustment levers are found in Trays 6 and 7. These levers are used to improve paper feed accuracy and to reduce paper skew problems. ® ® Xerox Versant 3100 Press 5-15 User Guide... -
Page 54: Improving Paper Feed Performance In Trays 6 And 7
4. On the tray, slide the rear paper-feed adjustment lever to the right. 5. Close the tray by slowly pushing it in until it comes to a stop. 6. Run your print job. ® ® 5-16 Xerox Versant 3100 Press User Guide... - Page 55 • The paper is fed accurately without skew and the printed output is satisfactory; perform the following: 1. Open the tray. 2. Return the right-side paper-feed adjustment lever to its default position by sliding it toward the front of the tray. ® ® Xerox Versant 3100 Press 5-17 User Guide...
- Page 56 Close the tray and verify the tray settings from the Stock Library Manager on the print server. d) Run your print job. 12. After the print job finishes, open the tray and return both levers to their default positions: ® ® 5-18 Xerox Versant 3100 Press User Guide...
- Page 57 • Adjust the Regi-Loop to resolve the problem. If the problem continues, contact the Customer Support Center. Important If using an Advanced Stock Setup feature, always return the feature to its default setting before using the press. ® ® Xerox Versant 3100 Press 5-19 User Guide...
-
Page 58: Printing On Special Media
Transparencies Guidelines for Printing on Transparencies Always refer to the following guidelines before using transparencies: • For optimum system performance and image projection, use Xerox removable stripe transparency materials. These premium transparencies are specifically designed to provide optimum print quality. -
Page 59: Loading Transparencies In Trays 1, 2, And 3
Loading Transparencies in Tray 5 (Bypass) Load the transparencies in the LEF (portrait) direction and align the edge of the transparencies against the right edge of the tray, with the side to be printed on facing ® ® Xerox Versant 3100 Press 5-21 User Guide... -
Page 60: Hole-Punched Paper
Loading Hole-punched Paper in Trays 1, 2, and 3 Load and align the edge of the hole-punched paper with the holes against the left edge of the tray. ® ® 5-22 Xerox Versant 3100 Press User Guide... -
Page 61: Loading Hole-Punched Paper In Trays 6 And 7
Load and align the paper against the right side of the tray for SEF direction. Loading Hole-punched Paper in Tray 5 (Bypass) Load and align the edge of the hole-punched paper with the holes against the right edge of the tray. ® ® Xerox Versant 3100 Press 5-23 User Guide... -
Page 62: Tab Stock
- For the stock size, set a Custom Size of 9 x 11 inches (229 x 279 mm) LEF. - For the Print Output Order / Tab Sequence, select N to 1. - For Output Delivery, select Face Up. ® ® 5-24 Xerox Versant 3100 Press User Guide... -
Page 63: Loading Tab Stock In Trays 1, 2, And 3
Load straight collated tabs with the first blank tab cutout toward the rear of the tray. Loading Reverse Collated Tabs Load reverse collated tabs with the first blank tab cutout toward the front of the tray. ® ® Xerox Versant 3100 Press 5-25 User Guide... -
Page 64: Loading Tab Stock In Trays 6 And 7
Load straight collated tabs with the first blank tab cutout toward the front of the tray. Loading Reverse Collated Tabs Load reverse collated tabs with the first blank tab cutout toward the rear of the tray. ® ® 5-26 Xerox Versant 3100 Press User Guide... -
Page 65: Loading Tab Stock In Tray 5 (Bypass)
Load straight collated tabs with the first blank tab cutout toward the front of the tray. Loading Reverse Collated Tabs Load reverse collated tabs with the first blank tab cutout toward the rear of the tray. ® ® Xerox Versant 3100 Press 5-27 User Guide... -
Page 66: Labels
Refer to the following when loading labels in the paper trays. • Load labels in Trays 1, 2 and 3 with the labels face down. • Load labels in Trays 5 (Bypass), 6 and 7 with the labels face up. ® ® 5-28 Xerox Versant 3100 Press User Guide... -
Page 67: Glossy Paper
• Long periods of storage in extreme conditions can cause postcard stock to jam in the press. • When submitting your print file, from either the Stock Library Manager or from your print driver, select the following options: ® ® Xerox Versant 3100 Press 5-29 User Guide... -
Page 68: Supported Postcard Sizes
2. Move the paper guides out to their largest position. 3. To remove the postcard bracket, loosen the screw on the left side of the tray ( and remove the bracket ( ® ® 5-30 Xerox Versant 3100 Press User Guide... -
Page 69: Loading Postcards In Tray 5 (Bypass)
10. Store the postcard bracket by inserting it into the storage area on the left side of the tray ( ) and tightening the screw ( Loading Postcards in Tray 5 (Bypass) Load postcards SEF, with the side to be printed on facing up. ® ® Xerox Versant 3100 Press 5-31 User Guide... -
Page 70: Envelopes
• Some wrinkling or embossing may occur when printing on envelopes. Successful envelope printing depends on the quality and construction of the envelopes. Try another envelope brand if problems occur. ® ® 5-32 Xerox Versant 3100 Press User Guide... -
Page 71: Supported Envelope Sizes
Install the postcard bracket before printing envelopes. 1. Slowly open one of the paper trays until it stops and remove the paper. 2. Move the paper guides out to their largest position. ® ® Xerox Versant 3100 Press 5-33 User Guide... - Page 72 • When loading envelopes LEF, ensure the flaps are closed and face down, and postion the flaps along the right of the tray. ® ® 5-34 Xerox Versant 3100 Press User Guide...
-
Page 73: Loading Envelopes In Trays 6 And 7 With The Optional Envelope Support Kit
The Envelope Support Kit enables a greater quantity of envelopes to be loaded and printed from the tray. 1. Slowly open one of the paper trays until it stops and remove the paper. ® ® Xerox Versant 3100 Press 5-35 User Guide... - Page 74 Place the magnet at the end of the piece into the corner of the tray and facing down. ® ® 5-36 Xerox Versant 3100 Press User Guide...
-
Page 75: Loading Envelopes In Tray 5 (Bypass)
Loading Envelopes in Tray 5 in the SEF Direction When loading envelopes SEF, ensure the flaps are closed and face down, and postion the flaps along the front of the tray. ® ® Xerox Versant 3100 Press 5-37 User Guide... -
Page 76: Loading Media In Optional Devices
Loading Media in Optional Devices Loading Media in the Optional Dual Advanced High Capacity Feeder (Trays 8 and 9) Refer to the Optional Devices Guide for Xerox ® Versant ® 3100 Press for specific information on this device. -
Page 77: Maintenance
• Follow all warnings and instructions that are marked on or supplied with the equpiment. • Do not block or cover the slots and openings on the equipment. • Do not attempt to override any electrical or mechanical interlock devices. Xerox ® Versant ®... -
Page 78: Cleaning The Press
The press automatically runs this routine periodically, but if you see image quality problems with dry ink / toner on the back of prints, you can initiate this procedure manually in order to resolve the issue. ® ® Xerox Versant 3100 Press User Guide... -
Page 79: Performing The Clean Fuser Assembly Procedure
Note If you still notice contaminants on the back of the prints after running this procedure, contact your Xerox Service Representative. Dry ink / toner debris may be coming from the transfer roll area instead of the fuser. 1. Select the Tools button on the press control panel. -
Page 80: Cleaning The Raster Output Scanner (Ros) Window Areas
Replace the pad when it becomes a dark color. Always use a clean pad in order to ensure optimum image quality on the printed output. To acquire additional pads, contact your Xerox Service Representative. 4. Clean one of the ROS windows: ®... -
Page 81: Performing The Clean Toner Procedure
The press runs a full-page halftone to purge the debris and any residual dry ink / toner from the system. ® ® Xerox Versant 3100 Press User Guide... - Page 82 After the purge page prints, a Successfully Completed message displays. 8. To ensure that the problem is resolved, select Sample Print. 9. Select Close repeatedly until the main Tools screen displays. 10. Exit the administrator mode. ® ® Xerox Versant 3100 Press User Guide...
-
Page 83: Calibrating The Press
These Full Width Array quality control measurements and adjustments are automatic, once you initiate them from either the Tools menu on the press control panel or from the Stock Library Manager Profiles feature. ® ® Xerox Versant 3100 Press User Guide... -
Page 84: Density Uniformity Adjustment
You may have to wait a few minutes while the Full Width Array gets ready. 6. Select Start. The press prints the test targets, measures them, and automatically adjusts the toner density for consistent application across the page. ® ® Xerox Versant 3100 Press User Guide... -
Page 85: Replacing Consumable Supplies
Replacing Consumable Supplies Note Refer to www.xerox.com for the latest consumable part numbers. The following items are the Customer Replaceable Units (CRU) for the press. It is recommended that you have a supply of these items available to eliminate down time when they need to be replaced. -
Page 86: Ordering Supplies
* Dry Ink / Toner yield projections are based on 7.5 percent-area coverage per color (4 colors = 30 percent) at standardized conditions on A4 (8.5 x 11 in.), for Xerox Digital Color Xpressions+, 24 lb. (90 gsm) and for Colotech Plus 90 gsm reference paper. - Page 87 3. From the menu, select Other Consumables to see the status of other consumables. The Other Consumables window displays and provides information about the percentage of remaining life for each consumable. ® ® Xerox Versant 3100 Press 6-11 User Guide...
- Page 88 / toner waste container, trays 6/7 feeder rolls, and consumables for any additional optional devices that are configured with the press. Note The status of the suction filter is not shown, but a message displays when it requires replacement. ® ® 6-12 Xerox Versant 3100 Press User Guide...
-
Page 89: Replacing The Tray 5 Feed Rolls
1. Locate Tray 5 (Bypass) on top of Trays 6 and 7. 2. Lift up and open the bypass tray cover to access the feed roll components. 3. Remove the feed roll and install a new one. ® ® Xerox Versant 3100 Press 6-13 User Guide... - Page 90 Install a new nudger roll by squeezing the metal shaft at both ends and sliding it into place. 5. Remove the separator roll and install a new one. ® ® 6-14 Xerox Versant 3100 Press User Guide...
- Page 91 Select Reset Current Value. The system resets the High Frequency Service Item (HFSI) to 0. h) Exit the administrator mode by pressing the Log In / Out button on the control panel. When prompted, select Logout. ® ® Xerox Versant 3100 Press 6-15 User Guide...
-
Page 92: Replacing The Tray 6/7 Feed Rolls
Separator Roll (shown with the feed roll removed) 2. Feed Roll 1. To access the feed components , pull out the tray slowly until it stops. 2. Replace the nudger roll: ® ® 6-16 Xerox Versant 3100 Press User Guide... - Page 93 Slide the separator roll assembly all the way to the left so it is out of the slots. c) Pull the assembly out towards you until completely removed from the tray, and set aside the assembly. 4. With the separator roll assembly out, replace the feed roll: ® ® Xerox Versant 3100 Press 6-17 User Guide...
- Page 94 6. Reinstall the separator roll assembly into the tray. a) Align the cutout holes of the assembly with the frame of the tray so the pin holes match up. ® ® 6-18 Xerox Versant 3100 Press User Guide...
- Page 95 Repeat the previous steps until the counters for all three components are reset to zero (0). i) Exit administrator mode by pressing the Log In / Out button on the control panel When prompted, select Logout. ® ® Xerox Versant 3100 Press 6-19 User Guide...
-
Page 96: Replacing A Dry Ink / Toner Cartridge
4. Dispose of or recycle the cartridge per your local authorities and regulations. In the United States, also refer to the Electronic Industries Alliance website: www.eiae.org. For more information about Xerox environmental programs, go to www.xerox.com/environment. 5. Remove the new dry ink / toner cartridge from its packaging. - Page 97 After you replace a dry ink / toner cartridge, the system automatically resets the High Frequency Service Item (HFSI) usage counter for this CRU to zero (0). Check the consumables Supplies screen to verify the reset and new status. ® ® Xerox Versant 3100 Press 6-21 User Guide...
-
Page 98: Replacing The Dry Ink / Toner Waste Bottle
3. Grasp the handle of the dry ink / toner waste bottle and slowly pull it halfway out of the press. Slowly pulling out the bottle prevents any dry ink / toner from spilling. 4. Continue slowly pulling out the bottle until it is removed from the press: ® ® 6-22 Xerox Versant 3100 Press User Guide... -
Page 99: Replacing The Suction Filter
1. At the back of the press, locate the suction filter cover on the lower panel. 2. Us the Torx driver to remove the screw on the right side of the cover by turning the screw counterclockwise (left). ® ® Xerox Versant 3100 Press 6-23 User Guide... - Page 100 Select the Technical Key Operator icon. The Technical Key Operator feature displays. f) In the Part Number list, select Suction Filter. g) Select Reset Current Value. The system resets the HFSI to 0. 10. Exit administrator mode. ® ® 6-24 Xerox Versant 3100 Press User Guide...
-
Page 101: Replacing A Drum Cartridge
Caution Replace drum cartridges while the press is powered ON. 1. Ensure that the press is stopped and not currently printing jobs. 2. Open the press Left and Center Front doors. ® ® Xerox Versant 3100 Press 6-25 User Guide... - Page 102 Exposing the drum cartridges to direct sunlight or strong light from indoor fluorescent lighting for more than one minute may cause image quality defects. 6. Clean under drum cartridge area: ® ® 6-26 Xerox Versant 3100 Press User Guide...
-
Page 103: Fuser Assembly Procedures
Technical Key Operator (TKO) or Service Representative. In special infrequent cases and only when directed by service, the customer may replace fuser assembly. ® ® Xerox Versant 3100 Press 6-27 User Guide... -
Page 104: Fuser Assembly Cautions And Warnings
When pulling out the transfer drawer to the service position, do not attempt to pull the drawer further out towards you. Pulling the drawer further out will disengage it from the rails resulting in damage to the drawer and possible injury. ® ® 6-28 Xerox Versant 3100 Press User Guide... -
Page 105: Reasons For Removing / Replacing Fuser Assembly Components
• T10 and T15 Torx drivers (located in the Nationalization Kit) • Fuser Handles (originally stored inside the Paper Tray 2 compartment) • Pressure Roll Handles (originally stored inside the Paper Tray 2 compartment) ® ® Xerox Versant 3100 Press 6-29 User Guide... -
Page 106: Removing The Fuser Module
1. Power off the press by pressing the On/Off button. 2. When the indicator light stops blinking, open the left and the center front doors. 3. Switch off the main power switch. ® ® 6-30 Xerox Versant 3100 Press User Guide... - Page 107 Handle to push through the hole in the Transfer Drawer rail to release the tab on one side of the drawer. b) Repeat the previous step for the other side of the drawer. ® ® Xerox Versant 3100 Press 6-31 User Guide...
- Page 108 Pinch the tabs on both sides of the black connector and lift to remove. b) Using a Torx driver, gently push the tabs in on each of the three white connectors while pulling slightly on the wires to remove. ® ® 6-32 Xerox Versant 3100 Press User Guide...
-
Page 109: Replacing The Stripper Finger Assembly
15. Place it on the Fuser Holding Rack provided. Align the edge of the roller to the scribe mark on the holding rack frame. 16. If damaged or end-of-life, place it inside the original box and return to Xerox for recycling. -
Page 110: Replacing The Pressure Roll Assembly
5. Align the bearings to the cradle as you gently lower the Pressure Roll into place, and then remove the handles. 6. Rotate the roll to ensure that the gears mesh properly. ® ® 6-34 Xerox Versant 3100 Press User Guide... -
Page 111: Replacing The Pressure Roll Cleaning Pad Assembly
If installing a fuser with a different width fuser, remove the new fuser from its packaging. Otherwise, retrieve the fuser that was removed previously and which is sitting on the Holding Rack. ® ® Xerox Versant 3100 Press 6-35 User Guide... - Page 112 Fuser Belt Module again. Leave the Top Cover open. 4. Replace the wire bundle into the harness clip. Reconnect the three white connectors at the front of the Fuser by pushing into place. ® ® 6-36 Xerox Versant 3100 Press User Guide...
- Page 113 CRU component. The HFSI components that need to be reset at the press touch screen are: • Belt Module 1 (No Fuser connector) • Belt Module 2 (Fuser connector 1) • Belt Module 3 (Fuser connector 2) ® ® Xerox Versant 3100 Press 6-37 User Guide...
-
Page 114: Extending Fuser Life With Multiple Fusers
Also, a clip on the fuser front cover identifies the width of the fuser being used. Note Before using the new fuser, the system administrator must update the NVM width setting values to match the specific width used for this fuser. ® ® 6-38 Xerox Versant 3100 Press User Guide... -
Page 115: Changing The Fuser Width Id
• 11 inch (A4 / Letter SEF) width fuser • 12 inch (A3 SEF / A4 / Letter LEF / 304.8 mm) width fuser • 13 inch (SRA 3/ 330.2 mm) width fuser • Custom and other size papers ® ® Xerox Versant 3100 Press 6-39 User Guide... - Page 116 3. Locate the black fuser front cover. 4. Remove the fuser front cover by using the T10 Torx driver to unscrew the one mounting screw at the center of the cover. ® ® 6-40 Xerox Versant 3100 Press User Guide...
- Page 117 Cancel the job and submit the correct paper width for that job, or change fusers so that the correct width-range fuser is installed. ® ® Xerox Versant 3100 Press 6-41 User Guide...
- Page 118 Maintenance ® ® 6-42 Xerox Versant 3100 Press User Guide...
-
Page 119: Troubleshooting
Troubleshooting General Troubleshooting The following table helps you resolve some basic problems you may encounter with the press. If the problem persists after following all the instructions, contact your Xerox Representative or the Customer Support Center. Note Before contacting Customer Support, refer to the Customer Diagnostic Tool and the Stock Library Manager Help for additional problem solving information. - Page 120 • The system has two print modes selectable at the print server: Four color mode (CMYK: cyan, magenta, yellow, black) Black and white mode only ® ® Xerox Versant 3100 Press User Guide...
- Page 121 • Select the paper size, tray and weight at the print server and ensure these paper attributes are set correctly at the Tray Properties window. • Ensure that Fit to Paper or an equivalent selection is not selected in your print driver. ® ® Xerox Versant 3100 Press User Guide...
- Page 122 • Paper and transparencies may stick together if environmental conditions are too dry and cause excessive static. Increase the humidity level in the room to minimize static. ® ® Xerox Versant 3100 Press User Guide...
- Page 123 The Offset Catch Tray (OCT) holds a maximum capacity of 500 sheets of 24 lb. (90 gsm) paper. For all other optional finishing devices, refer to the Optional Devices Guide for Xerox ® ® Versant 3100 Press for output specifications.
-
Page 124: Reducing Toner Consumption
3. Lower Toner Consumption Pri- Set NVM to 0 (Off) No change re- No change required ority quired These settings decrease toner usage and increase productivity, but may result in degraded IQ. ® ® Xerox Versant 3100 Press User Guide... -
Page 125: Image Quality (Iq) Troubleshooting
The print shows lines or bands running from the inboard-to-outboard (IB/OB) direction (side- to-side direction). Note For defects running from the lead-edge to trail-edge (LE/TE) direction, refer to Streaks or Lines Prints. Suggested Solutions Measure the frequency of the spot intervals. ® ® Xerox Versant 3100 Press User Guide... - Page 126 If spots occur every 147 mm on the prints, run the Halftone Test Pattern to determine which color drum is affected. Replace or swap the appropriate drum cartridge; refer to Replacing a Drum Cartridge. ® ® Xerox Versant 3100 Press User Guide...
- Page 127 This occurs mainly when using heavier or lighter weight stock. Suggested Solutions If you run multiple width papers, refer to Extending Fuser Life with Multiple Fusers Preventing Fuser Damage for more information. ® ® Xerox Versant 3100 Press User Guide...
- Page 128 Ensure the paper tray guides are touching the edges of the loaded paper. Push the tray in completely. • Refer to Stock Library Manager Troubleshooting and review the Suggested Solutions for “Image Registration, Perpendicularity, Skew, or Magnification.” ® ® 7-10 Xerox Versant 3100 Press User Guide...
-
Page 129: Stock Library Manager Troubleshooting
Perform these actions first to improve print quality: • Confirm the media being used is compatible with the Press, within supported specifications, in good condition, and has been assigned to the correct Press Tray. ® ® Xerox Versant 3100 Press 7-11 User Guide... - Page 130 Stock Setup > Enable Tray Heater • To Disable (unchecked) the tray heater: Remove any paper loaded in the tray. In Tray Air Assist select any option except Forced Off . ® ® 7-12 Xerox Versant 3100 Press User Guide...
- Page 131 IDM Curl Correction option on the IDM control panel is set to Auto. Note ® ® For more information, refer to the Optional Devices Guide for Xerox Versant 3100 Press, the Interface Decurler Module (IDM) chapter. Change the Paper Curl Correction setting from the Stock Library Manager on the print server.
- Page 132 • This feature is accessed from Stock Library Manager > Stock Properties > Advanced Stock Setup > Secondary Transfer Voltage Adjustment. • The Secondary Transfer Voltage Adjustment procedure can be performed by selecting either Auto or Manual. ® ® 7-14 Xerox Versant 3100 Press User Guide...
- Page 133 If using trays 1, 2, or 3, try switching to tray 6 or 7 or optional tray 8 or 9 (if available). Note Trays 6-9 have better registration and skew performance. ® ® Xerox Versant 3100 Press 7-15 User Guide...
- Page 134 Upon completion of the print job, the recommendation is to return the option to its default setting. • Use this feature to adjust the aligner roll pressure. ® ® 7-16 Xerox Versant 3100 Press User Guide...
- Page 135 • If feeding paper from tray 1, 2 or 3 and repeated Regi-Loop adjustments do not make any improvements in a registration problem, return the Regi-Loop value to its default, and adjust the Pre Gate Roll Adjustment setting. Refer to Change the Pre Gate Roll Adjustment setting. ® ® Xerox Versant 3100 Press 7-17 User Guide...
- Page 136 • User this feature to adjust the fuser temperature. • If dry ink / toner comes off the paper, especially with special media, resolve the problem by increasing the fusing temperature. ® ® 7-18 Xerox Versant 3100 Press User Guide...
- Page 137 In this case, you may need to decrease the roll pressure to apply less force to hold down the paper. To change the Aligner Roll Pressure setting, perform the following: ® ® Xerox Versant 3100 Press 7-19 User Guide...
- Page 138 • Optional C/Z Folder with one of the following optional finishers: PR Finisher, or PR Booklet Maker Finisher, or PR Finisher Plus For detailed information about these finishing devices, refer to the Optional Devices Guide for Xerox ® Versant ® 3100 Press.
- Page 139 Setup > Fuser Speed Adjustment. • Increase fuser speed in increments of 0.5%. After every increment adjustment run test prints and evaluate the output to determine if additional adjustment is necessary. ® ® Xerox Versant 3100 Press 7-21 User Guide...
-
Page 140: Stock Library Manager Default Settings
-2.0 to 2.0 mm Determined by test print output Perpendicularity Side 1 -1.0 to 1.0 mm Determined by test print output Side 2 -1.0 to 1.0 mm Determined by test print output Skew ® ® 7-22 Xerox Versant 3100 Press User Guide... - Page 141 Determined by is Longer test print output Bi-Fold – Multiple Sheets Stapled Left and Right Sides Equal Left Side of Fold 0.0 – 20.0 mm Determined by is Longer test print output ® ® Xerox Versant 3100 Press 7-23 User Guide...
- Page 142 On the Fold Left of Fold 0.0 – 20.0 mm Determined by test print output Right of Fold 0.0 – 20.0 mm Determined by test print output C-Fold ® ® 7-24 Xerox Versant 3100 Press User Guide...
- Page 143 Primary Transfer Current Adjustment Yellow 10 to 200 % Determined by test print output Magenta 10 to 200 % Determined by test print output Cyan 10 to 200 % Determined by test print output ® ® Xerox Versant 3100 Press 7-25 User Guide...
- Page 144 -3.0 to 3.0 mm 0.3 mm Alignment Profile Default Distinct Selec- Available selec- Determined by tions Available tions will be test print output based on the Pro- files created by the user ® ® 7-26 Xerox Versant 3100 Press User Guide...
- Page 145 Moderate (Small) Up- ward or Moder- ate (Small) Downward • Custom Curl Correction: Medium Up- ward or Medi- um Downward • Custom Curl Correction: Severe (Large) Upward or Severe (Large) Downward ® ® Xerox Versant 3100 Press 7-27 User Guide...
- Page 146 • Default Custom • Type A Severe Upward Medium Upward • Type B Moderate Up- • Type C ward • Custom Curl Slight Upward Correction: No Curl Slight (Very Slight Downward ® ® 7-28 Xerox Versant 3100 Press User Guide...
-
Page 147: Paper Jams
You can get injured or burned. Switch off the press immediately and contact the Customer Support Center. ® ® Xerox Versant 3100 Press 7-29 User Guide... -
Page 148: Clearing Jams In Area 2
The transfer drawer includes the following jam clearance areas: • Registration and alignment transport • Registration roll • Duplex transport • Fuser entrance 1. Open the left and center front doors. ® ® 7-30 Xerox Versant 3100 Press User Guide... - Page 149 4. If paper is jammed at the top of the transfer drawer, remove paper from area 2a by pulling it straight out. 5. Open lever 2b upward and any remove jammed paper. ® ® Xerox Versant 3100 Press 7-31 User Guide...
- Page 150 7. Locate area 2c and pull any jammed paper out towards the left. 8. Open lever 2d upward and lever 2e to the right ; remove any jammed paper 9. Return levers 2d and 2e to their original position. ® ® 7-32 Xerox Versant 3100 Press User Guide...
-
Page 151: Clearing Jams In Areas 3, 4 And 5
13. Close the left and center front doors completely. The press does not operate when doors or covers are open. Clearing Jams in Areas 3, 4 and 5 Important Before opening any press doors, ensure that the press has stopped printing. ® ® Xerox Versant 3100 Press 7-33 User Guide... - Page 152 Note There may be extra sheets remaining in the press. To ensure all sheets are removed, rotate knob 3b clockwise (right) three times. 4. Return lever 3a to its original position. ® ® 7-34 Xerox Versant 3100 Press User Guide...
- Page 153 6. If there is difficulty in removing the jammed paper, rotate knob 5b clockwise (right) , and remove the jammed paper 7. Return lever 5a to its original position. 8. Open lever 5c downward , and remove any jammed paper ® ® Xerox Versant 3100 Press 7-35 User Guide...
- Page 154 10. Return lever 5c to its original position. 11. To open the exit module drawer, grasp handle 4 and rotate handle to the right to the horizontal position. 12. Slowly pull out the exit module drawer until stops. ® ® 7-36 Xerox Versant 3100 Press User Guide...
- Page 155 15. Open lever 4b to the right , and remove any jammed paper 16. If there is difficulty in removing the jammed paper, open lever 4d to the right and remove the jammed paper ® ® Xerox Versant 3100 Press 7-37 User Guide...
- Page 156 , and rotate handle to the left to lock the module in place 22. Close the right front door completely. The press will not operate if a door is open even slightly. ® ® 7-38 Xerox Versant 3100 Press User Guide...
-
Page 157: Paper Jams In Trays 1-3
Always ensure that all paper jams, including any small, ripped pieces of paper, are cleared before proceeding with any print jobs. 1. Remove the paper currently loaded in the Bypass (Tray 5). 2. Lift and open the Top Cover of the Bypass (Tray 5). ® ® Xerox Versant 3100 Press 7-39 User Guide... -
Page 158: Ohcf Jam Clearance (Trays 6 And 7)
Paper Jams inside OHCF Trays 6 and 7 1. Pull out the tray where the paper jam occurred. ® ® 7-40 Xerox Versant 3100 Press User Guide... -
Page 159: Ohcf (Trays 6 And 7) Paper Jams At Lever 1A And Knob 1C
4. Close the front cover of the feeder module. Note If the front cover of the feeder module is not completely closed, a message will appear and the machine will not operate. ® ® Xerox Versant 3100 Press 7-41 User Guide... -
Page 160: Ohcf (Trays 6 And 7) Paper Jams At Lever 1B And Knob 1C
If the front cover of the feeder module is not completely closed, a message will appear and the machine will not operate. OHCF (Trays 6 and 7) Paper Jams at Lever 1d and Knob 1c 1. Open the front cover of the feeder module. ® ® 7-42 Xerox Versant 3100 Press User Guide... -
Page 161: Fault Information
• The press stops running and an fault message displays on the press touch screen. • The message includes a graphical illustration showing the location of the fault along with a brief explanation of corrective actions for clearing the fault. ® ® Xerox Versant 3100 Press 7-43 User Guide... -
Page 162: Obtaining Fault Information From The Press Touch Screen
1. From Home on the press touch screen, select the Faults button. • If there is only one fault, a Fault screen displays. ® ® 7-44 Xerox Versant 3100 Press User Guide... -
Page 163: Fault Messages
If a fault occurs in more than one location, the illustration changes to indicate the multiple locations and the required corrective actions. ® ® Xerox Versant 3100 Press 7-45 User Guide... -
Page 164: Troubleshooting Help
Faults Tab Fault Messages. 2. Record the press serial number. a) Select the Machine Status button at the press control panel. b) From the Machine Status screen, select the Machine Information tab. ® ® 7-46 Xerox Versant 3100 Press User Guide... - Page 165 4. If possible, use a phone near the press when calling for assistance. Follow the instructions provided by the operator. 5. For system support, user help, and service support, call the appropriate number. For the specific number in your area, go to www.xerox.com and select the Support link. ®...
- Page 166 Troubleshooting ® ® 7-48 Xerox Versant 3100 Press User Guide...
-
Page 167: Specifications
1200 x 1200 dpi Paper Size Ranges For information, refer to Paper Size Ranges. Paper Tray Information For information, refer to Paper Tray Information. Productivity Information For information, refer to Press Productivity Information. Xerox ® Versant ® 3100 Press User Guide... -
Page 168: Performance Specifications
50° to 90° F (10° to 32° C) Required Relative Humidity 15% to 85% Relative Humidity (RH) Altitude(above sea level) Max of 8,200 ft. (2,500 meters) Sound Pressure Levels • Running: 65 dBA (decibels (Acoustics)) • Standby: 40.8 dBA ® ® Xerox Versant 3100 Press User Guide...