TCS UbiquiSTAT US4050 Configuration Manual
Commercial bacnet controller
Hide thumbs
Also See for UbiquiSTAT US4050:
- Product manual (50 pages) ,
- Product manual (32 pages) ,
- Installation manual (8 pages)

Related Manuals for TCS UbiquiSTAT US4050


Summary of Contents for TCS UbiquiSTAT US4050
- Page 1 Configuration Guide UbiquiSTAT Commercial BACnet Controller 2800 Laura Lane • Middleton, WI 53562 | 800.288.9383 | www.tcsbasys.com 202211...
-
Page 2: Table Of Contents
Contents Introduction ............................3 Model-Specific Features/Instructions ....................3 Configuring Via the Touchscreen Interface ..................3 Home Screen Overview ..............................3 Room Temperature and Setpoints ........................4 DI Setpoint Setback Active Indicator .......................4 Information Text .............................4 Settings Screens .............................4 Fan Mode ..................................5 System Mode ....................................5 Occupancy Setpoints ..................................6 Schedule Settings ....................................6 Date and Time ....................................9... -
Page 3: Introduction
Cloud or TCS Insight software, which is available for download on the website. If you have any questions regarding your UbiquiSTAT room controller, contact TCS Technical Support at 800-288-9383, ext. 2. Our Technical Support Department hours are Monday – Friday, 7:00 a.m. to 7:00 p.m. (CST). -
Page 4: Room Temperature And Setpoints
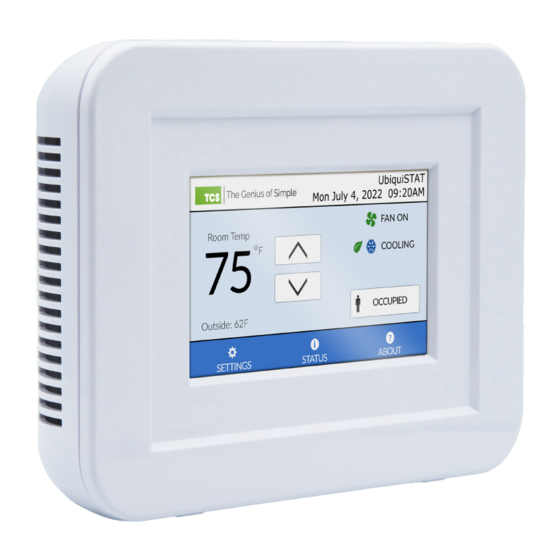
Configuration Room Temperature and Setpoints The room temperature is rounded to the nearest whole number. The active heat and cool setpoints will appear in place of the room temperature when using the up/down arrows to adjust the temperature value or when touching the Room Temperature display. -
Page 5: Fan Mode
Configuration Fan Mode Set/change the fan’s operation for occupied and unoccupied status by touching the FAN MODE button in the Settings display. Select from the following modes: • On: The fan runs continuously. • Auto: The fan runs only when there is a call for heat or cool. •... -
Page 6: Occupancy Setpoints
Occupancy Setpoints Screen Heating and Cooling Setpoints Example NOTE: While the minimum “deadband” between heat and cool setpoints is set to five degrees by default, TCS recommends a deadband of at least two degrees for most conditions. Schedule Settings Before creating occupancy schedules, make sure you have configured your desired occupancy setpoint pairs, as you must assign a setpoint pair to each schedule setting. - Page 7 Configuration Weekly Schedules The UbiquiSTAT has a total of eight customizable schedule settings that can be used to create daily, weekly, or holiday schedules. (By default, the UbiquiSTAT includes two schedule settings: an [A] Occupied setting at 8:00 AM Weekdays setting, and an Unoccupied setting at 5:00 PM Weekdays setting.) You can link schedules to the any of the five occupancy setpoints available.
- Page 8 Configuration STEP 4 In the START TIME screen, use the up/down ar- rows to select the time you want the new sched- ule to start. Select the Occupancy Setpoint pair you wish to assign. (OPTIONAL: you can edit the setpoints for the setpoint group you selected, but this will change the values wherever that setpoint pair is assigned.) Touch DONE to save your entry.
-
Page 9: Date And Time
Configuration STEP 3 In the SET HOLIDAY screen, select the day, month and year you wish to create the holiday schedule for. STEP 4 Select the Occupancy Settings pair you wish to attach to the new date. Touch DONE to save the settings. -
Page 10: Advanced Settings
Configuration Advanced Settings Touching the ADVANCED button in the SETTINGS display brings up the first of two screens: ADVANCED 1/2 has buttons for Network Settings (wireless models), RS-485 Network (wired models), Thermostat Type, Analog Outputs, Display Options, and Temperature Calibration. ADVANCED 2/2 has buttons for Factory Defaults, Internal BACnet Explorer, Access Code, System Test Mode, and System Event Log. - Page 11 Configuration RS-485 Network Settings Set/change the network settings for mode type, baud rate, device address and device instance. Touch the SAVE button on each screen to save any changes. RS-485 Network Settings Screen – TCSbus Mode RS-485 Communication Mode Screen RS-485 Baud Rate Screen RS-485 Network Settings Screen –...
- Page 12 Configuration BACnet Wi-Fi Settings (Wi-Fi Models Only) After selecting BACNET WI-FI in the NETWORK SETTINGS screen, touch the ENABLE SETTINGS button. This will activate the screens for scanning available Wi-Fi networks, assigning a port number, and a device instance number. Enable Wi-Fi Screen Available Wi-Fi Networks Screen Wi-Fi Passphrase Screen...
- Page 13 Configuration Thermostat Type Touching the THERMOSTAT TYPE button on the ADVANCED 1/2 display allows you to specify whether the UbiquiSTAT is controlling a conventional HVAC system or a heat pump system. Thermostat Type Selection Screen Analog Outputs Touching the ANALOG OUTPUTS button on the ADVANCED 1/2 display allows you to configure either of the UbiquiSTAT’s Analog output ports for HVAC mode, the type of you action you wish to assign to the port, and the range.
- Page 14 Configuration Room Temperature Source Touching the ROOM TEMP SOURCE button on the ADVANCED 1/2 display allows you to configure the source of the UbiquiSTAT’s room temperature measurement. You can select the device’s internal temperature sensor, a remotely connected sensor, or you can configure an average of both. When selecting the AVERAGE button, you can fine-tune the weighting between the internal sensor and the external sensor in five-percent increments.
- Page 15 Configuration Outdoor Air Sensor Calibration Screen NOTE: The UbiquiSTAT will display a default temperature of 160°F if no sensor is detected. Factory Defaults Touching the FACTORY DEFAULTS button on the ADVANCED 2/2 display will bring up a warning message advising you that loading the factory defaults will reset any programming changes you have made.
- Page 16 Configuration Access Code Touching the ACCESS CODE button on the ADVANCED 2/2 display allows you enter a four-digit code to lock out most settings and discourage tampering. (Users will still be able to adjust the setpoints). After entering the four-digit code, you will be prompted to confirm the number.
-
Page 17: Status Screens
• Action: Describe changes made to the device from a local user or an outside programming source (i.e., Ubiquity Cloud). • Fault: These are only reported when the UbiquiSTAT detects an unexpected behavior. Report any faults to TCS technical support. - Page 18 Configuration NOTES: Inputs for Mixed Air and CO are only available on ‘40 ‘50 Input for Humidity is only available on ‘50 • Relay Outputs: The current state of heating, cooling, and fan operation. Advanced Screen Status Section Advanced Screen Example The ADVANCED screen displays the following information: Operating Modes: Whether the UbiquiSTAT is in conventional HVAC or heat pump mode, system status, and fan operation mode...
-
Page 19: About Section
• Last restart information • Sub-assembly serial number • Factory codes Touching the TCS logo again will return you to the main ABOUT screen. Touching the HOME button will return you to the Home screen. About Section Main Screen About Section Second Screen... -
Page 20: Additional Configurations
Configuration Additional Configurations This section describes how to configure many of the advanced options built into the UbiquiSTAT. Configuring these advanced options calls for an understanding of the use of BACnet objects, which are accessible through the BACnet Explorer (see ADVANCED 2/2 screen in the “Advanced Settings”... -
Page 21: Troubleshooting
TCS Technical support, try the remedies shown here. If you are still experiencing issues with your UbiquiSTAT room controller, do not hesitate to contact TCS Technical Support at 800-288-9383, ext. 2. Our Technical Support Department hours are Monday – Friday, 7:00 a.m. to 7:00 p.m. (CST). - Page 22 Configuration Issue Probable Cause(s) Solution Service status symbol is on • Indicates The UbiquiSTAT needs service in • When the DI is configured for fan proving, the icon is showing on display) one or more of the following conditions: system will shut down if the fan is not ⸰...