AudioCodes 300HD Series User Manual
Hide thumbs
Also See for 300HD Series:
- Administrator's manual (110 pages) ,
- Quick manual (2 pages) ,
- Quick manual (2 pages)

Related Manuals for AudioCodes 300HD Series


Summary of Contents for AudioCodes 300HD Series
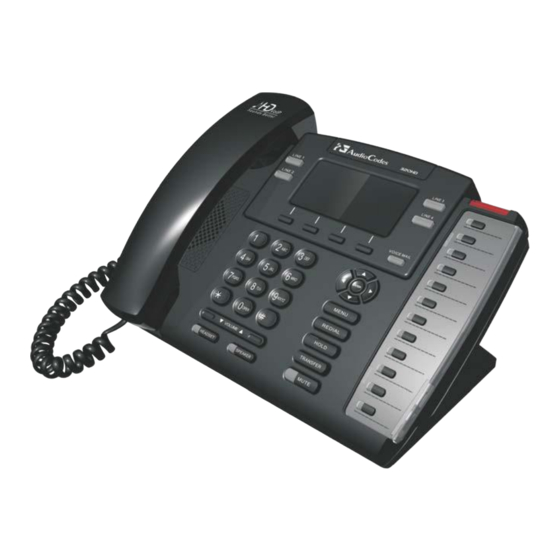
- Page 1 AudioCodes 300HD Series of High Definition IP Phones HD VoIP 320HD IP Phone User’s Manual 320HD IP Phone Version 1.6.0...
-
Page 3: Table Of Contents
User's Manual Contents Table of Contents Introduction ......................... 9 Hardware Setup ......................11 Unpacking the Package Contents ................... 11 Physical Description ......................12 2.2.1 Front View .......................... 12 2.2.2 Rear View .......................... 14 Cabling the Phone ......................15 Mounting the Phone ......................16 2.4.1 Placing the Phone on a Desk .................... - Page 4 320HD IP Phone 4.12 Locking and Unlocking the Phone ................... 49 4.12.1 Single-Line Mode ....................... 49 4.12.2 Locking / Unlocking in Multi-Line Mode ................50 4.13 Changing your Presence Status ..................51 Basic Phone Operations ................... 53 Using the Phone’s Audio Devices ..................53 Making Calls ........................
- Page 5 User's Manual Contents List of Figures Figure 2-1: Front View ............................12 Figure 2-2: Rear View ............................14 Figure 2-3: Cabling the Phone .......................... 15 Figure 2-4: Adjusting the Phone in Vertical Plane .................... 16 Figure 2-5: Routing the LAN and PC Cables ....................17 Figure 2-6: Routing the Phone’s AC Power Cord .....................
- Page 6 320HD IP Phone List of Tables Table 2-1: Font View Description ........................13 Table 2-2: Rear View Description ........................14 Table 3-1: Main Areas of LCD Display ......................21 Table 3-2: Softkey Description ......................... 22 Table 3-3: In-Progress Operational Messages Displayed on LCD Screen ............26 Table 4-1: BLF LED Description ........................
- Page 7 Notices Notice This document provides instructions on how to use your AudioCodes 320HD IP Phone. Information contained in this document is believed to be accurate and reliable at the time of printing. However, due to ongoing product improvements and revisions, AudioCodes cannot guarantee accuracy of printed material after the Date Published nor can it accept responsibility for errors or omissions.
- Page 8 320HD IP Phone Related Documentation Document Name 300HD IP Phone Release Notes 320HD IP Phone Administrator’s Manual 320HD IP Phone Quick Guide User's Manual Document #: LTRT-24503...
-
Page 9: Introduction
1. Introduction Introduction AudioCodes 320HD IP Phone is based on AudioCodes High Definition voice technology, providing clarity and a rich audio experience in Voice-over-IP (VoIP) calls. The 320HD is a 4-line, 2 concurrent calls per line premium model which includes a large monochrome multi-language graphic LCD display. - Page 10 320HD IP Phone Reader’s Notes User's Manual Document #: LTRT-24503...
-
Page 11: Hardware Setup
User's Manual 2. Hardware Setup Hardware Setup Unpacking the Package Contents When unpacking the IP phone, ensure that the following items are present and undamaged: 320HD IP Phone Handset Ethernet Cable AC Power Adapter Two Wall-Mounting Screws If anything appears to be missing or broken, contact the distributor from whom you purchased the phone for assistance. -
Page 12: Physical Description
320HD IP Phone Physical Description You can use the graphics below to identify buttons and hardware on your phone. Use this section to familiarize yourself with the phones buttons functions. 2.2.1 Front View The front view of the phone is shown below and described in Table 2-1. -
Page 13: Table 2-1: Font View Description
User's Manual 2. Hardware Setup Table 2-1: Font View Description Item # Label/Name Description LCD Display Screen Interactive LCD display screen, which displays various calling information and allows you to setup phone features. Ring LED Indicates when an incoming call is received (phone rings). The LED is lit red. -
Page 14: Rear View
320HD IP Phone 2.2.2 Rear View The rear view of the phone is shown in the figure below and described in Table 2-2. Figure 2-2: Rear View Table 2-2: Rear View Description Item # Label / Name Description Handset Jack RJ-9 port for connecting the handset. -
Page 15: Cabling The Phone
User's Manual 2. Hardware Setup Cabling the Phone The procedure below describes how to cable your phone. Some of the cabling steps are optional and depend on your requirements. To cable the phone: Connect the RJ-9 handset jack to the handset. (Optional) Connect the RJ-9 headset jack to a headset. -
Page 16: Mounting The Phone
320HD IP Phone Mounting the Phone The phone can be mounted in one of the following ways: Desktop mounting (see Section 2.4.1 below) Wall mounting (see Section 2.4.2 on page 18) 2.4.1 Placing the Phone on a Desk This section describes the procedures for placing the phone on a desk or flat surface. -
Page 17: Figure 2-5: Routing The Lan And Pc Cables
User's Manual 2. Hardware Setup Plug the LAN cable in the LAN port. Insert the LAN cord in the allotted slot on the right side of the bracket. Figure 2-5: Routing the LAN and PC Cables To route the phone’s power adapter cord: Insert the AC power adapter cord through the bracket hole (A). -
Page 18: Wall-Mounting The Phone
320HD IP Phone 2.4.2 Wall-Mounting the Phone You can mount the phone on a wall or wall plate. You need two screws (not supplied) to fit the keyhole slots. To wall mount the phone: On the wall or a wall plate, drill two holes with a distance of 3 15/16 inches (100 mm) apart. Thread a screw into each hole with each head extending about 3/16 inch (5 mm) from the wall or wall plate. -
Page 19: Figure 2-9: Wall-Mounting The Phone
User's Manual 2. Hardware Setup Align the phone’s keyhole slots with the screws and slide the phone downward to secure it. Figure 2-9: Wall-Mounting the Phone Version 1.6.0 January 2012... - Page 20 320HD IP Phone Reader’s Notes User's Manual Document #: LTRT-24503...
-
Page 21: Getting Started With Phone User Interface
User's Manual 3. Getting Started with Phone User Interface Getting Started with Phone User Interface The phone provides an LCD-based user interface screen, providing an intuitive, menu-driven user interface for configuring the phone and viewing various call information. This section provides an overview on using the phone’s screen. -
Page 22: Working With Softkeys
320HD IP Phone Working with Softkeys Softkeys are activated by pressing one of the four corresponding phone keys located directly below the softkey displayed on the LCD screen. The displayed softkeys depend on the menu level currently accessed. The phone provides the following softkeys: Table 3-2: Softkey Description Description Opens the phone directory. -
Page 23: Accessing Menus
User's Manual 3. Getting Started with Phone User Interface Accessing Menus The phone’s menus are used for configuring the phone (e.g., adding contacts to the phone directory) and obtaining various information (e.g., missed calls and network status). The phone’s main menu is accessed using the MENU key. Drilling down to submenus is done by using the Navigation keys to select the required menu, and then pressing ENTER or the Select softkey. -
Page 24: Entering Numbers, Letters And Symbols
320HD IP Phone Select the menu, by performing one of the following: • Press the ENTER key. • Press the Select softkey. Repeat steps 2 through 3 to select the next menu levels. To cancel your selection and move to the previous menu level, press the Back softkey. Entering Numbers, Letters and Symbols The phone’s alphanumerical keypad allows you to enter numbers, letters, and symbols. -
Page 25: Figure 3-5: Lcd Screen In Alphabetical Mode For Symbols
User's Manual 3. Getting Started with Phone User Interface To enter symbols: Where you want to enter the symbol, select the alphanumerical selection softkey A/a/1 (or press the pound # key), and then choose the ABC mode. Figure 3-5: LCD Screen in Alphabetical Mode for Symbols On the keypad, press the 1 key to enter a symbol. -
Page 26: Displayed Messages
320HD IP Phone Displayed Messages The phone’s LCD screen displays messages to indicate certain process currently in progress. These messages include the following: Table 3-3: In-Progress Operational Messages Displayed on LCD Screen Message Description "Initializing" Initializing "Discovering LLDP" Discovering Link Layer Discovery Protocol (LLDP) for initialization "Discovering CDP"... -
Page 27: Customizing Your Phone
User's Manual 4. Customizing Your Phone Customizing Your Phone This chapter provides step-by-step procedures on customizing your phone. Changing the LCD Screen Language The phone’s LCD screen supports numerous languages. By default, the phone’s user interface is English, but you can change this to another language, as described in the procedure below. ... -
Page 28: Selecting Ring Tone
320HD IP Phone Selecting Ring Tone The phone provides you a list of ring tones from which you can choose for indicating incoming calls. If your phone is defined with line extensions, you can also assign a ring tone per extension. ... -
Page 29: Defining Date And Time
User's Manual 4. Customizing Your Phone Defining Date and Time You can manually change the displayed date and time if Network Time Protocol (NTP) is not used (see note below). Notes: • Typically, the phone retrieves the date and time from a Network Time Protocol (NTP) server over the Internet. - Page 30 320HD IP Phone Set the time: Select the Time option, and then modify the time using the Clear softkey. The time is in the format HH:MM. To add the colon (:), press the # key to choose the ABC mode, and then choose the colon by pressing the 1 key.
-
Page 31: Changing Lcd Screen Contrast Level
User's Manual 4. Customizing Your Phone Changing LCD Screen Contrast Level The phone’s LCD screen supports 15 different contrast levels. To define the contrast level of the LCD screen: Access the LCD Contrast submenu (MENU key > Settings menu > LCD Contrast submenu). -
Page 32: Changing Lcd Screen Backlight Timeout
320HD IP Phone Changing LCD Screen Backlight Timeout You can define the duration (in seconds) for which the phone’s backlight is lit when the phone is not being used (idle). After this duration expires, the backlight turns off. You can also decide to have the backlight on all the time, by selecting the Always on option. -
Page 33: Changing Audio Device
User's Manual 4. Customizing Your Phone Changing Audio Device You can select the type of audio device–speaker or headset–that is activated when pressing a LINE key or the Accept softkey to answer calls, or the LINE key or dial pad when dialing calls. By default, the speaker is used. -
Page 34: Adjusting Phone Volume
320HD IP Phone Adjusting Phone Volume The volume of the following phone entities can be adjusted: Ring Tones (e.g., dial tone) Handset Speakerphone Headset 4.7.1 Adjusting Ring Volume The volume of the ring, which indicates an incoming call, can be adjusted as described below: ... -
Page 35: Adjusting Tone Volume
User's Manual 4. Customizing Your Phone 4.7.2 Adjusting Tone Volume The phone tones include dial tone, ring-back tone and all other call progress tones. To adjust the tone volume: Off-hook the phone (using handset, speaker, or headset). Press the VOLUME key; the Tones Volume level bar is displayed on the screen: Adjust the volume using the VOLUME keys. -
Page 36: Adjusting Speakerphone Volume
320HD IP Phone 4.7.4 Adjusting Speakerphone Volume The volume of the speakerphone can only be adjusted during a call. Once you have changed the volume level, the volume applies to all subsequent speakerphone use. To adjust the speakerphone volume: During a call, press the SPEAKER key. -
Page 37: Enabling Call Waiting
User's Manual 4. Customizing Your Phone Enabling Call Waiting You can enable or disable the phone’s call waiting feature. When this feature is enabled and you receive another call while you are currently in call with another party, the LED of the available LINE key flashes red. -
Page 38: Defining Call Forwarding
320HD IP Phone Defining Call Forwarding The Call Forward feature allows you to automatically redirect an incoming call to another phone number, upon a user-defined condition (e.g., when the line is busy). If the phone has line extensions, you can also define a specific call forwarding rule per line (or for all extensions). ... - Page 39 User's Manual 4. Customizing Your Phone Press the Select softkey, and then define the destination to where you want the call forwarded: • Number To Forward: enter the number to where you want the call forwarded. • Select from Directory: choose this option and then select an existing contact in your phone directory to where you want the call forwarded.
-
Page 40: Managing Your Personal Phone Directory
320HD IP Phone 4.10 Managing Your Personal Phone Directory The phone directory feature enables you to add contacts to your phone’s local directory, and then edit and delete them if required. Once you have added a contact, you can easily call the contact directly from the directory (see Section on page 64). -
Page 41: Adding Contacts To The Personal Directory
User's Manual 4. Customizing Your Phone 4.10.2 Adding Contacts to the Personal Directory The procedure below describes how to add contacts to the phone directory. For each contact, you can enter a phone number for different locations (e.g., home, office, and mobile phone). You can also assign a ring tone to the contact, which plays when a call is received from the contact. -
Page 42: Editing Contacts In The Personal Directory
320HD IP Phone 4.10.3 Editing Contacts in the Personal Directory You can modify contacts in the phone directory, as described in the procedure below. To edit a contact: In the phone directory, choose the contact to edit, as shown below: Press the Detail softkey;... -
Page 43: Deleting Contacts From The Personal Directory
User's Manual 4. Customizing Your Phone 4.10.4 Deleting Contacts from the Personal Directory You can remove contacts from the phone directory, as described in the procedure below. To delete a contact: In the phone directory, choose the contact you want to delete, as shown below: Press the Detail softkey;... -
Page 44: Searching Contacts
320HD IP Phone 4.10.5 Searching Contacts You can use the phone’s search feature to quickly and easily locate a contact in the phone directory. The search feature is especially useful if you have a long list of contacts. To search the directory for a contact: Access the phone directory. -
Page 45: Defining Speed Dialing
User's Manual 4. Customizing Your Phone 4.11 Defining Speed Dialing Speed dialing allows you to quickly place a call by simply pressing a Speed Dial key that has been assigned with a phone number. You can assign up to 12 speed dial numbers. You can assign a contact in your directory to a Speed Dial key or manually assign a phone number to a Speed Dial key. - Page 46 320HD IP Phone Notes: • Speed dial Index 1 represents the top-most Speed Dial key on your phone; speed dial Index 12 represents the bottom-most Speed Dial key. • Instead of performing steps 1 and 2, you can simply press one of the phone’s Speed Dial keys, and then continuing with Step 3.
-
Page 47: Editing Speed Dials
User's Manual 4. Customizing Your Phone To enable the busy lamp field (BLF) feature for the Speed Dial key, perform the following: Choose the ‘Call Type’ field. Choose one of the following options (using the Navigation keys): ♦ Speed Dial: no BLF is defined for the Speed Dial key. ♦... -
Page 48: Deleting Speed Dials
320HD IP Phone 4.11.3 Deleting Speed Dials You can delete a speed dial assignment, as described below. To delete a speed dial: Access the Speed Dial screen (MENU key > Speed Dial menu). Choose a Speed Dial key (using the Navigation keys) that you want to delete, and then press the Select softkey. -
Page 49: Locking And Unlocking The Phone
4.12 Locking and Unlocking the Phone If your phone is deployed with AudioCodes solution for Microsoft® Lync™ Server 2010, you can lock your phone to prevent anyone from using it (such as making and receiving calls). To unlock your phone, you need to enter a password. -
Page 50: Locking / Unlocking In Multi-Line Mode
320HD IP Phone 4.12.2 Locking / Unlocking in Multi-Line Mode When your phone is configured with multiple lines (extensions), you can perform a lock per extension or for all extensions, as described in the procedure below. To lock your phone: Press the star key until the Lock screen is displayed: Choose an extension (or All Extensions to lock all extensions) that you want to lock, using Navigation keys, and then press the Lock softkey;... -
Page 51: Changing Your Presence Status
4.13 Changing your Presence Status If your phone is deployed with AudioCodes solution for Microsoft Lync Server 2010, you can assign a presence status to control how or whether you want people to contact you. By default, your status is based on your Lync client. You can set your phone to one of the following presence status: ... - Page 52 320HD IP Phone Reader's Notes User's Manual Document #: LTRT-24503...
-
Page 53: Basic Phone Operations
User's Manual 5. Basic Phone Operations Basic Phone Operations This section discusses basic phone operations. Using the Phone’s Audio Devices You can use one of the following audio devices on the phone for speaking and listening: Handset: Simply lift the handset off the cradle to answer or make a call. ... -
Page 54: Making Calls
320HD IP Phone Making Calls The phone offers a variety of ways that you can make a call, discussed later in this section. When you dial a number and the phone calls the party, the following indications are provided by the phone: ... -
Page 55: Dialing From The Keypad
User's Manual 5. Basic Phone Operations 5.2.1 Dialing from the Keypad You can make calls by dialing the number directly from the phone’s keypad. If before dialing, you press the SPEAKER key or lift up the handset, you can also dial a destination based on a URL address (e.g., with a host and domain name, or IP address) or alphabetical letters (e.g., "tvservice"). -
Page 56: Redialing A Number
320HD IP Phone To delete (from right to left) entered digits, press the Clear softkey. To cancel the call, press the Cancel softkey. Once you have completed entering the number, you can then dial the number by performing one of the following: •... -
Page 57: Dialing A Missed Call
User's Manual 5. Basic Phone Operations 5.2.3 Dialing a Missed Call The phone logs all missed calls. You can easily dial a missed call, as described in the procedure below. To dial a missed call: Access the Missed Calls screen, by pressing the Missed softkey (in the idle display), as shown below: The Missed Calls screen is shown below: Choose (using the... -
Page 58: Answering Calls
320HD IP Phone Answering Calls The phone provides the following indications for an incoming call: LCD screen displays the icon and “INCOMING CALL” indication, together with the caller’s phone number (or contact name if listed in the phone directory). ... -
Page 59: Rejecting Incoming Calls
User's Manual 5. Basic Phone Operations Rejecting Incoming Calls You can manually reject an incoming call. When you do this, the caller hears a busy tone from your phone. To reject an incoming call: Press the Reject softkey. Silencing Incoming Calls You can manually silence the ringing of an incoming call. -
Page 60: Viewing Logged Missed, Received And Dialed Calls
320HD IP Phone Viewing Logged Missed, Received and Dialed Calls Your phone stores information of missed, received, and dialed calls. In idle display, the phone indicates missed calls by displaying “Missed Calls” with the number of missed calls. To easily view missed calls from the idle display: ... - Page 61 User's Manual 5. Basic Phone Operations Press the Select softkey; a list of the logged calls is displayed (for example, missed calls as shown below): Press the required softkey: • Dial: dials the number of the selected logged entry. • Save: saves the related information about the call entry in the personal directory (for adding a contact in the directory, see Section 4.10...
- Page 62 320HD IP Phone Reader's Notes User's Manual Document #: LTRT-24503...
-
Page 63: Advanced Phone Operations
User's Manual 6. Advanced Phone Operations Advanced Phone Operations This chapter describes advanced phone operations. Answering Waiting Calls You can accept another incoming call on an extension (or LINE) that is already in an active call. The procedure below describes how to answer a waiting call and is based on the following example scenario: Call in progress with “Mike”... -
Page 64: Placing Calls On Hold
320HD IP Phone To answer a waiting call: Press the LINE key that is flashing red to answer the waiting call (e.g., LINE 2 to answer a call from “Sue”); the following occurs: • The pressed LINE key (e.g., LINE 2) LED changes to solid green and the icon is displayed in the LCD screen for the answered waiting call (e.g., for “Sue”... -
Page 65: Placing Calls To Phone Directory Contacts
User's Manual 6. Advanced Phone Operations To retrieve a call on hold: Press the HOLD key again. Press the Resume softkey. Press the corresponding LINE key (flashing green). Placing Calls to Phone Directory Contacts The procedure below describes how to make calls to contacts that are listed in your phone directory. -
Page 66: Making Calls Using Speed Dialing
320HD IP Phone Making Calls using Speed Dialing You can use the Speed Dial keys (located on the right side of the phone) to quickly dial a configured speed dial number. For assigning phone numbers to speed dial keys, see Section 4.11 on page 45. - Page 67 User's Manual 6. Advanced Phone Operations To make multiple calls on a line: Make the first call: Press the LINE 1 key; the LINE 1 key LED is lit green and the following appears on the screen: Enter the phone number that you want to call, and then press the Dial softkey; the phone calls the number: When the called party answers the phone, the following is displayed: Version 1.6.0...
- Page 68 320HD IP Phone Make the second call: Press the LINE 2 key; LINE 1 is put on hold and its LED flashes green, and LINE 2 key LED is lit green and the screen prompts you to enter the phone number of the second call: Enter the phone number that you want to call, and then press the Dial softkey;...
-
Page 69: Transferring Calls
User's Manual 6. Advanced Phone Operations Transferring Calls You can transfer a call to another party. This includes transferring a single, established call or transferring a second concurrent call. The transfer of the call can be done using one of the following methods: ... -
Page 70: Call Transfer With Two Concurrent Calls
320HD IP Phone To transfer the call immediately before the party answers (i.e., semi-attended transfer), press the Trans softkey; otherwise, wait until the called party answers the call, as shown below: To transfer the call, press the Trans softkey; the call is transferred: 6.6.2 Call Transfer with Two Concurrent Calls The procedure below describes how to transfer one of two established, concurrent calls. -
Page 71: Hosting Three-Way Conference Calls
User's Manual 6. Advanced Phone Operations Hosting Three‐Way Conference Calls You can make a three-way conference call between your phone and two other called parties. To make a three‐way conference call: Call the first participant; the call is established: Press the Conf softkey (or place the first participant on hold);... -
Page 72: Muting Calls
320HD IP Phone Press the Conf softkey to include all participants in the call; the conference call is established and the screen lists all the participants in your conference call, as shown below: To end the conference call, you can either hang up the phone or press the End softkey. Muting Calls The phone allows you to mute the microphone (of the handset, headset, or speakerphone) during a call so that the other party cannot hear you. -
Page 73: Retrieving Voice Mail Messages
User's Manual 6. Advanced Phone Operations To deactivate Do Not Disturb: Ensure that the phone is in idle state (i.e., you are currently not in any active call or dialing a number) and that the main screen is displayed. Press the DnD softkey;... -
Page 74: Using Multiple Lines
320HD IP Phone 6.11 Using Multiple Lines Your phone can support up to four lines. Each line is configured per LINE key with its own extension number. The figure below displays the main screen when the phone is setup with multiple lines. The extension number of each line is displayed alongside its corresponding LINE key. -
Page 75: Choosing The "Default" Line
User's Manual 6. Advanced Phone Operations 6.11.1 Choosing the “Default” Line You can select the line that you want as your “default” line. The default line is the line on which all new calls are made, without having to select the line by pressing its LINE key. The “default” line is indicated in the screen by a bar above its extension number, as shown below: ... - Page 76 320HD IP Phone • Using the Navigation keys, move the “default” line bar to the required line phone extension (see previous section). • When entering the phone number, change the current line by using the Navigation keys. The line number is displayed on the screen, as shown below: Enter the phone number or select the contact from the phone directory, and then press the Dial softkey;...
-
Page 77: Making Multiple Line Calls
User's Manual 6. Advanced Phone Operations 6.11.3 Making Multiple Line Calls Your phone can sustain multiple calls at the same time. This can be achieved by making calls on different lines and putting them on hold. In addition, as each line can support up to two calls, you can therefore have up to eight calls running on your phone simultaneously, where one call is active and the rest are on hold. - Page 78 320HD IP Phone Make a second call on a different line extension: Press the required LINE key (e.g., LINE 2, extension 204); the currently active call on the other line extension (e.g., LINE 1) is automatically put on hold and you are prompted to enter the phone number for calling on Line 2.
- Page 79 User's Manual 6. Advanced Phone Operations Make a third call on a different line extension: Press the required LINE key (e.g., LINE 3, extension 204); the currently active call on the other line extension (e.g., LINE 2, “Sue”) is automatically put on hold and you are prompted to enter the phone number for calling on Line 3.
-
Page 80: Toggling Between Multiple-Line Calls
320HD IP Phone 6.11.4 Toggling Between Multiple-Line Calls Once you have established calls on different lines, you can easily toggle between the calls. In multiple lines, only one line is active and the rest are on hold. Therefore, switching between lines simply means placing the currently active call on hold and then resuming a previously held call. -
Page 81: Making Two Calls On A Line
User's Manual 6. Advanced Phone Operations 6.11.5 Making Two Calls on a Line In addition to making calls on multiple lines, you can also make a second call on each line. The procedure below describes how to make a second call on a line and is based on the following example scenario: ... -
Page 82: Toggling Between Calls On The Same Line
320HD IP Phone Enter the required number (or press and select a contact from the directory), and then press the Dial softkey; the phone calls the number. When the called party answers, the following is displayed: 6.11.6 Toggling Between Calls on the Same Line The procedure below describes how to toggle between two calls on a specific line. -
Page 83: Ending Calls
User's Manual 6. Advanced Phone Operations 6.11.8 Ending Calls You can only end calls that are active (i.e., not on hold). To end a call: Ensure that the call is active and not on hold. Press the End softkey or the SPEAKER key. Version 1.6.0 January 2012... - Page 84 320HD IP Phone Reader's Notes User's Manual Document #: LTRT-24503...
-
Page 85: Troubleshooting
User's Manual 7. Troubleshooting Troubleshooting This chapter provides troubleshooting for solving any problems that may arise with your phone. If these troubleshooting measures do not resolve the problem, please contact your system administrator. Table 7-1: Troubleshooting Symptom Problem Corrective Procedure ... - Page 86 AudioCodes 300HD Series of High Definition IP Phones HD VoIP 320HD IP Phone User’s Manual 320HD IP Phone Version 1.6.0 www.audiocodes.com...