Advertisement
Quick Links
π
H-2563
6' A-FRAME
PICNIC TABLE
TOOLS NEEDED
7/16" Socket Wrench
Power Drill (Or Screw Gun)
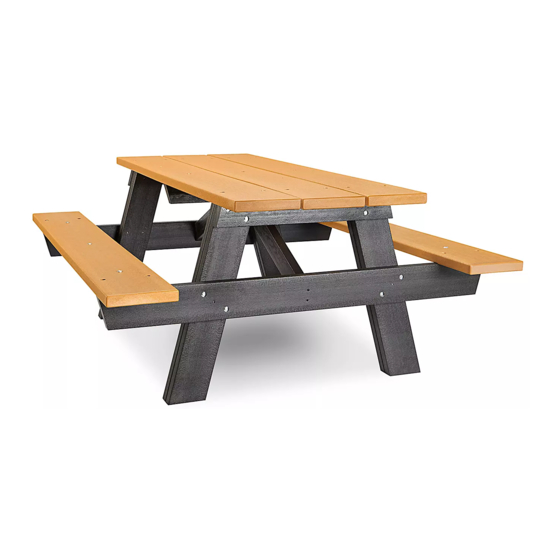
Seat With Metal Brace x 2
Tabletop Support
(Different Angle) x 1
Figure 1
PAGE 1 OF 2
1-800-295-5510
uline.com
PARTS
Tabletop Board x 3
A-Frame Base x 2
ASSEMBLY
3⁄" Lag Screw x 23
1.
Place the two A-Frame bases on a flat level surface.
2. Place one seat slat on each side of the A-Frame
bases. Align the pre-drilled holes.
3. Loosely attach seat slats to A-Frame base with the
3⁄" lag screws and washers using the socket wrench.
(See Figure 1)
3" Deck Screw x 10
Washer x 23
Tabletop Support
(Equal Angle) x 2
0313 IH-2563
Advertisement

Related Manuals for U-Line H-2563


Summary of Contents for U-Line H-2563
- Page 1 π H-2563 1-800-295-5510 uline.com 6' A-FRAME PICNIC TABLE TOOLS NEEDED 7/16" Socket Wrench Power Drill (Or Screw Gun) PARTS 3⁄" Lag Screw x 23 3" Deck Screw x 10 Washer x 23 Seat With Metal Brace x 2 Tabletop Board x 3...
- Page 2 ASSEMBLY CONTINUED 4. Align the pre-drilled holes of tabletop boards to the table top support (of different angle). Attach using 3⁄" lag screws and washers. (See Figure 2) Figure 2 5. Place the three tabletop boards on the A-Frame bases. Align the pre-drilled holes with the A-frame base.