
Related Manuals for Daikin LREQ15B7Y1R


Summary of Contents for Daikin LREQ15B7Y1R
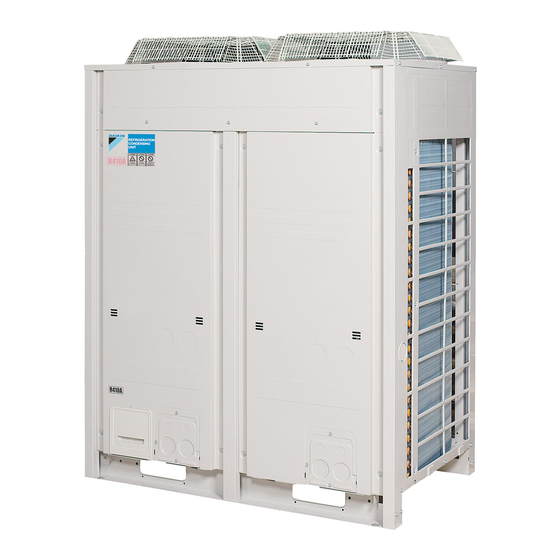
- Page 1 INSTALLATION MANUAL Air cooled refrigeration condensing unit LREQ15B7Y1R LREQ20B7Y1R...
- Page 2 2PW40200-15Q...
- Page 3 2PW40200-15Q...
-
Page 4: Table Of Contents
A high surge current from lightning or other sources may cause damage to the condensing unit. • This document is an installation manual for the Daikin Air Cooled • Be sure to install an earth leakage breaker. Refrigeration Condensing Unit. Before installing the unit, read this Failure to install an earth leakage breaker may result in electric manual thoroughly, and following the instructions contained in it. -
Page 5: Special Notice Of Product
A.Clean and dry CAUTION Strict measures must be taken to keep impurities (including SUNISO oil and other mineral oils as well as moisture) out of the • Carry out drain piping properly following this installation manual system. and insulate the pipe to prevent condensation. B.Tightly sealed Improper drain piping may result in indoor water leakage and Take care to keep the system tight when installing. -
Page 6: Before Installation
BEFORE INSTALLATION LREQ15, LREQ20 CAUTION • When installing the indoor unit, refer to the installation manual provided for the indoor unit. 1, 2, 3 • Use the outdoor unit multi-connection piping kit(EKHRQZM) to split up the gas piping and connect it to the different outdoor units. •... - Page 7 • As regards space in front of the unit, consider the space needed for f≥600 f≥500 — the local refrigerant piping when installing the units. • If the work conditions in the following figure do not apply, contact A+B+C+D your dealer or Daikin directly. a≥50 a≥100 — b≥300 b≥100 —...
- Page 8 Slave unit 2 An inverter condensing unit may cause electronic noise generated g Wall height unrestricted from AM broadcasting. Examine where to install the main In case a suction-side board is required: condensing unit and electric wires, keeping proper distances away from stereo equipment, personal computers, etc.
-
Page 9: Handling The Unit
HANDLING THE UNIT Base form Decide on the transportation route. Independent Beam Beam foundation foundation foundation If a forklift is to be used, pass the forklift arms through the large (horizontal) (vertical) openings on the bottom of the unit. Center of the product Center of the product Foundation bolt point (4-15 ×... -
Page 10: Selection Of Piping Material
• Do not use the existing piping in the following cases. Perform new • Be sure to insulate the connection piping. piping instead. The liquid and gas pipe temperatures are as follows: • The piping is different in size. Liquid pipe arrival minimum temperature: 0°C •... -
Page 11: Protection Against Contamination When Installing Pipes
Piping between Select the piping from the following table in accordance with the total capacity of indoor units connected branching areas (B, b, downstream C, c) Total capacity of indoor units after branching Liquid pipe size less than 4.0 kW Ø6.4 x 0.8 (O type) 4.0 kW over and less than 14.0 kW Ø9.5 x 0.8 (O type) - Page 12 Directions to bring out the pipes CAUTION The local interunit piping can be connected either forward or to the sides (taken out through the bottom) as shown in the following Never remove the pinched piping by brazing. figure. When passing out through the bottom, use the knock hole in the bottom frame.
- Page 13 Shutoff valve sizes Handling Precautions for Service Port • Work on the service port with a charge hose provided with a LREQ pushing rod. LREQ15-20 • At the time of mounting the cap, apply a screw lock agent to the screw thread.
- Page 14 2. Connect gas side branch pipes(2) to the gas side shutoff valves. When connected at the lateral side (bottom) The pipes are supplied with the outdoor unit multi-connection piping kit. CAUTION • Only use the dedictated outdoor unit multi-connection piping kit (EKHRQZM).
- Page 15 4. Connect gas side branch pipe (1) to the main gas pipe. The main Dryer installation gas pipe is field-supplied. Select a dryer from the following chart: Model Required dryer core (recommended type) LREQ15-20 550 g (100% molecular sieve equivalent) (48-DM: Danfoss made) •...
-
Page 16: Field Wiring
• Use a T-joint for the gas refrigerant branch and connect from the • Be sure to install an earth leakage circuit breaker. top of the main piping. This unit uses an inverter, so install the earth leakage circuit breaker that be capable of handling high harmonics in order to prevent malfunctioning of the earth leakage circuit breaker itself. -
Page 17: Procedure For Incoming Wiring
4 Remote switch (See Note 2) 7-3 Procedure for power supply wiring 5 Caution output Procedure for Power Supply Wiring 6 Warning output 7 Alarm panel 8 Run output 9 Panel 10 Earth 11 OFF: Normal mode ON: Low noise mode 12 Indoor unit 13 Multi transmission (Q1, Q2) Note... - Page 18 Point for attention regarding quality of the public electric power Remote switch wiring connections supply • When installing a remote switch, clamp as indicated by the following diagram: This equipment complies with respectively: EN/IEC61000-3-11 provided that the system impedance Z ...
-
Page 19: Procedure For Wiring Inside Units
–100.7kPa (5 Torr or –755 mmHg). Gas for airtight • Nitrogen gas test use Daphne FVC68D Refrigerant oil Only use the refrigerant oil listed in the Daikin sevice parts list. LREQ15+20B7Y1R Installation manual Air cooled refrigeration condensing unit 4P360438-1B – 2014.01... - Page 20 Constant (l) CAUTION piping (mm) length (m) (l/m) • Only use the refrigerant oil listed in the Daikin service parts list Ø12.7 × (1 l can; Parts No.: 5004333) Ø15.9 × • Not using the refrigerant oil listed in the Daikin service parts list Ø19.1...
-
Page 21: Thermal Insulation Work
Shutoff valve Piping lead-out Gas side shutoff valve service port hole lid Block Liquid side piping Pressure-reducing valve Liquid side Charge shutoff valve hose Valve R410A Outdoor unit To indoor unit Vacuum pump Meter Used for refrigerant Open a knock replenishment Note: Field pipings... -
Page 22: Refrigerant Replenishment
10. REFRIGERANT REPLENISHMENT 1. The refrigerant must be noted for this product. Calculate the amount of refrigerant replenishment according to the label for the calcula- tion of the amount of refrigerant replenishment. For refrigerant filling contractor 2. Take the following procedure for refrigerant replenishment. Only use refrigerant R410A. -
Page 23: Field Settings
[Precautions for refrigerant cylinder] 2 Lift to open At the time of refrigerant filling, check whether the siphon tube is 3 Operation switch (S1S) provided. Then locate the cylinder so that the refrigerant will be filled in 4 Electric component box cover the state of liquid (see table below). -
Page 24: Test Run
12. TEST RUN 5. Press the MODE button (BS1) to restore the LED to the original state. For test run operators Do not operate the outdoor unit alone on a trial basis. In a multi-system, all units work together. It is not possible to operate the master or a slave unit seperately. - Page 28 *4P360438-1 B 0000000_* 4P360438-1B 2014.01...