Table of Contents
Advertisement
Available languages
Available languages
Quick Links
Advertisement
Table of Contents

Related Manuals for ECM Barista A2


Summary of Contents for ECM Barista A2
-
Page 2: Verwendete Symbole / Used Symbols
Dear customer, With the Barista A2, you have purchased an espresso coffee machine of the highest quality. We thank you for your choice and wish you a lot of pleasure preparing perfect espresso and cappuccino with your espresso coffee machine. -
Page 3: Table Of Contents
FIRST USE ..............................20 First use ..............................20 Programming of the dosage........................21 Activation of the pre-infusion ........................21 Deactivating the pre-infusion ........................21 USE OF THE MACHINE ..........................22 Preparation of the machine ........................22 Preparing coffee ............................22 Dispensing of hot water..........................22 Bedienungsanleitung/ Instruction manual Barista A2... - Page 4 General cleaning ............................23 Automatic group cleaning and degreasing of the brew groups ..............24 Draining the boiler ............................24 Small technical maintenance ........................25 TRANSPORT AND WAREHOUSING ......................26 Packing..............................26 Transport ..............................26 Warehousing ............................26 DISPOSAL ..............................26 CE CONFORMITY.............................27 TROUBLESHOOTING..........................27 RECOMMENDED ACCESSORIES......................28 Bedienungsanleitung/ Instruction manual Barista A2...
-
Page 5: Lieferumfang
Installation und Inbetriebnahme der Maschine ist nur durch autorisierte Fachhändler durchführen zu lassen. Unsere Geräte entsprechen den gültigen Sicherheitsbestimmungen. Reparaturen oder Austausch einzelner Komponenten dürfen ausschließlich von autorisierten ECM Manufacture Service-Stellen durchgeführt werden. Ist das Stromkabel beschädigt, muss dieses umgehend von dem autorisierten Fachhändler bzw. -
Page 6: Gerätebeschreibung
DEUTSCH 2.2 Bestimmungsgemäße Verwendung Die Barista A2 darf nur für die Kaffeezubereitung, Heißwasser- und Dampfentnahme verwendet werden. Jegliche Benutzung für andere Zwecke ist seitens des Herstellers untersagt und zu unterlassen. Für Schäden, die auf nicht sachgemäßen Gebrauch zurückzuführen sind, übernehmen wir keinerlei Haftung und sind auch nicht regresspflichtig. -
Page 7: Technische Daten
Wasseranschluss Festwasser 3/8“ Anschluss Metallschlauch Befestigung (Schlüsselweite 20) Wichtig Rotationspumpen benötigen einen Vordruck. Deshalb die Maschine immer an einem Festwasser- anschluss und nicht drucklos mit einem externen Wasserbehälter betreiben. Dies könnte zu Schäden an der Pumpe führen. Bedienungsanleitung/ Instruction manual Barista A2... -
Page 8: Installation Des Wasserabflusses
Der Füllstand des Wasserniveaus im Kessel wir in der Niveaukontrolle angezeigt (Abbildung). Kontroll-Lampe rot Kontroll-Lampe grün Kontroll-Lampe rot = Der Füllstand ist zu niedrig, die Pumpe füllt den Kessel nach Kontroll-Lampe grün = Die Maschine ist eingeschaltet Bedienungsanleitung/ Instruction manual Barista A2... -
Page 9: Einstellung Der Programmierung
2. Halten Sie die Taste 3 (1 große Tasse) gedückt und schalten Sie nun das Gerät ein, die Leuchte der Taste brennt. Lassen Sie die Taste los. 3. Schalten Sie das Gerät aus. 4. Bei erneutem Einschalten der Maschine ist die Preinfusion an beiden Brühgruppen deaktiviert. Bedienungsanleitung/ Instruction manual Barista A2... -
Page 10: Betrieb Der Maschine
• Ein optimales Kaffee-Ergebnis ist nur mit frisch gemahlenem Kaffee möglich. Hierzu sollten Sie eine Profi-Mühle verwenden. In unserem Sortiment finden Sie einige professionelle Mühlen in kompakter Form. • Zum Anpressen des Kaffeemehls empfehlen wir Edelstahl-Tamper mit 58 mm Durchmesser. Bedienungsanleitung/ Instruction manual Barista A2... -
Page 11: Heißwasserentnahme
Einstellschraube/ Justierschraube 6.4 Dampfentnahme Die Barista A2 ermöglicht die Erzeugung von Dampf zum Erhitzen oder Aufschäumen von Flüssigkeiten, wie z.B. Milch oder Glühwein. Sie ist eine professionelle Espressomaschine und hat ein enormes Dampfvolumen. Dies bedeutet, dass Sie innerhalb weniger Sekunden Milchschaum zubereiten können. Beachten Sie deshalb die untenstehenden Punkte, damit die Milch nicht durch zu lange Dampfentnahme zum Kochen gebracht wird, da der Milchschaum sonst zerfällt. -
Page 12: Reinigung Und Wartung
7. Starten Sie das Reinigungsprogramm ohne Reinigungsmittel erneut in dem Sie Punkt 5 wiederholen. Anschließend Filterträger ausspannen, Blindsieb entnehmen und das Tassensieb wieder in den Filterträger einsetzen. Filterträger wieder in die Brühgruppe einspannen. Vorsicht! Während der Reinigung mithilfe des Blindsiebs kann es zu heißen Wasserspritzern kommen. Bedienungsanleitung/ Instruction manual Barista A2... -
Page 13: Entleerung Des Kessels
Dichtung auszuhebeln Duschensieb und Dichtung aus der Jetzt die neuen Teile vorbereiten Gruppe mit Bürste reinigen. Brühgruppe entnehmen (die abgerundete Seite der Gruppen- Duschensieb fest in die Dichtung dichtung nach oben zu Brühguppe) einpassen Bedienungsanleitung/ Instruction manual Barista A2... -
Page 14: Transport Und Lagerung
Die kleine Dichtung zwischen Düse und Gewinde nicht verlieren! (Art.-Nr. P6002.1) Die Düse anschließend wieder anschrauben. TRANSPORT UND LAGERUNG 8.1 Verpackung Die Barista A2 wird in einem Karton durch eine Kunststoffhülle geschützt geliefert. Nur Versand auf Palette möglich. Vorsicht! Verpackungsmaterial außerhalb der Reichweite von Kindern aufbewahren. Wichtig Verpackungsmaterial für eventuellen Transport unbedingt aufbewahren. -
Page 15: Lagerung
Mühle neu einstellen (Beim Schaum statt Crema Mahlgrad der Mühle nicht passend Wechseln der Kaffeemischung für die verwendete Kaffeemischung Mahlgrad verändern notwendig) Siebträger nicht richtig eingesetzt Siebträger richtig einsetzen Siebträger/ Brühgruppe tropft Gruppendichtung und Duschensieb Gruppendichtung defekt tauschen Bedienungsanleitung/ Instruction manual Barista A2... - Page 16 Schaum vorhandenen großen Milchblasen an die Oberfläche kommen und der Schaum kompakt wird. • Nach dem Aufschäumen kurz Dampf in die Wasserauffangschale ablassen, um eine Verklebung der Öffnungen in der Dampfdüse zu vermeiden. Bedienungsanleitung/ Instruction manual Barista A2...
-
Page 17: Empfohlenes Zubehör
Blindsieb zur Gruppenreinigung (im Lieferumfang enthalten) • Reinigungssmittel zur Gruppenreinigung mit Blindsieb (im Fachhandel erhältlich) (Art.-Nr. PAV9001034) • Edelstahl-Tamper • Tamperstation • Gran Crema Filterträger • Dampfdüsensortiment Gran Crema Tamper mit planer oder konvexer Unterseite Filterträger Tamperstation Abschlagbox Gruppenreinigungspulver Dampfdüsensortiment Bedienungsanleitung/ Instruction manual Barista A2... -
Page 18: Product Delivery
Contact your specialised dealer before undertaking this measure. 2.2 Proper use The Barista A2 may be used for the preparation of coffee, hot water and steam only. The machine is not intended for commercial use. Use of the machine other than for the aforementioned purpose is strictly prohibited. The manufacturer cannot be held responsible for damages due to unsuitable use of the machine and is not liable for recourse. -
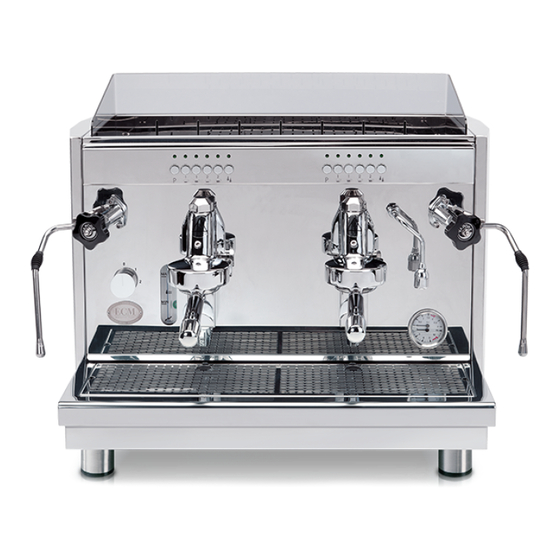
Page 19: Machine Description
8 Brew groups 9 On / Off switch 0/1/2 0= Off/ 1=Pump/ 2=Pump + Heater 10 Steam lever valve with steam wand right Barista A2 Caution! Danger of injury: The following parts are hot or may become hot: • area around the steam and hot wandswater lever valves •... -
Page 20: Technical Data
3.3 Technical data Voltages: 2 Phase 220 – 240 V Power: 4.000 W Water tank: 14 L Measurements: w x d x h / 730 mm x 537 mm x 520 mm Weight: 86 kg MACHINE INSTALLATION The installation is to be carried out exclusively by qualified specialists and according to the following instructions and in compliance with valid laws. -
Page 21: First Use
4.4 Installation of the water drainage The water drainage hose has to be connected to the connecting piece and the installed syphon drainage at the bottom of the machine. Please make sure that the hose is installed in a manner that no water can accumulate in it. Water drainage hose Connection water drainage hose to the connecting piece of the machine... -
Page 22: Programming Of The Dosage
5.2 Programming of the dosage To program the doses proceed as follows: Choose a filter holder and fill it with the desired quantity of coffee powder for the button you would like to program (e. g. filter 1 cup for filter holder 1 cup: 7g coffee, button no. 1). Place a cup under the filter holder. Press the P- key until the lamp above the button flashes. -
Page 23: Use Of The Machine
USE OF THE MACHINE 6.1 Preparation of the machine The switched off machine is to be placed in operation as follows: Make sure that there is water pressure in the supply hose. Turn the machine on (power switch in position “2”, pic. 1). Wait until the pressure gauge indicates approx. -
Page 24: Dispensing Of Steam
6.4 Dispensing of steam The Barista A2 makes it possible to generate large amounts of steam in order to heat or froth beverages, e. g. milk or punch. It is a professional and compact espresso coffee machine with an enormous steam volume. Therfore, within a few seconds you can prepare milk froth. -
Page 25: Automatic Group Cleaning And Degreasing Of The Brew Groups
Cleaning as necessary: Clean the steam and hot water valve after every use. Clean the body when the machine is switched off and cold. Use a soft, damp cloth for cleaning. Never use abrasive or chloric detergents! 7.2 Automatic group cleaning and degreasing of the brew groups A brew group cleaner (in powder or tablet form) is available at your specialized dealer. -
Page 26: Small Technical Maintenance
7.4 Small technical maintenance (If you have any questions, please contact your specialised dealer.) Replacing the group gasket and the shower screen (Group gasket (item no. C449900229) and shower screen (item no. C519900103) must be changed at the same time) Switch off the machine and let it cool to room temperature. -
Page 27: Transport And Warehousing
Afterwards replace the steam nozzle. TRANSPORT AND WAREHOUSING 8.1 Packing The Barista A2 is delivered in a special carton and protected by a plastic cover and foam. Shipping on pallet only! Caution! Keep packing material out of the reach of children! -
Page 28: Ce Conformity
10 CE CONFORMITY Conformity The product complies with the following EU Directives: Machine: 98/37/CE Low Voltage: 73/23/CEE/, 93/68/CEE EMC: 89/336/CEE, 93/68/CEE, 92/31/CEE PED: 97/23/EC EN-Directives: EN 60335-1, EN 60335-2-75, EN 55014-1, EN 61000-3, EN 61000-4, EN 55104-2, EN50366 11 TROUBLESHOOTING Problem Possible Cause Troubleshooting... -
Page 29: Recommended Accessories
If the machine will not be used for a long period of time, it is recommended to .. clean the brew group (see instructions on 7.2). Afterwards, please do not clamp the filter holder back into the group. .. empty the boiler. Reg. 7.3 How to froth milk like a “barista”...