
Related Manuals for Daikin VAM-J8 Series


Summary of Contents for Daikin VAM-J8 Series
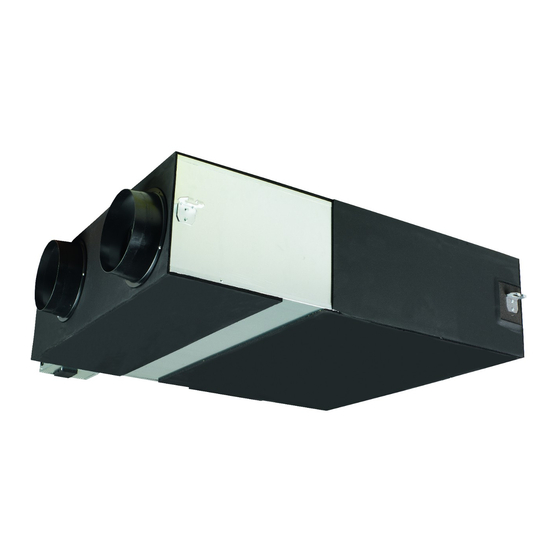
- Page 1 Installer and user reference guide Heat reclaim ventilation unit VAM350J8VEB VAM500J8VEB VAM650J8VEB VAM800J8VEB VAM1000J8VEB VAM1500J8VEB VAM2000J8VEB...
-
Page 2: Table Of Contents
Table of contents Table of contents 1 About the documentation About this document ..............................Meaning of warnings and symbols..........................2 General safety precautions For the installer ................................2.1.1 General ................................2.1.2 Installation site ............................... 2.1.3 Electrical ................................. 3 Specific installer safety instructions For the user 4 User safety instructions General.................................... - Page 3 Table of contents 14.4 To install the anchor bolts .............................. 47 14.5 Duct connections ................................48 15 Electrical installation 15.1 About connecting the electrical wiring .......................... 50 15.1.1 Precautions when connecting the electrical wiring..................50 15.1.2 Guidelines when connecting the electrical wiring..................51 15.1.3 Wiring connection ............................
- Page 4 Table of contents 21.3.1 Error codes: Overview ............................ 102 22 Disposal 23 Technical data 23.1 Wiring diagram................................105 23.2 Service space................................... 108 24 Glossary Installer and user reference guide VAM350~2000J8VEB Heat reclaim ventilation unit 4P664012-1 – 2021.08...
-
Page 5: About The Documentation
The original documentation is written in English. All other languages are translations. Technical engineering data ▪ A subset of the latest technical data is available on the regional Daikin website (publicly accessible). ▪ The full set of latest technical data is available on the Daikin Business Portal (authentication required). -
Page 6: Meaning Of Warnings And Symbols
About the documentation 1.2 Meaning of warnings and symbols DANGER Indicates a situation that results in death or serious injury. DANGER: RISK OF ELECTROCUTION Indicates a situation that could result in electrocution. DANGER: RISK OF BURNING/SCALDING Indicates a situation that could result in burning/scalding because of extreme hot or cold temperatures. - Page 7 About the documentation Symbol Explanation Indicates a table title or a reference to it. Example: " 1–3 Table title" means "Table 3 in chapter 1". VAM350~2000J8VEB Installer and user reference guide Heat reclaim ventilation unit 4P664012-1 – 2021.08...
-
Page 8: General Safety Precautions
Improper installation or attachment of equipment or accessories could result in electrical shock, short-circuit, leaks, fire or other damage to the equipment. ONLY use accessories, optional equipment and spare parts made or approved by Daikin. WARNING Make sure installation, testing and applied materials comply with applicable legislation (on top of the instructions described in the Daikin documentation). -
Page 9: Installation Site
General safety precautions In accordance with the applicable legislation, it might be necessary to provide a logbook with the product containing at least: information on maintenance, repair work, results of tests, stand-by periods,… Also, at least, following information MUST be provided at an accessible place at the product: ▪... - Page 10 General safety precautions WARNING ▪ ONLY use copper wires. ▪ Make sure the field wiring complies with the applicable legislation. ▪ All field wiring MUST be performed in accordance with the wiring diagram supplied with the product. ▪ NEVER squeeze bundled cables and make sure they do NOT come in contact with the piping and sharp edges.
- Page 11 General safety precautions NOTICE ONLY applicable if the power supply is three‑phase, and the compressor has an ON/ OFF starting method. If there exists the possibility of reversed phase after a momentary black out and the power goes ON and OFF while the product is operating, attach a reversed phase protection circuit locally.
-
Page 12: Specific Installer Safety Instructions
Specific installer safety instructions 3 Specific installer safety instructions Always observe the following safety instructions and regulations. Unit installation (see "14 Unit installation" [ 42]) WARNING Fixing method of the heat reclaim ventilation unit MUST be in accordance with the instructions from this manual. See "14.4 To install the anchor bolts" [ 47]. - Page 13 Specific installer safety instructions WARNING ▪ All wiring MUST be performed by an authorised electrician and MUST comply with the applicable legislation. ▪ Make electrical connections to the fixed wiring. ▪ All components procured on-site and all electrical construction MUST comply with the applicable legislation.
- Page 14 Specific installer safety instructions WARNING Prevent hazards due to inadvertent resetting of the thermal cut-out: power to this appliance MUST NOT be supplied through an external switching device, such as a timer, or connected to a circuit that is regularly turned ON and OFF by the utility. WARNING ▪...
- Page 15 Specific installer safety instructions Commissioning (see "18 Commissioning" [ 97]) WARNING Commissioning method MUST be in accordance with the instructions from this manual. See "18 Commissioning" [ 97]. VAM350~2000J8VEB Installer and user reference guide Heat reclaim ventilation unit 4P664012-1 – 2021.08...
-
Page 16: For The User
For the user VAM350~2000J8VEB Installer and user reference guide Heat reclaim ventilation unit 4P664012-1 – 2021.08... -
Page 17: User Safety Instructions
User safety instructions 4 User safety instructions Always observe the following safety instructions and regulations. In this chapter General....................................Instructions for safe operation............................... 4.1 General WARNING If you are NOT sure how to operate the unit, contact your installer. WARNING This appliance can be used by children aged from 8 years and above and persons with reduced physical, sensory or mental capabilities or lack of experience and knowledge if... -
Page 18: Instructions For Safe Operation
User safety instructions ▪ Units are marked with the following symbol: This means that electrical and electronic products may NOT be mixed with unsorted household waste. Do NOT try to dismantle the system yourself: the dismantling of the system, treatment of the refrigerant, of oil and of other parts MUST be done by an authorised installer and MUST comply with applicable legislation. - Page 19 User safety instructions WARNING Stop operation and shut OFF the power if anything unusual occurs (burning smells etc.). Leaving the unit running under such circumstances may cause breakage, electrical shock or fire. Contact your dealer. VAM350~2000J8VEB Installer and user reference guide Heat reclaim ventilation unit 4P664012-1 –...
-
Page 20: User Interface
User interface 5 User interface This operation manual offers a non-exhaustive overview of the main functions of the system. Detailed information on required actions to achieve certain functions can be found in the dedicated installation and operation manual of the indoor unit. Refer to the operation manual of the installed controller. -
Page 21: Operation
Operation 6 Operation In this chapter Before operation ..................................Operation range..................................Ventilation mode ..................................6.3.1 To set the ventilation mode........................... Ventilation rate..................................6.4.1 To set the ventilation rate............................6.1 Before operation WARNING This unit contains electrical parts. WARNING Before operating the unit, be sure the installation has been carried out correctly by an installer. -
Page 22: To Set The Ventilation Mode
Operation Icon Ventilation mode Energy Reclaim Ventilation. The outdoor air is supplied to the room after passing through a heat exchanger. Bypass. The outdoor air is supplied to the room without passing through a heat exchanger. Auto. To ventilate the room in the most efficient way, the heat reclaim ventilation unit automatically switches between "Bypass"... - Page 23 Operation 3 Press to confirm. Result: The heat reclaim ventilation unit changes its ventilation rate and the controller returns to the home screen. VAM350~2000J8VEB Installer and user reference guide Heat reclaim ventilation unit 4P664012-1 – 2021.08...
-
Page 24: Energy Saving And Optimum Operation
Energy saving and optimum operation 7 Energy saving and optimum operation Observe the following precautions to ensure the system operates properly. ▪ Adjust the air outlet properly and avoid direct air flow to room inhabitants. ▪ NEVER place objects near the air inlet or the air outlet of the unit. Doing so may cause a reduced heating/cooling effect or stop operation. -
Page 25: Maintenance And Service
Maintenance and service 8 Maintenance and service CAUTION "4 User safety instructions" [ 17] to aknowledge all related safety instructions. NOTICE Maintenance MUST be done by an authorised installer or service agent. We recommend performing maintenance at least once a year. However, applicable legislation might require shorter maintenance intervals. - Page 26 Maintenance and service a Service cover b Hinge mechanism c Hanging metal A Models 350~1000 B Models 1500+2000 2 Take out the air filters from the unit body. a Heat exchange element b Handle c Rail d Air filter A Models 350~1000 B Models 1500+2000 3 To clean the air filter, lightly pat it with your hand or remove dust with a vacuum cleaner.
-
Page 27: Maintenance Of The Heat Exchange Element
Maintenance and service 6 Install the service cover securely in place. 8.2 Maintenance of the heat exchange element NOTICE ▪ NEVER wash the heat exchange element with water. ▪ NEVER touch the heat exchange element paper because it can be damaged if it is forced. -
Page 28: Troubleshooting
Troubleshooting 9 Troubleshooting If one of the following malfunctions occur, take the measures shown below and contact your dealer. The system MUST be repaired by a qualified service person. Malfunction Measure If a safety device such as a fuse, a breaker or an Turn OFF the main power earth leakage breaker frequently actuates or the switch. - Page 29 Troubleshooting Malfunction Measure The amount of discharged ▪ Check if the air filter and heat exchange element air is small and the are NOT clogged. Refer to "8 Maintenance and discharging sound is high. service" [ 25]. The amount of discharged ▪...
-
Page 30: Relocation
Relocation 10 Relocation Contact your dealer for removing and reinstalling the total unit. Moving units requires technical expertise. VAM350~2000J8VEB Installer and user reference guide Heat reclaim ventilation unit 4P664012-1 – 2021.08... -
Page 31: Disposal
Disposal 11 Disposal NOTICE Do NOT try to dismantle the system yourself: dismantling of the system, treatment of the refrigerant, oil and other parts MUST comply with applicable legislation. Units MUST be treated at a specialised treatment facility for reuse, recycling and recovery. VAM350~2000J8VEB Installer and user reference guide Heat reclaim ventilation unit... -
Page 32: For The Installer
For the installer VAM350~2000J8VEB Installer and user reference guide Heat reclaim ventilation unit 4P664012-1 – 2021.08... -
Page 33: About The Box
About the box 12 About the box In this chapter 12.1 Overview: About the box................................ 12.2 Heat reclaim ventilation unit..............................12.2.1 To unpack the heat reclaim ventilation unit......................12.2.2 To remove the accessories ............................ 12.2.3 To handle the heat reclaim ventilation unit ......................12.1 Overview: About the box This chapter describes what you have to do after the box with the heat reclaim ventilation unit is delivered on-site. -
Page 34: Heat Reclaim Ventilation Unit
About the box 12.2 Heat reclaim ventilation unit 12.2.1 To unpack the heat reclaim ventilation unit Models 350+500 Models 650~1000 VAM350~2000J8VEB Installer and user reference guide Heat reclaim ventilation unit 4P664012-1 – 2021.08... - Page 35 About the box Models 1500+2000 VAM350~2000J8VEB Installer and user reference guide Heat reclaim ventilation unit 4P664012-1 – 2021.08...
-
Page 36: To Remove The Accessories
About the box 12.2.2 To remove the accessories Models 350+500 Models 650~1000 Models 1500+2000 a Connector for additional external damper b General safety precautions c Installation and operation manual d Duct flanges (models 350~1000 4×, models 1500+2000 8×) e Screws (models 350+500 16×, models 650~1000 24×, models 1500+2000 48×) f Seal strips for cables (switchbox cable entry) VAM350~2000J8VEB Installer and user reference guide... -
Page 37: To Handle The Heat Reclaim Ventilation Unit
About the box 12.2.3 To handle the heat reclaim ventilation unit NOTICE When removing the heat reclaim ventilation unit from the packaging, do NOT place the suction or discharge side of the unit on the floor. Possible consequence: Deformation of the suction or discharge openings and damaged expanded polystyrene parts of the unit. -
Page 38: About The Units And Options
About the units and options 13 About the units and options In this chapter 13.1 Overview: About the units and options ..........................13.2 Identification................................... 13.2.1 Identification label: Heat reclaim ventilation unit....................13.3 About the heat reclaim ventilation unit..........................13.3.1 About the EKVDX option ............................13.4 Combining units and options.............................. -
Page 39: About The Heat Reclaim Ventilation Unit
About the units and options Code Explanation Power supply: 1~, 50 Hz 220~240 V Power supply: 1~, 60 Hz 220 V European market Minor model change indication 13.3 About the heat reclaim ventilation unit The heat reclaim ventilation unit is intended for indoor installation. NOTICE ALWAYS use the air filters. -
Page 40: Combining Units And Options
About the units and options 13.4 Combining units and options INFORMATION Certain options may NOT be available in your country. 13.4.1 Possible options for the heat reclaim ventilation unit Adapter PCB Options BRP4A50A and KRP2A51. At temperatures below –10°C, it is mandatory to use an electrical pre-heater. This heater is connected with option PCB BRP4A50A. - Page 41 About the units and options Plenum (EKPLEN200) The plenum is an option for models 1500 and 2000. This option can be used to ease the installation of the heat reclaim ventilation unit. Replace the 2 duct joints of Ø250 mm with the plenum and a duct joint of Ø350 mm.
-
Page 42: Unit Installation
Unit installation 14 Unit installation In this chapter 14.1 Preparing the installation site ..............................14.1.1 Installation site requirements for the heat reclaim ventilation unit..............14.2 Preparing the unit................................... 14.2.1 To install the optional adapter PCB ........................14.2.2 To install the duct flanges ............................14.2.3 To install the EKVDX option ........................... -
Page 43: To Install The Optional Adapter Pcb
Unit installation INFORMATION ▪ Flexible ducting with sound insulation is effective to reduce blowing noises. ▪ When selecting installation materials, consider the required volume of air flow and the acceptable level of noise for that particular installation. ▪ When room air infiltrates into the ceiling and the temperature and humidity in the ceiling become too high, insulate the metal parts of the unit. - Page 44 Unit installation For model 650 a BRP4A50A (optional accessory) b KRP2A51 (optional accessory) c KRP1BA101 (installation box) d EKMP65VAM (mounting plate) f Screw g Screw (supplied with the installation box) 1 Remove the screws from the unit. 2 Attach the optional mounting plate (EKMP65VAM) to the unit. 3 Attach the optional adapter PCB (KRP2A51) in the installation box (KRP1BA101).
-
Page 45: To Install The Duct Flanges
Unit installation c KRP1BA101 (installation box) d EKMP65VAM (mounting plate) f Screw g Screw (supplied with the installation box) 1 Remove the screws from the middle of the plate connecting the 2 units. 2 Attach the optional mounting plate (EKMPVAM) on top of the plate connecting the 2 units. -
Page 46: Unit Orientation
Unit installation 14.3 Unit orientation The following illustration helps you to install the heat reclaim ventilation unit in the correct position: Normal installation Upside down installation Vertical installation INFORMATION When the unit is installed vertically, the installer MUST provide a support under the unit to distribute the weight of the unit between the support and the installation bolts in the wall. -
Page 47: To Install The Anchor Bolts
Unit installation Installation tips ▪ Installing the unit upside down allows for common use of the inspection hole, thus reducing the required maintenance space. For example, if 2 units are installed closely together, only 1 inspection hole is required for maintaining or replacing filters, heat exchange elements,…... -
Page 48: Duct Connections
Unit installation For models 1500+2000 a Ceiling hook b Nut c Washer d Double nut NOTICE ALWAYS hang up the unit by its suspension brackets. 14.5 Duct connections Do NOT connect the ducts as follows: Extreme bend. Do NOT bend the duct more than 90°. - Page 49 Unit installation ▪ All 4 ducts MUST have a length ≥1.5 m (exception: VAM in combination with optional EKVDX, see EKVDX operation and installation manual). Models 350~1000 Name Plate Models 1500+2000 a Aluminium tape (field supply) b Insulation material (field supply) c Duct flange (accessories) d Slope minimum 1:50 e Supply air...
-
Page 50: Electrical Installation
Electrical installation 15 Electrical installation CAUTION "3 Specific installer safety instructions" [ 12] to make sure this installation complies with all safety regulations. In this chapter 15.1 About connecting the electrical wiring ..........................15.1.1 Precautions when connecting the electrical wiring ....................15.1.2 Guidelines when connecting the electrical wiring .................... -
Page 51: Guidelines When Connecting The Electrical Wiring
Electrical installation NOTICE If the power supply has a missing or wrong N-phase, equipment will break down. NOTICE Do NOT install a phase advancing capacitor, because this unit is equipped with an inverter. A phase advancing capacitor will reduce performance and may cause accidents. -
Page 52: Component Electrical Specifications
Electrical installation You can use a single switch to supply power to units on the same system. However, branch switches and branch circuit breakers MUST be selected carefully. Fit the power supply wiring of each unit with a switch and fuse as shown in the drawing below. -
Page 53: Specifications For Field Supplied Fuses And Wires
Electrical installation NOTICE The power supply MUST be protected with the required safety devices, i.e. a main switch, a slow blow fuse on each phase and an earth leakage protector in accordance with the applicable legislation. NOTICE See the data book for more details. 15.1.5 Specifications for field supplied fuses and wires Power supply wiring Field supplied fuses... -
Page 54: Opening The Switch Box
Electrical installation Wiring example P1 P2 F1 F1 T1 T1 P2 P1 F1 F2 J2 J3 a Outdoor unit/BS unit b Switch box c Indoor unit d Power supply 220-240 V~50/60 Hz e Controller for VRV f Transmission wiring g Controller for VAM VRV VRV indoor unit VAM VAM heat reclaim ventilation unit WARNING... - Page 55 Electrical installation Models 350~650 J3 J2 J1JC F2F1P2P1 X33A X14A X35A X24A X29A VAM350~2000J8VEB Installer and user reference guide Heat reclaim ventilation unit 4P664012-1 – 2021.08...
- Page 56 Electrical installation a Switch box b PCB c Switch box cover d Securing screw and washer e Grounding terminal f Terminal board g Transmission wiring terminal board (P1, P2, F1, F2) h Transmission wiring (to optional controller) i Power supply cable j Wires for connection of additional external damper (supplied accessory) k Insulated splices-closed barrel connector (0.75 mm²) (field supply) l Double or reinforced insulated flexible cable (0.75 mm²) to external damper (field...
- Page 57 Electrical installation Models 800+1000 J3 J2 J1 JC F2 F1 P2 P1 X33A X14A X35A X24A X29A d+e k VAM350~2000J8VEB Installer and user reference guide Heat reclaim ventilation unit 4P664012-1 – 2021.08...
- Page 58 Electrical installation a Switch box b PCB c Switch box cover d Securing screw and washer e Grounding terminal f Terminal board g Transmission wiring terminal board (P1, P2, F1, F2) h Transmission wiring (to optional controller) Ii Power supply cable j Wires for connection of additional external damper (supplied accessory) k Insulated splices-closed barrel connector (0.75 mm²) (field supply) l Double or reinforced insulated flexible cable (0.75 mm²) to external damper (field...
- Page 59 Electrical installation Models 1500+2000 J3 J2 J1JC F2 F1 P2 P1 X33A X14A X35A X24A X29A X27A VAM350~2000J8VEB Installer and user reference guide Heat reclaim ventilation unit 4P664012-1 – 2021.08...
- Page 60 Electrical installation X35A X24A a Switch box b PCB c Switch box cover VAM350~2000J8VEB Installer and user reference guide Heat reclaim ventilation unit 4P664012-1 – 2021.08...
-
Page 61: Electrical Connections For Additional Field Supplied Damper
Electrical installation d Securing screw and washer e Grounding terminal f Terminal board g Transmission wiring terminal board (P1, P2, F1, F2) h Transmission wiring (to optional controller) Ii Power supply cable j Wires for connection of additional external damper (supplied accessory) k Insulated splices-closed barrel connector (0.75 mm²) (field supply) l Double or reinforced insulated flexible cable (0.75 mm²) to external damper (field supply) - Page 62 Electrical installation J3 J2 J1 JC F2 F1 P2 P1 J1 JC F2 F1 N/P2 P/P1 X6A X12A X11A NOR. NOR. X27A F1U 6.3A a Power supply b Terminals c Bypass damper d Bypass damper (only models 1500+2000 bottom unit) e External damper (field supply) f Fan communications g KRP2A51 (option)
-
Page 63: To Connect The Monitoring Output
Electrical installation 15.5 To connect the monitoring output Prerequisite: Connect the adapter PCB BRP4A50A to monitor operation. 1 Plug the connector of the adapter PCB BRP4A50A into the X33A port. L . N X33A a Operation lamp b Power source c Power source d Heat reclaim ventilation unit's PCB e Adapter PCB (BRP4A50A) -
Page 64: System Configuration
System configuration 16 System configuration Table of Contents 16.1 About control systems................................16.2 Independent system................................16.3 Linked operation control system............................16.4 Central control system ................................16.5 EKVDX option ..................................16.1 About control systems Independent system control system Central Unified ON/OFF Schedule timer Controller for Controller for air... -
Page 65: Independent System
System configuration 16.2 Independent system a Controller b Heat reclaim ventilation unit (VAM) ▪ Up to 16 units can be controlled with the controller (a system with 2 controllers can be created using master/slave switching). ▪ All VAM operations can be used and displayed. ▪... -
Page 66: Central Control System
System configuration ▪ Up to 64 groups of units can be controlled. ▪ The controller control transmission line can be extended to up to 1000 m. ▪ A direct duct connection is NOT possible. ▪ Set ON for central zone link setting. ▪... -
Page 67: Ekvdx Option
System configuration Zone control system a Controller b Heat reclaim ventilation unit (VAM) c Air conditioner d Central controller Zone 1 Zone 2 ▪ Use of the central controller enables zone control via the central control line (up to 64 zones). ▪... - Page 68 System configuration Central control system with EKVDX a Controller b Heat reclaim ventilation unit (VAM) c EKVDX unit d Central controller VAM350~2000J8VEB Installer and user reference guide Heat reclaim ventilation unit 4P664012-1 – 2021.08...
-
Page 69: Configuration
Configuration 17 Configuration In this chapter 17.1 To change settings.................................. Case 1: Change settings with BRC1E53 ......................... Case 2: Change settings with BRC301B61 ......................Case 3: Change settings with BRC1H ........................17.2 Field settings ................................... 17.3 Settings for all configurations..............................17.3.1 About setting 19(29)-0-04 and 19(29)-0-05 ...................... -
Page 70: Case 2: Change Settings With Brc301B61
Configuration 1 Briefly press a button to turn on the screen light. 2 Press and hold the Cancel button (a) for at least 4 seconds to enter the Service Settings menu. 3 Go to Field Settings with the Up/Down buttons and press the Menu/Enter button (b). -
Page 71: Case 3: Change Settings With Brc1H
Configuration 2 Use the Ventilation mode button (b) and the Airflow rate button (c) to select a mode number. Result: The code display is blinking. 3 To configure settings for individual units under group control, press the Timer setting on/off button (d) and select the number of the unit that you want to configure. -
Page 72: Field Settings
Configuration Installer and user reference guide VAM350~2000J8VEB Heat reclaim ventilation unit 4P664012-1 – 2021.08... - Page 73 Configuration VAM350~2000J8VEB Installer and user reference guide Heat reclaim ventilation unit 4P664012-1 – 2021.08...
-
Page 74: Settings For All Configurations
Configuration 17.3 Settings for all configurations Setting 17(27)-4: First choose the fan speed. Set it to high or ultra-high. Flow "All other system configurations" is not applicable when combining VAM with EKVDX. Check the field settings for both units to make sure the combination of VAM and EKVDX is operational Direct duct connection All other system configurations or external fan... -
Page 75: About Setting 19(29)-0-04 And 19(29)-0-05
Configuration 17.3.1 About setting 19(29)-0-04 and 19(29)-0-05 ▪ When you have configured setting 19(29)‑0‑04 successfully, the system automatically changes it to setting 19(29)‑0‑01. ▪ When you have configured setting 19(29)‑0‑05 successfully, the system automatically changes it to setting 19(29)‑0‑02. NOTICE If the ducting is changed, install clean filters and reconfigure setting 19(29)‑0‑04 or 19(29)‑0‑05. -
Page 76: 1-Group Linked-Control System
Configuration b Slave controller for VAM c Switch position: Master d Switch position: Slave e Maximum length of connection line: 500 m VAM VAM heat reclaim ventilation unit NOTICE Factory settings: Do NOT change the switch settings when a controller is connected. SS1 is a setting switch to operate the unit without controller. -
Page 77: Direct Duct Connection
Configuration ▪ Up to 64 units, a combination of air conditioners and VAM units, can be connected to the F1 and F2 terminals. ▪ KRP2A51 ONLY has ON/OFF control. If the VAM units run in automatic mode, they have a fixed setpoint. If P1/P2 is NOT connected, the setpoint of the air conditioner is unknown. -
Page 78: Central Control System
Configuration ▪ Mode number: 17 ▪ Switch number: 5 ▪ Position number: 07 Other functions Like in a 1-group linked-control system, other VAM functions can also be configured. 17.3.6 Central control system To change the settings, P1/P2 of the controller MUST be connected to the heat reclaim ventilation units. - Page 79 Configuration ▪ The adapter PCB can be connected to the electric component mounting base of either the VAM unit or the air conditioner. All/individual control F1 F2 F1 F2 F1 F2 F1 F2 F1 F2 VAM 1 F1 F2 VAM 2 F1 F2 P1 P2 VRV 1...
- Page 80 Configuration Zone control F1 F2 VAM 1 F1 F2 VAM 2 F1 F2 P1 P2 VAM 3 F1 F2 F1 F2 P1 P2 Zone 1 Zone 2 a Controller for air conditioner b Maximum length of connection line: 1000 m c Central controller (DCS302C51 or DCS601C51 or DCM601A51) VAM 1 VAM heat reclaim ventilation unit 1 VAM 2 VAM heat reclaim ventilation unit 2 VAM 3 VAM heat reclaim ventilation unit 3...
-
Page 81: Ekvdx Option - Extra Settings
Configuration 17.3.7 EKVDX option - extra settings In case of a EKVDX +VAM combination, the following specific VAM settings can be made: Automatic cool-heat switching function The automatic cool-heat switching function, in case the EKVDX option is used, is only possible using the user interface. To use this function, do the following: 1 Choose setting 1c-01-02. -
Page 82: About The Controller
Configuration 17.4 About the controller 17.4.1 BRC1E53 controller NOTICE This controller is NOT allowed in combination with EKVDX indoor units. Please read the manual supplied with the controller (BRC1E53) for more detailed instructions. a Operation Mode Selector button b Fan Speed/Airflow Direction button c Menu/Enter button d Up button e Down button... - Page 83 Configuration Ventilation Ventilation Rate High Return Setting To select ventilation mode Ventilation mode is used when cooling or heating is NOT necessary, so ONLY the heat reclaim ventilation units are operating. 1 Press the Operation Mode Selector button several times until the ventilation mode is selected.
- Page 84 Configuration Mode Description Bypass mode The outdoor air bypasses the heat exchange element. This means that outdoor air is supplied to the room without heat exchange with the room air. Time to clean filter indication When the filter pressure drop becomes too large, the following message or icon is displayed at the bottom of the basic screen: Time to clean filter or .
-
Page 85: Brc301B61 Controller
Configuration 17.4.2 BRC301B61 controller NOTICE This controller is NOT allowed in combination with EKVDX indoor units. For non-independent systems, starting, stopping and setting a timer is NOT possible with this controller (BRC301B61). In such cases, use the air conditioner controller (BRC1E53) or the central controller. FRESH UP TEST Item... - Page 86 Configuration Item Description Air filter cleaning Filter signal reset button Indication of air filter cleaning. When you see this symbol, clean the air filter. Air flow rate Air flow rate changeover button Air flow rate changeover display High No FRESH UP (fresh-up) indication: The volume of outdoor air supplied into the room and that of the room air exhausted outdoors is equal.
-
Page 87: Brc1H Controller
Configuration Item Description Indication of operation standby This icon indicates that the unit is precooling/preheating. The unit's start-up is delayed until precooling/preheating is finished. Precooling/preheating means that the heat reclaim ventilation units are NOT started while linked air conditioners are starting up, for example, before office hours. -
Page 88: Detailed Explanation Of Settings
Configuration 17.5 Detailed explanation of settings 17.5.1 About fresh-up operation Purpose When combined with a local ventilation fan, such as the ones in bathrooms or kitchens, the air flow rate of the heat reclaim ventilation unit is balanced by either fan operation or exhaust operation. -
Page 89: About The External Damper Operation
Configuration Supply Fresh-up Exhaust Fresh-up Example a Part of supply fresh-up operation b Air exhaust c Air supply d Heat reclaim ventilation unit e Normal ventilation fan f Part of exhaust fresh-up operation g Air exhaust h Patient room If an external fan is connected to J1 and JC, take the following into account: ▪... -
Page 90: About The Co₂ Sensor
Configuration X24A a Air suction/discharge grille b External damper (field supply) c Inspection hole d Switch box e Heat insulation f Outdoor air (fresh air from outdoors) g Exhaust air (exhaust air to outdoors) h Round shape hood i PCB j Power source Essential wiring "15.2 Opening the switch... - Page 91 Configuration Trigger value Linear control (minutes) Fixed control Stop Tap A Tap B CO₂ ppm 1000~1150 — — — 850~1000 — — 700~850 — — 550~700 — — — 400~550 — — stop CO₂ parts per million Ultra High High 1000: base concentration Example When the sensor measures 900 ppm in linear control, the unit runs in high mode for 20 minutes and the next 10 minutes in low mode, then measures again.
- Page 92 Configuration a Hinge mechanism b Service cover c Heat exchange element d Air filter e Heat exchange element rail f Screw 1 g Screw 2 1 Open the service cover hinge by loosening the screw. 2 Remove the service cover. 3 Remove the 2 heat exchange elements and the 4 air filters.
- Page 93 Configuration To route the wiring of the carbon dioxide sensor X6A X12A X11A J1 JC F2 F1 N/P2 P/P1 a CO₂ sensor b Clamp c Sealing material d Bush e Switch box f X14A connector g Screw 1 Remove the screws of the switch box cover. 2 Open the switch box.
-
Page 94: About Nighttime Free Cooling Operation
Configuration To install the components 1 Close the switch box cover. 2 Install the components. Follow the reverse procedure of "To remove the components" [ 91]. 17.5.4 About nighttime free cooling operation Nighttime free cooling function The nighttime free cooling function is an energy-conserving function that works at night, when the air conditioner is off. -
Page 95: About The Precool And Preheat Function
Configuration INFORMATION This function is NOT possible when the heat reclaim ventilation unit is NOT linked to an air conditioner. 17.5.5 About the precool and preheat function When the precool/preheat function is set, the heat reclaim ventilation unit switches on at the configured time (30, 45, or 60 minutes) after the air conditioner starts cooling or heating. -
Page 96: About The Ultra-Low Setting
Configuration 17.5.8 About the ultra-low setting If the amount of ventilation is too high, even in low mode, it is possible to have the fans work intermittently or at a very low speed with setting 19(29)‑1. INFORMATION This function is NOT possible when there is a direct duct connection. INFORMATION For EKVDX combinations, this operation is disabled. -
Page 97: Commissioning
Commissioning 18 Commissioning In this chapter 18.1 Overview: Commissioning ..............................18.2 Checklist before commissioning............................. 18.3 Checklist during commissioning ............................. 18.3.1 About the test run..............................18.1 Overview: Commissioning After installation and once the field settings are defined, the installer is obliged to verify correct operation. -
Page 98: Checklist During Commissioning
Commissioning Air inlet/outlet Check that the air inlet and outlet of the unit is NOT obstructed by paper sheets, cardboard, or any other material. Fuses, circuit breakers, or protection devices Check that the fuses, circuit breakers, or the locally installed protection devices are of the size and type specified in the chapter "15 Electrical installation" [... -
Page 99: Hand-Over To The User
Hand-over to the user 19 Hand-over to the user Once the test run is finished and the unit operates properly, please make sure the following is clear for the user: ▪ Make sure that the user has the printed documentation and ask him/her to keep it for future reference. -
Page 100: Maintenance And Service
Maintenance and service 20 Maintenance and service NOTICE Maintenance MUST be done by an authorised installer or service agent. We recommend performing maintenance at least once a year. However, applicable legislation might require shorter maintenance intervals. NOTICE Applicable legislation on fluorinated greenhouse gases requires that the refrigerant charge of the unit is indicated both in weight and CO equivalent. -
Page 101: Checklist For Maintenance Of The Heat Reclaim Ventilation Unit
Maintenance and service Models 350~650 C– C– Models 800~2000 C– C– For details, refer to the wiring diagram on the outside of the service cover. 20.3 Checklist for maintenance of the heat reclaim ventilation unit Check the air filters at least once a year. The air filters can get blocked due to dust, dirt, leaves, etc. -
Page 102: Troubleshooting
Troubleshooting 21 Troubleshooting In this chapter 21.1 Overview: Troubleshooting ..............................102 21.2 Precautions when troubleshooting............................102 21.3 Solving problems based on error codes..........................102 21.3.1 Error codes: Overview............................102 21.1 Overview: Troubleshooting This chapter describes what you have to do in case of problems. It contains information about solving problems based on error codes. - Page 103 Troubleshooting Code Description Unstable fan rpm: failure of filter contamination check or failure of function 19(29)-0-04/-05 VAM air flow rate dropped below legal threshold limit (for R32 application) VAM air flow rate approaches legal threshold limit (for R32 application) VAM warning for air flow rate drop (for R32 application) Power supply malfunction Capacity setting malfunction Fan communication error...
-
Page 104: Disposal
Disposal 22 Disposal NOTICE Do NOT try to dismantle the system yourself: dismantling of the system, treatment of the refrigerant, oil and other parts MUST comply with applicable legislation. Units MUST be treated at a specialised treatment facility for reuse, recycling and recovery. VAM350~2000J8VEB Installer and user reference guide Heat reclaim ventilation unit... -
Page 105: Technical Data
Technical data 23 Technical data ▪ A subset of the latest technical data is available on the regional Daikin website (publicly accessible). ▪ The full set of latest technical data is available on the Daikin Business Portal (authentication required). In this chapter 23.1... - Page 106 Technical data Limit switch damper motor Limit switch damper motor (VAM1500+2000) Diode bridge X1M (A1P) Terminal X2M (A1P) Terminal (outside input) Terminal (power supply) Noise filter Noise filter (ferrite core) Remote controller Selector switch Connector for option X14A Connector (CO sensor) X24A Connector (outside damper)
- Page 107 Technical data English Translation An EKVDX unit and its corresponding An EKVDX unit and its corresponding VAM-J8 unit should be connected to a VAM-J8 unit should be connected to a common power supply. Refer to the common power supply. Refer to the installation manual of the EKVDX unit installation manual of the EKVDX unit for further details.
-
Page 108: Service Space
Technical data 23.2 Service space 150-250 >50 (mm) a Service space Models VAM350+500 900 mm 675 mm VAM650 1100 mm 700 mm VAM800~2000 1100 mm 850 mm VAM350~2000J8VEB Installer and user reference guide Heat reclaim ventilation unit 4P664012-1 – 2021.08... -
Page 109: Glossary
Optional equipment Equipment made or approved by Daikin that can be combined with the product according to the instructions in the accompanying documentation. Field supply Equipment NOT made by Daikin that can be combined with the product according to the instructions in the accompanying documentation. - Page 112 4P664012-1 2021.08 Verantwortung für Energie und Umwelt...