Crestron TSW-570 Quick Start Manual
5 in., 7 in., and 10.1 in. wall mount touch screens
Hide thumbs
Also See for TSW-570:
- Product manual (82 pages) ,
- Quick start manual (9 pages) ,
- Getting started (2 pages)
Advertisement
Quick Links
TSW-570, TSW-770, and TSW-1070
5 in., 7 in., and 10.1 in. Wall Mount Touch Screens
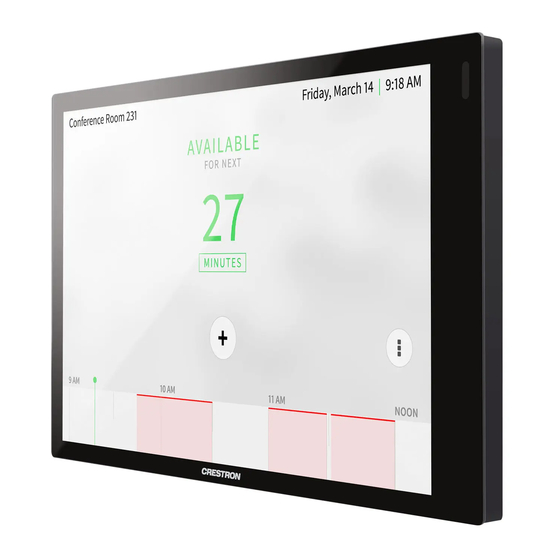
The Crestron® TSW-570, TSW-770, and
screens that feature web browsing, Smart Graphics® software and
HTML5 UI technology, custom-programmable virtual buttons,
H.265/H.264 streaming video, a Rava® SIP intercom (TSW-770 and
TSW-1070 only), Wi-Fi® network connectivity (TSW-770 and TSW-1070
only), and PoE+ (Power over Ethernet Plus) network power. The touch
screens also provide built-in applications for room scheduling,
conferencing, and home control.
NOTE: The TSW-570, TSW-770, and TSW-1070 are functionally
similar. For simplicity within this guide, the term "touch screen" is used
except where otherwise noted.
In the Box
1
TSW-570, TSW-770, or TSW-1070*, Wall Mount
Touch Screen
Additional Items
1
Bracket, Security (2055451)
2
Screw, M2 x 4 mm, Security (2055454)
1
Key, Security Bracket Release (2055452)
TSW-570 Only
1
Bracket, Preconstruction, TSW-UMB-70-PMK (4531647)
1
Bracket, Mounting, TSW-UMB-70 (4531354)
2
Screw, 6-32 x 1/2 in., Pan Head, Phillips (2007240)
TSW-1070
are wall mount touch
TSW-770 and TSW-1070 Only
1
Bracket, Mounting (2055453)
4
Screw, 6-32 x 3/4 in., Undercut Head, Phillips (2033247)
4
Screw, M3 x 16 mm, Flat Head, Phillips (2013788)
2
Screw, M3.5 x 25 mm, Flat Head, Phillips (2023756)
4
Anchor, #6-8, Self-Drilling (2035879)
4
Screw, 6-AB x 1 in., Flat Head, Phillips (2056874)
* Refer to the TSW-570-B-S, TSW-770-B-S, and TSW-1070-B-S product pages at
www.crestron.com
for a complete list of color variations.
Quick Start
1
Advertisement

Related Manuals for Crestron TSW-570


Summary of Contents for Crestron TSW-570
- Page 1 Screw, 6-AB x 1 in., Flat Head, Phillips (2056874) NOTE: The TSW-570, TSW-770, and TSW-1070 are functionally * Refer to the TSW-570-B-S, TSW-770-B-S, and TSW-1070-B-S product pages at similar. For simplicity within this guide, the term "touch screen" is used www.crestron.com for a complete list of color variations.
-
Page 2: Install The Mounting Bracket
Install the TSW-570 Mounting Bracket by turning the bracket to face the wall, ensuring it is level, and The TSW-570 can be mounted into drywall and other surfaces, or it can tacking it to the wall temporarily with finishing nails (not be mounted onto a wall stud. - Page 3 Quick Start TSW-570, TSW-770, and TSW-1070 5 in., 7 in., and 10.1 in. Wall Mount Touch Screens Install the TSW-770/TSW-1070 Mounting Bracket 5. Push the rear half of the mounting bracket back so that it is seated behind the mounting surface completely.
- Page 4 Quick Start TSW-570, TSW-770, and TSW-1070 5 in., 7 in., and 10.1 in. Wall Mount Touch Screens Drywall Mounting For U.S. installations, use the four 6-32 x 3/4 in. screws. Mounting hardware is provided with the touch screen for drywall installations without an electrical box. Using this hardware will ensure that the bracket is completely flush with the touch screen to provide maximum magnetic force.
- Page 5 Quick Start TSW-570, TSW-770, and TSW-1070 5 in., 7 in., and 10.1 in. Wall Mount Touch Screens To remove the touch screen after installation, use the included release Install the Security Bracket key to push down on the security bracket release tabs as shown in the...
- Page 6 Observe the following when connecting the touch screen: Power and data connection is provided to the touch screen by a single Ethernet cable. A Crestron PoE (Power over Ethernet) power supply, If the touch screen is not level after installation, pull it out of the such as the PWE-4803RU, or a PoE-capable network switch is mounting bracket and loosen the screws holding the bracket into place.
-
Page 7: Configure The Touch Screen
Quick Start TSW-570, TSW-770, and TSW-1070 5 in., 7 in., and 10.1 in. Wall Mount Touch Screens Touch the screen to display the main Setup screen (TSW-1070 shown). Configure the Touch Screen When power is applied for the first time, the following screen is displayed. -
Page 8: Set The Time Zone
1. Ensure that the touch screen is connected to the network. Select the device from the cloud interface to view its status and 2. Use the Device Discovery tool in Crestron Toolbox™ software to settings. The device may now also be managed and assigned to a group discover the touch screen and its IP address on the network. -
Page 9: Select An Application
A similar message may be selected from the default project that ships with the touch is displayed when connecting to the device in Crestron Toolbox software screen. if an admin account has not already been created. - Page 10 Development Tools License Agreement. Crestron product operating system software is licensed to Crestron dealers, CSPs, and end-users under a separate End-User License Agreement. Both of these Agreements can be found on the Crestron website at Visit the Product Pages www.crestron.com/legal/software_license_agreement.