
Related Manuals for Endress+Hauser StamoLys CA 71 SI


Summary of Contents for Endress+Hauser StamoLys CA 71 SI
- Page 1 StamoLys CA 71 SI BA 364C/07/en/07.03 51512332 Valid of: Silicate Analyzer Software version 5.2 Operating Instructions Quality made by Endress+Hauser ISO 9001...
-
Page 3: Table Of Contents
StamoLys CA 71 SI Table of contents Safety instructions ....4 Trouble-shooting ....38 Designated use . -
Page 4: Safety Instructions
• If faults can not be rectified, the products must be taken out of service and secured against unintentional commissioning. • Repairs not described in these Operating Instructions may only be carried out at the manufacturer’s or by the Endress+Hauser service organisation. Endress+Hauser... -
Page 5: Operational Safety
• Installation instructions • Local prevailing standards and regulations. Return If the analyzer has to be repaired, please return it cleaned to the Endress+Hauser sales centre responsible. Please use the original packaging, if possible. Please enclose the completed Dangerous Goods sheet (copy the second last page of these Operating instructions) with the packaging and also the shipping documents. -
Page 6: Identification
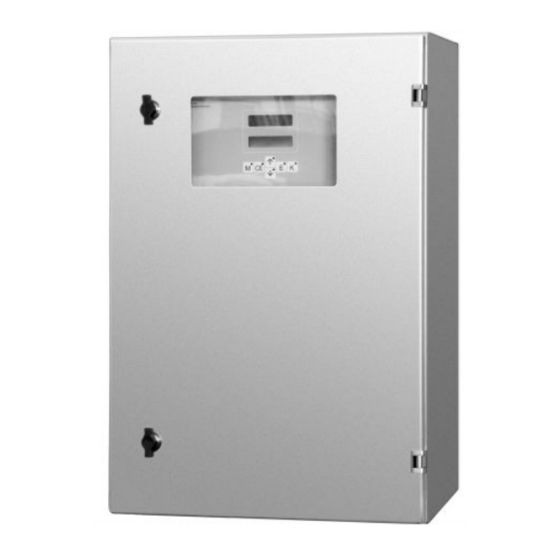
Identification StamoLys CA 71 SI Identification Device designation 2.1.1 Nameplate Check the order code on the nameplate (at the analyzer) with the product structure (see below) and your order. C07-CA71SIx-18-08-00-xx-001.EPS Fig. 1: Example of a nameplate 2.1.2 Product structure Measuring range Measuring range 1.0 ... -
Page 7: Scope Of Delivery
The product meets the legal requirements of the harmonised European standards. Endress+Hauser confirms compliance with the standards by affixing the symbol. 2.3.2 Manufacturer certificate Quality certificate With the certificate Endress+Hauser confirms compliance with all technical regulations and the successful testing individually for your product. Endress+Hauser... -
Page 8: Installation
The original packaging offers the best protection. Also, keep to the approved ambient conditions (see "Technical data"). • If you have any questions, please contact your supplier or your Endress+Hauser sales centre responsible (see back page of these Operating Instructions). - Page 9 StamoLys CA 71 SI Installation C07-CA71xxx-06-08-00-en-002.eps Fig. 3: CA 71 dimensions, GFK version 3.2.2 Connecting the sample line C07-CA71xxx-11-08-00-xx-001.eps C07-CA71xxx-06-08-02-en-003.eps Fig. 4: Collecting vessel at analyzer (optionally) Fig. 5: Collecting vessel dimensions Ventilation variable, freely adjustable dimensions Sample inlet from sampling...
- Page 10 Installation StamoLys CA 71 SI One-channel version E+H Collecting vessel (at CA 71, with or without level measurement) Connection hose ID 3.2 mm (0.13") Customer collecting vessel Connection hose ID 1.6 mm (0.06") Max. distance from collecting vessel to analyzer 1 m (3.28 ft)
-
Page 11: Installation Instructions
– Sample conditioning using ultrafiltration for heavily soiled media, e.g. from the primary settling tank For questions regarding sample conditioning and its automation, please contact Endress+Hauser Service or the Endress+Hauser Sales Centre responsible for your region. Endress+Hauser... -
Page 12: Installation Examples
Installation StamoLys CA 71 SI Connect the tubes from canisters containing reagents, standard and cleaning agents to the following nozzles: Canister Hose designation (mark) Sample Reagent 1 Reagent 2 Reagent 3 Standard solution Cleaner Note! The pressure of the hose cassette is set at the factory such that the sample and reagent are fed in without bubbles. -
Page 13: Post-Installation Check
StamoLys CA 71 SI Installation 3.4.2 CAT 411, CAT 430 and two CA 71 analyzers (two-channel version) • Permeate not free of air bubbles • Distance between the analyzers as short as possible: sampling line between T-piece and the second analyzer CA 71 (Fig. -
Page 14: Wiring
Wiring StamoLys CA 71 SI Wiring Electrical connection Warning! • The electrical connection must only be carried out by authorised technical personnel. • Technical personnel must have read and understood the instructions in this manual and must adhere to them. - Page 15 StamoLys CA 71 SI Wiring 4.1.2 Terminal assignment Function Designation Terminal Terminal one channel two channels Mains Alarm value 1, channel 1 Alarm value 2, channel 1 – Alarm value 1, channel 2 – – – Alarm value 2, channel 2 –...
-
Page 16: Signal Connection
Wiring StamoLys CA 71 SI Signal connection 4.2.1 Screening of the analog outputs The interference suppressor attenuates electromagnetic effects on control, power and signal lines. After the connection of the data transfer cables clip the interference suppressor (in scope of delivery) on the cable cores (not on the outer insulation of the cable!). Place the cable screen out of the interference suppressor and connect it to PE (brass screw with bolt, top right in the connection compartment) ( →... -
Page 17: Switching Contacts
StamoLys CA 71 SI Wiring 4.2.3 Two-channel version Connection Designation Function Leak Liquid has collected in the drip pan Signal inputs No sample No sample available, measurement is not started, display flashes AV 1 - 1 Alarm value 1, channel 1 exceeded or undershot... -
Page 18: Serial Interface
Wiring StamoLys CA 71 SI Two-channel version Connection Terminal connection for Terminal connection for Terminal connection for condition fulfilled condition not fulfilled power off AV 1 - 1 AV 1 - 2 AV 2 - 1 AV 2 - 2 Fault Channel ½... -
Page 19: Post-Connection Check
StamoLys CA 71 SI Wiring Post-connection check Carry out the following checks after electrical connection: Device status and specifications Note Is the analyzer or cable externally undamaged? Visual inspection Electrical connection Note Does the supply voltage correspond to the data on the nameplate? 230 V AC / 50 Hz 115 V AC / 60 Hz... -
Page 20: Operation
Operation StamoLys CA 71 SI Operation Operation and commissioning The following chapters provide you with information on the analyzer’s operating elements and explain how to make settings. In chapter “Commissioning” you will find the procedure for initial start-up and for daily analyzer operation. - Page 21 StamoLys CA 71 SI Operation 5.3.1 Main menu Access the main menu by holding down the key until “AUTO MEASURING” is displayed. For the main menu options and information about them, please see the following table. Selection Display Info Calibration, measurement, flushing time-controlled...
- Page 22 Operation StamoLys CA 71 SI 5.3.3 CONFIGURATION Note! Some settings that can be made in this menu affect the defaults in the PARAMETER ENTRY menu. In view of this, complete the CONFIGURATION menu first during initial start-up. Option Range of adjustment...
- Page 23 StamoLys CA 71 SI Operation Option Range of adjustment Display Info (default settings in bold) Selection for the scope of channel 1 measuring range. If the concentration measuring range is Analog output 1 Analog output 1 0 ... 5 mg/l, this corresponds to 0 mg/l either 4 mA 4- 20 mA or 0 mA.
- Page 24 Operation StamoLys CA 71 SI 5.3.4 PARAMETER ENTRY Note! In the following table and in the tables in the next chapter, example images can be found for each option under "Display". In addition to the numerical values, the parameter is also displayed in some options. This is not shown in the images. Moreover, individual numerical values in the images can differ from the actual settings.
- Page 25 StamoLys CA 71 SI Operation Option Range of adjustment Display Info (default settings in bold) Time of 1st calibration (DD.MM.YY, time hh.mm). After each change the instrument does not wait for the calibration interval. If the calibration is to start immediately, set the time in the past.
- Page 26 Operation StamoLys CA 71 SI 5.3.5 LANGUAGE The following languages are available: • Deutsch • English • Français • Nederlands • Suomi • Magyar • Polski • Italiano. 5.3.6 ERROR DISPLAY Note! • This menu is a "Read-Only-Menu". • You can find the individual error messages, their meaning and solutions to problems in chapter "Trouble-shooting instructions".
- Page 27 StamoLys CA 71 SI Operation 5.3.8 DATA STORAGE-Measured values Note! Two menus, "DATA MEMORY 1" and "DATA MEMORY 2", are only for the two-channel version. In the one-channel version there is only one menu "DATA MEMORY". Selection Display Info The data memory contains the last 1024 concentration measured values with date and time.
-
Page 28: Calibration
Operation StamoLys CA 71 SI Calibration 5.4.1 Standard calibration data The signal strength is processed device-internally as a frequency. The following table provides an overview of the standard calibration data (frequency-offset = 0). Note! Compare these values to your own data. - Page 29 StamoLys CA 71 SI Operation 5.4.3 Calibration example Proceed as follows if you want to activate an immediate calibration (e.g. after you have replaced the reagents). Ensure that you have changed the reagents, filled the hoses again (no air bubbles) and the analyzer is in measuring mode.
-
Page 30: Commissioning
Commissioning StamoLys CA 71 SI Commissioning Function check Warning! • Check that all connections have been made correctly. Check, in particular, that all hose connections are secure, so that no leaks occur. • Ensure that the mains voltage corresponds to the voltage specified on the nameplate. - Page 31 StamoLys CA 71 SI Commissioning The following summary presents procedures carried out in the device and the intervals you have programmed: Function Duration [s] Range of adjustment Measurement Flushing (sample) 3 x 15 Delay to sample 20 ... 300 CONFIGURATION / "Delay to sample"...
-
Page 32: Maintenance
Maintenance StamoLys CA 71 SI " Maintenance Caution! You must not carry out any procedures not listed in the following chapters, yourself. This work must only be carried out by the E+H Service. Note! Please, find accessories and wear parts in chapter "Accessories". -
Page 33: Replacing Reagents
StamoLys CA 71 SI Maintenance Replacing reagents Warning! • There is a danger of crushing limbs at doors, inserts and pump heads. • Refer to the warning instructions in the safety data sheets when handling reagents. Wear protective clothing, gloves and goggles. -
Page 34: Replacing Pump Hoses
Maintenance StamoLys CA 71 SI Replacing pump hoses Note! With versions CA 71 CL-A+B a violet-white pump hose and with CA 71 CL-C+D a blue-yellow pump hose is used (s. "Accessories"/Maintenance kits). Warning! When removing hoses from the hose nozzles, beware of reagent splashing. For this reason, wear protective gloves and goggles. -
Page 35: Replacing The Static Mixer
StamoLys CA 71 SI Maintenance C07-CA71xxx-00-08-00-xx-005.eps Fig. 15: Valves and valve hoses Valve 1 Valve 2 To the pump Y-piece, Y-piece, connecting hose to valve 1, behind it Hose valve 2, front, standard Hose valve 2 back, cleaning agent Hose valve 1 front, sample... -
Page 36: Cleaning
Maintenance StamoLys CA 71 SI " Caution! Do not under any circumstances touch the optical window of the cell with your fingers! Otherwise, traces of grease remain on the optical surfaces. This can lead to corrupted measured values. Connect the cell to the hoses such that the sample is fed in from below. -
Page 37: Accessories
StamoLys CA 71 SI Accessories Accessories Collecting vessel • for sampling from pressurized systems • results in an unpressurized continuous sample stream ❑Collecting vessel without level measurement; order no. 51512088 Reagents, cleaner, standard solution ❑Reagent set active, 1 l SI1+SI2+SI3 each; order no. CAY643-V10AAE ❑Reagent set, inactive, 1 l SI1+SI2+SI3 each;... -
Page 38: Trouble-Shooting
Trouble-shooting StamoLys CA 71 SI Trouble-shooting Trouble-shooting instructions Although the analyzer is not very prone to faults due to its simple assembly, problems can, of course, not be completely ruled out. Possible errors, their causes and their possible remedies are listed below. -
Page 39: Process Errors Without Messages
StamoLys CA 71 SI Trouble-shooting Process errors without messages Error Possible cause Tests and / or corrective measures Reagents Simple check: Add about 20 ml of standard solution with about 1 ml of reagent in a vessel. If it contaminated or aged does not change colour after max. -
Page 40: Spare Parts
Trouble-shooting StamoLys CA 71 SI Error Possible cause Tests and / or corrective measures Time of 1st The date must be between 01.01.1996 and the current date. measurement not "Measurement" reached display flashes Interval not expired Change parameters. Time of 1st calibration The date must be between 01.01.1996 and the current date. -
Page 41: Return
51512078 – SI-B 51512079 Return If the device requires repair, please send it cleaned to the appropriate Endress+Hauser sales office. Please use the original packaging, if possible. Please enclose the completed Dangerous Goods sheet (copy the second last page of these Operating Instructions) with the packaging and the transportation documents. -
Page 42: Technical Data
Technical data StamoLys CA 71 SI Technical data 10.1 Input Measured variable [µg/l / mg/l] Measuring range 1 ... 200 µg/l (SI-A) 0.01 ... 5.00 mg/l (SI-B) Wave length 810 nm Reference wave length 565 nm (SI-B only) 10.2 Output Output signal 0/4 ... -
Page 43: Performance Characteristics
StamoLys CA 71 SI Technical data 10.4 Performance characteristics Time between two measurements = reaction time + rinse time + waiting time + rinse again time + filling time (min. waiting time = 0 min) Maximum measured error 2 % of measuring range end... -
Page 44: Appendix
Appendix StamoLys CA 71 SI Appendix 11.1 Operating matrix One-channel version AUTO Calibration Measuring Waiting Flushing MEASURING Measuring Measuring Measuring Calibration Alarm value Alarm value PARAMETER range start range end interval Measurem. interval alibration ENTRY Concentrat. Code Default Measuring Calibration... - Page 45 StamoLys CA 71 SI Appendix Standard Flushing Flushing solution Flushing interval time Analog Alarm value Alarm value Error act. Date/ Calibrate Frequency output contact time offset offset Endress+Hauser...
- Page 46 Appendix StamoLys CA 71 SI Two-channel version AUTO Calibration Measuring Flushing Waiting MEASURING Measuring Measuring Measuring Measuring Alarm value Alarm value Alarm value Alarm value PARAMETER range start1 range start2 range end 1 range end 2 ENTRY Measuring Code Default Calibration Concentr.
- Page 47 StamoLys CA 71 SI Appendix Measuring 1 st Calibration Calibration Flushing Flushing Measurem. interval Channel 1 Channel 2 interval solution Flushing interval alibration time Analog Analog Frequency Alarm value Alarm value Alarm value Alarm value Error act. Date/ Calibrate output 1...
-
Page 48: Ordering Forms
Appendix StamoLys CA 71 SI 11.2 Ordering forms to Fax no: Telefax for chemicals ordering to (adress of your E+H sales centre, see OM backpage) from (invoice adress) Company: Concern: Street: Zip code / Town: Telefax / Telephone: Adress for delivery (if not the above adress) - Page 49 StamoLys CA 71 SI Appendix to Fax no: Telefax for wear parts ordering to (adress of your E+H sales centre, see OM backpage) from (invoice adress) Company: Concern: Street: Zip code / Town: Telefax / Telephone: Adress for delivery (if not the above adress)
-
Page 50: Analyzer Settings
Appendix StamoLys CA 71 SI 11.3 Analyzer settings Place: Type: Serial no. Analyzer: Serial no. Photometer: Software version: Date: Photometer Type: Measuring unit: Calibration factor: ❑ mg/l ❑ µg/l c-offset: Dilution: Delay to sample: ❑ 0-20 mA ❑ 4-20 mA Analog output: ❑... - Page 51 StamoLys CA 71 SI Appendix Submenu Error mask: MB >: MBE: Rinse again: Filling time: Reaction time: U/min: K floating mean: Points mg/l / µg/l F 1: mg/l / µg/l F 2: mg/l / µg/l F 3: mg/l / µg/l F 4: mg/l / µg/l...
-
Page 52: Maintenance Schedule
Appendix StamoLys CA 71 SI 11.4 Maintenance schedule Form Maintenance schedule for Analyser Nr....weekly ⇒ Check and note calibration factor ⇒ visible control (Soiling or blinding, pump tubings, reagent, sample inlet etc.) done KW 1 KW 2 KW 3... -
Page 53: Index
StamoLys CA 71 SI Index Accessories ....... 37 Main menu ....... . . 21 AUTO MEASURING . - Page 54 StamoLys CA 71 SI Safety icons ....... . 5 Sample line....... . . 9 Scope of delivery .
- Page 55 'HFODUDWLRQ RI FRQWDPLQDWLRQ Dear customer, Because of legal determinations and for the safety of our employees and operating equipment we need this “Declaration of contamination” with your signature before your order can be handled. Please put the completely filled in declaration to the instrument and to the shipping documents in any case. Add also safety sheets and/or specific handling instructions if necessary.
- Page 56 Poland – Wroclaw Costa Rica – San Jose ❑ Sakura Endress Co. Ltd. ❑ Endress+Hauser Polska Sp. z o.o. Tel. (01) 88 05 60, Fax (01) 88 05 63 35 Euro-Tec S.A. Tel. (0422) 54 06 11, Fax (0422) 55 02 75 Tel.