Endress+Hauser Stamolys CA71CODcr Operating Instructions Manual
Photometric analytical system for determining the chemical oxygen demand following the din dichromate method
Hide thumbs
Also See for Stamolys CA71CODcr:
- Operating instructions manual (48 pages) ,
- Operating instructions manual (56 pages)

Related Manuals for Endress+Hauser Stamolys CA71CODcr


Summary of Contents for Endress+Hauser Stamolys CA71CODcr
- Page 1 Operating Instructions Stamolys CA71CODcr Photometric analytical system for determining the chemical oxygen demand following the DIN dichromate method BA00458C/07/DE/13.11 71148153 Valid of: Software version 01.03.03...
- Page 2 – Front hose: sample inlet – Rear hose: inlet from valve V2 (0 mg/l O standard or standard) • Valve V2 – Front hose: inlet from canister with standard – Rear hose: inlet from canister with 0 mg/l O standard Endress+Hauser...
-
Page 3: Table Of Contents
Stamolys CA71CODcr Table of contents Safety instructions ....4 Troubleshooting ....39 Designated use . -
Page 4: Safety Instructions
Safety instructions Stamolys CA71CODcr Safety instructions Designated use The analyzer is a compact photometric analysis system. In particular, CA71 is designated for: • Monitoring sewage treatment plant outlets • Monitoring sewage treatment plant inlets • Monitoring process wastewater • Monitoring the discharge of industrial wastewater Any other use than the one described here compromises the safety of persons and the entire measuring system and is not permitted. -
Page 5: Notes On Safety Conventions And Icons
Stamolys CA71CODcr Safety instructions Notes on safety conventions and icons 1.4.1 Warning notices The structure, signal words and safety colors of the signs comply with the specifications of ANSI Z535.6 ("Product safety information in product manuals, instructions and other collateral materials"). -
Page 6: Identification
Identification Stamolys CA71CODcr Identification Device designation 2.1.1 Nameplate Compare the (extended) order code on the nameplate (on the analyzer) to the product structure and your order. You can read the following information from the nameplate: • Order code • Extended order code (= order code from the product structure) •... -
Page 7: Certificates And Approvals
Stamolys CA71CODcr Identification Certificates and approvals 4 mark 2.3.1 Declaration of Conformity The product meets the requirements of the harmonized European standards. As such, it meets the legal regulations of the EC directives. The manufacturer confirms successful testing of the product by affixing to it the 4- mark. -
Page 8: Installation
Installation Stamolys CA71CODcr Installation Incoming acceptance, transport, storage ► Make sure the packaging is undamaged! ► Inform the supplier about damage to the packaging. Keep the damaged packaging until the matter has been settled. ► Make sure the contents are undamaged! ►... -
Page 9: Installation
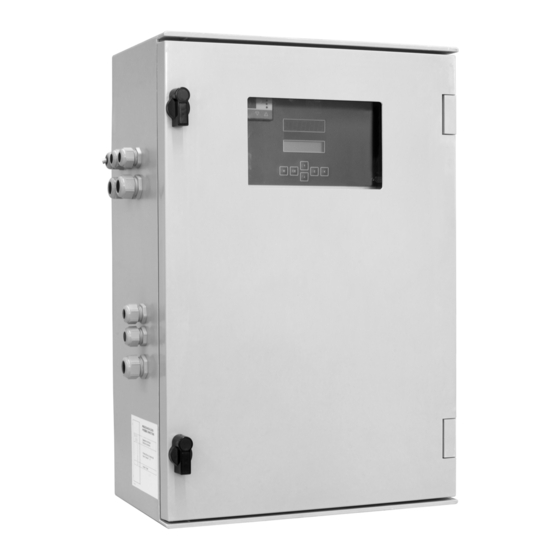
Stamolys CA71CODcr Installation NOTICE Sufficient space and backwater in the outflow hose ► Allow at least 400 mm (16") under the housing as space for the waste collecting tank. ► On the left-hand side of the device, observe a lateral distance of at least 150 mm (5.91") for mounting the collecting vessel. - Page 10 Installation Stamolys CA71CODcr Mount the analyzer and secure it to a vibration-free wall using screws (Ø6 mm / 0.24"). The fastening clips make sure that the necessary distance to the wall is observed for ventilation purposes. For the installation dimensions, please see the previous chapter.
-
Page 11: Installation Examples
Stamolys CA71CODcr Installation Canister Tube designation (mark) Sample Reagent R1 none (PTFE hose) Reagent R2 Standard 0 mg/l O standard 3.3.2 Collecting vessel (optional) Mount the base plate and collecting vessel on the left-hand side of the analyzer. Connect the hoses for sample intake, sample supply to analyzer and sample overflow to the appropriate hose connections (→... -
Page 12: Post-Installation Check
Installation Stamolys CA71CODcr 3.4.2 No filter used A complete measuring system comprises: • A sample pump with backwash function • An agitated collecting vessel • A CA71CODcr analyzer a0016626-1 Fig. 9: Complete measuring system Sample pump with backwash function Overflow... -
Page 13: Wiring
Stamolys CA71CODcr Wiring Wiring Electrical connection WARNING Device is energized Inappropriate connection can cause serious injuries or death ► The electrical connection may only be established by an electrical technician. ► The electrical technician must have read and understood these Operating Instructions and must follow the instructions they contain. - Page 14 Wiring Stamolys CA71CODcr 4.1.2 Terminal assignment CAUTION The diagram shown (→ å 11) is an example The terminal assignment and cable colors can deviate from the actual assignment and colors! ► Only use the terminal assignment of the sticker in the device (→ å 12) to connect your...
- Page 15 Stamolys CA71CODcr Wiring Function Designation Terminal One-channel version Mains Alarm value 1, channel 1 Alarm value 2, channel 1 Fault Unassigned Analog output 1 – 0/4 to 20 mA Screen Input Sample conditioning remote control Brass screw with bolt at top right in the connection compartment (marked with...
-
Page 16: Signal Connection
Wiring Stamolys CA71CODcr Signal connection 4.2.1 Shielding of the analog outputs The interference suppressor attenuates electromagnetic effects on control, power and signal lines. After the connection of the data transfer cables clip the interference suppressor (in scope of delivery) on the cable cores (not on the outer insulation of the cable!). Place the cable shield out of the interference suppressor and connect it to PE (brass screw with bolt, top right in the connection compartment) (→... -
Page 17: Switching Contacts
Stamolys CA71CODcr Wiring Switching contacts Terminal connection for Terminal connection for Terminal connection for condition fulfilled condition not fulfilled power off AV 1 AV 2 Fault Unassigned A = NO current configured R = NC current configured "Condition fulfilled" means: •... -
Page 18: Connecting The Collecting Vessel
Wiring Stamolys CA71CODcr Connecting the collecting vessel Disconnect the analyzer from the mains. Fold out the frame (→ ä 13). Guide the cable of the level measurement unit into the analyzer and connect the connecting cables as follows: – Black cable (BK) in terminal 58 –... -
Page 19: Post-Connection Check
Stamolys CA71CODcr Wiring Post-connection check Carry out the following checks after electrical connection: Device status and specifications Note Is the analyzer or cable externally undamaged? Visual inspection Electrical connection Note Does the supply voltage correspond to the data on the nameplate? -
Page 20: Operation
Operation Stamolys CA71CODcr Operation Display and operating elements M CE RS 232 a0012457 Fig. 14: Display and operating elements LED display (measured value) LC display (status) Serial interface RS 232 Operating keys and control LEDs Temperature indicators of the heating element... - Page 21 Stamolys CA71CODcr Operation 5.2.1 Main menu Access the main menu by holding down the key until AUTO MEASURING is displayed. For the main menu options and information about them, please see the following table. Menu item Display Info AUTO MEASURING...
- Page 22 Operation Stamolys CA71CODcr 5.2.3 CONFIGURATION Some settings that can be made in this menu affect the defaults in the PARAMETER ENTRY menu. ► Complete the CONFIGURATION menu first during initial startup. Menu item Range of adjustment Display Info (default settings in bold) Input 03.
- Page 23 Stamolys CA71CODcr Operation Menu item Range of adjustment Display Info (default settings in bold) Stripping time 1 to 30 min During this time, any chloride in the sample is removed to 10 min avoid incorrect measured values. Increase the stripping time if chloride concentrations >...
- Page 24 Operation Stamolys CA71CODcr 5.2.4 PARAMETER ENTRY Menu item Range of adjustment Display Info (default settings in bold) Measuring range COD-A: 0 to 200 mg/l / 0 mg/l The specified concentration is allocated a value of 0 or 4 Range start 0.00 mg/l...
- Page 25 Stamolys CA71CODcr Operation 5.2.7 MAINTENANCE Menu item Display Info Empty reactor Starts a process of cooling, draining and rinsing the Empty re actor reactor so you can perform maintenance work on the yes:K no:E reactor assembly without any safety hazards. Also empty the reactor before replacing the hoses to remove the acid from the pump hose.
-
Page 26: Calibration
Operation Stamolys CA71CODcr Menu item Display Info Frequency Signal frequency of the photometer (read only) 6000 Hz In the event of silver chloride precipitate, clean the reactor with 2% ammonium hydroxide solution. 5.2.9 DATA STORAGE Menu item Display Info The data memory contains the last 1024 concentration measured values with date and time. - Page 27 Stamolys CA71CODcr Operation Calibration example 2 Automatic calibration This consists of two offset measurements and a calibration of the K-factor. Hold down until AUTO MEASURING appears. to move through the PARAMETER ENTRY menu and press to go to the "Calib. interval" item.
-
Page 28: Commissioning
Commissioning Stamolys CA71CODcr Commissioning Function check CAUTION Avoid damage due to incorrect power supply and inaccurate or insecure hose connections. ► Check that all connections have been made correctly. Check, in particular, that all hose connections are secure, so that no leaks occur. - Page 29 Stamolys CA71CODcr Commissioning Perform the following tasks in the SERVICE menu: a. Switch the P2 reagent pump "on" (select P2 with and set to "g" with ). Leave it running until you can tell that there is reagent at the reactor.
-
Page 30: Maintenance
► Any maintenance work not listed in the following sections may only be performed by Endress+Hauser Service. ► Wear your personal protective clothing when carrying out any maintenance work. The use of components that have not been approved by Endress+Hauser renders the guarantee and the certified device conformity void. Maintenance schedule All maintenance duties that have to be carried out during normal operation of the analyzer are explained below. -
Page 31: Replacing Reagents
Stamolys CA71CODcr Maintenance Replacing reagents CAUTION Corrosive chemicals and other risks Eye and skin injuries or crushing possible ► There is a danger of crushing limbs at doors, inserts and pump heads. ► Refer to the warning instructions in the safety data sheets when handling reagents and cleaning solutions. -
Page 32: Replacing Pump Hoses
Maintenance Stamolys CA71CODcr Replacing pump hoses CAUTION When removing hoses from the hose nozzles, beware of reagent splashing. ► Wear protective clothing, gloves and goggles. NOTICE Acid and reagents Hose cases can become brittle and break ► Ensure that you always wear clean gloves to handle the hose cases. -
Page 33: Setting The Hose Cases
Stamolys CA71CODcr Maintenance a0012351 a0012676 Fig. 16: Pump 1, top view Fig. 17: Pump 2, top view Reagent 1 Reagent 2 Reconnect the reagent hoses to the canisters and the valve manifold. After installation, refill the hoses with sample, standard or 0 mg/l O standard and reagents (SERVICE). -
Page 34: Replacing Valve Hoses
Maintenance Stamolys CA71CODcr Replacing valve hoses To replace the hoses (valve 1 and 2) , proceed as follows: Flush the old hoses with water first and then with air to empty them (see SERVICE). Remove the hoses from the valves: a. - Page 35 Stamolys CA71CODcr Maintenance 7.6.2 Cleaning the housing NOTICE When cleaning, ensure that you do not damage the nameplate on the analyzer. ► Do not use any solvent-based cleaning agents. To clean the analyzer housing, proceed as follows: • Wipe up any reagent contamination with a disposable cloth and rinse the area with clean water.
-
Page 36: Placing Out Of Service
Maintenance Stamolys CA71CODcr Placing out of service You must place out of service the analyzer before shipping or before longer operation breaks (more than 2 days). CAUTION Residues of chemicals can cause injuries ► Thoroughly rinse all of the lines of the measuring system with clean water. -
Page 37: Accessories
Stamolys CA71CODcr Accessories Accessories The following section provides you with information on the most important accessories available at the time this documentation was issued. Contact your local Service Center or Sales Center for accessories that are not listed here. Collecting vessel Agitated collecting vessel with level measurement •... -
Page 38: Additional Accessories
Accessories Stamolys CA71CODcr Additional accessories • Interference suppressor for control, power and signal lines Order No. 51512800 • Medium-viscosity silicone grease, 35g tube Order No. 71017654 • Kit CA71COD hose set Order No. 71103284 • Kit CA71COD hose fittings Order No. 71103286 •... -
Page 39: Troubleshooting
Stamolys CA71CODcr Troubleshooting Troubleshooting Troubleshooting instructions Although the analyzer is not very prone to faults due to its simple assembly, problems can, of course, not be completely ruled out. Possible errors, their causes and their possible remedies are listed below. - Page 40 Troubleshooting Stamolys CA71CODcr 9.1.2 Process errors without messages Errors Possible cause Tests and / or corrective measures Reagents contaminated The dichromate solution (R2) must be orange to brown in color. It should not have a green hue. or aged Sulfuric acid (R1) must be clear and colorless.
-
Page 41: Spare Parts
Stamolys CA71CODcr Troubleshooting Errors Possible cause Tests and / or corrective measures Device or discharge Remove blockage. Leak at photometer blocked Service Blockage, deposits in Not enough sample Shorten the cleaning intervals of sample conditioning. Improve filtering and homogenization. sample conditioning... -
Page 42: Software History
06/2010 01.00.06 Improvement BA458C/07/XX/06.10 • Modification in workflows • Optimized factory settings 11/2009 01.00.04 CA71COD original software BA458C/07/XX/11.09 Return Note the following prior to returning the device: ► Contact your Endress+Hauser sales center for information on the return procedures. Endress+Hauser... -
Page 43: Disposal
Stamolys CA71CODcr Troubleshooting Disposal NOTICE Waste containing chromate and waste free from chromate are produced. The latter contains sample residue and acid. Reagent waste must be disposed of correctly. ► Your local sales office will be happy to assist in the correct disposal of reagent waste. -
Page 44: Technical Data
Technical data Stamolys CA71CODcr Technical data 10.1 Input Measured variable COD [mg/l O Measuring range CA71COD-A 5 to 200 mg/l O CA71COD-B 50 to 5000 mg/l O Wave length CA71COD-A 465 nm and 625 nm CA71COD-B 589 nm 10.2 Output... -
Page 45: Performance Characteristics
Stamolys CA71CODcr Technical data 10.4 Performance characteristics Maximum measured error CA71COD-A and repeatability < 110 mg/l O : ± 11 mg/l O > 110 mg/l O : ± 10 % CA71COD-B < 500 mg/l O : ± 50 mg/l O >... -
Page 46: Mechanical Construction
Technical data Stamolys CA71CODcr 10.8 Mechanical construction Design, dimensions see chapter "Installation" Weight Approx. 32 kg (71 lbs) Materials Housing Front windows Polycarbonate Hose C-FLEX, NORPRENE, PTFE, PFA Pump hose TYGON Valves C-FLEX, PVDF, FFKM Endress+Hauser... - Page 47 Stamolys CA71CODcr Technical data Endress+Hauser...
-
Page 48: Appendix
Appendix Stamolys CA71CODcr Appendix 11.1 Operating matrix a0012416-en Endress+Hauser... - Page 49 Stamolys CA71CODcr Appendix a0012417-en Endress+Hauser...
-
Page 50: Index
Stamolys CA71CODcr Index Accessing the terminal block..... . . 13 Hose case ........33 Accessories. - Page 51 Stamolys CA71CODcr PARAMETER ENTRY ......24 Valve 3 ........34 Performance characteristics .
- Page 52 BA00458C/07/EN/13.11...