Trane ComfortLink XL850 User Manual
Smart control
Hide thumbs
Also See for ComfortLink XL850:
- User manual (32 pages) ,
- Installation manual (24 pages) ,
- Quick start manual (3 pages)
Table of Contents
Advertisement
Quick Links
ComfortLink™ Trane XL850
Smart Control User Guide
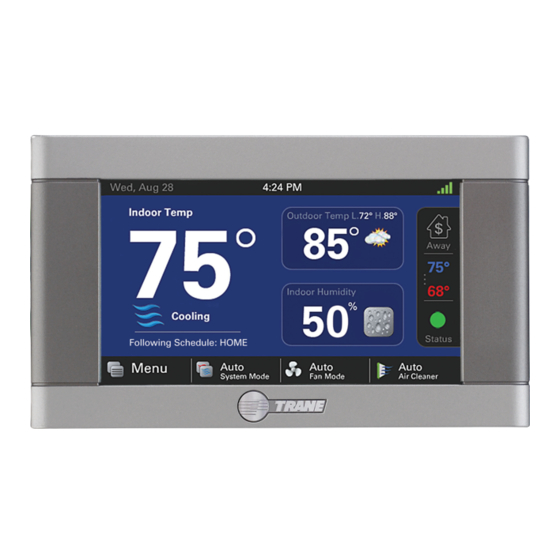
The XL850 is an easy-to-use,
programmable control with a
color touch-screen.
®
When connected with Trane
Home you can control your
home's heating and cooling
system and up to 230 separate
Z-Wave™ devices from a
smartphone, PC or tablet from
virtually anywhere.
This guide will help you
configure and connect your
Start using your
XL850 Smart Control quickly
new now! See
"Start Here!" on
and easily.
page 3.
032-5091-06C-EN
Advertisement
Table of Contents

Related Manuals for Trane ComfortLink XL850


Summary of Contents for Trane ComfortLink XL850
- Page 1 Smart Control User Guide The XL850 is an easy-to-use, programmable control with a color touch-screen. ® When connected with Trane Home you can control your home’s heating and cooling system and up to 230 separate Z-Wave™ devices from a smartphone, PC or tablet from virtually anywhere.
-
Page 2: Table Of Contents
Up to eight smart controls of any combination of the IC NOTICE ..............31 http://www.tranehome.com 1050, 850, 824, and 624 are allowed on your Trane Home account for no additional cost. A monthly subscription For tutorials search: XL850. charge may apply beyond this number of devices. -
Page 3: User Setup Wizard
• Your XL850 control comes equipped with Home screen. To complete the Setup Wizard and connect the remote access and other features from Trane Schedule Settings XL850 to Trane Home, you need: Home. • Set the XL850 scheduling feature to enabled •... -
Page 4: Navigating The Control
Default Home Screen can be customized with several widgets. To learn more about this feature see the Date and Time Noti cations and System Alerts section in this user guide about customization. Trane Home and Network Status Increase set point... - Page 5 Home Screen View Homeowners may toggle between Home Screen Options by selecting: Home Screen > Menu > Settings > Screen > Home View Options. Select Simple View or Classic View. NOTE: Simple View is the default view. Simple View Classic View 032-5091-06C-EN page 5...
- Page 6 Home Screen can be customized with several widgets. To learn more about this feature see the section in this user guide about customization. Date and Time Noti cations and System Alerts Trane Home and Network Status 1-Touch presets (O /Home/Away/...
-
Page 7: Temperature Control Panel
Temperature Control Panel The Temperature Control Panel is where target Available when Available when temperatures are manually set and adjusted. Scheduling is Enabled Scheduling is Disabled Activate 1-Touch Presets Cooling Set Point The panel is shown on the Classic View Home Disable Schedule (select to change) Screen only. -
Page 8: Home Screen - Simple View
Home Screen - Simple View Optionally, up to 2 widgets may be chosen to appear on your home screen. They can be selected by navigating to Menu > Settings > Screen > Screen Layout When scheduling is enabled, the Preset button is disabled and a Permanent Hold button is... -
Page 9: Home Screen Customization
Home Screen Customization Homeowners may customize the Home Screen by selecting: Menu > Settings > Screen > Screen Layout Choose up to two widgets (or apps) to show up on the Home Screen. Make selection and select Apply. 032-5091-06C-EN page 9... -
Page 10: Menu Screen
Menu Screen Navigate to Menu Screen by selecting: Home Screen > Menu Edit your schedule (when scheduling Weather, 5-Day Forecast, System Information: Alerts, is enabled) or edit 1-Touch Presets Radar and Weather Demand Response, (when scheduling is disabled) Alerts. Noti cations, and About Enable/Disable Scheduling at Menu>Schedules &... -
Page 11: Settings Screen
Navigate to Settings Screen by selecting: Home Screen > Menu > Settings Manually set the Date, Time and Time User Setup Wizard Modify screen brightness, Zone. No need to update when backlight timer, screensaver, connected to Trane Home. and color theme Temperature scale, Deadband, Calibration* and Displayed Outdoor... -
Page 12: Scheduling
Schedule Screen Navigate to Scheduling Screen by selecting: Home Screen > Menu > Schedules & Presets > Custom Schedule The current day or group Press in the red or blue area, then adjust the Set Point of days is highlighted using the up and down arrows Change start or stop... - Page 13 Grouping Screen Navigate to Grouping Screen by selecting: Home Screen > Menu > Schedules & Presets > Custom Schedule > Grouping Then select the days to be grouped or removed from Select Grouping to use the same set points and times the group.
-
Page 14: Changing Periods
Changing Periods To change Periods select: Home Screen > Menu > Schedules & Presets > Custom Schedule > Select Schedule time Adjust Start and Press in the red or blue area, then adjust End Times the Set Point using the up Changing Period Start or End Times and down arrows 1. -
Page 15: Adding Periods
Adding Periods Navigate to Add Period by selecting: Home Screen > Menu > Schedules & Presets > Custom Schedule > Add Period The XL850 Smart Control is capable of adjusting 3. Choose a name for the new Period or select 6. -
Page 16: Deleting Periods
Deleting Periods Navigate to Delete Periods by selecting: Home Screen > Menu > Schedules & Presets > Custom Schedule > Delete Period Deleting Periods Select the trash can to mark a period for deletion 1. From the Schedule Screen select DELETE PERIOD, the Delete Periods Screen is Delete Periods displayed. -
Page 17: Overriding Schedules
Overriding Schedules NOTE: These functions require Scheduling to 6. Press in the STATUS AREA again to toggle Use the UP and DOWN Arrows to adjust the be enabled. To enable Scheduling, go to HOME to the Time setting. The Time will appear in Set Point to the desired temperature. -
Page 18: Configuring 1-Touch Presets
Configuring 1-Touch Presets Navigate to Configuring 1-Touch Presets by selecting: Home Screen > Menu > Schedules & Presets > 1-Touch Presets 1-Touch Presets provide predetermined Heating Cooling Set Point and Cooling Set Points for Home, Away and Sleep (select to change) time periods. - Page 19 Configuring 1-Touch Presets Configuring 1-Touch Presets 1-Touch Presets provide predetermined Heating Use the UP and DOWN Arrows to adjust the and Cooling Set Points for Home, Away and Sleep Set Point to the desired temperature. 1. To change the Cooling Set Point, select the time periods.
-
Page 20: Setting Access Restrictions
Setting Access Restrictions To select access restrictions select: Home Screen > Menu > Settings > Screen > Access Restrictions page 20 850 User Guide... -
Page 21: Trane Home
Trane Home When enrolled to a Trane Home account, the XL850 is a Z-Wave Plus™ security-enabled device that can serve as a central hub for an entire network of home automation devices from different manufacturers and product categories, including all non-battery powered devices that will act as repeaters on your network. -
Page 22: Network Setup
Network Setup There are several ways to connect the XL850 Control to a local network: Option 1. Wi-Fi connection Option 2. WPS for Wi-Fi connection Wi-Fi Step 1. Navigate Home > Menu > Settings > Network > Connect WPS Step 1. Press the WPS button on your router, then return to your XL850 to WiFI Network. - Page 23 Hidden WiFi Step 2. Enter the name of the network you would like to connect an Ethernet connection. If an Ethernet cable is connected the User to then select Next. Wizard will skip the Wireless setup screens and display the Trane Home registration screen next. 032-5091-06C-EN...
-
Page 24: Trane Home Registration
Step 1. Go to www.tranehome.com or use your mobile app to setup a Trane Home account. Download the Trane Home mobile app from the Google Play™ Store or App Store , then launch ®... - Page 25 Trane Home Registration Step 7. Return to the XL850 control and select Step 9. Read the License Agreement, then ACCEPT or NEXT. DECLINE. Step 6. The mobile app will generate a Pin Code. Record the Pin Code. Step 8. Enter the Pin Code and select NEXT.
-
Page 26: Adding/Removing Z-Wave Devices
REMOVE DEVICE button. Advanced Z-Wave Settings Select ADVANCED for advanced Z-Wave functions including unregistering your bridge from Trane Home or factory resetting your bridge. See the Advanced Z-Wave Settings section for more information. -
Page 27: Adding Z-Wave Devices (Via Mobile App)
Adding Z-Wave Devices (via mobile app) Alternatively, your XL850 allows you to add Z-Wave 4. Select Z-Wave Device. devices using the Trane Home app on your mobile device. Adding Z-Wave Devices 1. Start the mobile app. 2. Select the menu button in the top left corner. -
Page 28: Advanced Z-Wave Settings
This function is not allowed if your bridge is a primary controller with included Z-Wave devices. Unregister Removes the bridge from Trane Home. All remote control features will be disabled. Factory Reset Resets all Z-Wave information and removes all devices from the bridge. - Page 29 Notification Terminology Other Information The following terms may be used interchangeably by other devices, This device ignores Basic Set/Get manufacturers, and Trane Home. commands. Add, include, inclusion, enroll, connect Basic Command Class: This device controls other devices with OFF (0x00) and ON (0xFF) as a...
-
Page 30: Other Features
To disable Smart Optimization altogether, navigate to Home > Menu > Smart Optimization The XL850 Control is equipped with Smart When the XL850 is connected to Trane and select Disabled and select Apply. Home account, software updates will occur Optimization. By executing a series of blower... -
Page 31: Notices
Notices FCC Notice IC NOTICE instructions, may cause harmful interference to radio communications. However, there is no FCC ID: XVR-CONT8505 IC ID: 6178D-CONT8505 guarantee that interference will not occur in a INFORMATION TO USER This device complies with Industry Canada particular installation. - Page 32 For more information, please visit trane.com or tranetechnologies.com. Trane has a policy of continuous data improvement and it reserves the right to change design and specifications without notice. We are committed to using environmentally conscious print practices.