Table of Contents
Advertisement
Quick Links
Advertisement
Table of Contents

Related Manuals for Ryobi OBS1815


Summary of Contents for Ryobi OBS1815
- Page 1 FRONT PAGE OBS1815...
-
Page 2: Intended Use
shock. IMPORTANT! ■ If operating a power tool in a damp location is It is essential that you read the instructions in this manual unavoidable, use a residual current device (RCD) before assembling, operating, and maintaining the protected supply. Use of an RCD reduces the risk of product. - Page 3 power tool’s operation. If damaged, have the power use. Check for cracked and deteriorated hoses, leaks, tool repaired before use. Many accidents are caused clogged nozzles, and missing or damaged parts. Have by poorly maintained power tools. damaged product repaired before use. Many accidents are caused by poorly maintained products.
-
Page 4: Additional Safety Warnings
change clothing that are contaminated with plant control ■ Charge the battery pack in a location where the ambient chemicals. temperature is between 10°C and 38°C. WARNING! Keep spray materials away from eyes. ■ Store the battery pack in a location where the ambient If spray materials come in contact with the eyes, wash temperature is between 0°C and 40°C. -
Page 5: Symbols In This Manual
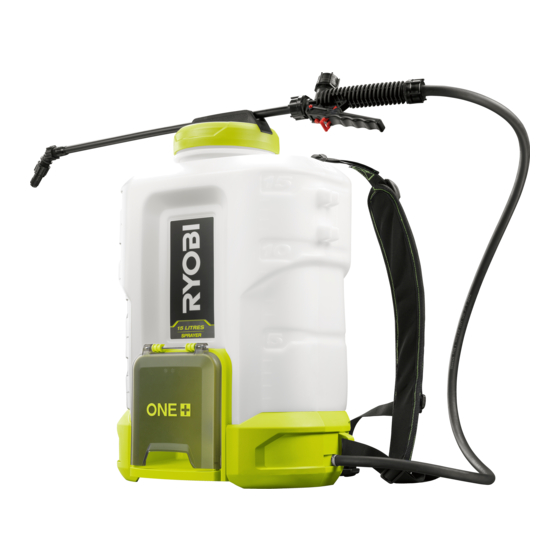
■ Store the product in a cool, dry, and well-ventilated area Keep bystanders, especially children that is inaccessible to children. Keep the product away and animals away from the work from corrosive agents such as garden chemicals and de- area. Never spray in the direction of icing salts. - Page 6 OBS1815 OBS1815 Hose Hose Trigger Trigger Lock-on latch Lock-on latch Spray wand Spray wand Tank Tank Shoulder strap Shoulder strap Battery door Battery door Elbow Elbow On/Off/ On/Off/ Variable knob Variable knob Tank lid Tank lid Basket filter Basket filter Operator’s manual...
- Page 7 Always wear safety goggles or safety Insert the spray wand into the trigger Install either the flat fan nozzle or cone glasses with side shields when handle. Slide the nut onto the threaded spray nozzle and tighten. operating the product. Wear non-skid, coupling and hand tighten securely.
- Page 8 Operating the Installing the elbow p.11 and nozzle product Cleaning the Storing the p.13 p.15 product product...
-
Page 9: Operating The Product
OPERATING THE PRODUCT WARNING: Do not smoke, eat, or drink while using the product. Do not spray in the direction of people or animals. Always spray downwind. 1. Raise the battery cover, and install the battery pack. Make sure that the latches on each side of the battery pack click in place. - Page 10 4. Use the backpack sprayer with either the cone spray nozzle (left) or flat fan nozzle (right). NOTE: The cone spray nozzle can be adjusted from a stream to a scatter spray. ■ For a scatter spray, turn the nozzle clockwise.
- Page 11 INSTALLING ELBOW NOZZLE 1. Turn off the product. 2. Loosen and remove the installed nozzle. 3. Install and tighten the elbow. 4. Install either the flat fan nozzle (left) or cone spray nozzle (right). 5. Install and tighten the nozzle. Operation...
- Page 12 NOTE: The cone spray nozzle can be adjusted from a stream to a scatter spray. ■ For a scatter spray, turn the nozzle clockwise. ■ For a stream spray, turn the nozzle counterclockwise. NOTE: The flat fan nozzle provides a fan spray.
-
Page 13: Cleaning The Product
CLEANING THE PRODUCT 1. Remove the battery pack. Raise the battery cover then press the latches on both sides to release the battery pack and remove it from the product. 2. Remove the tank cover. 3. Drain the contents of the tank to a suitable container. - Page 14 6. Turn on the product. 7. Squeeze the trigger to start the flow of liquid. NOTE: Spray until the tank has been completely emptied. 8. Wipe the outside of the tank with a clean, dry cloth. Maintenance...
-
Page 15: Storing The Product
STORING THE PRODUCT 1. Remove the battery pack. Raise the battery cover then press the latches on both sides to release the battery pack and remove it from the product. 2. Attach the spray wand into the holder until it snaps into place. 3. -
Page 16: Product Specifications
BCL14181H, BCL14183H, BCS618, RC18627, Compatible RC18627U, RC18150, RC18150U, RC18120, chargers RC18115, RC18118C, BCL1418IV REPLACEMENT PARTS Outlet filter 316757001 Inlet filter 541716001 Wand and nozzle assembly 313969003 NOTE: Visit your local special orders desk or contact RYOBI Customer Service for replacement parts. - Page 20 31 Gilby Road, Mount Waverley, VIC 3149 Melbourne, Australia Techtronic Industries N.Z. Limited Unit C, 70 Business Parade South, Highbrook, Auckland 2013, New Zealand RYOBI is a trade mark of Ryobi Limited, and is used under license. © 2021 Techtronic Cordless GP xxxxxxxxxxxxx...