
Related Manuals for HYOSUNG NH 2700


Summary of Contents for HYOSUNG NH 2700
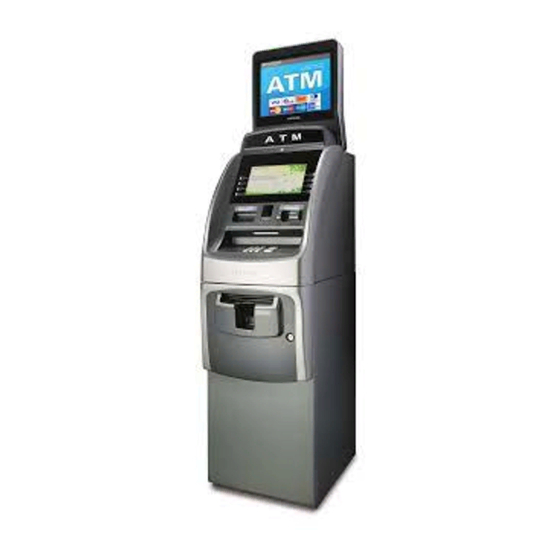
- Page 1 Toll Free: (866) 5ATM-INC Main Office: (248) 932-5400 24/7 Technical Support: (866) 638-5918 Fax: (248) 932-5404 Hyosung NH2700 Manual...
-
Page 2: Table Of Contents
NH 2100T Table of Contents 1. Introduction 1.1 About NH 2100T ·········································································· 1-2 1.2 Features ························································································ 1-2 1.3 What is in this Manual ·································································· 1-3 1.4 Terminologies ··············································································· 1-4 2. Safety Precautions 2.1 Overview ······················································································· 2-2 2.2 Description of Precaution Symbols ············································... - Page 3 NH 2100T 5. Operator Functions 5.1 Basic System Operation ································································ 5-2 5.2 Settlement ··················································································· 5-5 5.3 Journal ················································································· 5-11 5.4 Report ·········································································· 5-19 5.5 Diagnostics ·········································································· 5-27 5.6 Customer Setup ·········································································· 5-39 5.7 System Setup ·········································································· 5-50 5.8 Host Setup ··········································································...
-
Page 4: Introduction
NH 2100T 1. Introduction Chapter 1. Introduction... -
Page 5: About Nh 2100T
NH 2100T 1. Introduction 1. Introduction 1.1 About the NH 2100T The NH 2100T (Through-The-Wall Type) is designed to meet the higher transaction volumes and the low maintenance components. Whether installed as a walk-up or drive- through, NH 2100T offers solid, weatherized construction while its compact architecture allows flexibility in mounting. -
Page 6: What Is In This Manual
This NH 2100T Manual contains all information needed for normal operational use. This manual contains Unit Specifications, Opening & Closing Procedures, Operator Functions(Supervisor Screen), Error Recovery, etc. Some of the information in this manual may be subsequently updated based on the customer’s needs or the improvement by Nautilus Hyosung. -
Page 7: Terminologies
NH 2100T 1. Introduction 1.4 Terminologies ◈ CE : Control Electronics ◈ Earphone Jack : Voice Converter for Visually Disabled Persons (ADA) ◈ CDU : Cash Dispensing Unit ◈ EPP : Encrypted PIN Pad ◈ ISO: International Standard Organization ◈ ISO 1: IATA(International Air Transaction Association) ◈... -
Page 8: Safety Precautions
NH 2100T 2. Safety Precautions Chapter 2. Safety Precautions... -
Page 9: Overview
NH 2100T 2. Safety Precautions 2. Safety Precautions 2.1 Overview Common Safety Precaution Safety Precautions outlined this manual provide information on safe and proper handling of the product. Non-compliance of the safety precautions may result in injury or damage to the product. This precaution symbol with sample term tells you safety warnings during equipment handlings. -
Page 10: Description Of Precaution Symbols
NH 2100T 2. Safety Precautions 2.2 Description of Precaution Symbols Symbol Description Electrical Shock Warning • Do not remove cover. Only a maintenance engineer in allowed to open the cover. • Do not touch. You may receive electric shock. • Make sure to turn off the power when servicing the equipment. High Temperature Warning •... - Page 11 NH 2100T 2. Safety Precautions Symbol Description Unplug the Equipment • Stop using the equipment immediately if it smokes, emits an unusual smell, makes abnormal sounds, or if liquids or other foreign materials enter the equipment. • If the above-mentioned abnormalities occur, immediately turn off the power, unplug the equipment and contact the service center.
-
Page 12: Hardware Specifications
NH 2100T 3. Hardware Specifications Chapter 3. Hardware Specifications 3- 1... -
Page 13: Dimensions
NH 2100T 3. Hardware Specifications 3. Hardware Specifications 3.1 Dimensions Fig. 3.1 Dimensions 3- 2... -
Page 14: Component Name And Locations
NH 2100T 3. Hardware Specifications 3.2 Component Name and Locations Component Location (Front) ① ④ ② ⑤ ⑥ ⑦ ③ ⑧ 3.2 Component Location (Front) Fig. 1. Lighted Top Panel 5. Flicker 2. LCD & Customer Keypad 6. Card Reader Slot 3. - Page 15 NH 2100T 3. Hardware Specifications Component Location (Back) ① ④ ⑤ ② ③ 3.3 Component Location (Back) Fig. 1. Slip Printer(SPR) 4. Supervisor Panel(T-SPL) 2. Cash Dispenser Unit(CDU) 5. System Door 3. Vault Door 3- 4...
-
Page 16: Lcd & Customer Keypad
NH 2100T 3. Hardware Specifications 3.3 LCD & Customer Keypad Fig. 3.4 LCD & Customer Keypad Screen Size : 5.7″ Mono LCD Resolution : 320 × 240 Display Characters : 40 × 15 (Standard Character) Keypad 10 Alphanumeric ,3,4, CANCEL, CLEAR, ENTER, BLANK Keypads 8 Function Keys ADA Port Voice assisted operation available through the headphone jack on the front bezel... -
Page 17: Cdu (Cash Dispensing Unit)
NH 2100T 3. Hardware Specifications 3.4 CDU (Cash Dispensing Unit) Fig. 3.5 CDU Cash Dispenser Unit Friction feed cash dispensing unit Dispensing speed : 7 notes/second Capacity of 2,000 new notes Reject bin with capacity of 200 notes Cash tray sensors Slides out for easy service Double detection/Skewed note sensors 3- 6... -
Page 18: Spr (Slip Printer/Receipt Printer)
NH 2100T 3. Hardware Specifications 3.5 SPR (Slip Printer/Receipt Printer) Fig. 3.6 SPR Receipt Printer 3 1/8" thermal printer 100 mm/sec print speed Automatic paper loading and cutting Paper out sensor Accommodates a 7" roll & slides out for easy service See Appendix C : RECEIPT PAPER SEPECIFICATIONS 3- 7... -
Page 19: Mcu (Magnetic Card Unit)
NH 2100T 3. Hardware Specifications 3.6 MCU (Magnetic Card Unit) Fig. 3.7 MCU Magnetic Card Unit Dip type Card Reader (ISO Track 1 & 2) Card read timing : Ejection Readable ejection speed : 6 inches ~ 39.3 inches/second MTBF : 1 million passes See Appendix D : MAGNETIC CARD SPECIFICATIONS ☞... -
Page 20: Main Control Board
NH 2100T 3. Hardware Specifications 3.7 Main Control Board Fig. 3.8 Main Control Board Modem : 56kbps dial-up modem (standard) Electronic Journal : Max 2,000 transactions Battery back-up for set-up parameters Real Time Clock 3- 9... -
Page 21: Operating Environment
NH 2100T 3. Hardware Specifications 3.8 Operating Environment Power Requirements 115 Vac ±10% 3.0A 60Hz , 350 Watt 230 Vac ±10% 1.5A 50Hz , 350 Watt Power Connections The NH 2100T ATM must be connected to a dedicated power circuit. This circuit must consist of LINE, NEUTRAL and GROUND leads connected directly to the power circuit breaker panel. -
Page 22: Operating Instructions
NH 2100T 4. Operating Instructions Chapter 4. Operating Instructions 4- 1... -
Page 23: Opening And Closing The Doors
NH 2100T 4. Operating Instructions 4. Operating Instructions 4.1 Opening and Closing the Doors Opening the Doors 1) Turn the key in 90 degrees clockwise and then open the door. 2) Enter the password. (Default : 123456) 3) Turn the handle clockwise and open the vault door. - Page 24 NH 2100T 4. Operating Instructions Closing the Doors 1) Close the Vault Door and turn the handle counterclockwise. The Vault Door will be locked in 5~6 seconds automatically. 2) Close the door and turn the key counterclockwise. Fig.4.1.2 Closing the Security Door 4- 3...
-
Page 25: Replenishing The Cash Cassette
NH 2100T 4. Operating Instructions 4.2 Replenishing the Cash Cassette 1) With one hand holding the cassette handle and the other hand supporting cash cassette from bottom, pull it up and out carefully. 2) Place the cash cassette on a flat level platform turn... - Page 26 NH 2100T 4. Operating Instructions NOTE : 1. Fan the notes so that the notes are not sticking together. 2. Remove all notes with holes or notes that are torn. 3. Unfold the folded notes. 4. Place the notes correctly. 4- 5...
-
Page 27: Emptying The Reject Box
NH 2100T 4. Operating Instructions 4.3 Emptying the Reject Box 1) Insert the reject box key, turn it clockwise, and pull box lid. 2) Take bills in reject box Fig. 4.3 Emptying the reject box 4- 6... -
Page 28: Removing Bills
NH 2100T 4. Operating Instructions 4.4 Removing Bills 1) Pull the Cash Dispenser Unit forward while pressing the highlighted green button on the bottom of the system. 2) Open the cover. 3) Check bills in the dispensing part of the system. 4- 7... - Page 29 NH 2100T 4. Operating Instructions 4) Take it out by using the side of the belt. Fig. 4.4 Note jam removal 4- 8...
-
Page 30: Loading The Receipt Paper
NH 2100T 4. Operating Instructions 4.5 Loading the Receipt Paper 1) Pull the Slip Printer Unit forward while pressing the highlighted green button on the bottom of the system 2) Put Receipt paper on the guide with the printed surface facing upward. ※... - Page 31 NH 2100T 4. Operating Instructions 4- 10...
-
Page 32: Receipt(Slip) Paper Jam Removal
NH 2100T 4. Operating Instructions 4.6 Receipt(Slip) Paper Jam Removal 1) Take down the guide and lift the head open lever to the down direction. 2) Remove the receipt paper jammed inside and then set the receipt paper again. 3) Place the printer head lever to up position. -
Page 33: Operator Functions
NH 2100T 5.Operator Functions Chapter 5. Operator Functions... -
Page 34: Basic System Operation
NH 2100T 5.Operator Functions 5. Operator Functions 5.1 Basic System Operation Entering to Operator Function Menu 1) Change to supervisor mode by pressing highlighted switch. 2) Enter the Operator Password and press. If the wrong password is entered, the screen will be back to “ENTER PASSWORD”... - Page 35 NH 2100T 5.Operator Functions How to Use Keypad This section will explain the basic operation of the Keypad. Fig. 5.2.1 Keypad Shift Status Space Upper Alpha Space Lower Don’t Numeric < ‘ care > “ Don’t The character on the current cursor position on the Table care screen will be selected.
- Page 36 NH 2100T 5.Operator Functions How to Enter the Character The Keypad Character Table of Fig. 5.2.2 will appear on the bottom of the screen in all keypad input screens. F5 key gives the option for Alpha or Numeric, Table mode. Default is Alpha. F6 key gives the option for Upper or Lowercase characters.
-
Page 37: Settlement
NH 2100T 5.Operator Functions 5.2 Settlement The Settlement Function of the Operator Function includes the following : DAY TOTAL / TRIAL DAY TOTAL CASSETTE TOTAL / TRIAL CASSETTE TOTAL ADD CASSETTE #1... - Page 38 NH 2100T 5.Operator Functions 5.2.1 Day Total / Trial Day Total 1) Press ‘SETTLEMENT’ button in the OPERATOR FUNCTION menu. 2) Press ‘DAY TOTAL’ / ‘TRIAL DAY TOTAL’ in the SETTLEMENT menu. 3) After the information is downloaded from the processor, the Day Total / Trial Day Total information will be printed on receipt paper.
- Page 39 NH 2100T 5.Operator Functions Fig. 5.4 A sample print out of DAY TOTAL and TRIAL DAY TOTAL Function Description The DAY TOTAL includes all information of the ATM terminal totals and the host totals. If the host can not be connected, an “ERROR” message will be displayed and only the ATM terminal totals will be printed without verification with the host.
- Page 40 NH 2100T 5.Operator Functions 5.2.2 Cassette Total / Trial Cassette Total 1) Press ‘SETTLEMENT’ button in the OPERATOR FUNCTION menu. 2) Press ‘(TRIAL) CASSETTE TOTAL’ button in the SETTLEMENT menu. 3) The (Trial) Cassette Total information will be printed on receipt paper. Fig.
- Page 41 NH 2100T 5.Operator Functions Fig. 5.6 A sample print out of CASSETTE TOTAL and TRIAL CASSETTE TOTAL Function Description The CASSETTE TOTAL includes the total loaded number of bills in the cassette, the normal dispensed amount, the number of rejected notes, the test dispensed amount and the number of remaining notes, etc.
- Page 42 NH 2100T 5.Operator Functions 5.2.3 Add Cassette #1 1) Press ‘ADD CASSETTE #1’ button in the SETTLEMENT menu. 2) Enter the number of bills loaded in the cassette. And the number of bills will be accumulated. NOTE : Enter the number of bills, NOT the amount of cash.
-
Page 43: Journal
NH 2100T 5.Operator Functions 5.3 Journal The Journal Function of the Operator Function includes the following: PRINT JOURNAL LAST X PRINT VIEW JOURNAL CLEAR JOURNAL CLEAR TRANSACTION SEQUENCE NUMBER 5-11... - Page 44 NH 2100T 5.Operator Functions 5.3.1 Print Journal 1) Press ‘JOURNAL’ button in the OPERATOR FUNCTION menu. 2) Select ‘PRINT JOURNAL’ in the JOURNAL menu. 3) Wait while the Journal data is being printed. If the GOOD message appears, press “ENTER”. Fig.
- Page 45 NH 2100T 5.Operator Functions Fig. 5.9 A sample print out of PRINT JOURNAL Function Description The PRINT JO URNAL function is used to automatically print out any journal entries collected since the last time this command was operated. 5-13...
- Page 46 NH 2100T 5.Operator Functions 5.3.2 Last X Print 1) Press ‘JOURNAL’ button in the OPERATOR FUNCTION menu. 2) Press ‘LAST X PRINT’ button in the JOURNAL menu. 3) Press ‘PRINT’ / ‘CONDENSED JOURNAL’ button in the LAST X PRINT menu. 4) Enter the number of records to be printed.
- Page 47 NH 2100T 5.Operator Functions 5) If the GOOD message appears, press “ENTER”. Fig. 5.10 LAST X PRINT(PRINT/CONDENSED PRINT) Function Description The LAST X PRINT(PRINT) function is used to reprint records for which the paper trail has been lost or destroyed. Reprint certain range of journal data specified by X record after they have been printed or cleared.
- Page 48 NH 2100T 5.Operator Functions 5.3.3 View Journal 1) Press ‘JOURNAL’ button in the OPERATOR FUNCTION menu. 2) Press ‘VIEW JOURNAL’ button in the JOURNAL menu. 3) You may see the Journal Data which will be displayed on the screen. Fig. 5.11 VIEW JOURNAL Function Description The VIEW JOURNAL function is used to display the journal data in the LCD screen.
- Page 49 NH 2100T 5.Operator Functions 5.3.4 Clear Journal 1) Press ‘CLEAR JOURNAL’ button in the JOURNAL menu. The pointer of Journal data to print will be reset. CLEAR JOURNAL ? YES OR NO Fig. 5.12 CLEAR JOURNAL Function Description The CLEAR JOURNAL function is used to mark all records not printed in the journal. Journal records are not erased.
- Page 50 NH 2100T 5.Operator Functions 5.3.5 Clear TRAN. Sequence No. 1) Press ‘CLEAR TRAN. SEQUENCE NO.’ button in the JOURNAL menu. Transaction Sequence Number will be reset to ‘1’ if “YES” is pressed. It will not be reset if “NO” is pressed. CLEAR SEQUENCE # ? YES OR NO Fig.
-
Page 51: Report
NH 2100T 5.Operator Functions 5.4 Report The Report function of the Operator Function includes the following : ERROR CODE MEMORY DUMP S/W VERSION PRINT ALL SETUP ERROR SUMMARY STATISTICS REJECT ANALYSIS 5-19... - Page 52 NH 2100T 5.Operator Functions 5.4.1 Error code 1) Press ‘REPORT’ button in the OPERATOR FUNCTION menu. 2) Press ‘ERROR CODE’ button in the REPORT menu. 3) The Error code, description and corrective action will be displayed. Fig. 5.14 ERROR CODE Function Description The ERROR CODE includes all error codes, descriptions and corrective actions.
- Page 53 NH 2100T 5.Operator Functions 5.4.2 S/W Version 1) Press ‘S/W VERSION’ button in the REPORT menu. 2) Software Version will be displayed. To print the Software Version information, press “ENTER”. 3) Software version will be printed from the receipt printer. Fig.
- Page 54 NH 2100T 5.Operator Functions Fig. 5.17 A sample print out of S/W Version Print Function Description The S/W VERSION function is used to display each software version of system. 5-22...
- Page 55 NH 2100T 5.Operator Functions 5.4.3 Print All Setup 1) Press ‘PRINT ALL SETUP’ button in the REPORT menu. 2) All setup parameters will be printed from the Receipt Printer. If the GOOD message appears, press “ENTER”. Fig. 5.18 PRINT ALL SETUP Function Description The PRINT ALL SETUP function is used to print all parameters of the system.
- Page 56 NH 2100T 5.Operator Functions 5.4.4 Error Sum 1) Press ‘ERROR SUM’ button in the REPORT menu. 2) The error summary data will be displayed. Press “PRINT” key to print the Error Sum Data. Fig. 5.19 ERROR SUMMARY Function Description The ERROR SUM function is used to display the error code and number of times the error occurred since the last ERROR SUM CLEAR.
- Page 57 NH 2100T 5.Operator Functions 5.4.5 Statistics 1) Press ‘STATISTICS’ button in the Report Menu. 2) Statistics data will be displayed. Press “ENTER” key to print data. Fig. 5.20 STATISTICS Function Description The STATISTICS displays all transaction statistics data. To clear the data, press “CLEAR”. 5-25...
- Page 58 NH 2100T 5.Operator Functions 5.4.6 Reject Analysis 1) Press ‘REJECT ANALYSIS’ button in the REPORT menu. 2) Reject Analysis data will be displayed. Press “PRINT” key to print data. Fig. 5.21 REJECT ANALYSIS Function Description The REJECT ANALYSIS function includes the analysis for the reason of the note reject and it is useful for the preventive maintenance.
-
Page 59: Diagnostics
NH 2100T 5.Operator Functions 5.5 Diagnostics The Diagnostic function of Operator Function includes the following: INITIALIZE RECEIPT PRINTER CASH DISPENSER MODEM CARD SCAN KEY MATRIX SENSOR AGING 5-27... - Page 60 NH 2100T 5.Operator Functions Changing the TEST COUNT The TEST COUNT means the number of test. 1) If you want to change the test count, press “CLEAR” then input the test count and press “ENTER”. 2) If you input ‘0 (zero)’, the test count will be changed to unlimited.
- Page 61 NH 2100T 5.Operator Functions 5.5.1 Initialize 1) Press ‘DIAGNOSTICS’ button in the OPERATOR FUNCTION. 2) Press ‘INITIALIZE’ button in the DIAGNOSTICS menu. All units will be initialized. 3) When the ATM is in the normal state, the GOOD message will be displayed. If not, error code will be displayed on LCD screen.
- Page 62 NH 2100T 5.Operator Functions 5.5.2 Receipt Printer 1) Press ‘RECEIPT PRINTER’ button in the DIAGNOSTICS menu. Test String will be printed from the receipt printer. 2) When the ATM is in the normal state, the GOOD message will be displayed. If not, error code will be displayed on LCD screen.
- Page 63 NH 2100T 5.Operator Functions Fig. 5.25 A Sample of the print out from RECEIPT PRINTER TEST Function Description The RECEIPT PRINTER has the function of printing a sample receipt and cutting out one receipt. 5-31...
- Page 64 NH 2100T 5.Operator Functions 5.5.3 Cash Dispenser 1) Press the ‘CASH DISPENSER’ button in the DIAGNOSTICS menu. The CASH DISPENSER test will be performed. 2) When the ATM is normal state, the GOOD message will be displayed. Fig. 5.26 CASH DISPENSING UNIT Function Description The CASH DISPENSER has the function of testing the dispense mechanisms.
- Page 65 NH 2100T 5.Operator Functions 5.5.4 Modem 1) Press ‘MODEM’ button in the DIAGNOSTICS menu. 2) The MODEM TEST will be displayed. Fig. 5.27 MODEM Function Description The MODEM has the function of testing the modem for any errors. When the phone number input is displayed after pressing the TEST DIAL key, input the desired phone number.
- Page 66 NH 2100T 5.Operator Functions 5.5.5 Card Scan 1) Press ‘CARD SCAN’ button in the DIAGNOSTICS menu. And if the display is ready, please insert and remove your card quickly. 2) The card data will be displayed. Fig. 5.28 CARD SCAN Function Description The CARD SCAN has the function of testing the magnetic stripe reader and the card itself.
- Page 67 NH 2100T 5.Operator Functions 5.5.6 Key Matrix 1) Press 'KEY MATRIX' button in the DIAGNOSTICS menu. 2) Select the desired key to be tested and the key being pressed will blink on the display. Fig. 5.29 KEY MATRIX Function Description The KEY MATRIX has the function of testing the key pad.
- Page 68 NH 2100T 5.Operator Functions 5.5.7 Sensor 1) Press 'SENSOR' button in the DIAGNOSTICS menu. 2) Press a button you want to check in the SENSOR menu. Fig. 5.30 SENSOR Main Screen 5-36...
- Page 69 NH 2100T 5.Operator Functions CDU SENSOR 1) All sensor data of cash dispenser will be displayed. Each CDU sensor status will be changed by turning the sensors on and off. Fig. 5.31 CDU SENSOR Screen OTHER SENSOR 1) All sensor data will be displayed. Each sensor status will be changed by turning the sensors on and off.
- Page 70 NH 2100T 5.Operator Functions 5.5.8 Aging 1) Select ‘AGING’ in the ‘DIAGNOSTICS’ menu. 2) All units will be tested upto count you set. When you press “CANCEL” key, the testing will be stopped immediately. Fig. 5.34 AGING Function Description The AGING function is only used at the factory. 5-38...
-
Page 71: Customer Setup
NH 2100T 5.Operator Functions 5.6 CUSTOMER SETUP The Customer Setup function of the OPERATOR MENU includes the following : CHANGE MESSAGE BIN LIST SURCHARGE MODE ADVERTISEMENT OPTIONAL FUNCTION OPTIONAL SETTING 5-39... - Page 72 NH 2100T 5.Operator Functions 5.6.1 Change message WELCOME MESSAGE 1) Press 'CUSTOMER SETUP' button in the OPERATOR FUNCTION menu. 2) Select the 'CHANGE MESSAGE' in the CUSTOMER SETUP menu. 3) Select the 'WELCOME MESSAGE' in the CHANGE MESSAGE menu. 5-40...
- Page 73 NH 2100T 5.Operator Functions 4)You can edit the welcome message. Please refer to “How to use keypad”(Chapter 5.1 Basic System Operation). Fig. 5.35 WELCOME MESSAGE Function Description The WELCOME MESSAGE function is used to edit the welcome text in “INSERT AND REMOVE YOUR CARD QUICKLY”...
- Page 74 NH 2100T 5.Operator Functions RECEIPT HEADER 1) Select the 'CHANGE MESSAGE' in the CUSTOMER SETUP menu. 2) Select the ‘RECEIPT HEADER’ in the CHANGE MESSAGE menu. 3) You can edit the RECEIPT HEADER. Please refer to “How to use keypad”(Chapter 5.1 Basic System Operation).
- Page 75 NH 2100T 5.Operator Functions 5.6.2 Bin List 1) Select the ‘BIN LIST' in the CUSTOMER SETUP menu. 2) Select BIN LIST you want to register. 3) The BIN LIST menu will be displayed. Fig. 5.37 BIN LIST Function Description The BIN LIST function is used to register bank lists and give bin codes not to surcharge the additional fee.
- Page 76 NH 2100T 5.Operator Functions 5.6.3 Surcharge mode 1) Select the 'SURCHARGE MODE' button in the CUSTOMER SETUP menu. 2) The SURCHARGE MODE menu will be displayed. 3) If you press the ENABLE key, it will be enabled as displayed. 4) If you press the AMOUNT key, you can enter the desired surcharge amount.
- Page 77 NH 2100T 5.Operator Functions 5) If you press the SURCHARGE OWNER key, you can enter the owner’s name with keypad. Please refer to “How to use keypad”(Chapter 5.1 Basic System Operation). Fig. 5.38 Surcharge Mode Function Description The SURCHARGE MODE includes the function to enable or disable the surcharge warning screen, setting the surcharge amount and surcharge owner.
- Page 78 NH 2100T 5.Operator Functions 5.6.4 Advertisement 1) Select the 'ADVERTISEMENT' button in the CUSTOMER SETUP menu. 2) The ADVERTISEMENT menu will be displayed. 3) If you press the PRIMARY SCREEN key, the PRIMARY SCREEN will be displayed. And select the 'SCREEN #1' in the PRIMARY SCREEN MENU.
- Page 79 NH 2100T 5.Operator Functions 5) Select the 'SCREEN TITLE key' in the PRIMARY SCREEN MENU. 6) If you press the SCREEN TITLE key, you can enter the desired advertisement message. Please refer to “How to use keypad”(Chapter 5.1 Basic System Operation). 7) If you press the TIMER key, you can input the desired refreshing timer of advertisement text.
- Page 80 NH 2100T 5.Operator Functions 5.6.5 Optional Function 1) Select the 'OPTIONAL FUNCTION' button in the CUSTOMER SETUP menu. PRE-DIALING 1) Select the ‘PRE DIALING’ in the OPTIONAL FUNCTION menu. 2) If you press the PRE DIALING key, you can change the desired pre-dialing mode.
- Page 81 NH 2100T 5.Operator Functions 5.6.6 Optional Setting 1) Select the ‘OPTIONAL SETTING’ button in the ‘CUSTOMER SETUP’ menu. 2) ATM will not go to out of service mode until the number of error is exceeded the C0047 RETRY COUNT number. Default number is 3.
-
Page 82: System Setup
NH 2100T 5.Operator Functions 5.7 System setup The SYSTEM SETUP function of the OPERATOR FUNCTION includes the following: SET CLOCK ISO #1, #2, #3 EN/DISABLE LANGUAGE EN/DISABLE CHANGE PASSWORD MODEM MODEM SETUP DIAL MODE MODEM SPEED SPEAKER OUT INITIAL STRING MODEM TEST RMS RING COUNT SPEAKER VOLUME... - Page 83 NH 2100T 5.Operator Functions 5.7.1 Set clock Accessing the SET CLOCK 1) Select the ‘SYSTEM SETUP’ in the OPERATOR FUNCTION menu. 2) Select the ‘SET CLOCK’ in the SYSTEM SETUP menu. 3) The SET CLOCK menu will be displayed. Fig. 5.41 SET CLOCK Function Description The SET CLOCK function is used to set the date and clock.
- Page 84 NH 2100T 5.Operator Functions 5.7.2 ISO #1, #2, #3 En/Disable Accessing the ISO #1, #2, #3 EN/DISABLE 1) Select the ‘SYSTEM SETUP’ in the OPERATOR FUNCTION menu. 2) Select the ‘ISO #1, #2, #3 EN/DISABLE’ in the SYSTEM SETUP menu. 3) If you press the ISO #1, #2, #3 key, it will be changed to be enabled or disabled.
- Page 85 NH 2100T 5.Operator Functions 5.7.3 Language en/disable Accessing the LANGUAGE EN/DISABLE 1) Select the ‘SYSTEM SETUP’ in the OPERATOR FUNCTION menu. 2) Select the ‘LANGUAGE EN/DISABLE’ in the SYSTEM SETUP menu. 3) If you press the ENGLISH or SPANISH or KOREAN or JAPANSE key, it will be changed to be enabled or disabled.
- Page 86 NH 2100T 5.Operator Functions 5.7.4 Change password Accessing the CHANGE PASSWORD 1) Select ‘SYSTEM SETUP’ in OPERATOR FUNCTION menu. 2) Select ‘CHANGE PASSWORD’ in ‘SYSTEM SETUP’ menu. 3) Select ‘MASTER PASSWORD’, ‘OPERATOR PASSWORD’ or ‘SERVICE PASSWORD’ in CHANGE PASSWORD. And enter the current Operator Password. Fig.
- Page 87 NH 2100T 5.Operator Functions 4) Enter the new password you want to change. 5) Enter the new password again. 6) The password will be changed. Fig.5.44 CHANGE PASSWORD Function Description The CHANGE PASSWORD function is used to change the Operator Password. The factory default Operator Password is “222222”.
- Page 88 NH 2100T 5.Operator Functions 5.7.5 Modem 5.7.5.1 MODEM SETUP A) DIAL MODE Accessing the DIAL MODE 1) Select ‘SYSTEM SETUP’ in OPERATOR FUNCTION menu. 2) Select ‘MODEM’ in SYSTEM SETUP menu. 3) Select ‘MODEM SETUP’ in MODEM menu. 5-56...
- Page 89 NH 2100T 5.Operator Functions 4) When DIAL MODE is pressed , it will be toggled to DTMF or PULSE. Fig. 5.45 DIAL MODE Function Description The DIAL MODE function is used to change the Dial Mode to touch-tone mode(DTMF) or rotary mode(PULSE).
- Page 90 NH 2100T 5.Operator Functions B) Modem speed Accessing the MODEM SPEED 1) Select ‘SYSTEM SETUP’ in OPERATOR FUNCTION menu. 2) Select ‘MODEM’ in SYSTEM SETUP menu. 3) Select ‘MODEM SETUP’ in MODEM menu. 4) Select ‘MODEM SPEED’ in MODEM SETUP menu.
- Page 91 NH 2100T 5.Operator Functions 5) The Modem Speed can be changed from 300bps up to 56,000bps. Fig. 5.46 MODEM SPEED Function Description The MODEM SPEED function is used to set the modem connecting speed with the host. The factory default speed is 2400bps. 5-59...
- Page 92 NH 2100T 5.Operator Functions C) Speaker out Accessing the SPEAKER OUT 1) Select ‘SYSTEM SETUP’ in OPERATOR FUNCTION menu. 2) Select ‘MODEM’ in SYSTEM SETUP menu. 3) Select ‘MODEM SETUP’ in MODEM menu. 4) Select ‘SPEAKER OUT’ in MODEM SETUP menu.
- Page 93 NH 2100T 5.Operator Functions Function Description The SPEAKER OUT function is used to change the speaker out on or off at the modem dial connection. Service Personnel can check the dialing if it is normal or abnormal with this function in the speaker out on state. The factory default is OFF. 5-61...
- Page 94 NH 2100T 5.Operator Functions D) Initial string Accessing the INITIAL STRING 1) Select ‘SYSTEM SETUP’ in OPERATOR FUNCTION menu. 2) Select ‘MODEM’ in SYSTEM SETUP menu. 3) Select ‘MODEM SETUP’ in MODEM menu. 4) Select ‘INITIAL STRING’ in MODEM SETUP menu.
- Page 95 NH 2100T 5.Operator Functions 5) Enter the desired modem initial string. Please refer to 5.1 Basic Operation (How to use keypad). Fig.5. 48 INITIAL STRING Function Description The INITIAL STRING function is used to edit the Modem Initial String when the special circumstances require a nonstandard Modem Initial String.
- Page 96 NH 2100T 5.Operator Functions 5.7.5.2 Modem test Accessing the MODEM TEST 1) Select ‘SYSTEM SETUP’ in OPERATOR FUNCTION menu 2) Select ‘MODEM’ in SYSTEM SETUP menu. The modem will be started to test. 3) Select ‘MODEM TEST’ in MODEM menu. 4) If the GOOD message appears, press “ENTER”.
- Page 97 NH 2100T 5.Operator Functions Function Description The MODEM TEST function is used to perform the modem reset test. When the error is occurred, contact the Service Personnel. 5-65...
- Page 98 NH 2100T 5.Operator Functions 5.7.6 RMS ring count Accessing the RMS RING COUNT 1) Select ‘SYSTEM SETUP’ in OPERATOR FUNCTION menu. 2) Select ‘RMS RING COUNT’ in SYSTEM SETUP menu. 3) Enter RMS RING COUNT and press ‘ENTER’. Fig.5. 50 RMS RING COUNT Function Description When RMS calls to ATM, ATM will answer to RMS after ringing as RMS RING COUNT.
- Page 99 NH 2100T 5.Operator Functions 5.7.7 Speaker volume Accessing the SPEAKER VOLUME 1) Select ‘SYSTEM SETUP’ in OPERATOR FUNCTION menu. 2) Select ‘SPEAKER VOLUME’ in SYSTEM SETUP menu. 3) Set your speaker volume with using , key. Fig.5. 51 SPEAKER VOLUME Function Description The SPEAKER VOLUME function is used to set the speaker volume.
- Page 100 NH 2100T 5.Operator Functions 5.7.8 Device Setup 5.7.8.1 CDU Setup A) Accessing CDU Setup 1) Select ‘SYSTEM SETUP’ in OPERATOR FUNCTION menu. 2) Select ‘DEVICE SETUP’ in SYSTEM SETUP FUNCTION menu. Fig.5. 52 CDU Setup Main screen B) Changing Country Code in CDU 1) Press ‘COUNTRY’...
- Page 101 NH 2100T 5.Operator Functions C) Changing MB TYPE in CDU 1) Press ‘MB TYPE’ button. The type of CDU will be changed. MB Type is for the front/rear service, shutter Existing or not and so on. Fig. 5.54 MB Type Setup D) Changing CASSETTE VOLUME in CDU 1) Press ‘CASSETTE VOLUME’...
-
Page 102: Host Setup
NH 2100T 5.Operator Functions 5.8 Host setup The HOST SETUP function of the OPERATOR FUNCTION includes the following: KEY MANAGEMENT MASTER KEY INDEX CHECK MASTER KEY EDIT MASTER KEY SET MASTER KEY SERIAL NUMBER TELEPHONE NUMBER TERMINAL NUMBER HEALTH CHECK MESSAGE CONNECT TIMER 60 SECOND REMOTE MONITOR RMS EN/DISABLE... - Page 103 NH 2100T 5.Operator Functions 5.8.1 Key management 5.8.1.1 Master key index Accessing the MASTER KEY INDEX 1) Select ‘HOST SETUP’ in OPERATOR FUNCTION menu. 2) Select ‘KEY MANAGEMENT’ in HOST SETUP menu. 3) Select the ‘MASTER KEY INDEX’ in the KEY MANAGEMENT menu.
- Page 104 NH 2100T 5.Operator Functions 5.8.1.2 Check master key Accessing the CHECK MASTER KEY 1) Select ‘HOST SETUP’ in OPERATOR FUNCTION menu. 2) Select ‘KEY MANAGEMENT’ in HOST SETUP menu. 3) Select ‘CHECK MASTER KEY’ in KEY MANAGEMENT menu. 4) It will display the check sum of all injected master key.
- Page 105 NH 2100T 5.Operator Functions Function Description The CHECK MASTER KEY function is used to display the check sum of all injected Master Key. The master key which is displayed as “_______” means it is in empty state. 5-73...
- Page 106 NH 2100T 5.Operator Functions 5.8.1.3 Edit master key Accessing the EDIT MASTER KEY 1) Select ‘HOST SETUP’ in OPERATOR FUNCTION menu. 2) Select ‘KEY MANAGEMENT’ in HOST SETUP menu. 3) Select ‘EDIT MASTER KEY’ in KEY MANAGEMENT menu. 4) Select ‘MASTER KEY PART1’ or ‘MASTER KEY PART2’ in EDIT MASTER KEY menu.
- Page 107 NH 2100T 5.Operator Functions 5) Enter the master key index. 6) Enter the Master Key PART 1. 7) Verify the Master Key PART 1. 8) Enter the Master Key PART 2 Fig.5. 58 Edit Master Key 5-75...
- Page 108 NH 2100T 5.Operator Functions 9) Verify the Master Key PART 2. 10) After inputting the Master Key, the check sum will be displayed. Press “ENTER” after confirming the check sum. Fig.5. 58 Edit Master Key Function Description The EDIT MASTER KEY function is used to enter the Master Key. 5-76...
- Page 109 NH 2100T 5.Operator Functions 5.8.1.4 Set master key serial number Accessing the SET MASTER KEY SERIAL NUMBER 1) Select ‘HOST SETUP’ in OPERATOR FUNCTION menu. 2) Select ‘KEY MANAGEMENT’ in HOST SETUP menu. 3) Select ‘MASTER KEY SERIAL NUMBER’ in KEY MANAGEMENT menu.
- Page 110 NH 2100T 5.Operator Functions 5.8.2 Telephone number Accessing the TELEPHONE NUMBER 1) Select ‘HOST SETUP’ in OPERATOR FUNCTION menu. 2) Select ‘TELEPHONE NUMBER’ in HOST SETUP menu. 3) Select ‘HOST PHONE #1’ in TELEPHONE NUMBER menu. 4) Enter Host Phone number 1. Please refer to 5.1 Basic Operation(How to use keypad).
- Page 111 NH 2100T 5.Operator Functions 5) Select ‘HOST PHONE #2’ in TELEPHONE NUMBER menu. 6) Enter Host Phone number 2. Please refer to 5.1 Basic Operation(How to use keypad). Fig.5. 60 Telephone Number Function Description The TELEPHONE NUMBER function is used to enter the Primary Telephone Number and the Back-up Telephone number of the host.
- Page 112 NH 2100T 5.Operator Functions 5.8.3 TERMINAL NUMBER Accessing the TERMINAL NUMBER 1) Select ‘HOST SETUP’ in OPERATOR FUNCTION menu. 2) Select ‘TERMINAL NUMBER’ in HOST SETUP menu. 3) Enter the Terminal Number. Please refer to 5.1 Basic Operations. (How to use keypad) Fig.
- Page 113 NH 2100T 5.Operator Functions 5.8.4 Health Check Message Accessing the HEALTH CHECK MESSAGE 1) Select ‘HOST SETUP’ in OPERATOR FUNCTION menu. 2) Select ‘HEALTH CHECK MESSAGE’ in HOST SETUP menu. 3) Select ‘HOST SEND’ and ‘MESSAGE SEND INTERVAL’ in HEALTH CHECK MESSAGE menu. Fig.5.
- Page 114 NH 2100T 5.Operator Functions Connect timer 60 second Accessing the CONNECT TIMER 60 SECOND 1) Select ‘HOST SETUP’ in OPERATOR FUNCTION menu. 2) Press ‘CONNECT TIMER 60 SECOND’ in HOST SETUP menu. After entering the timer parameter with PIN pad, press “ENTER”. Fig.5.
- Page 115 NH 2100T 5.Operator Functions 5.8.6 Remote monitor 5.8.6.1 RMS EN/DISABLE Accessing the RMS EN/DISABLE 1) Select ‘HOST SETUP’ in OPERATOR FUNCTION menu. 2) Select ‘REMOTE MONITOR’ in HOST SETUP menu. 3) Select ‘RMS EN/DISABLE’ in REMOTE MONITOR menu. Fig.5. 64 RMS EN/DISABLE 5-83...
- Page 116 NH 2100T 5.Operator Functions 4) When you press RMS EN/DISABLE key, it will be changed to be enabled or disabled. Fig.5. 65 RMS EN/DISABLE Function Description The RMS(Remote Monitoring System) EN/DISABLE function is used to connect with the RMS mode in enabled or in disabled. The factory default is disabled. 5-84...
- Page 117 NH 2100T 5.Operator Functions 5.8.6.2 RMS status send en/disable Accessing the RMS STATUS SEND EN/DISABLE 1) Select ‘HOST SETUP’ in OPERATOR FUNCTION menu. 2) Select ‘REMOTE MONITOR’ in HOST SETUP menu. 3) Select ‘RMS STATUS SEND EN/DISABLE’ in REMOTE MONITOR menu. Fig.5.
- Page 118 NH 2100T 5.Operator Functions 4) When you press the RMS STATUS SEND EN/DISABLE key, it will be changed to be enabled or disabled. Fig. 5.67 RMS STATUS SEND EN/DISABLE Function Description The RMS(Remote Monitoring System) STATUS SEND EN/DISABLE function is used to send NH 2100T status to the RMS when NH 2100T status is changed.
- Page 119 NH 2100T 5.Operator Functions 5.8.6.3 Password Accessing the PASSWORD 1) Select ‘HOST SETUP’ in OPERATOR FUNCTION menu. 2) Select ‘REMOTE MONITOR’ in HOST SETUP menu. 3) Select ‘PASSWORD’ in REMOTE MONITOR menu. Fig. 5.68 PASSWORD 5-87...
- Page 120 NH 2100T 5.Operator Functions 4) Enter MASTER Password. 5) Enter new RMS Password. 6) Enter new RMS Password again. 7) The password will be changed. Fig. 5.69 PASSWORD Function Description The PASSWORD function is used to set the RMS password to connect to NH 2100T from RMS.
- Page 121 NH 2100T 5.Operator Functions 5.8.6.4 Remote phone Accessing the REMOTE PHONE 1) Select ‘HOST SETUP’ in OPERATOR FUNCTION menu. 2) Select ‘REMOTE MONITOR’ in HOST SETUP menu. 3) Select ‘REMOTE PHONE #1’ in REMOTE MONITOR menu. Fig.5. 70 REMOTE PHONE 5-89...
- Page 122 NH 2100T 5.Operator Functions 4) Enter the first Remote Phone number. Please refer to 5.1 Basic Operations. (How to use keypad) 5) Select ‘REMOTE PHONE #2’ in REMOTE MONITOR menu. 6) Enter the second Remote Phone number 2. Please refer to 5.1 Basic Operations. (How to use keypad) Fig.
- Page 123 NH 2100T 5.Operator Functions 5.8.6.5 Modem speed Accessing the MODEM SPEED 1) Select ‘HOST SETUP’ in OPERATOR FUNCTION menu. 2) Select ‘REMOTE MONITOR’ in HOST SETUP menu. 3) When you press MODEM SPEED key, the speed will be changed to 300bps up to 56,000bps. Fig.
- Page 124 NH 2100T 5.Operator Functions 5.8.7 Routing ID Accessing the ROUTING ID 1) Select ‘HOST SETUP’ in OPERATOR FUNCTION menu. 2) Select ‘ROUTING ID’ in the HOST SETUP menu. 3) Enter the desired Routing ID number. Please refer to 5.1 Basic Operations. (How to use keypad) Fig.
- Page 125 NH 2100T 5.Operator Functions 5.8.8 Trial Day Total Accessing the TRIAL DAY TOTAL 1) Select ‘HOST SETUP’ in OPERATOR FUNCTION menu. 2) Select ‘TRIAL DAY TOTAL’ in HOST SETUP menu. 3) If you press ‘TRIAL DAY TOTAL’ button, it will be changed to be enabled or disabled.
-
Page 126: Transaction Setup
NH 2100T 5.Operator Functions 5.9 Transaction Setup The TRANSACTION SETUP function of the OPERATOR FUNCTION includes the following: DISPENSE LIMIT DENOMINATION FAST CASH CURRENCY LOW CHECK 5-94... - Page 127 NH 2100T 5.Operator Functions 5.9.1 Dispense limit Accessing the DISPENSE LIMIT 1) Select ‘TRANSACTION SETUP’ in OPERATOR FUNCTION menu. 2) Enter the desired dispense limit after pressing DISPENSE LIMIT button. Fig. 5.74 DISPENSE LIMIT Function Description The DISPENSE LIMIT function is used to set the maximum amount of notes that can be dispensed per transaction.
- Page 128 NH 2100T 5.Operator Functions 5.9.2 Denomination Accessing the DENOMINATION 1) Select ‘TRANSACTION SETUP’ in OPERATOR FUNCTION menu. 2) Select ‘DENOMINATION’ in TRANSATION SETUP. 3) Enter the desired denomination of bills after pressing DENOMINATION button. Fig. 5.75 DENOMINATION Function Description The DENOMINATION function is used to set the denomination of notes to be set in the cassette.
- Page 129 NH 2100T 5.Operator Functions 5.9.3 Fast cash Accessing the FAST CASH 1) Select ‘TRANSACTION SETUP’ in OPERATOR FUNCTION menu. 2) Select ‘FAST CASH’ in TRANSACTION SETUP menu. 3) You can change the fast cash amount LB0 to LB2 and RB0 to RB2 with press the button. Fig.5.76 FAST CASH Function Description The FAST CASH function is used to set the cash amount, which is to be displayed on the...
- Page 130 NH 2100T 5.Operator Functions 5.9.4 Currency low check Accessing the CURRENCY LOW CHECK 1) Select ‘TRANSACTION SETUP’ in OPERATOR FUNCTION menu. 2) If you want to enable Low Currency Check function, press CURRENCY LOW CHECK button once. Fig.5.77 CURRENCY LOW CHECK Function Description The CURRENCY LOW CHECK function is used to set the cassette low level detection.
-
Page 131: Appendix
NH 2100T 6. Appendix 6. Appendix 6 - 1... -
Page 132: Summary Of Specification
NH 2100T 6. Appendix 6. Appendix A. SUMMARY OF SPECIFICATION (sec : second) Specification Item Description Default Option Product Type Through The Wall Maintenance Rear Door Access Control i80186EB Electronics Serial Ports 5 ports (extended 2 ports) Memory FLASH 512KB NVRAM 128KB SRAM... -
Page 133: Bill Conditions
NH 2100T 6. Appendix B. BILL CONDITIONS B-1 Acceptable condition Bill which is very clean and can readily be recognized as a true bill Bill has sufficient life or sizing to be handled easily Bill which can be manually held straightly when one end is held by a hand and the bill is slightly curved vertically 6 - 3... - Page 134 NH 2100T 6. Appendix B-2 Unacceptable condition Bill having serious wrinkles, torn or broken section wherein paper fiber is broken and separation begins Wrinkle Wrinkle Torn Torn Broken section Broken Section 6 - 4...
- Page 135 NH 2100T 6. Appendix Bill having adequate life or sizing, but stained seriously Stained Bill with holes (Perforated bill) Hole Bill ragged and cannot be held straightly when one end is supported by a hand 20mm 35mm When the bill is held by 20mm and the straightness of the bill is 35mm or less, it cannot be used 6 - 5...
- Page 136 NH 2100T 6. Appendix Bill with cellophane tape, scotch tape, etc Tape Bill with folds Fold Gradually curved bill (bills tied by hand seal, etc) Band seal 6 - 6...
- Page 137 NH 2100T 6. Appendix Bill with folded lines Case 1 Case 2 Case 3 ☞ Bill distortion should not exceed 10 mm 6 - 7...
-
Page 138: Receipt Paper Specifications
NH 2100T 6. Appendix C. RECEIPT PAPER SPECIFICATIONS - All measurements are in mm. 6 - 8... -
Page 139: Magnetic Card Specifications
NH 2100T 6. Appendix D. MAGNETIC CARD SPECIFICATIONS Item ISO Card (Unit : Inch) Length Card Bending Magnetic Stripe Position 6 - 9... -
Page 140: Error Codes Table
NH 2100T 6. Appendix E. ERROR CODE TABLE ERROR CODES ERROR DESCRIPTION CORRECTIVE ACTION 00000 Normal Status Normal Status 20001 Cash cassette is not properly set. Set the cash cassette properly. 20002 Cash cassette empty. Load the cash into the cash cassette and set the number of bills. - Page 141 NH 2100T 6. Appendix ERROR CODES ERROR DESCRIPTION CORRECTIVE ACTION Set the cash cassette properly C0040 Cash cassette taken out during dispense Call your service personnel C0041 Dispensing error Note jam Clear jammed notes or C0042 call your service personnel. C0043 Over 10 notes has been rejected per 1 Check notes or...
- Page 142 NH 2100T 6. Appendix ERROR CODES ERROR DESCRIPTION CORRECTIVE ACTION Call your service personnel. E0001 RMS port failure RMS response timeout Call your service personnel. E0002 E0003 RMS modem failure Call your service personnel. E0004 RMS no dial tone Call your service personnel. E0005 RMS retry over Call your service personnel.