
Related Manuals for HYOSUNG MONiMAX8100T


Summary of Contents for HYOSUNG MONiMAX8100T
- Page 1 Operator Manual MONiMAX8100T System V01.00.00 (2018.11.7) © Hyosung TNS Inc. All Rights Reserved.
- Page 2 No. Version Date Description of Change Chapter V01.00.00 2018/11/07 Preliminary version © Hyosung TNS Inc. All Rights Reserved. The content of this specification is protected by copyright laws. 2018. 11. 7 1st Release © Hyosung TNS Inc. All Rights Reserved.
-
Page 3: Table Of Contents
Bill Conditions ............................... 5-4 Acceptable condition ········································································································· 5-4 Unacceptable condition ······································································································ 5-5 How to open and close the lower module (BMD) ..................5-9 Opening Lower Module (BMD) ···························································································· 5-9 Closing Lower Module (BMD) ···························································································· 5-10 © Hyosung TNS Inc. All Rights Reserved. - Page 4 How to replace the Cartridge ........................6-13 How to replace the Felt ..........................6-14 How to remove the check from Stack Bin ....................6-16 How to remove Jam ............................ 6-17 Careful for the damage ..........................6-18 © Hyosung TNS Inc. All Rights Reserved.
-
Page 5: Chapter1. Preface
This manual details how the customers replenish the notes and paper and how they remove the jam at the MX8100T. Audience ► Customers and staffs of Hyosung TNS who use and operate the MX8100T in each branches of bank. Support Information ►... -
Page 6: Terminologies
Assembly Bill Recycling Machine Bill Checker Body Module-Down (Lower Body of the Machine) Body Module-Up (Upper Body of the Machine) Customer Service Module Deposit Cassette Recycle Cassette Reject Cassette Temporary Stacker Utility Cassette © Hyosung TNS Inc. All Rights Reserved. - Page 7 On Screen Display Board Power Supply Encryption PIN Pad Panel Control Board Printer (mainly Receipt Printer) Switch Sensor and Indications Unit Service Provider Slip Printer (Receipt Printer) Text Terminal Unit (OPL or SPL) © Hyosung TNS Inc. All Rights Reserved.
-
Page 8: Safety Precautions (English)
▪ Do not touch the equipment when it is running. ▪ The equipment can get extremely hot and may cause a burn. ▪ Make sure to close the cover before running the equipment. © Hyosung TNS Inc. All Rights Reserved. - Page 9 TYPE. DISPOSED OF USED BATTERIES ACCORDING TO THE INSTRUCTIONS 3. FOR PLUGGABLE EQUIPMENT, THE SOCKET-OUTLET SHALL BE INSTALLED NEAR THE EQUIPMENT AN SHALL BE EASILY ACCESSIBLE 4. THE EQUIPMENT IS TO BE SECURED TO THE BUILDING STRUCTURE BEFORE OPERATION © Hyosung TNS Inc. All Rights Reserved.
-
Page 10: Précautions Pour La Sécurité (French)
• Ne pas retirer le couvercle. Seul le technicien d'entretien est autorisé à ouvrirle couvercle. • Ne pas toucher. Vous pouvez avoir un choc électrique. • Assurez-vous d'éteindre l'appareil lors de l'entretien de l'équipement. © Hyosung TNS Inc. All Rights Reserved. - Page 11 26 OU LA LIGNES DE TELECOMMUNICATION PLUS GROSSE 2. RISQUE D'EXPLOSION SI LA BATTERIE EST REMPLACEE PAR UN TYPE INCORRECT. DISPOSER POUR UTILISATION DES BATTRIES SELON LES INSTRUCTIONS 3. POUR LES APPAREILS RACCORDES, LA PRISE DOIT ETRE INSTALLEE PRES © Hyosung TNS Inc. All Rights Reserved.
- Page 12 Chapter1. Preface Operator Manual D’EQUIPEMENT POUR ÊTRE FACILEMENT ACCESSIBLE 4. L’EQUIPEMENT DOIT ETRE SECURISE A LA STRUCTURE DU BATIMENT AVANT D'UTILISER © Hyosung TNS Inc. All Rights Reserved.
-
Page 13: Related Document
▪ Installation Manual ▪ Service Manual • Error Code Manual For the contact of maintenance staffs of Hyosung TNS, see the E-mail addresses and telephone numbers provided separately. © Hyosung TNS Inc. All Rights Reserved. -
Page 14: Chapter2. Introduction
A bank customer and a teller can easily interact on a touch screen, just like talking, through Hyosung TNS’s intuitive and easy UI. Allows easy and quick installation and maintenance. <Note!> The figures/photos/diagrams in this manual are for well understanding therefore they may be different from real machines. © Hyosung TNS Inc. All Rights Reserved. -
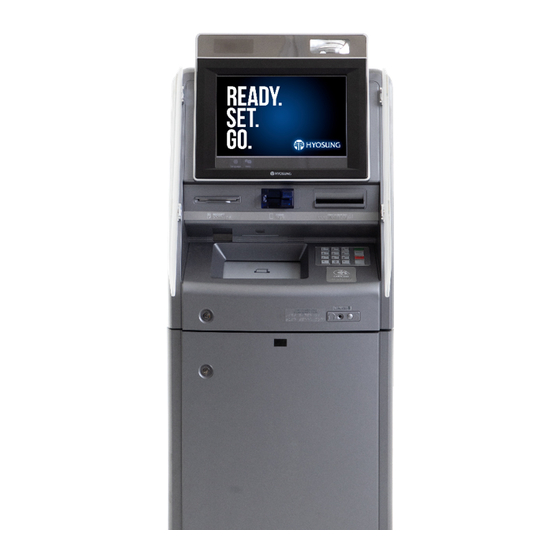
Page 15: The Exterior Overview
The customer selects transactions and requests information at the fascia. Customer Display (with Check Deposit touch screen) EPP (Pin-Pad) Card Reader Slot Contactless Receipt Printer Card Reader Slot (CCR) Earphone Jack Cash (Bill Recycling Machine) © Hyosung TNS Inc. All Rights Reserved. -
Page 16: Basic Features
Customer USB Interface Touch Screen Input CAP) Method Polycarbonate EPP(PCI EPP Guard Support Pin-Pad Compliant) 10.4” TFT LCD, 250cd/m Supervisor Display Module 10.4” Resistive Touch Screen Operation Input Method Mover Type Slide Drawer © Hyosung TNS Inc. All Rights Reserved. - Page 17 200 dpi Type Transmission Image Reflection Red, Green, Blue, IR940 Capture (Canon: Transmission Green, IR730, IR880 MG06H- Resolution 200dpi Z02) Method Digital I/F, Face up and Down Endorsement Type Ink jet 1 Line © Hyosung TNS Inc. All Rights Reserved.
- Page 18 5,000 Transaction/Roll Depends on Format Black Mark Paper Support None Option Type Thermal Roll Paper Paper Width Max. 80mm Specification Outer Max. 210Φ Diameter Barcode Payable option Barcode Reader (Honeywell) 2D BCR (Honeywell 3330g) © Hyosung TNS Inc. All Rights Reserved.
- Page 19 LEFT TO RIGHT SWING Normal Swing Safety Door Open Direction (Front View) Install Method Anchor Lobby : About 992 lbs Weight 1,278 lbs (580kg) (450kg) Battery System Battery Alarm Battery Option Heater None © Hyosung TNS Inc. All Rights Reserved.
-
Page 20: Devices Of Mx8100T
USB HUB used to communicate with several devices such as a cash dispenser, card reader, receipt printer and EPP. ►Basic Specification & Sample Picture © Hyosung TNS Inc. All Rights Reserved. -
Page 21: Customer Display & Pin-Pad
The customer touch screen is used with the customer display. The customer selects functions or enters information by touching the screen. ►Basic Specification & Sample Picture Customer Display (with touch screen) (Encryption PIN Pad) © Hyosung TNS Inc. All Rights Reserved. -
Page 22: Teller Display
Operator Manual Chapter2. Introduction Teller Display ► Basic Specification & Sample Picture © Hyosung TNS Inc. All Rights Reserved. -
Page 23: Bill Recycler (Brm58, Bill Recycle Machine)
This considerably lengthens the replenishment or emptying cycles on cash-in/cash-out systems and, at the same time, the cash holding per system can be reduced. ►Basic Specification & Sample Picture 2-10 © Hyosung TNS Inc. All Rights Reserved. - Page 24 Operator Manual Chapter2. Introduction <Upper Module of BRM> <Lower Module of BRM> © Hyosung TNS Inc. All Rights Reserved. 2-11...
-
Page 25: Check Single Deposit Module (Csm33, Check Scan Module 33)
Check Single Deposit Module (CSM33, Check Scan Module 33) ► Check Scan Module accepts a sheet of check in endorsement way. The consumer can deposit a check through the CSM33 slot. ►Basic Specification & Sample Picture 2-12 © Hyosung TNS Inc. All Rights Reserved. - Page 26 Operator Manual Chapter2. Introduction © Hyosung TNS Inc. All Rights Reserved. 2-13...
-
Page 27: Card Reader
ATM card in the card entry slot and then removes the card to begin the transaction. The dip card reader can read magnetic stripe cards and memory chip cards. The dip card reader cannot retract, capture, or retain cards. ►Basic Specification & Sample Picture 2-14 © Hyosung TNS Inc. All Rights Reserved. -
Page 28: Contactless Card Reader (Ccr)
Contactless Card Reader (CCR) ► The contactless card reader is designed to support contactless transactions. It is composed of a compact controller module and an antenna module. ►Basic Specification & Sample Picture Contactless Card Reader © Hyosung TNS Inc. All Rights Reserved. 2-15... -
Page 29: Receipt Printer (Spr60)
ATM number and location, and other desired information. After the customer uses the ATM, a printed record of the transaction information is presented through the appropriate printer entrance. ► Basic Specification & Sample Picture 2-16 © Hyosung TNS Inc. All Rights Reserved. -
Page 30: Barcode
Operator Manual Chapter2. Introduction Barcode ► Basic Specification & Sample Picture © Hyosung TNS Inc. All Rights Reserved. 2-17... -
Page 31: Chapter3. For The Beginning Operator
Do NOT operate Main Switch on power supply when you would like to turn off the power. It may cause damage to operate system or destabilize control electronics in ATM. Power Switch Main Switch © Hyosung TNS Inc. All Rights Reserved. -
Page 32: Power Supply Status
<System Off> procedure starts, and only [AC IN] LED is turned on. ▪ In case power failure occurs during normal system operation, the system will enter <Power Failure Mode> and only [DC OUT] will be turned off. © Hyosung TNS Inc. All Rights Reserved. -
Page 33: Security Locking Device - Cencon Lock
Left (Counter Clockwise). The purpose is both to give the lock additional power and to ensure the lock bolt is fully extended. CW = Clockwise; CCW = Counter Clockwise © Hyosung TNS Inc. All Rights Reserved. - Page 34 4. Turn the dial right (CW) until it stops. The lock’s bolt is now retracted and the lock is open. 5. Turn the handle and open the security door. 6. Turn the dial a minimum of one complete rotation to the left (CCW) to extent the bolt. © Hyosung TNS Inc. All Rights Reserved.
- Page 35 The best thing to do in analyzing the lock level is to write down the entire string and then pick out the portions of it that are significant to you, or if you are experiencing a problem with the lock, report the entire string to the Tech Support group. © Hyosung TNS Inc. All Rights Reserved.
- Page 36 Enter the current shelved mode combination, “EnF” (Enter new Factory combination) will be displayed. 10. EnF Enter New Combination Cnf Select and enter the new combination. “CnF” (confirm new Factory combination) will be displayed © Hyosung TNS Inc. All Rights Reserved.
- Page 37 15. OPr Retract Bolt Turn the Dial to the right (CW) to retract the bolt. 16. Close Door 17. Extend Bolt Turn the Dial to the left (CCW) to extend the bolt. © Hyosung TNS Inc. All Rights Reserved.
-
Page 38: Chapter4. Receipt Printer (Spr60)
Chapter4. Receipt Printer (SPR60) Introduction ► Information in this section is subject to change without notice. Hyosung TNS reserves the right to improve products as new technology, components, software, and hardware become available. If users need further data about these products, please feel free to contact Hyosung TNS or your local dealer. -
Page 39: Summary
● Special Function: - Anti-jam - Anti-pull ● Applications - Instruction set compatible with HYOSUNG’s LSPR3 EP standard for SPR60 with USB communication interface; - Instruction set compatible with HYOSUNG’s KSPR1-VEP standard for SPR60 with serial communication interface; - Characters handling: Supports ASCII code for SPR60 with serial communication interface;... - Page 40 - Single USB interface or single serial interface is optional; - Mark identification and checkout; - Lower mark sensor for non-thermal side is adjustable; - Semi-auto paper loading; - Firmware can be updated on-line. © Hyosung TNS Inc. All Rights Reserved.
-
Page 41: Paper Specification
80-100 um ► Recommended Paper: 1. Recommended continuous paper: Paper type Manufacturer FD200 OJI Paper CO., LTD. FD210 OJI Paper CO., LTD. ADP78 OJI Paper CO., LTD. PD150R OJI Paper CO., LTD. <Recommended paper> © Hyosung TNS Inc. All Rights Reserved. - Page 42 Only one mark sensor is mounted on the non-thermal side when the printer is delivered from the factory (default position is on the non-thermal side of paper path) and the mark sensor position is continuously adjustable. © Hyosung TNS Inc. All Rights Reserved.
- Page 43 4. Do not rub the paper surface with a nail or hard metal. Otherwise it may discolor; 5. When the temperature goes up to 70℃, paper will discolor. So please be careful to the effect of temperature, humidity and sunlight in environment. © Hyosung TNS Inc. All Rights Reserved.
-
Page 44: Structure And Functions
The controlling parts include circuit board and corresponding adjustment buttons and interfaces. 1. Exterior of print unit and controlling parts The print unit consists of print mechanism and cut mechanism, referring to the figure below: <Print unit and controlling parts> © Hyosung TNS Inc. All Rights Reserved. - Page 45 Indicate whether the power is on or not and it is always on when the printer is turned on. Heating: The print head and the motor gives out heat while using, please do not touch it just after operation. © Hyosung TNS Inc. All Rights Reserved.
- Page 46 3. Presenter top cover: After pressing the snap-fit, the cover can be opened for clearing Presenter jammed paper. 4. Paper outlet mouth. 5. Snap-fit for fixing the top cover. © Hyosung TNS Inc. All Rights Reserved.
-
Page 47: Install And Load The Paper Roll
When the paper sensor detects paper, the platen rollers will start rotation to complete the semi- automatic paper loading. Caution: Before loading paper, cut the paper head trim according to the figure below: <Paper head> 4-10 © Hyosung TNS Inc. All Rights Reserved. - Page 48 If the angle between paper center line and the printer center line is≤4°, it can guarantee that the paper jamming malfunction will not happen. <Paper loading> © Hyosung TNS Inc. All Rights Reserved. 4-11...
-
Page 49: Clear The Jammed Paper In The Cutter
3. Check whether there is wastepaper under the cutter blade and print head. If so, please take it out; 4. When confirming there is no wastepaper, close the top cover; Caution: Turn off the power before removing the jammed paper. 4-12 © Hyosung TNS Inc. All Rights Reserved. -
Page 50: Clear The Jammed Paper In The Presenter
1. Press the snap-fit on Pre upper path as shown in the following figure and apply force upwardly to remove the Presenter top cover; <Clean the jammed paper in the Presenter> 2. Take out the jammed paper and install the Pre top cover to the printer. © Hyosung TNS Inc. All Rights Reserved. 4-13... -
Page 51: Troubleshooting And Maintenance
Chapter4. Receipt Printer (SPR60) Operator Manual Troubleshooting and maintenance ► If errors occur in the printer, consult the troubleshooting table below. If still can’t settle the trouble, please contact with Hyosung TNS or the distributor. Errors and settlement ► Error index Error LED... -
Page 52: Solution For Common Errors
Paper jams. Remove jammed paper. <Problems during printing> To adjust print darkness, contact with our distributors or Hyosung TNS. If paper jams in cutter, please remove the jammed paper firstly, and then press CUT button to reset the cutter. © Hyosung TNS Inc. All Rights Reserved. - Page 53 <Other problems> <Note!> Paper near end alarm acts only as a prompt for users, not an error status. Therefore when this alarm is given, printing task can still be sent. 4-16 © Hyosung TNS Inc. All Rights Reserved.
-
Page 54: Self-Test Page
1 second while turning on the printer. The printer will start to print a self-test page. (Take 203DPI/USB interface model for an example, and the self-test page is shown as follows). © Hyosung TNS Inc. All Rights Reserved. 4-17... - Page 55 Chapter4. Receipt Printer (SPR60) Operator Manual 4-18 © Hyosung TNS Inc. All Rights Reserved.
- Page 56 Operator Manual Chapter4. Receipt Printer (SPR60) ► Explanation of self-test page: © Hyosung TNS Inc. All Rights Reserved. 4-19...
-
Page 57: Chapter5. Bill Recycler (Brm58)
► The idea of recycling is to make the cash that is paid in during deposit transactions available again for dispensing. This considerably lengthens the replenishment or emptying cycles on cash-in/cash-out systems and, at the same time, the cash holding per system can be reduced. <BRM58 Block Diagram> © Hyosung TNS Inc. All Rights Reserved. -
Page 58: Basic Specification
Retract Cassette During Stack 65mm 300 bills (*) 1 (RTC) Reject Cassette During Stack 231mm 2000 bills (*) 1 (RJC) * It is the reference value based on the used bill (thickness: 0.1mm). © Hyosung TNS Inc. All Rights Reserved. -
Page 59: External Appearance
Height: 431 ± 3 (mm) Cassette Weight 4.3 kg (except bill weight) Width: 230 ± 3 (mm) Dimension Length: 135 ± 3 (mm) Retract/Reject(RT/RJC) Height: 431 ± 3 (mm) Cassette Weight 3 kg (except bill weight) © Hyosung TNS Inc. All Rights Reserved. -
Page 60: Bill Conditions
2. Bill has sufficient life or sizing to be handled easily 3. Bill which can be manually held straightly when one end is held by a hand and the bill is slightly curved vertically. © Hyosung TNS Inc. All Rights Reserved. -
Page 61: Unacceptable Condition
Chapter5. Bill Recycler (BRM58) Unacceptable condition ▶ 1. Bill with serious wrinkles, torn or broken section wherein paper fiber is broken and separation begins. ▪ Wrinkle Wrinkle ▪ Torn Torn ▪ Broken section Broken Section © Hyosung TNS Inc. All Rights Reserved. - Page 62 4. Bill ragged and cannot be held straightly when one end is supported by a hand 20mm (0.79inch) 35mm (1.38inch) When the bill is held by 20mm (0.79inch) and the straightness of the bill is 35mm (1.38inch) or less, it cannot be used © Hyosung TNS Inc. All Rights Reserved.
- Page 63 5. Bill with cellophane tape, scotch tape, etc Tape 6. Bill with folds Fold 7. Gradually curved bill (bills tied by hand seal, etc) Band seal 8. Bill with folded lines Case 1 Case 2 © Hyosung TNS Inc. All Rights Reserved.
- Page 64 Chapter5. Bill Recycler (BRM58) Operator Manual Case 3 <Note!> Bill distortion should not exceed 10 mm (0.39inch). © Hyosung TNS Inc. All Rights Reserved.
-
Page 65: How To Open And Close The Lower Module (Bmd)
1. Push down the lever A to release the lock from BRM58 Frame. After that, hold the end of lever A and pull it until the lower unit is completely taken out. 2. Hold the handle of Mid Transport Path and then lift up until it is fixed. © Hyosung TNS Inc. All Rights Reserved. -
Page 66: Closing Lower Module (Bmd)
2 steps, so you have to close it by pressing the lever C once again. 2. Push the lower unit until it is locked into the BRM58 Frame as shown in the picture below. 5-10 © Hyosung TNS Inc. All Rights Reserved. -
Page 67: How To Replenish The Recycling Cassette (Rc) With Bills
1. Separate the lower unit from the BRM58 Frame. (Refer to “Opening Lower Module”.) 2. Take out the cassette by lifting up the handle D of the cassette. 3. Place the cassette on the flat surface and open the door by turning the key clockwise. © Hyosung TNS Inc. All Rights Reserved. 5-11... - Page 68 6. Replenish the cassette with bills to the position of label. And then pull the Push-Plate all the way up while pressing the green lever E. 5-12 © Hyosung TNS Inc. All Rights Reserved.
- Page 69 2) Remove all notes with holes or notes that are torn. 3) Unfold the folded notes. 4) Place the notes correctly. 7. After closing the door, completely lock the cassette by turning the key and then remove the key. © Hyosung TNS Inc. All Rights Reserved. 5-13...
- Page 70 Chapter5. Bill Recycler (BRM58) Operator Manual 8. Fold the holder of cassette and mount the cassette onto the set guide. 9. Mount the lower unit onto the BRM58 Frame. (Refer to “Closing Lower Module.”) 5-14 © Hyosung TNS Inc. All Rights Reserved.
-
Page 71: How To Remove Bills From Retract/Reject Cassette (Rt/Rjc)
2. Hold the handle A and completely separate the Retract/Reject Cassette from the set guide. 3. Place the cassette on the flat surface and open the door by turning the key clockwise. © Hyosung TNS Inc. All Rights Reserved. 5-15... - Page 72 5. Press the green lever B in the lower part of the Retract Cassette and open the rear transport path. 6. Turn the gear, and then remove the bills when enough space is created for removing them. 5-16 © Hyosung TNS Inc. All Rights Reserved.
- Page 73 Retract/Reject cassette by turning the key. Remove the key after locking the cassette. 8. Close the door and mount the Retract/Reject Cassette onto the set guide again. 9. Mount the lower unit onto the BRM58 Frame. (Refer to “Closing Lower Module”) © Hyosung TNS Inc. All Rights Reserved. 5-17...
-
Page 74: How To Open And Close The Upper Module (Bmu)
Closing Upper Module (BMU) ► Close the upper module of BRM 1. As shown in the picture below, push the upper unit in the direction of the arrow until it is locked. 5-18 © Hyosung TNS Inc. All Rights Reserved. -
Page 75: Opening The Customer Service Module (Csm)
Opening the Customer Service Module (CSM) ► Opening the Customer Service Module 1. Hold the handle A and lift up the Customer Service module to fix it to the safety lock B. © Hyosung TNS Inc. All Rights Reserved. 5-19... -
Page 76: Closing The Customer Service Module
2) Push the CSM forward slowly to completely close it. If it is completely closed, fix it by pressing the lever A. At this time, make sure to close it by pressing the lock B since it is closed through two steps. 5-20 © Hyosung TNS Inc. All Rights Reserved. -
Page 77: Opening The Temporary Stacker (Tsk)
► Opening the Temporary Stacker (TSK) 1. After releasing lock by pressing the lever A, hold the handle B and lift up the Temporary Stack to fix it to safety lock C. © Hyosung TNS Inc. All Rights Reserved. 5-21... -
Page 78: Closing The Temporary Stacker (Tsk)
Do NOT take your hands off the handle until the upper unit is completely closed because the safety lock is released! And also, do NOT hold the other places except the handle! 5-22 © Hyosung TNS Inc. All Rights Reserved. -
Page 79: How To Remove The Jam
1. Press the green knob A and turn the screw B counterclockwise using (-) driver or a coin to open the outer shutter. 2. Open the internal shutter by turning the screw C counterclockwise using (-) driver or a coin. © Hyosung TNS Inc. All Rights Reserved. 5-23... - Page 80 5. If the jam occurs in the separation section, turn the green knob D counterclockwise to move the Push-Plate upwards (see the step “3)”). 6. Turn the Knob F counterclockwise while pressing the Front-Plate with one hand and remove the jammed bill. 5-24 © Hyosung TNS Inc. All Rights Reserved.
- Page 81 8. Open the Customer Service Module in order to remove the jammed bill on the transport path (refer to “Opening the Customer Service Module”). 9. Undo the hooks on the both sides of the Customer Service module and separate the lower Guide B (refer to the picture below). © Hyosung TNS Inc. All Rights Reserved. 5-25...
- Page 82 10. Remove the bills caught in the gap between the guides. And then move the lower guide to its original position to be hooked. 11. Close the Customer Service Module (refer to “Closing the Customer Service Module”). 5-26 © Hyosung TNS Inc. All Rights Reserved.
- Page 83 3. If the jam occurs in the Gate section, remove the jammed bill. 4. After removing the jammed bill, close the Customer Service Module and the upper unit (refer to “Closing Upper Module” / ”Closing the Customer Service Module”) © Hyosung TNS Inc. All Rights Reserved. 5-27...
- Page 84 1. Open the Customer Service Module and Temporary Stacker (refer to “Opening the Customer Service Module” and “Opening the Temporary Stacker”). 2. Unlock the green lever A and lift up BC. 3. Remove the jammed bill inside the BC while you keep holding the lever. 5-28 © Hyosung TNS Inc. All Rights Reserved.
- Page 85 Chapter5. Bill Recycler (BRM58) 4. After removing the jammed bill, lock the BC by fully pressing it. 5. Close the Tape Escrow and Customer Service Module (refer to “Closing the Temporary Stacker”). © Hyosung TNS Inc. All Rights Reserved. 5-29...
- Page 86 3. Remove the jammed bill by lifting up the knob A. 4. Close the Customer Service Module and Temporary Stacker (refer to “Closing the Customer Service Module” and “Closing the Temporary Stacker”). 5-30 © Hyosung TNS Inc. All Rights Reserved.
- Page 87 3. Move the Push-Plate in the direction of the arrow by turning the knob B to secure the space for removing the jammed bill inside the Temporary Stacker. 4. Remove the jammed bill by turning the knob C. © Hyosung TNS Inc. All Rights Reserved. 5-31...
- Page 88 6. After removing the jammed bill, close the Customer Service module and Tape Escrow (refer to “Closing the Customer Service Module” and “Closing the Temporary Stacker”). 5-32 © Hyosung TNS Inc. All Rights Reserved.
- Page 89 3. In case of the bill jammed while entering the cassette, remove it by turning the green knob A clockwise until the bill appears. 4. Mount the lower unit onto the BRM58 Frame (refer to “Closing Lower Module”). © Hyosung TNS Inc. All Rights Reserved. 5-33...
- Page 90 4. Pull the Push-Plate all the way up and close the cassette door. And then, mount it onto the set guide (for detailed information, refer to “How to replenish the Recycling Cassette (RC) with bills”). 5. Mount the lower unit onto the BRM58 Frame (refer to “Closing Lower Module”). 5-34 © Hyosung TNS Inc. All Rights Reserved.
- Page 91 4. Close the reject cassette door and mount the reject cassette onto the set guide (for more information, refer to “How to remove bills from Retract/Reject Cassette (RT/RJC)”). 5. Mount the lower unit onto the BRM58 Frame (refer to “Closing Lower Module”). © Hyosung TNS Inc. All Rights Reserved. 5-35...
- Page 92 4. Close the reject cassette door and the rear guide. And then, mount the reject cassette onto the set guide (for more information, refer to “How to remove bills from Retract/Reject Cassette (RT/RJC)”). 5. Mount the lower unit onto the BRM58 Frame (refer to “Closing Lower Module”). 5-36 © Hyosung TNS Inc. All Rights Reserved.
-
Page 93: Chapter6. Check Single Deposit Module (Csm33)
5. PRT(Printer) : Printing on check ► RF(Reer Feeding) : Feed the check passed through the Print section to Stack Bin. ► SB (Stack Bin) : Receive and store the check in the Box by the single-sheet. © Hyosung TNS Inc. All Rights Reserved. - Page 94 Chapter6. Check Single Deposit Module (CSM33) Operator Manual ReerFeeding Open Upper Cover Open PRT Open © Hyosung TNS Inc. All Rights Reserved.
-
Page 95: Device Specification
Residue Detection - Available Section : inside Stack B Key Lock Media Collect Stack Box - Available Detection Full Detection Door Open - Available Detection Stack Box Door Others - Available Set Detection © Hyosung TNS Inc. All Rights Reserved. - Page 96 Chapter6. Check Single Deposit Module (CSM33) Operator Manual Item Assortment Details of Spec Remarks - USB2.0 (Debug port : Interface RS232C) Perform Transport Speed - 508mm/s ±5% ance © Hyosung TNS Inc. All Rights Reserved.
-
Page 97: Check Conditions
2. Check has sufficient life or sizing to be handled easily 3. Check which can be manually held straightly when one end is held by a hand and the bill is slightly curved vertically © Hyosung TNS Inc. All Rights Reserved. - Page 98 1. Bill having serious wrinkles, torn or broken section wherein paper fiber is broken and separation begins. Wrinkle Wrinkle Torn Torn Broken section Broken Section Check with print damage Damage © Hyosung TNS Inc. All Rights Reserved.
- Page 99 4. Check ragged and cannot be held straightly when one end is supported by a hand 20mm (0.79inch) 35mm (1.38inch) When the bill is held by 20mm (0.79inch) and the straightness of the bill is 35mm (1.38inch) or less, it cannot be used © Hyosung TNS Inc. All Rights Reserved.
- Page 100 Chapter6. Check Single Deposit Module (CSM33) Operator Manual 5. Check with cellophane tape, scotch tape, etc Tape 6. Check with folds Fold 7. Gradually curved check (checks tied by hand seal, etc) Band seal © Hyosung TNS Inc. All Rights Reserved.
- Page 101 Operator Manual Chapter6. Check Single Deposit Module (CSM33) 8. Check with folded lines Case 1 Case 2 Case 3 <Note!> Check distortion should not exceed 10 mm (0.39inch). © Hyosung TNS Inc. All Rights Reserved.
-
Page 102: Switch Specification
3. LED: Machine Status Display ►S/W Operation (Green) 1. Sustainable Push for 3 seconds Felt Clear 2. Press three times Ink Count Initialization ► S/W Operation (Red) 1. Sustainable Push for 3 seconds 6-10 © Hyosung TNS Inc. All Rights Reserved. -
Page 103: How To Open & Close Each Module
► Put the thumb inside the Lever A and pull it counterclockwise to release the lock. Then continually lift it counterclockwise. Main Module Closing ► Press the middle of red section in the picture below and check that the left & right are locked. Press CAUTION!!! © Hyosung TNS Inc. All Rights Reserved. 6-11... -
Page 104: Printer Module Opening
Printer Module Opening ► Put the thumb inside the Lever B and pull it counterclockwise to release the lock. Then continually lift it counterclockwise. 6-12 © Hyosung TNS Inc. All Rights Reserved. -
Page 105: How To Replace The Cartridge
► Replace the cartridge as follows, 1. Pull the Knob (C) forward. 2. Turn the Knob clockwise and pull it forward. 3. Push down the Knob (D) and take out the Cartridge. © Hyosung TNS Inc. All Rights Reserved. 6-13... -
Page 106: How To Replace The Felt
2. Lift up PRT Module and unfasten the screw of the left. (1 place). 3. Unfasten the screw fixing PRT Mold Lever and remove the Lever. 4. Unfasten the Hook fixing Upper Cover and take it off. (2 places) 6-14 © Hyosung TNS Inc. All Rights Reserved. - Page 107 Operator Manual Chapter6. Check Single Deposit Module (CSM33) 5. Hold the Felt with pliers. 6. Take off the Felt © Hyosung TNS Inc. All Rights Reserved. 6-15...
-
Page 108: How To Remove The Check From Stack Bin
► Remove the check from the stack bin as follows, 1. Insert the key in the lock and turn the key clockwise. (Lock Open) 2. Hold the door handle and lift it up and take out the check. 6-16 © Hyosung TNS Inc. All Rights Reserved. -
Page 109: How To Remove Jam
► How to remove jam from Main Module 1. Open the Main Module and remove the jammed check. ► How to remove jam from PRT Module 1. Open the PRT Module and remove the jammed check. © Hyosung TNS Inc. All Rights Reserved. 6-17... -
Page 110: Careful For The Damage
1. Open the RF Module and remove the jammed check. Careful for the damage ► Be careful the shock when closing each module again after opening them. (Electromagnetic parts can be damaged by the shock.) 6-18 © Hyosung TNS Inc. All Rights Reserved.