Table of Contents
Advertisement
Quick Links
We advise you to read this manual carefully, which contains all the instructions for
maintaining the appliance's aesthetic and functional qualities.
For further information on the product: www.smeg.com
Contents
74
74
75
77
77
77
77
78
78
79
79
79
80
80
81
82
82
84
84
85
94
99
108
118
124
130
130
130
130
131
131
131
131
133
137
137
137
138
73
Advertisement
Table of Contents

Related Manuals for Smeg SF4603MCNX


Summary of Contents for Smeg SF4603MCNX
-
Page 1: Table Of Contents
4.8 Vapor Clean 5 Installation 5.1 Electrical connection 5.2 Cable replacement 5.3 Positioning We advise you to read this manual carefully, which contains all the instructions for maintaining the appliance’s aesthetic and functional qualities. For further information on the product: www.smeg.com... -
Page 2: Instructions
Instructions 1 Instructions IMPORTANT SAFETY INSTRUCTIONS PLEASE READ CAREFULLY AND RETAIN FOR FUTURE USE. 1.1 General safety instructions people of reduced physical and mental capacity, or lacking in Risk of personal injury experience in the use of electrical • WARNING: If the door or the appliances, as long they are door seal is damaged, the oven supervised or instructed by adults... -
Page 3: Instructions For Using Microwaves
Instructions • Do not try to repair the appliance 1.2 Instructions for using yourself or without the intervention microwaves of a qualified technician. • Check the appliance visually • If the power supply cable is during the cooking of foods in damaged, contact technical plastic or paper containers. - Page 4 Instructions (e.g. drying clothes, warming • Do not heat food contained within slippers, sponges, wet cloths or the food packages. like, dehydrating foods) because • Do not use the microwave they can lead to the risk of injury or functions when the oven is empty. fire.
-
Page 5: Manufacturer Liability
Instructions 1.3 Manufacturer liability 1.6 Disposal The manufacturer declines all liability for This appliance must be disposed of damage to persons or property caused by: separately from other waste (Directives 2002/95/EC, 2002/ • Use of the appliance other than the one 96/EC, 2003/108/EC). -
Page 6: This User Manual
Instructions 1.7 This user manual 1.8 How to read the user manual This user manual is an integral part of the This user manual uses the following reading appliance and must therefore be kept in its conventions: entirety and within the user’s reach for the Instructions whole working life of the appliance. -
Page 7: Description
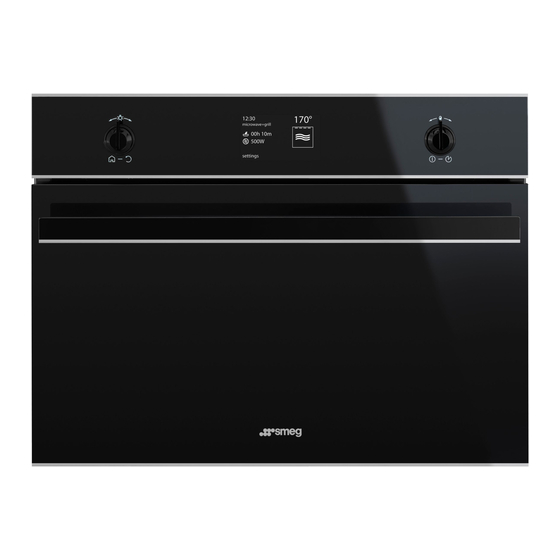
Description 2 Description 2.1 General Description 1 Control panel 4 Door 2 LH light 5 Fan 3 Seal 6 Rack/tray support frames Frame shelf 2.2 Control panel 1 Return knob 3 Control knob This know allows you to return to the This knob allows you to turn the appliance previous item in the appliance’s menu. -
Page 8: Other Parts
Description 2.3 Other parts Interior lighting The appliance’s interior lighting comes on: Shelves • When the door is opened. The appliance features shelves to position • When any function is selected, apart trays and racks at different heights. The from the Sabbath and Vapor insertion heights are indicated from the bottom upwards (see 2.1 General... -
Page 9: Available Accessories
Description 2.5 Available accessories Tray rack Some models are not provided with all accessories. Rack To be placed above the glass dish. To cook foods which may drip. Boiling rod Used for supporting containers with food during cooking. Glass dish To be placed in containers when heating liquids, necessary to avoid delayed boiling. -
Page 10: Use
3 Use High temperature inside the oven during use 3.1 Instructions Danger of fire or explosion High temperature inside the oven • Do not spray any spray products near during use the appliance. Danger of burns • Do not use or leave flammable materials near the appliance. - Page 11 Materials suitable for microwaves In general, in order for all of the food to be Dishes must be free of metal reached, the materials used for microwave decorations. cooking must be transparent to microwave energy. Testing dishes Below is a table of materials to use and those not to use: The microwave function can be MATERIALS TO USE...
-
Page 12: First Use
3.2 First use 1. Remove any protective film from the outside or inside of the appliance, including accessories. 2. Remove any labels (apart from the technical data plate) from the accessories and from the oven cavity. 3. Remove and wash all the appliance accessories (see 4 Cleaning and High temperature maintenance). -
Page 13: Using The Oven
3.4 Using the oven Boiling rod When using the microwave to heat or First use reheat liquids, the boiling process may be delayed while the liquids nevertheless exceed 100 degrees. To avoid this, place the boiling rod (or a heat-resistant plastic spoon) supplied into the container while heating. - Page 14 1. Press the control knob to activate the Microwave functions appliance. For microwave cooking, the food 2. From the main menu, turn the control must be placed in a container knob to select “cooking functions”. resting on the rack inserted in the 3.
- Page 15 5. Press the control knob to confirm the 10. Press the control knob again to start selection. microwave cooking. 6. Turn the control knob to modify the 11. At the end of the cooking cycle, cooking duration. “microwave function ended” appears on the display and a buzzer will sound that can be deactivated by pressing the control knob.
- Page 16 Microwave power levels Combination functions Below is a list of the power levels that can Combination cooking is a mix of be selected: traditional cooking and microwave operation Power (W) Useful for Combination functions list Defrosting food Improper use Risk of damage to the appliance Cooking meat or delicate cooking •...
- Page 17 1. Press the control knob to activate the 5. Press the control knob to confirm the appliance. selected function. The display shows the screen for setting the parameters of the 2. From the main menu, turn the control selected combination function. knob to select “cooking functions”.
- Page 18 8. Turn the control knob to modify the 13. The appliance will begin preheating. cooking duration. The display will show the chosen function, the pre-set temperature, the 9. Press the control knob to confirm the current time and the progress bar of the cooking time set (for example 15 minutes).
- Page 19 14. When the preheating stage is over, a Traditional functions buzzer will sound to indicate that the 1. Press the control knob to activate the food can be placed inside the oven. appliance. 2. From the main menu, turn the control knob to select “cooking functions”.
- Page 20 6. The appliance will begin preheating. The display will show the chosen function, the To extend the cooking time pre-set temperature, the current time and manually, press the control knob the progress bar of the temperature again. The appliance will resume reached (preheating).
- Page 21 Traditional functions list Fan assisted The operation of the fan, combined with traditional cooking, ensures The combination of the fan and the consistent cooking even with circulaire heating element, in ECO complex recipes. Perfect for roasts. mode, is particularly indicated for cooking on a single shelf, with reduced power consumption.
-
Page 22: Traditional Cooking Tips
3.5 Traditional cooking tips Circulaire The combination of the fan and the General advice circulaire heating element • Use a fan assisted function to achieve (incorporated in the rear of the consistent cooking at several levels. oven) allows you to cook different •... - Page 23 Advice for cooking desserts/pastries and Timer during function biscuits This function only activates the • Use dark metal moulds: They help to buzzer, without stopping cooking. absorb the heat better. • The temperature and the cooking time 1. Press the control knob during a cooking depend on the quality and consistency function.
- Page 24 3. A few seconds after the required Timed cooking duration is set, the symbol stops Timed cooking is the function flashing and timed cooking starts. which allows a cooking operation to be started and then ended after a specific length of time set by the user.
- Page 25 Delay cooking Delay cooking is the function Turn the control knob to add some which allows a cooking operation minutes of cooking time. to be stopped at an established time depending on the time set by To extend the cooking time the user, after which the oven will manually, press the control knob switch off automatically.
- Page 26 7. At the end of the cooking cycle, “function 4. After a few seconds the symbols ended” appears on the display and a stop flashing. The appliance buzzer will sound that can be waits for the delay start time. deactivated by pressing the control knob.
-
Page 27: Special Functions
3.6 Special functions Modifying the data set during programmed cooking The special functions menu After modifying the cooking contains some functions like the duration, the end of cooking time timer with the oven off, defrosting must be re-set. or cleaning functions. During operation, it is possible to modify 1. - Page 28 List of special functions Vapor Clean This function facilitates cleaning Timer using the steam produced by a This function sounds a buzzer when small quantity of water poured onto the time set has elapsed. the bottom of the oven. (See “Cleaning and maintenance”).
- Page 29 Timer 4. If you leave the timer setting screen, the symbol will be displayed at the top 1. Turn the control knob to the right or left to select timer from the “special functions” left, indicating that a timer is active. menu.
- Page 30 Defrost by weight 5. Turn the control knob to select the weight (in kilograms) of the food to defrost. 1. Place the food inside the appliance. 2. Turn the control knob to the right or left to select defrost by weight from the “special functions”...
- Page 31 8. At the end of the function, “function Defrost by time ended” appears on the display and a 1. Place the food inside the appliance. buzzer will sound that can be 2. Turn the control knob to the right or left to deactivated by pressing the control select defrost by time from the “special knob.
- Page 32 5. Press the control knob to confirm the set “Turn” procedure parameters. For best defrosting results it is recommended, when necessary, to turn the dish inside the oven cavity. 1. Put the dish in the oven, placing it parallel to the door. 6.
- Page 33 4. Close the door and press the control Proving knob to resume operation. For successful proving, a container 5. If necessary the appliance will again ask of water should be placed in the for rotation of the dish. The display will bottom of the oven.
- Page 34 5. The appliance will begin preheating. 7. Press the control knob to make the desired changes. 6. It will then proceed with the selected function. Unless otherwise set, the proving will have a maximum duration of 13 hours. The light inside the oven will remain off during the proving function.
- Page 35 Reheat Sabbath This function allows you to heat This function results in the previously cooked food which has appliance operating in a particular been kept cool or in the way: refrigerator. • Cooking can proceed indefinitely, it is not possible to 1.
-
Page 36: Preset Recipes
2. Press the control knob to confirm. 3.7 Preset recipes This mode allows you to select a pre-set food cooking program. The appliance will automatically calculate the optimum cooking parameters based on the weight entered. 1. On the clock screen, press the control knob to access the main menu. - Page 37 Starting a preset recipe 4. Select the type of cooking (where possible, depending on the dish chosen) 1. Turn the control knob to the right or left to and press the control knob to confirm. select the required type of dish from the “preset recipes”...
- Page 38 At this point it is possible to start the selected 7. A specific message will indicate when preset recipe, permanently modify the you should put the dish in the oven and settings or perform delay cooking. start cooking. 6. If you choose the start option, cooking 8.
- Page 39 End of a preset recipe Permanently modifying a preset recipe 1. When the preset recipe has finished, the 1. In the selected preset recipe, turn the appliance will warn the user with control knob to the right or left to select change from the menu of the selected acoustic signals and the symbol dish.
- Page 40 5. Turn the control knob to the right or left to 9. Turn the control knob to the right or left to select the weight of the dish to associate select the cooking temperature to with the preset recipe. associate with the preset recipe. 6.
- Page 41 13. Pressing the control knob again will return to point 2 of the change sequence. Press the return knob to save the preset recipe. The appliance will ask to confirm the changes which have just been made. If the modifications are not confirmed, the preset recipe will remain unchanged.
- Page 42 Predefined programs table MEATS Weight Temp. Time Subcategory Cooking Function Shelf (Kg) (°C) (minutes) Rare Roast beef Medium Well done Roast pork Fresh Medium Lamb Well done Veal Fresh Pork spare ribs Fresh Pork chops Fresh Pork sausages Fresh Bacon Fresh Roast turkey Fresh...
- Page 43 FISH Weight Temp. Time Subcategory Cooking Function Shelf (Kg) (°C) (minutes) Fish Fresh Fish Frozen Sea bass Fresh Monkfish Fresh Snapper Fresh Turbot Fresh VEGETABLES Weight Temp. Time Subcategory Cooking Function Shelf (Kg) (°C) (minutes) Grilled vegetables Fresh Roasted vegetables Fresh Roast potatoes Fresh...
- Page 44 DESSERTS/PASTRIES Weight Temp. Time Subcategory Cooking Function Shelf (Kg) (°C) (minutes) Bundt cake Fresh Biscuits Fresh Muffins Fresh Profiteroles Fresh Meringues Fresh Sponge cake Fresh Strudel Fresh Tart Fresh Brioche bread Fresh Croissants Fresh BREAD Weight Temp. Time Subcategory Cooking Function Shelf (Kg)
- Page 45 PIZZA Weight Temp. Time Subcategory Cooking Function Shelf (Kg) (°C) (minutes) Pan baked pizza Fresh Pizza Frozen Stone baked pizza Fresh PASTA Weight Temp. Time Subcategory Cooking Function Shelf (Kg) (°C) (minutes) Pasta bake Fresh Lasagne Fresh Lasagne Frozen Paella Fresh Quiche Fresh...
-
Page 46: Personal Recipes
3.8 Personal recipes Adding a recipe 1. Select add from the “personal recipes” This menu allows you to enter a menu. personal recipe with the parameters you wish to use. On first use, the appliance will only offer you to add a new recipe. After saving your recipes, these will then be available in the relative menu. - Page 47 4. Turn the control knob to the right or left to 8. Turn the control knob to the right or left to select the weight of the dish to associate select the cooking temperature to with the recipe. associate with the recipe. 5.
- Page 48 12. Pressing the control knob again will 14. After entering the name of your recipe, return to point 2 of the change sequence. press the return knob to confirm or cancel You must press the return knob to save the information you have entered. Select the recipe.
- Page 49 Using a personal recipe Cooking will start with the parameters previously set for the recipe. 1. Turn the control knob to the right or left to select a previously stored personal recipe from the “personal recipes” menu (in the example, the recipe test has been stored).
- Page 50 Modifying a personal recipe Deleting a personal recipe 1. Turn the control knob to the right or left to 1. Turn the control knob to the right or left to select a previously stored personal select a previously stored personal recipe from the “personal recipes”...
- Page 51 5. Confirm the deletion. Select YES to Delay cooking permanently delete the recipe. 1. Turn the control knob to the right or left to select a previously stored personal recipe from the “personal recipes” menu (in the example, the recipe test has been stored).
-
Page 52: Settings
5. Turn the control knob to the right or left to 3.9 Settings select the cooking end time with the The product configuration can be control knob. The symbol flashes. set using this menu. 1. On the clock screen, press the control knob to access the main menu. - Page 53 Language Clock Sets the interface language from those Allows you to change time displayed. available. 1. Turn the control knob to the right or left to select language from the “settings” menu. 1. Turn the control knob right or left to set the hours.
- Page 54 Controls lock Demo mode (for showrooms only) Allows the appliance to automatically lock This mode allows the appliance to the controls after one minute of normal deactivate all heating elements, while operation without any intervention from the keeping the control panel active. user.
- Page 55 Eco-Logic (only on some models) Sound This mode allows the appliance to limit the Whenever one of the knobs is pressed, the appliance beeps. This setting disables these power used. Suitable for simultaneous use sounds. with further home appliances. If this option is enabled, the symbol will appear on the display.
- Page 56 Keep warm Eco-Light This mode allows the appliance to keep For greater energy savings, the light is cooked food warm (at low temperatures) automatically deactivated one minute after after cooking finishes with a cooking cycle the start of cooking. for which a duration has been set (if this is not manually interrupted), without altering the taste and smell obtained during cooking.
- Page 57 Digital clock (only on some models) When no appliance function is active, the display will show the current time in digital Displays the time in digital format. format. • To confirm the activation of the digital clock, select YES.
-
Page 58: Cleaning And Maintenance
Cleaning and maintenance 4 Cleaning and maintenance Improper use Danger of explosion/burns 4.1 Instructions High temperature inside the oven • Do not use detergents with high alcohol during use content or which can release inflammable vapours. Subsequent Danger of burns heating could set off an explosion inside •... -
Page 59: Food Stains Or Residues
Cleaning and maintenance 4.4 Food stains or residues 4.6 Cleaning the door glazing Do not use steel sponges and sharp The glass in the door should always be kept scrapers, as they will damage the surfaces. thoroughly clean. Use absorbent kitchen roll. - Page 60 Cleaning and maintenance Removing racks/trays support frames Cleaning the top section Removing the guide frames enables the The appliance is fitted with a tilting heating sides to be cleaned more easily. This element that makes it easier to clean the top operation should be performed each time part of the oven.
-
Page 61: Vapor Clean
Cleaning and maintenance 4.8 Vapor Clean • Pour approx. 40 cc of water onto the floor of the oven. Make sure it does not Vapor Clean is an assisted overflow out of the cavity. cleaning procedure which facilitates the removal of dirt. This process makes it possible to clean the inside of the oven very easily. - Page 62 Cleaning and maintenance Vapor Clean setting The duration and temperature If the internal temperature is parameters cannot be modified by greater than that required for the the user. Vapor clean function, the cycle will be stopped immediately and 3. Press the control knob twice to start the “Internal temperature unsafe, cleaning cycle.
- Page 63 Cleaning and maintenance Setting the programmed Vapor Clean End of the Vapor Clean cycle cycle 1. Open the door and wipe away the less It is possible to program the vapor clean stubborn dirt with a microfibre cloth. start time, like any cooking function. 2.
- Page 64 Cleaning and maintenance What to do if... If the door is opened during a fan assisted function, the fan stops: The display is completely off: • This is not a fault. It is a normal operation • Check the mains power supply. of the appliance, useful when cooking •...
-
Page 65: Installation
Installation 5 Installation Fixed connection Fit the power line with an omnipolar circuit 5.1 Electrical connection breaker in compliance with installation regulations. Power voltage The omnipolar circuit breaker should be Danger of electrocution located near the appliance and in an easily reachable position, according to •... -
Page 66: Positioning
Installation 5.3 Positioning Position of the power cable Heavy appliance Crushing hazard • Position the appliance into the cabinet cutout with the help of a second person. Pressure on the open door Risk of damage to the appliance • Never use the oven door to lever the appliance into place when fitting. - Page 67 Installation Fastening bushings Appliance overall dimensions (mm) Remove the bushing covers inserted on the oven front. (front view) Mount the appliance into the recess. Secure the appliance to the piece of furniture using screws. (top view) Cover the bushings with the previously removed covers.
- Page 68 Installation Mounting under worktops (mm) (side view) Make sure that the carcase rear/ bottom section has an opening of approx. 60 mm.
- Page 69 Installation Mounting into a column (mm) Make sure that the carcase top/ rear section has an opening approx. 35-40 mm deep.