Table of Contents
Advertisement
Quick Links
Advertisement
Table of Contents

Related Manuals for NEFF B47CR32.0


Summary of Contents for NEFF B47CR32.0
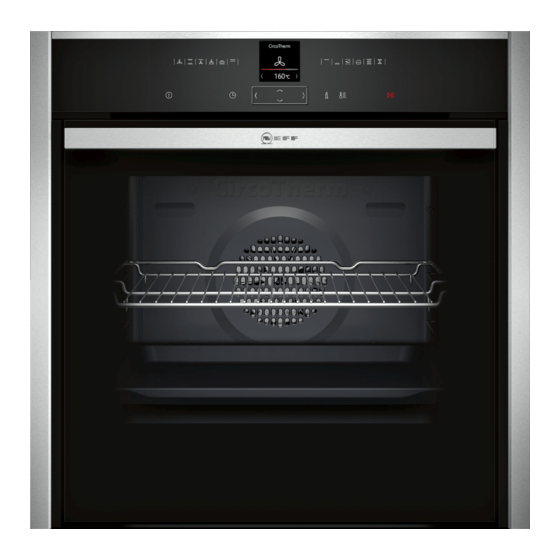
- Page 1 BUILT-IN OVEN [en] INSTRUCTION MANUAL B47CR32.0...
-
Page 3: Table Of Contents
Table of contents [ e n ] I N S T R U C T I O N M A N U A L Intended use ......4 Sabbath mode . -
Page 4: Intended Use
R ead these instructions carefully. Only then www.neff-international.com and in the online shop I n t e n d e d u s e will you be able to operate your appliance www.neff-eshop.com... -
Page 5: Important Safety Information
Important safety information Water in a hot cooking compartment may Risk of scalding! (Important safety ■ create hot steam. Never pour water into the information cooking compartment when the cooking compartment is hot. G eneral information Warning – Risk of injury! I m p o r t a n t s a f e t y i n f o r m a t i o n Scratched glass in the appliance door may Warning –... -
Page 6: Cleaning Function
Causes of damage Warning – Risk of electric shock! ]Causes of damage When replacing the cooking compartment bulb, the bulb socket contacts are live. Before G eneral information replacing the bulb, unplug the appliance from C a u s e s o f d a m a g e the mains or switch off the circuit breaker in Caution! the fuse box. -
Page 7: Environmental Protection
Environmental protection Open the appliance door as infrequently as possible 7Environmental protection ■ when the appliance is in use. Y our new appliance is particularly energy-efficient. E n v i r o n m e n t a l p r o t e c t i o n Here you can find tips on how to save even more energy when using the appliance, and how to dispose of your appliance properly. -
Page 8: Getting To Know Your Appliance
Getting to know your appliance Note: Depending on the appliance model, individual *Getting to know your details and colours may differ. appliance Control panel I n this section, we will explain the indicators and You can set your appliance's various functions on the G e t t i n g t o k n o w y o u r a p p l i a n c e controls. -
Page 9: Main Menu
Getting to know your appliance Main menu Basic settings " Individually adjusting the appliance Touch the 0 touch button to access the main menu. settings~ "Basic settings" on page 15 Menu Base clean ® Types of heating ¢ Cleaning the cooking compartment floor Select the desired heating type and temperature for ~ "Cleaning function"... -
Page 10: Cooking Compartment Functions
Accessories Cooking compartment functions _Accessories The features of the cooking compartment make your appliance easier to use. This, for example, enables the Y our appliance is accompanied by a range of cooking compartment to be well lit and a cooling fan to A c c e s s o r i e s accessories. -
Page 11: Combining Accessories
Before using for the first time Always insert the accessories fully into the cooking Optional accessories ■ compartment so they do not touch the appliance You can purchase optional accessories from the after- door. sales service and specialist retailers, or on the Internet. You will find a comprehensive range of products for Locking function your appliance in our brochures and on the Internet. -
Page 12: Cleaning The Cooking Compartment
Operating the appliance Setting the time 1Operating the appliance Use the & button to navigate to the next line. Use the ( or ) button to select the current time. Y ou have already learnt about the controls and how Press the % button. -
Page 13: Changing Or Cancelling The Appliance Operation
Operating the appliance Use the ( or ) button to select the type of heating. Use the # touch button to start the changed Use the & button to navigate to the next line. operation. Use the ( or ) button to select the temperature. Notes The cooling fan may continue to run while an ■... -
Page 14: Time-Setting Options
Time-setting options Touch the # touch button to start the appliance Touch the 0 touch button to start the timer. operation. The . symbol appears on the display.The timer Touch the ° touch button to activate the counts down. "PowerBoost" function. Note: As soon as the set time has elapsed, a signal The °... -
Page 15: Childproof Lock
Childproof lock If necessary, change the setting using the ( or ) Use the & button to navigate to the next line to save button. Set "00:00" to delete a time function. the setting. The setting is applied automatically. The "Automatic childproof lock" is deactivated. Touch the ±... -
Page 16: Setting Favourites
Sabbath mode FSabbath mode Display brightness Adjustable across 5 levels Clock display Digital Y ou can set a time of up to 74 hours using Sabbath S a b b a t h m o d e mode. The food in the cooking compartment remains Lighting On during operation warm, without you having to switch the appliance on or... -
Page 17: Surfaces In The Cooking Compartment
Cleaning agent Special cleaners for cleaning the appliance while it is ■ Door seal Hot soapy water: hot. Clean with a dishcloth. Do not remove. Wash new sponge cloths thoroughly before use. Do not scour. Check the position of the door seal after cleaning Tip: Highly recommended cleaning and care products it. -
Page 18: After Cleaning
Cleaning function compartment and the appliance door before you next Always remove flecks of limescale, grease, starch ■ heat up the appliance. and albumin (e.g. egg white) immediately. Use the universal pan for baking very moist cakes. ■ Leave the cooking compartment open to dry after Use suitable ovenware for roasting, e.g. -
Page 19: Base Clean
Cleaning function Touch the 0 touch button. Warning – Risk of burns! Use the ( or ) button to select "Base clean ®". ; The appliance becomes very hot on the outside Use the & button to navigate to the next line. during the cleaning function. -
Page 20: Rails
Rails qAppliance door pRails W ith good care and cleaning, your appliance will retain W ith good care and cleaning, your appliance will retain R a i l s A p p l i a n c e d o o r its appearance and remain fully functional for a long its appearance and remain fully functional for a long time to come. - Page 21 Appliance door Open the appliance door approx. 45° (fig. Warning Risk of injury! The door handle may break off. Do not carry the appliance door by the door handle. To carry or remove the appliance door, take hold of it with both hands, one on the left and one on the right.
-
Page 22: Removing And Installing The Door Panels
Appliance door Open the appliance door slightly until you hear a Push the intermediate panel downwards in the ‚ quiet click. Close the appliance door. area, carefully lift the ƒ holder until it can be pulled out (Fig. Warning Lift the intermediate panel from below (Fig. ) and Risk of injury if the door locks are not closed! remove it. -
Page 23: Trouble Shooting
Trouble shooting Insert the inner glass into the holder „ on the left and 3Trouble shooting right (Fig. Push the inner glass downwards until it locks into place (Fig. I f a fault occurs, there is often a simple explanation. T r o u b l e s h o o t i n g Before calling the after-sales service, please refer to the fault table and attempt to correct the fault yourself. -
Page 24: Maximum Operating Time Exceeded
Customer service Maximum operating time exceeded Glass cover Your appliance ends the operation automatically when If the glass cover of the halogen bulb is damaged, it no cooking time is set and the setting has not been must be replaced. You can obtain a new glass cover changed for a long time. -
Page 25: Tested For You In Our Cooking Studio
Tested for you in our cooking studio Baking on two levels: JTested for you in our Universal pan: Level 3 ■ cooking studio Baking tray: Level 1 Baking tins/dishes on the wire rack ■ First wire rack: Level 3 H ere, you can find a selection of dishes and the ideal Second wire rack: Level 1 T e s t e d f o r y o u i n o u r c o o k i n g s t u d i o settings for them. - Page 26 Tested for you in our cooking studio The setting values apply to food that is placed into a information can be found in the baking tips listed after cold cooking compartment; by doing this, you can the settings table. make energy savings of up to 20 per cent.If you preheat Remove unused accessories from the cooking the oven, you can reduce the indicated baking times by compartment.
- Page 27 Tested for you in our cooking studio Dish Accessories/cookware Shelf posi- Heating Tempera- Cooking tion function ture in °C time in mins. Yeast cake with dry topping Universal pan 160-180 15-20 ƒ Yeast cake with dry topping Universal pan 150-170 25-35 ‚...
- Page 28 Tested for you in our cooking studio Dish Accessories/cookware Shelf posi- Heating Tempera- Cooking tion function ture in °C time in mins. Biscuits, 2 levels Universal pan + baking tray 140-160 15-30 ‚ Biscuits, 3 levels Baking trays + universal pan 4+3+1 140-160 15-30...
-
Page 29: Bread And Rolls
Tested for you in our cooking studio Bread and rolls Frozen products Do not use frozen products that are heavily frosted. Your appliance offers you a range of heating types for Remove any ice on the food. baking bread and rolls. You can find the ideal settings for many dishes in the settings tables. - Page 30 Tested for you in our cooking studio Types of heating used: „ Circotherm intensive ■ ‚ CircoTherm … Bread baking ■ ■ ƒ Top/bottom heating ˆ Full-surface grill ■ ■ ‡ Circo-roasting ■ Dish Accessories Shelf posi- Type of Tempera- Cooking tion heating...
-
Page 31: Pizza, Quiche And Savoury Cakes
Tested for you in our cooking studio Pizza, quiche and savoury cakes not brown evenly. If you wish to bake using these baking tins/dishes and using top/bottom heating, slide Your appliance offers you a range of heating types for in the tin/dish at level 1. preparing pizza, quiche and savoury cakes. -
Page 32: Bakes And Soufflés
Tested for you in our cooking studio Types of heating used: „ Circotherm intensive ■ ‚ CircoTherm … Bread baking ■ ■ ƒ Top/bottom heating ■ Dish Accessories Shelf posi- Type of Tempera- Cooking tion heating ture in °C time in mins. -
Page 33: Poultry
Tested for you in our cooking studio energy savings of up to 20 per cent. If you preheat the Recommended setting values oven, the indicated cooking times will be reduced by In the table, you can find the ideal heating type for several minutes. - Page 34 Tested for you in our cooking studio In the table, you can find specifications for poultry with Grilling default values for the weight. If you wish to cook heavier Keep the appliance door closed when using the grill. poultry, use the lower temperature in every case. If Never grill with the appliance door open.
-
Page 35: Meat
Tested for you in our cooking studio Meat Uncovered cookware Use a deep roasting tin/dish for roasting meat. Place Your appliance offers you many heating types for the tin/dish onto the wire rack. If you do not have any preparing meat. You can find the ideal settings for many suitable cookware, use the universal pan. - Page 36 Tested for you in our cooking studio of meat, you should definitely use a lower temperature. additional information in the tips on roasting, braising If roasting several joints, use the weight of the heaviest and grilling attached to the settings table. piece as a basis for determining the cooking time.
-
Page 37: Fish
Tested for you in our cooking studio Tips on roasting and braising The cooking compartment becomes Prepare your food in an enclosed roasting dish with higher temperature or use the grill tray. You will achieve very dirty. the best roasting results if you use the grill tray. The grill tray can be bought later as a special accessory. The roast is too dark and the crack- Check the shelf position and temperature. -
Page 38: Vegetables And Side Dishes
Tested for you in our cooking studio As a general rule: the larger a fish, the lower the Remove unused accessories from the cooking cooking temperature and the longer the cooking time. compartment. This will achieve the best possible cooking results and energy savings of up to 20 per Turn any fish which is not in swimming position after cent. -
Page 39: Yogurt
Tested for you in our cooking studio Types of heating used: … Bread baking ■ ‚ CircoTherm ˆ Full-surface grill ■ ■ „ Circotherm intensive ■ Dish Accessories Shelf posi- Type of Tempera- Cooking tion heating ture in °C time in mins. - Page 40 Tested for you in our cooking studio Universal pan or baking tray Recommended setting values Slide the universal pan or the baking tray in carefully as Here, you can find specifications for the various dishes far as the limit stop with the bevelled edge facing the with CircoTherm Eco and Top/bottom heating Eco.
-
Page 41: Acrylamide In Foodstuffs
Tested for you in our cooking studio Dish Accessories/cookware Shelf posi- Type of Tempera- Cooking tion heating ture in °C time in mins. Pot-roasted beef, 1.5 kg Cookware, covered 200-220 140-160 ‘ Joint of veal, 1.5 kg Cookware, uncovered 170-180 110-130 ‘... -
Page 42: Drying
Tested for you in our cooking studio Type of heating used: Š Low temperature cooking ■ Dish Cookware Shelf posi- Heating Searing time Tempera- Cooking tion function in mins ture in °C time in mins Poultry Duck breast, medium rare, 300 g each Cookware, uncovered 45-60 Š... -
Page 43: Preserving
Tested for you in our cooking studio thinner the slices are, the quicker the drying process If you wish to dry additional foodstuffs, you should use will be and the more aromatic the dried food will similar foodstuffs in the table as a reference. remain. -
Page 44: Allowing The Dough To Prove At Dough Proving
Tested for you in our cooking studio Type of heating used: ‚ CircoTherm ■ Preserving Cookware Shelf posi- Type of Tempera- Cooking time in mins. tion heating ture in °C Vegetables, e.g. carrots 1-litre preserving jars 160-170 Before it starts bubbling:30-40 ‚... -
Page 45: Defrosting
Tested for you in our cooking studio Defrosting Tip: Items which were frozen flat or portioned defrost faster than those frozen in a block. Use heating type "CircoTherm" to defrost frozen fruit, vegetables and baked items. Poultry, meat and fish Remove frozen food from the packaging and place it in should ideally be defrosted in the refrigerator. - Page 46 Tested for you in our cooking studio Please note the information in the tables about Fatless sponge cake ■ Fatless sponge cake on two levels: vertically stack preheating. The setting values are valid without rapid springform cake tins in an offset manner on the wire heating-up.
- Page 48 *9001575931* 9001575931 000715...