Table of Contents
Advertisement
Quick Links
Advertisement
Table of Contents

Related Manuals for NEFF B47CS24 0 Series


Summary of Contents for NEFF B47CS24 0 Series
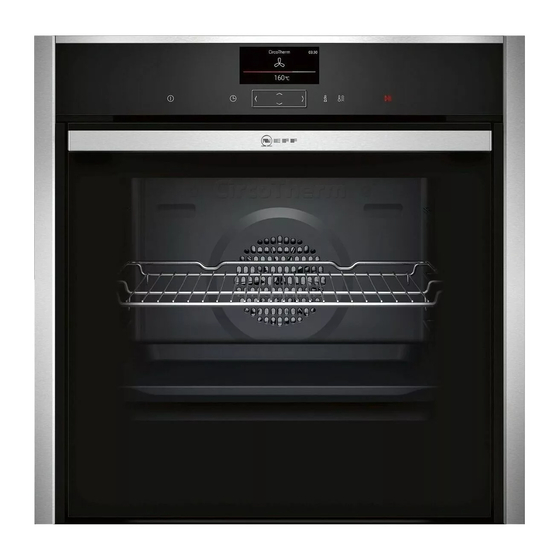
- Page 1 Built-in oven [en] INSTRUCTION MANUAL B47CS24.0...
-
Page 3: Table Of Contents
Table of contents [ e n ] I N S T R U C T I O N M A N U A L Intended use ......4 Baking and roasting assistant . -
Page 4: Intended Use
2000 metres above sea replacement parts and services can be found at level. www.neff-international.com and in the online shop www.neff-eshop.com This appliance may be used by children over the age of 8 years old and by persons with... -
Page 5: Important Safety Information
Important safety information Warning – Risk of injury! (Important safety Scratched glass in the appliance door may ■ information develop into a crack. Do not use a glass scraper, sharp or abrasive cleaning aids or detergents. General information i n f o r m a t i o n I m p o r t a n t s a f e t y The hinges on the appliance door move Risk of injury! -
Page 6: Causes Of Damage
Causes of damage ]Causes of damage 7Environmental protection General information Your new appliance is particularly energy-efficient. Here C a u s e s o f d a m a g e t e c t i o n E n v i r o n m e n t a l p r o you can find tips on how to save even more energy Caution! when using the appliance, and how to dispose of your... -
Page 7: Getting To Know Your Appliance
Getting to know your appliance Control panel *Getting to know your In the control panel, set the appliance's different appliance functions. The current settings are shown on the display. In this chapter, we will explain the displays and controls. y o u r a p p l i a n c e G e t t i n g t o k n o w You will also find out about the various functions of your appliance. -
Page 8: Main Menu
Getting to know your appliance Main menu MyProfile Individually adjusting the appliance settings Touch the 0 touch button to access the main menu. ~ "Basic settings" on page 16 Menu EasyClean š Types of heating ¢ Cleaning light soiling from the cooking compartment Selecting the required type of heating and tempera- ~ "Cleaning function"... -
Page 9: Cooking Compartment Functions
Accessories Cooking compartment functions _Accessories The functions in the cooking compartment make your appliance easier to use. This, for example, enables the Your appliance is accompanied by a range of cooking compartment to be well lit and a cooling fan to A c c e s s o r i e s accessories. -
Page 10: Combining Accessories
Accessories Ensure that the accessory is placed under the lug ‚ on When inserting baking trays, ensure that the lug ƒ is at the pull-out rail. the rear and is facing downwards. The sloping edge of the accessory „ must be facing towards the appliance Example in the picture: Universal pan door. -
Page 11: Before Using For The First Time
Before using for the first time KBefore using for the first Profi pan Z12CN10A0 Lid for the Profi pan Z12CL10A0 time Pizza tray Z1352X0 Grill tray Z12CQ10A0 Before you can use your new appliance, you must t h e f i r s t t i m e B e f o r e u s i n g f o r Ceramic brick Z1913X0... -
Page 12: Cleaning The Accessories
Operating the appliance Set the heating type and temperature, then start the 1Operating the appliance appliance operation. ~ "Setting and starting the appliance operation" on page 12 You have already learnt about the controls and how Settings p l i a n c e O p e r a t i n g t h e a p they work. -
Page 13: Changing Or Cancelling The Appliance Operation
Operating the appliance Use the ( or ) button to select the temperature. Changing or cancelling the appliance operation Changing the appliance operation Use the # button to stop the operation. Use the & or % button to navigate to the line for the setting that should be changed. -
Page 14: Time-Setting Options
Time-setting options Activating the "Rapid heat-up" function OTime-setting options Set top/bottom heating ƒ and the temperature. Note: Set a temperature above 100 °C to allow the Your appliance has different time-setting options. appliance to preheat quickly. i o n s T i m e - s e t t i n g o p t Touch the # touch button to start the appliance Time-setting option... -
Page 15: Setting The Cooking Time
Childproof lock Setting the cooking time AChildproof lock Once the set cooking time has elapsed, the appliance switches off automatically. The function can only be Your appliance is equipped with a childproof lock so used in combination with a type of heating. C h i l d p r o o f l o c k that children cannot switch it on accidentally or change any settings. -
Page 16: One-Time Childproof Lock
Basic settings One-time childproof lock QBasic settings The control panel is locked so that the appliance cannot be switched on. To switch it on, the one-time childproof There are various settings available to you in order to lock must be deactivated. After the appliance is B a s i c s e t t i n g s help use your appliance effectively and simply. -
Page 17: Setting Favourites
Baking and roasting assistant nBaking and roasting Fan run-on time Recommended Minimum assistant Pull-out system* Not retrofitted (rack or single pull-out sys- tem) The baking and roasting assistant helps you to prepare Retrofitted (double or triple pull-out sys- n g a s s i s t a n t B a k i n g a n d r o a s t i meals with ease. -
Page 18: Setting Meal
Sabbath mode FSabbath mode Dishes Beef pot roast Leg of lamb, boned You can set a time of up to 74 hours using Sabbath S a b b a t h m o d e mode. The food in the cooking compartment remains Chicken, whole warm, without you having to switch the appliance on or Chicken legs... -
Page 19: Cleaning Agent
Cleaning agent DCleaning agent Door panels Hot soapy water: Clean with a dish cloth and then dry with a soft cloth. With good care and cleaning, your appliance will retain Do not use a glass scraper or a stainless steel C l e a n i n g a g e n t its appearance and remain fully functioning for a long scouring pad. -
Page 20: Surfaces In The Cooking Compartment
Cleaning agent Surfaces in the cooking compartment After cleaning The back wall in the cooking compartment is self- After cleaning the door seal, check whether it is sitting cleaning.You can tell this from the rough surface. correctly on the left- and right-hand side (fig. The base, ceiling and side panel are enamelled and If the door seal is running over the spacer ‚, push the have smooth surfaces. -
Page 21: Cleaning Function
Cleaning function Final cleaning .Cleaning function Open the appliance door and remove the remaining water with an absorbent sponge cloth. The EasyClean cleaning aid makes it easier to clean the Clean the smooth surfaces in the cooking C l e a n i n g f u n c t i o cooking compartment. -
Page 22: Rails
Rails Push the bar towards the back ‚ and down ƒ onto pRails the pin „ (Fig. " Ensure that the hook is hooked onto the pin „ (Fig. With good care and cleaning, your appliance will retain R a i l s its appearance and remain fully functional for a long time to come. -
Page 23: Appliance Door
Appliance door Open the appliance door a little (Fig. qAppliance door Using a coin, fully turn both the left- and right-hand locks on the inside of the appliance at the bottom (Fig. With good care and cleaning, your appliance will retain &... -
Page 24: Removing And Installing The Door Panels
Appliance door Removing and installing the door panels Fitting the appliance door Fit the appliance door (Fig. For cleaning, you can remove the glass panels from the Fit the appliance door in the left and right-hand guide appliance door. rollers simultaneously (Fig. "... - Page 25 Appliance door Installation Note: When fitting the door panels, ensure that they are in the original order. Insert the intermediate panel and push it in the direction of the arrow until it is fitted in the frame. The arrow on the intermediate panel must line up with the arrow on the frame (Fig.
-
Page 26: Trouble Shooting
Trouble shooting 3Trouble shooting Warning – Risk of electric shock! Incorrect repairs are dangerous. Repairs may only be carried out and damaged power cables replaced by If a fault occurs, there is often a simple explanation. one of our trained after-sales technicians. If the T r o u b l e s h o o t i n g Before calling the after-sales service, please refer to the appliance is defective, unplug the appliance from the... -
Page 27: Replacing The Bulb In The Top Of The Cooking Compartment
Customer service Replacing the bulb in the top of the cooking 4Customer service compartment If the cooking compartment light bulb fails, it must be Our after-sales service is there for you if your appliance replaced. Heat-resistant, 40 watt, 230 V halogen bulbs C u s t o m e r s e r v i c e needs to be repaired. -
Page 28: Tested For You In Our Cooking Studio
Tested for you in our cooking studio Baking on two levels: JTested for you in our Universal pan: Level 3 ■ Baking tray: Level 1 cooking studio Baking tins/dishes on the wire rack ■ First wire rack: Level 3 Here, you can find a selection of dishes and the ideal Second wire rack: Level 1 u d i o n o u r c o o k i n g s t... - Page 29 Tested for you in our cooking studio The setting values apply to dishes placed into a cold Remove unused accessories from the cooking cooking compartment. By doing so, you can make compartment. This will achieve the best possible energy savings of up to 20 per cent. If you preheat the cooking results and energy savings of up to 20 per oven, you can reduce the indicated baking times by cent.
- Page 30 Tested for you in our cooking studio Dish Accessories/cookware Shelf posi- Type of Tempera- Cooking tion heating ture in °C time in mins. Yeast cake with dry topping Universal pan 160-180 15-20 ƒ Yeast cake with dry topping Universal pan 150-170 25-35 ‚...
- Page 31 Tested for you in our cooking studio Dish Accessories/cookware Shelf posi- Type of Tempera- Cooking tion heating ture in °C time in mins. Biscuits, 2 levels Universal pan + baking tray 140-160 15-30 ‚ Biscuits, 3 levels Baking trays + universal pan 4+3+1 140-160 15-30...
-
Page 32: Bread And Rolls
Tested for you in our cooking studio Bread and rolls Frozen products Do not use frozen products that are heavily frosted. Your appliance offers you a range of heating types for Remove any ice on the food. baking bread and rolls. You can find the ideal settings for many dishes in the settings tables. -
Page 33: Pizza, Quiche And Savoury Cakes
Tested for you in our cooking studio Dish Accessories Shelf posi- Type of Tempera- Cooking tion heating ture in °C time in mins. Bread White bread, 750 g Universal pan or cake tin 180-200* 30-40 ƒ White bread, 750 g Universal pan or cake tin 210-220* 10-15... - Page 34 Tested for you in our cooking studio Baking on several levels Frozen products Use CircoTherm. Baked items that are placed into the Do not use frozen products that are heavily frosted. oven on trays or in baking tins/dishes at the same time Remove any ice on the food.
-
Page 35: Bakes And Soufflés
Tested for you in our cooking studio Dish Accessories Shelf posi- Type of Tempera- Cooking tion heating ture in °C time in mins. Pizza, deep-pan, x 2 Universal pan + wire rack 190-210 20-30 … Pizza baguette Wire rack 200-220 15-20 „... -
Page 36: Poultry
Tested for you in our cooking studio Bakes & soufflés Accessories/cookware Shelf posi- Type of Tempera- Cooking tion heating ture in °C time in mins. Bake, savoury, cooked ingredients Ovenproof dish 170-190 35-50 ‚ Bake, savoury, cooked ingredients Ovenproof dish 200-220 30-50 ƒ... -
Page 37: Meat
Tested for you in our cooking studio In the table, you can find specifications for poultry with Tips default values for the weight. If you wish to cook heavier For duck or goose, pierce the skin on the underside ■ poultry, use the lower temperature in every case. - Page 38 Tested for you in our cooking studio Slide the universal pan into the oven at the indicated Grilling shelf position with the wire rack attached. Ensure that Keep the appliance door closed when using the grill. the wire rack is correctly positioned on the universal Never grill with the appliance door open.
- Page 39 Tested for you in our cooking studio Dish Accessories/cookware Shelf posi- Type of Tempera- Cooking tion heating ture in °C time in mins. Pork Joint of pork without rind, e.g. neck, 1.5 kg Cookware, uncovered 180-190 110-130 ‡ Joint of pork with rind, e.g. shoulder, 2 kg Wire rack 190-200 130-140...
-
Page 40: Fish
Tested for you in our cooking studio Fish When stewing, add two to three tablespoons of liquid and a little lemon juice or vinegar into the cookware. Your appliance offers you a range of heating types for Very hot steam may escape when opening the lid after preparing fish. -
Page 41: Vegetables And Side Dishes
Tested for you in our cooking studio Dish Accessories/cookware Shelf posi- Type of Tempera- Cooking tion heating ture in °C time in mins. Fish Fish, grilled, whole 300 g, e.g. trout Wire rack 170-190 20-30 ‡ Fish, grilled, whole 1.5 kg, e.g. salmon Wire rack 170-190 30-40... -
Page 42: Yogurt
Tested for you in our cooking studio Dish Accessories Shelf posi- Type of Tempera- Cooking tion heating ture in °C time in mins. Potato products, frozen Potato rösti Universal pan 200-220 25-35 „ Potato pockets, filled Universal pan 190-210 20-30 „... - Page 43 Tested for you in our cooking studio Types of heating used: ž CircoTherm Eco ■ ‘ Top/bottom heating Eco ■ Dish Accessories/cookware Shelf posi- Type of Tempera- Cooking tion heating ture in °C time in mins. Cakes in tins Sponge cake in a tin Ring tin/cake tin 140-160 60-80...
-
Page 44: Acrylamide In Foodstuffs
Tested for you in our cooking studio Acrylamide in foodstuffs crisps, chips, sliced bread, bread rolls, bread or fine baked goods (biscuits, gingerbread, spiced biscuit). Acrylamide is mainly produced in grain and potato products prepared at high temperatures, such as potato Tips for keeping acrylamide to a minimum General Keep cooking times as short as possible. -
Page 45: Drying
Tested for you in our cooking studio Dish Cookware Shelf posi- Type of Searing time Tempera- Cooking tion heating in mins. ture in °C time in mins. Pork medallions, 4 cm thick Cookware, uncovered 90-120 Š Beef Joint of beef (rump), 6-7 cm thick, Cookware, uncovered 8-10 210-270... -
Page 46: Preserving
Tested for you in our cooking studio Fruit, vegetables and herbs Accessories Type of Tempera- Cooking heating ture in °C time in hours Pomes (apple rings, 3 mm thick, 200 g per wire rack) 1-2 wire racks ‚ Stone fruit (plums) 1-2 wire racks 8-10 ‚... -
Page 47: Setting
Tested for you in our cooking studio Preserving Cookware Shelf posi- Type of Tempera- Cooking time in mins. tion heating ture in °C Stone fruit, e.g. cherries, damsons 1-litre preserving jars 160-170 Before it starts bubbling:30-40 ‚ Residual heat:35 Pomes, e.g. apples, strawberries 1-litre preserving jars 160-170 Before it starts bubbling:30-40... -
Page 48: Keeping Warm
Tested for you in our cooking studio Dish Accessories Shelf posi- Type of Tempera- Cooking tion heating ture in °C time in mins. Bread, bread rolls Bread & bread rolls general Baking tray 40-70 “ Cake Cake, moist Baking tray 70-90 “... -
Page 49: Test Dishes
Tested for you in our cooking studio Test dishes Apple pie on two levels: position dark-coloured springform cake tins above each other so that they are These tables have been produced for test institutes to offset. facilitate the inspection of the appliance. Cakes in tinplate springform cake tins: bake on one In accordance with EN 60350-1:2013 and IEC level with top/bottom heating. - Page 50 Tested for you in our cooking studio Type of heating used: Grilling ˆ Grill, large area Also slide in the universal pan. The liquid will be caught ■ and the cooking compartment stays cleaner. Dish Accessories Shelf posi- Type of Tempera- Cooking tion...
- Page 52 *9001024300* 9001024300 951109...