
Related Manuals for HELIX GRANVILLE-PHILLIPS Convectron ATM

Summary of Contents for HELIX GRANVILLE-PHILLIPS Convectron ATM
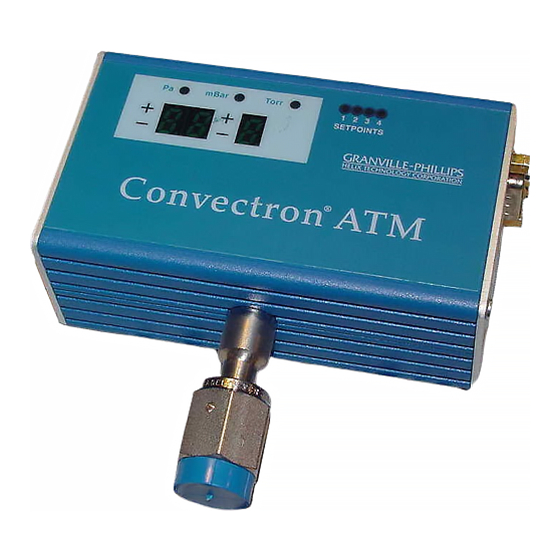
- Page 1 Convectron ® Vacuum Gauge Module GRANVILLE-PHILLIPS HELIX TECHNOLOGY CORPORATION Instruction Manual Instruction manual part number 385004 Revision 01 September 2004...
- Page 3 Instruction Manual © 2004, Helix Technology Corporation. All rights reserved. Convectron is a registered trademark of Helix Technology Corporation. Granville-Phillips is a trademark of Helix Technology Corporation. All other trademarks and registered trademarks are the properties of their respective owners.
-
Page 5: Table Of Contents
Contents Chapter 1 Before You Begin ........About these instructions . - Page 6 Contents Chapter 3 Analog Module Operation ......Preparing to operate the analog module ....Analog output .
- Page 7 Contents Chapter 5 Maintenance ......... Customer service .
- Page 8 ® Convectron ATM Vacuum Gauge Module Instruction Manual...
-
Page 9: Chapter 1 Before You Begin
Chapter 1 Before You Begin These instructions explain how to install, operate, and maintain the About these instructions ® ® Granville-Phillips Convectron ATM vacuum gauge module. • This chapter explains caution and warning statements, which must be adhered to at all times; explains your responsibility for reading and following all instructions;... -
Page 10: Reading And Following Instructions
• Heed warnings and cautions – Adhere to all warnings and caution statements on the product and in these instructions. • Parts and accessories – Install only those replacement parts and accessories that are recommended by Helix Technology. Substitution of parts is hazardous. ®... -
Page 11: Definitions Of Terms
Before You Begin The following terms are used throughout this manual in reference to the Definitions of terms Convectron ATM vacuum gauge module: Table 1-1 Terms describing Convectron ATM module and components Term Description Module The Convectron ATM vacuum gauge module, which contains a Convectron convection-enhanced Pirani heat-loss pressure gauge and a Piezo resistive diaphragm pressure sensor and electronics Convectron gauge... - Page 12 ® Convectron ATM Vacuum Gauge Module Instruction Manual...
-
Page 13: Chapter 2 Installation
Chapter 2 Installation The Convectron ATM module contains a Convectron convection-enhanced Module components Pirani heat-loss gauge and a Piezo resistive diaphragm sensor. WARNING Using the module to measure the pressure of flammable or explosive gases can cause a fire or explosion resulting in severe property damage, personal injury, or death. -
Page 14: Installation Procedure
Chapter 2 Figure 2-2 illustrates the RS–485 version of the module. In the RS–485 version, each of the four setpoint relays can be independently assigned to the Convectron gauge or the differential pressure sensor. Figure 2-2 RS–485 version of module Setpoint activation indicators Optional display... -
Page 15: Step 1 Install Pressure Relief Devices
Before you install the module, install appropriate pressure relief devices in the vacuum system. Helix Technology does not supply pressure relief valves or rupture disks. Suppliers of pressure relief valves and rupture disks are listed in the Thomas Register under “Valves, Relief” and “Discs, Rupture.”... -
Page 16: Orient The Module
Chapter 2 For proper operation of the module above 1 Torr, orient the module so the Orient the module axis is horizontal (see Figure 2-3). Although the Convectron gauge will read correctly below 1 Torr with the module mounted in any position, inaccurate readings will result at pressures above 1 Torr if the module axis is not horizontal. -
Page 17: Step 3 Attach Module To Vacuum Chamber
Installation Step 3 Attach module to vacuum chamber Attach the module vacuum chamber fitting to its mate on the vacuum chamber. The 1/8 NPT pipe thread accommodates a standard 1/8 NPT female fitting. 1/8 NPT pipe thread ® Wrap the threads of the port to the vacuum chamber with Teflon tape. -
Page 18: Step 4 Assemble And Connect Wiring
Chapter 2 Step 4 Assemble and connect wiring Cable is user-supplied. Helix Technology does not supply cable. Connecting cable Install externally shielded cable. • Connect the shield at both ends of the cable. • At the module end of the cable, connect the shield to the outer shell of the subminiature D connector. - Page 19 Installation Figure 2-4 Analog male I/O connector on module end panel Analog output 5 15 Relay 1 common Power ground 4 14 Relay 1 normally closed 11–26 V power input 3 13 Relay 2 normally closed Setpoint 2 adjust 2 12 Relay 2 common Setpoint 1 adjust 1 11 Relay 2 normally open...
-
Page 20: Grounding
Chapter 2 Grounding WARNING Improper grounding could cause product failure, serious personal injury, or death. To reduce the risk of product failure, serious personal injury, or death, follow ground network requirements for the facility. • Maintain all exposed conductors at earth ground. •... -
Page 21: Step 5 Configure Setpoint Relays For The Application
Installation Step 5 Configure setpoint relays for the application • To configure setpoint relays for the analog version of the module, see pages 26–33. • To configure setpoint relays for the RS–485 version of the module, see pages 49–53. If the module will measure the pressure of a gas other than N or air, you must adjust relay setpoints for the process gas. -
Page 22: Eliminating Radio Frequency Interference
Chapter 2 The RS–485 version of the module has been tested and found to comply Eliminating radio frequency interference with U.S. Federal Communications Commission (FCC) limits for a Class A digital device, pursuant to Part 15 of the FCC rules. These limits provide reasonable protection against harmful interference when the module operates in a commercial environment. -
Page 23: Chapter 3 Analog Module Operation
Chapter 3 Analog Module Operation This chapter explains how to operate the Convectron ATM module with a Preparing to operate the analog module non-linear analog output. WARNING Using the module to measure the pressure of flammable or explosive gases can cause a fire or explosion resulting in severe property damage, personal injury, or death. -
Page 24: Analog Setpoint Relay
Chapter 3 Table 3-1 Front panel features Feature Description Measure at: Set to: CONVECTRON ATM Enables Convectron gauge calibration at CONVECTRON 5.534 V at ADJUST potentiometer atmospheric pressure ANALOG and 760 Torr of N COMMON test points CONVECTRON VAC Enables Convectron gauge calibration at CONVECTRON 0.375 V at –4... - Page 25 1 setpoint for the process gas that will be used. See pages 26–33. If you need application assistance, phone a Helix Technology application engineer at 1–303–652–4400 or 1–800–776–6543 within the U.S.A., or mail custserv@helixtechnology.com.
-
Page 26: Analog Output
Chapter 3 The module contains a convection-enhanced Pirani thermal conductivity Analog output gauge. The gauge measures the heat loss from a heated, gold-plated tungsten sensing wire that is maintained at a constant temperature. The vacuum chamber pressure indicated by the gauge depends on the gas type, gas density (pressure), and the module orientation. - Page 27 Analog Module Operation Table 3-4 Equations for calculating N or air pressure versus analog output voltage • To convert Torr to mbar, multiply “y” by 1.333 • To convert Torr to Pa, multiply “y” by 133.3 Segment Output voltage Equation where y = pressure in Torr and x = voltage Coefficients 0.375 to 2.842 V –0.02585...
- Page 28 Chapter 3 Figure 3-2 Analog output voltage vs. indicated N or air pressure, 1 mTorr to 100 mTorr Analog Output - VDC ® Convectron ATM Vacuum Gauge Module Instruction Manual...
- Page 29 Analog Module Operation Figure 3-3 Analog output voltage vs. indicated N or air pressure, 100 mTorr to 1000 Torr 1000 Analog Output - VDC ® Convectron ATM Vacuum Gauge Module Instruction Manual...
- Page 30 Chapter 3 Table 3-5 Voltages (VDC) for commonly used gases, 0.1 mTorr to 1000 Torr ® Convectron ATM Vacuum Gauge Module Instruction Manual...
- Page 31 Analog Module Operation –4 –1 Figure 3-4 True pressure versus indicated pressure for commonly used gases, 10 to 10 Torr Convectron gauge axis must be horizontal Pressure unit equivalents: 1 µm Hg = 1 mTorr = 1 x 10 –3 Torr 1000 µm Hg = 1 Torr 1 mbar = 100 Pa...
- Page 32 Chapter 3 –1 Figure 3-5 True pressure versus indicated pressure for commonly used gases, 10 to 1000 Torr Convectron gauge axis must be horizontal Pressure unit equivalents: 1 µm Hg = 1 mTorr = 1 x 10 –3 Torr 1000 µm Hg = 1 Torr 1 mbar = 100 Pa Indicated pressure in Torr (Nitrogen equivalent)
- Page 33 Analog Module Operation –1 Figure 3-6 True pressure versus indicated pressure for commonly used gases, 10 to 1000 Torr Convectron gauge axis must be horizontal Pressure unit equivalents: 1 µm Hg = 1 mTorr = 1 x 10 –3 Torr 1000 µm Hg = 1 Torr 1 mbar = 100 Pa Indicated pressure in Torr...
-
Page 34: Setpoint Relays
Chapter 3 The module includes two single-pole, double throw (SPDT) relays. Each Setpoint relays relay has a programmable setpoint. The setpoint is a voltage level that corresponds to a specified pressure at which the relay activates and deactivates. See Table 3-6. In default mode, relay 1 activates with decreasing vacuum chamber pressure and deactivates at a higher pressure than the activation pressure, as illustrated in Figure 3-7. -
Page 35: Setpoint 1: Convectron Gauge
Analog Module Operation Figure 3-8 Relay 2 behavior Time Activate 8 Torr hysteresis Deactivate Relay activated Activated Deactivated If the module will measure the pressure of any process gas other than N Setpoint 1: Convectron gauge air, you must adjust setpoint 1 for the process gas that will be used. The true pressure of a gas other than N or air may be substantially different from the pressure that the output indicates. -
Page 36: Analog Test Point For Relay 1
Chapter 3 If you are using Figure 3-10 or Figure 3-11, find the point at which the horizontal line representing the desired trip point for N or air pressure intercepts the vertical line representing test point voltage. For example: • in Figure 3-10, a test point voltage of 0.64 V represents an N or air pressure of 40 mTorr. -
Page 37: Test Point Voltage Versus Pressure
Analog Module Operation Figure 3-10 Example test point voltage: 0.64 V equals 40 mTorr of N or air mTorr 0.64 V Test Point Voltage ® Convectron ATM Vacuum Gauge Module Instruction Manual... - Page 38 Chapter 3 Figure 3-11 Example test point voltage: 4.8 V equals 40 Torr of N or air 1000 Torr 4.8 V Test Point Voltage ® Convectron ATM Vacuum Gauge Module Instruction Manual...
-
Page 39: Setpoint 2: Differential Pressure Sensor
Analog Module Operation Refer to Figure 3-12 and use a a high-precision, high-input impedance Setpoint 2: differential pressure sensor > 1 MΩ) DVM to adjust relay 2. Use the following equation or the data in Figure 3-12 to determine the analog output voltage that corresponds to the differential pressure, in Torr, at which relay 2 will activate and deactivate: ×... -
Page 40: Analog Test Point For Relay 2
Chapter 3 Use a high-precision, high-input impedance (Z > 1 MΩ) DVM to measure the setpoint voltage across the SETPOINT2 and COMMON test points on the module front panel. Figure 3-13 illustrates SETPOINT2 and COMMON test points. Use a flat-head instrument screwdriver to adjust the SETPOINT2 potentiometer for the desired setpoint voltage at which relay 2 will activate and deactivate. -
Page 41: Setting Differential Pressure Activation Direction
Analog Module Operation Use the jumpers inside the module to set activation direction for relay 2. Setting differential pressure activation Activation direction determines whether relay 2 activates with increasing direction differential pressure or with decreasing differential pressure. To set the jumpers, refer to Figure 3-14 and follow these instructions: Shut off power to the module. -
Page 42: Reading Relay Status
Chapter 3 Use the setpoint indicators, illustrated in Figure 3-15, to read Reading relay status activation/deactivation status of relays. • The ON indicator is green when the module power supply is ON. • The SETPOINT1 indicator is green when relay 1 is activated. •... - Page 43 Analog Module Operation Figure 3-16 Atmospheric pressure calibration test points and potentiometers CONVECTRON ANALOG COMMON test point test point CONVECTRON ADJUST ATM potentiometer Table 3-7 Typical atmospheric pressures at altitude/Torr/voltage relationships Altitude (ft. above sea level) Pressure of N or air (Torr) Analog output voltage (VDC) 5.534 1000...
-
Page 44: Torr
Chapter 3 Periodic resets of the vacuum chamber calibration point improve the Calibrating Convectron gauge at vacuum accuracy and repeatability of the Convectron gauge. chamber pressure Regardless of the process gas that is being used, you should always use N or air to calibrate the Convectron gauge at vacuum chamber pressure. -
Page 45: Calibrating Differential Pressure Sensor Zero
Analog Module Operation The differential pressure sensor is factory calibrated to produce a 4.000 Calibrating differential pressure sensor zero VDC output at zero differential pressure. Any offset in this value may be adjusted in the field. An offset error is 1 Torr per 4 mV error in the analog output. For example, if output voltage equals 4.040 V, the zero error for the differential pressure sensor is +10 Torr. -
Page 46: Factory Settings
Chapter 3 Table 3-8 lists factory relay setpoint values and activation direction. Factory settings Table 3-8 Factory settings for relays Relay Default setting Relay 1 • Setpoint: Below 0.0 Torr vacuum chamber pressure • State: Deactivated (resets relay 1 to deactivated state) •... -
Page 47: Chapter 4 Rs-485 Module Operation
Chapter 4 RS–485 Module Operation This chapter explains how to operate the Convectron ATM module with an Preparing to operate the RS–485 module RS–485 digital output. WARNING Using the module to measure the pressure of flammable or explosive gases can cause a fire or explosion resulting in severe property damage, personal injury, or death. - Page 48 See pages 49–54. If you need application assistance, phone a Helix Technology application engineer at 1–303–652–4400 or 1–800–776–6543 within the U.S.A., or mail custserv@helixtechnology.com. • Figure 4-1 illustrates the RS–485 version front panel.
- Page 49 RS–485 Module Operation Table 4-2 Front panel features Feature Description –4 Optional LED pressure display • Pressure range: 1.0 x 10 Torr to 9.9 x 10 Torr • Can indicate vacuum chamber pressure measured by Convectron gauge or differential pressure measured by differential pressure sensor •...
-
Page 50: Address
Chapter 4 You must assign an address to enable the module to communicate with the Address host. Use the rotary switches, located on the module back panel, to set a hexadecimal value of 0 to 255 for the address. Figure 4-2 on page 42 illustrates the switches. -
Page 51: Rs-485 Commands
RS–485 Module Operation RS–485 commands require entry of integer values, hex code values (such as RS–485 commands “0F”), values in engineering notation (such as “2.00E+02”), and alphanumeric character strings. The ↵ symbol at the end of the command represents the carriage return (CR), which is entered as hex code 0D or by simultaneously pressing the “Control”... -
Page 52: Baud Rate
Chapter 4 The example set baud rate (SB) command sequence sets the baud rate to Baud rate 2400 baud: #01SB2400 ↵ Example SB command from host: *01 PROGM OK ↵ Response from module: Allowable SB values are 1200, 2400, 4800, 9600, 19200 (default), or 38400 baud. -
Page 53: Setpoint Relays
RS–485 Module Operation The module includes four single-pole, single throw (SPST) relays. Each relay Setpoint relays has programmable activation and deactivation setpoints. The setpoint is a programmable value representing an N or air pressure at which the relay activates or deactivates. •... - Page 54 Chapter 4 –4 –1 Figure 4-3 Reading true pressure values, 10 to 10 Torr 1.5 x 10 Torr –2 Convectron gauge axis must be horizontal Pressure unit equivalents: 1 µm Hg = 1 mTorr = 1 x 10 –3 Torr 1000 µm Hg = 1 Torr 1 mbar = 100 Pa Torr...
- Page 55 RS–485 Module Operation –1 Figure 4-4 Reading true pressure values, 10 to 1000 Torr 700 Torr Convectron gauge axis must be horizontal Pressure unit equivalents: 1 µm Hg = 1 mTorr = 1 x 10 –3 Torr 1000 µm Hg = 1 Torr 1 mbar = 100 Pa 20 Torr Indicated pressure in Torr (Nitrogen equivalent)
- Page 56 Chapter 4 –1 Figure 4-5 Reading true pressure values, 10 to 1000 Torr 200 Torr Convectron gauge axis must be horizontal Pressure unit equivalents: 1 µm Hg = 1 mTorr = 1 x 10 –3 Torr 1000 µm Hg = 1 Torr 1 mbar = 100 Pa 6 Torr Indicated pressure in Torr (Nitrogen equivalent)
-
Page 57: Adjusting Setpoints
RS–485 Module Operation If the module will measure the pressure of any process gas other than N Adjusting setpoints air, you must adjust setpoints for the process gas that will be used. If the module will measure the pressure of a gas other than N or air, you must adjust setpoints for the process gas. -
Page 58: Activation Direction
Chapter 4 Example PC command from host: #01PC1A+1.01E–01 ↵ *01 PROGM OK ↵ Response from module: Example PC command from host: #01PC1D+2.00E–01 ↵ *01 PROGM OK ↵ Response from module: The “PC1” value identifies process control relay 1. The “A” (activation) and “D” (deactivation) pressure values determine activation and deactivation pressures at which the relay switches states. -
Page 59: Relay 1 And 3 Behavior
RS–485 Module Operation Figure 4-6 Relay 1 and 3 default behavior Time Deactivate Software- defined hysteresis Activate Relay activated Activated Deactivated Figure 4-7 Relay 2 and 4 default behavior Time Activate Software- defined hysteresis Deactivate Relay activated Activated Deactivated ® Convectron ATM Vacuum Gauge Module Instruction Manual... - Page 60 Chapter 4 The plus (+) or minus (–) sign that precedes the pressure value is meaningful only if the relay will indicate differential pressure. If the relay is assigned to vacuum chamber pressure, you should not enter a + or – sign preceding the “A” and “D” pressure values. •...
-
Page 61: Disabling An Operable Relay
RS–485 Module Operation If relays have been made operable, you may send an O command to disable Disabling an operable relay any specified relay. The example command disables relay 1 by shutting it OFF: #01PC1O ↵ Example PC command from host: *01 PROGM OK ↵... -
Page 62: Reading Setpoint Relay Status
Chapter 4 The example process control gauge (PCG) command sequence assigns relays 1 and 3 to the Convectron gauge and relays 2 and 4 to the differential pressure sensor: #01PCGCCDD ↵ Example PCG command from host: *01 PROGM OK ↵ Response from module: The 4-digit value following “PCG”... -
Page 63: Pressure Values And Units
RS–485 Module Operation Use RS–485 set the pressure unit and to read the vacuum chamber pressure Pressure values and units or differential pressure value. The example set unit (SU) command sets the pressure unit to Torr: Setting and reading the pressure unit #01SUT ↵... -
Page 64: Calibrating Convectron Gauge At Atmospheric Pressure
Chapter 4 An atmospheric pressure calibration is performed on the Convectron gauge, Calibrating Convectron gauge at atmospheric using N , at the factory before the module is shipped. pressure Because performance varies depending on the process gas, you may wish to reset the atmospheric calibration point if a gas other than N or air is being used. -
Page 65: Torr
The example read firmware version (VER) command causes the module to 4.11 Reading the firmware version return a value that represents the Helix Technology internal part number 16400 and firmware revision 01 for the module: #01VER ↵ Example VER command from host: *01 16400–00 ↵... -
Page 66: Factory Defaults
Chapter 4 Table 4-11 lists default settings for the RS–485 version of the module. After 4.12 Factory defaults you’ve reconfigured the module, you may restore all parameters to their default values by cycling power to the module or by sending a factory reset (FAC) command. -
Page 67: Summary Of Rs-485 Commands
RS–485 Module Operation • Table 4-12, below, summarizes process control, send, and calibration 4.13 Summary of RS–485 commands commands. • Table 4-13 on page 60 summarizes read commands. Table 4-12 Process control, calibration, and set commands Type Description Structure Process control commands #XXPCGXXXX ↵... - Page 68 Chapter 4 Table 4-13 Read commands Type Description Structure Read commands #XXRPC1A ↵ RPC1A Read pressure at which relay 1 activates #XXRPC1D ↵ RPC1D Read pressure at which relay 1 deactivates #XXRPC2A ↵ RPC2A Read pressure at which relay 2 activates #XXRPC2D ↵...
-
Page 69: Maintenance
Chapter 5 Maintenance For customer service: Customer service • Phone 1–303–652–4400 or 1–800–776–6543 within the U.S.A. • Email custserv@helixtechnology.com. Shut off power to the module and refer servicing to qualified service Damage requiring service personnel under the following conditions: If any liquid has been spilled onto, or objects have fallen into, the module. -
Page 70: Symptoms, Causes, And Solutions
Substitution or modifying parts can result in serious product damage or personal injury due to electrical shock or fire. • Install only those replacement parts that are specified by Helix Technology. • Do not install substitute parts or perform any unauthorized modification to the module. •... - Page 71 Maintenance Table 5-1 Failure symptoms, causes, and solutions Symptom Possible causes Solution Output voltage = 0 V 11.5 to 26.5 V power supply cable is Repair or replace power supply cable improperly connected or faulty. (see page 10). Pressure reading is too high. •...
-
Page 72: Error Messages
Chapter 5 Table 5-2 on page 65 lists failure symptoms, causes, and solutions that are RS–485 error messages indicated by any of the following responses from the module: • A defective or contaminated Convectron gauge. • Excessive system pressure. • Failure to install the module according to the instructions on pages 5-14. •... - Page 73 Maintenance Table 5-2 Troubleshooting RS–485 error messages Message from module Possible causes Solution DEF SNSR • Convectron gauge is defective. • If Convectron gauge or diaphragm pressure • Diaphragm pressure sensor is defective. sensor is defective, return module to factory (see •...
-
Page 74: Convectron Gauge Test
Chapter 5 Table 5-3 Troubleshooting RS–485 responses related to data entry or inability to process a command Message from module Possible causes Solution COMM ER Parity error in command from host. Verify that parity from host matches parity configuration for module. NVRAM ER Module cannot write data to non-volatile memory 1. -
Page 75: Convectron Gauge Removal And Replacement
Maintenance Figure 5-1 Convectron gauge base Table 5-4 Convectron gauge resistance values Pins Normal resistance (Ω) 15 to 25 Ω Pins 1 to 2 50 to 60 Ω Pins 2 to 3 175 to 190 Ω Pins 1 to 5 Convectron gauge removal and replacement WARNING... -
Page 76: Removing The Convectron Gauge
Chapter 5 To avoid contaminating the Convectron gauge, wear sterile gloves during Removing the Convectron gauge the removal procedure. Refer to Figure 5-2 and follow these instructions: Vent the vacuum chamber to atmospheric pressure and shut off power to the module. Use the fitting to detach the module from the vacuum chamber. -
Page 77: Replacing The Convectron Gauge
Maintenance To avoid contaminating the Convectron gauge, wear sterile gloves during Replacing the Convectron gauge the replacement procedure. Refer to Figure 5-3 and follow these instructions: Shut off power to the module. Remove the differential pressure sensor port cover from the top of the Convectron gauge. -
Page 78: Returning A Damaged Module
Before you return the module, obtain an RA number by phoning Helix Technology Customer Service at 1–303–652–4400 or 1–800–776–6543 within the U.S.A. or by emailing custserv@helixtechnology.com. -
Page 79: Service Form
Street address __________________________________________________________________________________ City __________________________________________ State _________________ ZIP __________________ Please help Helix Technology provide the best possible service by giving us information that will help us determine the cause of the problem and protect our analysis and calibration equipment from contamination. - Page 80 ® Convectron ATM Vacuum Gauge Module Instruction Manual...
-
Page 81: Specifications
Appendix A Specifications Specifications for analog and RS-485 versions Vacuum chamber pressure measurement Torr 1 x 10 –4 to 1000 Measurement range for air mBar 1.33 x 10 –4 to 1333 or N 1.33 x 10 –2 Pa to 133 kPa Resolution is a function of range and is 1 x 10 –4 Torr (1 x 10... -
Page 82: Setpoint Relays
Appendix A 15-pin male, high-density subminiature D I/O connector Setpoint relays Analog version relays are single-pole, double-throw (SPDT), Form A Relay type RS–485 version relays are single-pole, single-throw (SPST), Form C 1 A, 30 VDC resistive, 30 VAC non-inductive Contact rating 11.5 to 26.5 VDC Power requirements 3.3 W maximum... -
Page 83: Module Dimensions
Specifications Physical characteristics Powder-coated extruded aluminum Case material Materials exposed to 304 stainless steel, gold, borosilicate glass, kovar, alumina, NiFe alloy, ® polyimide, Pyrex glass, ceramic, silicon, epoxy, RTV, nickel vacuum Weight 340 g (12 oz.) with 1/8 NPT fitting Dimensions Dimensions are in cm (in.) (4.3) -
Page 84: Specifications For Analog
Appendix A Specifications for analog output version 0.375 to 5.659 VDC for 0 to 1000 Torr, non-linear, absolute of N Analog output Two single-pole, double-throw (SPDT) relays. Use potentiometers and test Setpoint relays points on the module front panel and jumpers inside the module to configure relays. -
Page 85: Range
Specifications Specifications for RS-485 version American Standard Code for Information Interchange (ASCII) Digital format Protocol RS–485, 2-wire Parity • 8 data bits, no parity, 1 stop bit (default) • 7 data bits, odd parity, 1 stop bit • 7 data bits, even parity, 1 stop bit 1200, 2400, 4800, 9600, 19200 (default), or 38400 baud Baud rate Four single-pole, single-throw (SPST) relays. -
Page 86: Optional Display
Appendix A The RS-485 version of the module is available with an optional 7-digit green Optional display LED display • Can indicate vacuum chamber pressure measured by Convectron gauge or differential pressure measured by differential pressure sensor • Display value: two significant digits, 1-digit exponent, and + or – sign for the exponent, in ±XX±Y format •... -
Page 87: Theory Of Operation
Appendix B Theory of Operation The module measures gas pressures from 1 x 10 –4 Torr to 1000 Torr. Vacuum chamber pressure is measured by a Convectron convection-enhanced Pirani heat-loss gauge. The differential between atmospheric and vacuum chamber pressures is measured by a Piezo resistive diaphragm sensor. -
Page 88: Convectron Heat-Loss Pirani Gauge
Appendix B The Convectron gauge is a convection-enhanced Pirani gauge. It operates Convectron heat-loss Pirani gauge like a standard Pirani gauge, which employs the principle of a Wheatstone bridge to convert pressure to voltage, but uses convection cooling to enable accurate pressure measurement, when properly calibrated, from 10 –4 1000 Torr. - Page 89 Theory of Operation Bridge voltage is a non-linear function of pressure. This relationship is illustrated in Figure B-2. If the ambient temperature does not change, R remains constant. Figure B-2 Wheatstone bridge block diagram Process control Vacuum Amplifier and ATM Buffer adjust Vacuum...
- Page 90 ® Convectron ATM Vacuum Gauge Module Instruction Manual...
- Page 91 Index Activation direction Calibration analog setpoint relay 2 33 analog Convectron gauge at jumpers for analog setpoint relay 2 33 atmospheric pressure 34–35 RS-485 setpoints 50 analog Convectron gauge at Address vacuum chamber pressure 36 RS-485 switches 42 analog differential pressure sensor zero 37 Address for RS-485 module 42 Convectron gauge 13 Analog module...
- Page 92 Index Convectron gauge analog calibration at atmospheric pressure 34–35 Factory defaults for RS-485 module 57 analog calibration at Factory settings for analog module 38 vacuum chamber pressure 36 Firmware version for RS-485 module 57 analog setpoint relay 27–30 Fittings base 67 1/8 NPT pipe thread 9 internal volume 74 ConFlat flange fitting 9...
- Page 93 Index Instructions about 1 Operation analog module operation 15 analog front panel 15 installation 5 analog module 15–38 maintenance 61 analog output 18 reading and following 2 analog setpoint relay 1 behavior 26 RS-485 module operation 39 analog setpoint relay 2 behavior 27 below 10 Torr 36, 57 error responses from RS-485 module 43...
- Page 94 Index RS-485 module components 6 Parity for RS-485 module 43 digital format 77 Piezo resistive diaphragm sensor 79 dimensions 75 Potentiometers error responses 43 Convectron ATM adjust 16, 35 factory default settings 58 Convectron VAC adjust 16, 36 front panel 40 Diaphragm ATM zero adjust 16, 37 front panel features 41 setpoint 1 adjust 16, 28...
- Page 95 Index Specifications 73–78 analog and RS-485 modules 73–75 Service form 71 analog module 76 Setpoint relays analog output 76 activation direction 26, 50 analog setpoint relays 76 analog and power on indicators 34 CE compliance 73 analog Convectron gauge 27–30 Convectron gauge internal volume 74 analog differential pressure sensor 31 Convectron gauge sensing wire 74...
- Page 96 Index Troubleshooting 61–66 failure symptoms, causes, and solutions 62–63 precautions 61 RS-485 error messages 65 Vacuum chamber 1/8 NPT pipe thread fitting 9 attaching module to 9 ConFlat flange 9 connections 75 ground connection to 12 KF flange fitting 9 pressure measurement 73 VCR type fitting 9 Voltage...
- Page 98 508–337–5000 To obtain a copy of this instruction manual online, visit our website at www.helixtechnology.com ® ® (Adobe Reader version 5.0 or higher required) © 2004, Helix Technology Corporation. Instruction Manual Instruction manual part number 385004 Revision 01 September 2004...