Table of Contents
Advertisement
Quick Links
Advertisement
Table of Contents

Related Manuals for NEFF J1ACE4H.0B


Summary of Contents for NEFF J1ACE4H.0B
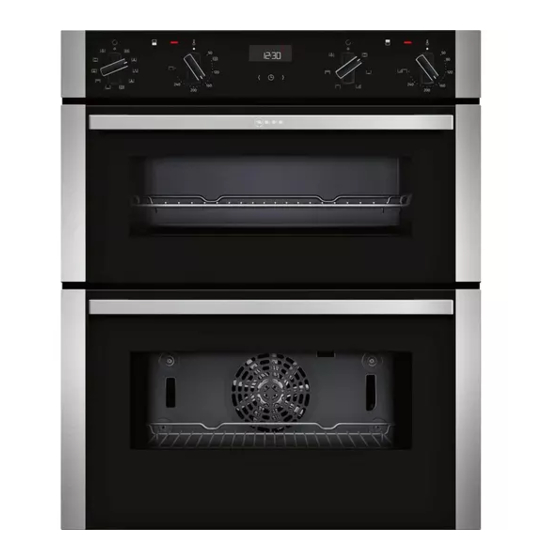
- Page 1 Double oven [en] User manual and installation instructions J1ACE4H.0B...
-
Page 2: Table Of Contents
en Safety 1.2 Intended use Table of contents This appliance is designed only to be built into kitchen units. Read the special installation instructions. USER MANUAL Only a licensed professional may connect ap- Safety .............. 2 pliances without plugs. Damage caused by in- correct connection is not covered under the Preventing material damage ....... -
Page 3: Safety
Safety en ▶ Keep your hands away from the hinges. Opening the appliance door creates a Components inside the appliance door may draught. Greaseproof paper may come into have sharp edges. contact with the heating element and catch ▶ Wear protective gloves. fire. -
Page 4: Preventing Material Damage
en Preventing material damage ▶ Do not let children play with packaging ma- WARNING ‒ Risk of electric shock! terial. When changing the bulb, the bulb socket con- Children may breathe in or swallow small tacts are live. parts, causing them to suffocate. ▶... -
Page 5: Environmental Protection And Saving En- Ergy
Environmental protection and saving energy en 3 Environmental protection and saving energy Help protect the environment by using your appliance in a way that conserves resources and by disposing of reusable materials properly. 3.1 Disposing of packaging The packaging materials are environmentally compat- ible and can be recycled. -
Page 6: Familiarising Yourself With Your Appliance
en Familiarising yourself with your appliance 4 Familiarising yourself with your appliance 4.1 Controls You can use the control panel to configure all functions of your appliance and to obtain information about the operat- ing status. On certain models, specific details such as colour and shape may differ from those pictured. Buttons Top oven ... - Page 7 Familiarising yourself with your appliance en Symbol Name Left arrow Decreases the adjustment values Right arrow Increases the adjustment values 4.3 Display The display shows the current settings, options or relevant information. The red bar above or below a symbol indicates which value is active or can be changed. Symbol Name Childproof lock activ-...
-
Page 8: Accessories
en Familiarising yourself with your appliance Symbol Type of heating What it's used for/how it works Bottom heating Final baking or cooking food in a bain marie. Heat is emitted from below. Grill, small area Grill small quantities of steak, sausages or toast. Brown small quantities of food. The central area underneath the grill element becomes hot. - Page 9 Accessories en Main cooking compartment Top cooking compartment The cooking compartment has three shelf positions. The cooking compartment has three shelf positions. Self-cleaning surfaces The self-cleaning surfaces in the cooking compartment are coated with a porous, matt ceramic layer and have a rough surface.
- Page 10 Place the accessory at the shelf positions with the You will find a comprehensive range of products for pull-out rails and pull out the pull-out rails. your appliance in our brochures and online: www.neff-international.com...
- Page 11 Before using for the first time en Accessories vary from one appliance to another. When You can find out which accessories are available for purchasing accessories, always quote the exact your appliance in our online shop or from our after- product number (E no.) of your appliance. sales service.
- Page 12 en Time-setting options 8 Time-setting options Your appliance has different time-setting options, with Use the button to reset the timer duration to zero. ▶ which you can control its operation. a After a few seconds, the appliance applies the change and goes out.
-
Page 13: Basic Settings
Childproof lock en Cancelling the end time Requirements ¡ A type of heating and a temperature or setting are You can delete the set end at any time. set for the main oven . is highlighted on the display. Requirement: ¡... - Page 14 en Basic settings Use the function selector to set a suitable type of a When the rapid heating process ends, an audible heating. signal sounds and the heating indicator goes out. Place the food in the cooking compartment. 11 Basic settings You can configure the appliance to meet your needs.
-
Page 15: Cleaning And Servicing
Cleaning and servicing en 12 Cleaning and servicing Do not use harsh or abrasive cleaning products. To keep your appliance working efficiently for a long ▶ Do not use cleaning products with a high alcohol time, it is important to clean and maintain it carefully. ▶... - Page 16 en Cleaning and servicing Cooking compartment Area Suitable cleaning agents Notes Enamel surfaces ¡ Hot soapy water Soak any heavily soiled areas and use a brush or steel wool. ¡ Vinegar water Leave the appliance door open to dry the cooking compartment after cleaning it.
- Page 17 Cleaning function en – From the glass cover for the oven light 12.4 Cleaning self-cleaning surfaces in the This prevents stains that cannot be removed. top cooking compartment Remove any objects from the cooking compartment. The back wall, ceiling and side walls of the top cooking The cooking compartment must be empty.
-
Page 18: Cleaning Function
en Cleaning function Setting the cleaning function for the top oven Requirements ¡ Start the cleaning aid only when the cooking com- partment has completely cooled down. WARNING ‒ Risk of burns! ¡ To remove particularly stubborn dirt, leave the soapy The outside of the appliance gets very hot when the water to work for some time before starting the cleaning function is in progress. -
Page 19: Shelf Supports
Shelf supports en 14 Shelf supports To clean the rails and the cooking compartment, or to ATTENTION! replace the rails, you can remove these. The self-cleaning surfaces in the cooking compartment may be damaged by detaching and attaching the pull- 14.1 Detach the rails in the main cooking out rails. - Page 20 en Shelf supports Remove the pull-out rail. Keep the PUSH tab pushed in and swing the pull- out rail inwards until the front retainer is located between the two bars . Release the PUSH tab. ‒ Clean the pull-out rail. → "Cleaning products", Page 15 14.4 Attaching the pull-out rail a The retainer...
-
Page 21: Appliance Door
Appliance door en ¡ For both shelf supports, ensure that the hooks that Push the rail into the front socket until the rail are attached at the rear are pointing upwards. also rests against the cooking compartment wall, and then press this downwards ... - Page 22 en Appliance door Close the appliance door fully . Grab hold of the Open the appliance door fully. appliance door with both hands (on the left and Open the locking levers on the left- and right-hand right) and pull it upwards and out . hinges ...
- Page 23 Appliance door en If necessary, you can remove the condensate Slide the inner pane into the left- and right-hand trough for cleaning. retainers . Open the appliance door. ‒ Tilt the condensate trough upwards and remove ‒ Push the inner pane upwards until it is in the left- and right-hand retainers ...
- Page 24 en Appliance door Slide the appliance door straight onto the two WARNING ‒ Risk of injury! hinges. Slide the appliance door on as far as it will When the hinges are not secured, they can snap shut with great force. Make sure that the locking levers are always ▶...
- Page 25 Appliance door en Close the appliance door fully . Grab hold of the 15.8 Installing the door panes for the upper appliance door with both hands (on the left and the appliance door right) and pull it upwards and out . WARNING ‒ Risk of injury! The hinges on the appliance door move when the door is opened and closed, which could trap your fingers.
-
Page 26: Troubleshooting
en Troubleshooting Slide the inner pane in. In doing so, ensure that the Slide the appliance door straight onto the two inner pane is in the retainer . hinges. Slide the appliance door on as far as it will go. When doing so, ensure that the hinges are in- serted into the correct opening. -
Page 27: Customer Service
Troubleshooting en 16.1 Malfunctions Fault Cause and troubleshooting The appliance is not working. The circuit breaker is faulty. Check the circuit breaker in the fuse box. ▶ There has been a power cut. Check whether the lighting in your kitchen or other appliances are working. ▶... - Page 28 en Disposal 17 Disposal Find out here how to dispose of old appliances cor- This appliance is labelled in accord- rectly. ance with European Directive 2012/19/EU concerning used elec- 17.1 Disposing of old appliance trical and electronic appliances (waste electrical and electronic equip- Valuable raw materials can be reused by recycling.
-
Page 29: How It Works
How it works en ¡ Keep the appliance door closed when using the Notes ¡ When baking on several layers, always use hot air. grill. Baked goods that are placed in the oven at the Never grill with the appliance door open. same time will not necessarily be ready at the same ¡... - Page 30 en How it works Food Accessories/cookware Shelf pos- Type of Temperature Cooking ition heating in °C/grill set- time in mins ting Fruit pie 20 cm diameter plate or 160-170 55-65 pie tin Quiche Quiche tin (dark-coated) 1 190-200 35-45 (White) bread Loaf tin (1 x 900 g or 2 180-200 20-30...
- Page 31 How it works en Cover the containers with foil, e. g. with cling film. 19.6 Yoghurt Place the containers on the cooking compartment You can use your appliance to make your own yoghurt. floor. Set the appliance according to the recommended Preparing yoghurt setting.
-
Page 32: Installation Instructions
en Installation instructions Food Accessories/cook- Shelf pos- Type of Temperature in Cooking time in ware ition heating °C mins Small cakes, 2 levels Universal pan 150-160 25-35 Baking tray Hot water sponge cake Springform cake tin, 160-170 25-35 diameter 26 cm Hot water sponge cake Springform cake tin, 160-170... - Page 33 Installation instructions en ¡ The mains socket for the appliance must 20.2 Appliance dimensions either be located in the hatched area You will find the dimensions of the appliance here outside of the area where the appliance is installed. Any unsecured units must be secured to the wall using a standard bracket ...
- Page 34 en Installation instructions 20.4 Installation underneath a hob If the appliance is installed under a hob, the following The minimum worktop thickness a is based on the minimum dimensions must be adhered to (including required minimum clearance . substructure, if applicable). Hob type a raised in mm a flush in mm...
- Page 35 Installation instructions en ¡ The appliance must be disconnected from the Remove the transport locks on the right and left and power supply whenever installation work is being then dispose of them. carried out. ¡ Contact protection must be ensured during the in- stallation.
- Page 36 en Installation instructions Secure the appliance using the wooden screws sup- Secure the bearing rails with screws so that they are plied in the cooking compartment. flush with the unit. Secure the mounting brackets with screws so that they are flush with the unit. 20.9 Installing the appliance under worktop Remove the angle brackets and bearing rails.
- Page 37 Installation instructions en Place the appliance in the unit and fold the carry handles down. Push the appliance in fully. Do not kink or trap the connecting cable, or route it over sharp edges. Centre the appliance. There must be an air gap of at least 5 mm between the appliance and adjacent unit fronts.
- Page 40 Valid within Great Britain: Imported to Great Britain by BSH Home Appliances Ltd. Grand Union House Old Wolverton Road Wolverton, Milton Keynes MK12 5PT United Kingdom *9001580274* 9001580274 Constructa-Neff Vertriebs-GmbH Carl-Wery-Straße 34 010121 81739 München GERMANY...