Fisher & Paykel CI302DTB User Manual
Black induction cooktop
Hide thumbs
Also See for CI302DTB:
- User manual (40 pages) ,
- Installation manual (25 pages) ,
- Installation instructions manual (17 pages)

Related Manuals for Fisher & Paykel CI302DTB


Summary of Contents for Fisher & Paykel CI302DTB
- Page 1 BLACK INDUCTION COOKTOP CI302DTB, CI603DTB, CI604DTB, CI764DTB & CI905DTB models USER GUIDE NZ AU GB IE SG HK SEA...
-
Page 3: Table Of Contents
CONTENTS Safety and warnings First use Cookware Using your cooktop Using the timer Safety features SmartZone Bridging zones PowerBoost GentleHeat Auto RapidHeat Cooking guidelines Care and cleaning Troubleshooting Energy guidelines Energy guidelines (GB IE only) Warranty and service Registration To register your product visit our website: fisherpaykel.com/register... -
Page 5: Safety And Warnings
SAFETY AND WARNINGS WARNING! Electric Shock Hazard Failure to follow this advice may result in electric shock or death. • Do not cook on a broken or cracked cooktop. If the cooktop surface should break or crack, switch the appliance off immediately at the mains power supply (wall switch) and contact a qualified technician. - Page 6 SAFETY AND WARNINGS WARNING! Hot Surface Hazard Failure to follow this advice may result in electric shock or death. • During use, accessible parts of this appliance will become hot enough to cause burns. • Do not let body, clothing or any item other than suitable cookware contact with the ceramic glass until the surface is cool.
- Page 7 SAFETY AND WARNINGS WARNING! Health Hazard Failure to follow this advice may result in death. • This appliance complies with electromagnetic safety standards. However, persons with cardiac pacemakers or other electrical implants (such as insulin pumps) must consult with their doctor or implant manufacturer before using this appliance to make sure that their implants will not be affected by the electromagnetic field.
- Page 8 SAFETY AND WARNINGS READ AND SAVE THIS GUIDE WARNING! To reduce the risk of fire, injury to persons or damage when using the appliance, follow the important safety instructions listed below. Read all the guidance before using the appliance. Installation Ensure your appliance is properly installed and grounded by a qualified technician.
- Page 9 SAFETY AND WARNINGS Do not cook on broken cooktop — If cooktop should break, cleaning solutions and spillovers may penetrate the broken cooktop and create a risk of electric shock. Contact a qualified technician immediately. Child Safety Do not allow children to play with the appliance or sit, stand, or climb on it. Do not store items of interest to children in cabinets above the appliance.
-
Page 10: First Use
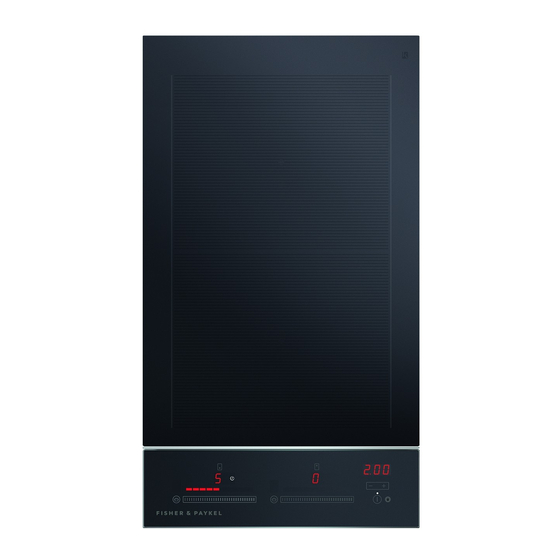
FIRST USE COOKTOP FEATURES 1 Induction zones 2 Control panel 3 Zone indicator 4 Zone display 5 Zone heat selector 6 GentleHeat control 7 GentleHeat indicators 8 Cooktop On/Off 9 Timer control !0 Timer display !1 Keylock ZONE DISPLAY DESCRIPTION Cooking zone off (not activated) Cooking zone on... - Page 11 FIRST USE CI302DTB model CI603DTB model CI604DTB model CI764DTB induction zones CI905DTB induction zones ZONE ZONE DIAMETER POWER POWERBOOST RECOMMENDED MINIMUM PAN SIZE 145mm 1400 W 2200 W* 120mm 180mm 1850 W 3000 W* 145mm 210mm 2300 W 3700 W*...
-
Page 12: Cookware
COOKWARE The quality of your cookware can affect cooking performance. Only use induction-compatible cookware that has been specifically designed for induction cooking. Look for the induction symbol on the packaging or the bottom of the pan. Suitable cookware material: Unsuitable cookware material: stainless steel –... -
Page 13: Using Your Cooktop
USING YOUR COOKTOP To start cooking Touch and hold the On/Off control COOKTOP for 2 seconds. The indicator light above the control will glow. will appear in the displays. COOKING ZONE Place a suitable pan on the cooking zone. Ensure the bottom of the pan and the surface of the cooking zone are clean and dry. - Page 14 USING YOUR COOKTOP If a display flashes alternately with the heat setting This means that: you have not placed a pan on the correct cooking zone or the pan you’re using is not suitable for induction cooking or the pan is too small or not properly centred on the cooking zone.
-
Page 15: Using The Timer
USING THE TIMER You may use the timer in two different ways: 1 You can use it as a minute minder, even when not using the cooktop. 2 You can use it to set individual timers for multiple cooking zones that are in use. You can set the timer for up to 1 hour and 59 minutes. - Page 16 USING THE TIMER Using the cooking zone after setting minute minder If you start using a cooking zone after you have set the minute minder, the minute minder will continue to count down. Setting minute minder while using one or more cooking zones To set the minute minder while using the cooking zone(s), repeatedly tap –...
- Page 17 USING THE TIMER Setting the timer for individual cooking zones Ensure the cooking zone(s) you want to set the timer for are in use. Tap the – and + controls of the timer together until the indicator of the desired cooking zone comes on.
- Page 18 USING THE TIMER Setting different times for each of the cooking zones Setting the minute minder when other timers are set 1 Repeatedly tap the – and + controls of the timer together as you cycle through the individual timers for the cooking zones until the egg timer glows.
- Page 19 USING THE TIMER To change or cancel a timer setting With the cooktop turned on, repeatedly tap the – and + timer controls together until the indicator light in the desired cooking zone window glows brightly. To change: Set the new time. To cancel: Touch the –...
-
Page 20: Safety Features
SAFETY FEATURES The cooktop control dials can be locked for cleaning and to prevent unintended use. When the cooktop is locked the controls and cooktop display will remain unresponsive. LOCKING THE COOKTOP UNLOCKING THE COOKTOP Ensure all cooking zones have been turned To unlock the cooktop, touch and hold . -
Page 21: Smartzone
SMARTZONE Using SmartZones (CI302DTB, CI604DTB & CI905DTB models only) The SmartZones are large and can accommodate several small pots. These small pots will be detected as one large pot. The entire SmartZone is activated when a pot is detected. This means that other magnetic items (such as cutlery) sitting in the cooking zone will heat up. -
Page 22: Bridging Zones
BRIDGING ZONES Using Bridging Zones (CI905DTB3, CI604DTB & CI302DTB models only) The bridging zone function allows you to use two SmartZones together giving you a larger cooking area. Your pan(s) will need to cover both cooking zones. There may be a cooler area in the centre of the cooktop between the cooking zones. You may need to move food around the pan to ensure even cooking. - Page 23 BRIDGING ZONES If no pan is detected on either cooking zone the left hand zone display will alternate between the selected setting and . The right hand selector will show If no pan is detected on one cooking zone: The left hand display will still show the selected temperature and the right hand display will still show If after 10 minutes no pan is detected: The bridging function will switch off.
-
Page 24: Powerboost
POWERBOOST Using PowerBoost This feature enables you to sear meat or bring liquid to boil very quickly. When a cooking zone is set to PowerBoost, it uses more than 100% of the power of that particular cooking zone, resulting in a boost of intense heat. PowerBoost heats food and liquids very quickly. - Page 25 POWERBOOST You can set two (CI603DTB, CI604DTB and CI764DTB) or three (CI905DTB) cooking zones for PowerBoost, as long as one is not behind the other. The following are examples of zones that can operate in PowerBoost mode simultaneously without reduced power level. Other combination not shown below will result in reduced power.
- Page 26 POWERBOOST CI764DTB model If one cooking zone is set to PowerBoost and a second cooking zone in front or behind the first cooking zone is accidentlly set to PowerBoost, will flash on the first cooking zone to alert that the configuration is not possible and power is automatically decreased. When a cooking zone is set for PowerBoost, the other cooking zone in front of or behind may automatically reduce its power level.
-
Page 27: Gentleheat
GENTLEHEAT Using GentleHeat There are two GentleHeat settings. The Low setting is ideal for the most delicate cooking tasks (such as melting chocolate), as the cooking zone will provide a very low continuous gentle heat. The Medium setting is ideal for keeping cooked food warm and the gentle warming of delicate foods. -
Page 28: Auto Rapidheat
AUTO RAPIDHEAT Using Auto RapidHeat APPROXIMATE TIME HEAT SETTING AT RAPID HEAT This feature enables the cooking zones to: 40 seconds heat up food or liquid quickly at the highest setting, and 1 minute reduce the temperature automatically 2 minutes to a pre-selected heat setting. - Page 29 AUTO RAPIDHEAT Then, when the period of highest setting is over, will stop flashing and the cooking zone will automatically reduce the heat to your pre-selected lower setting. If you would like a lower or higher heat setting than you originally selected, simply slide to the new setting and hold until the starts flashing.
-
Page 30: Cooking Guidelines
COOKING GUIDELINES Take care when frying: oil and fat heat up very quickly, particularly if you’re using PowerBoost. At extremely high temperatures oil and fat will ignite spontaneously and this presents a serious fire risk. Cooking tips When food comes to the boil, reduce the temperature setting. Using a lid will reduce cooking times and save energy by retaining the heat. - Page 31 COOKING GUIDELINES Heat settings The settings below are guidelines only. The exact setting will depend on several factors, including your cookware and the amount you are cooking. Experiment with the cooktop to find the settings that best suit you. Heat setting...
- Page 32 COOKING GUIDELINES HEAT SETTING SUITABILITY melting chocolate, butter, and foods that burn quickly delicate warming for small amounts of food 1 - 2 gentle simmering slow warming 3 - 4 reheating rapid simmering cooking rice 5 - 6 pancakes 7 - 8 sautéing cooking pasta stir-frying...
-
Page 33: Care And Cleaning
CARE AND CLEANING WHAT? HOW? IMPORTANT! Everyday soiling 1 Switch the power to the When the power to the on glass cooktop off at the wall. cooktop is switched off, (fingerprints, marks, there will be no ‘hot 2 Apply cooktop cleaner stains left by food or surface’... -
Page 34: Troubleshooting
TROUBLESHOOTING PROBLEM POSSIBLE CAUSES WHAT TO DO The cooktop cannot No power. Make sure the cooktop is be turned on. connected to the power supply and that it is switched on at the wall. Check whether there is a power outage in your home or area. - Page 35 TROUBLESHOOTING PROBLEM POSSIBLE CAUSES WHAT TO DO Some pans make This may be caused by the This is normal for induction crackling or construction of your cookware and does not clicking noises. cookware (layers of different indicate a fault. metals vibrating differently). The cooktop makes This is caused by This is normal, but the...
- Page 36 TROUBLESHOOTING PROBLEM POSSIBLE CAUSES WHAT TO DO Condensation is forming This is a normal for This is normal for induction on surrounding walls, induction cooking. cooking and does not cabinetry or your Energy efficient technology indicate a fault. overhead rangehood. means that no heat is lost to To minimise condensation: surrounding surfaces.
-
Page 37: Energy Guidelines
ENERGY GUIDELINES This cooktop has been designed and constructed in accordance with the following codes and specifications: In New Zealand and Australia: AS/NZS 60335-1:2011 General Requirements for Domestic electrical appliances AS/NZS 60335-2-6:2014 Particular Requirements for Domestic electrical cooking appliances AS/NZS CISPR 14.1.2013 Electromagnetic Compatibility Requirements. In Europe: Safety requirements of EEC Directive “Low voltage”... -
Page 38: Energy Guidelines (Gb Ie Only)
ENERGY ENERGY MODEL COOKING AREA CONSUMPTION* CONSUMPTION* ZONES COOKING ZONE (PER ZONE) (WHOLE COOKTOP) CI302DTB 20x25 cm 195.6 Wh/kg 191 Wh/kg per zone 187.0 Wh/kg CI603DTB LF (15 cm) LF 176.0 Wh/kg 179 Wh/kg LR (15 cm) LR 175.7 Wh/kg R (26 cm) R 184.0 Wh/kg... -
Page 39: Warranty And Service
WARRANTY AND SERVICE Before you call for service or assistance Check the things you can do yourself. Refer to the installation instructions and your user guide and check that: 1 Your product is correctly installed. 2 You are familiar with its normal operation. If after checking these points you still need assistance or parts, please refer to the Service &... - Page 40 FISHERPAYKEL.COM © Fisher & Paykel Appliances 2020. All rights reserved. The models shown in this guide may not be available in all markets and are subject to change at any time. The product specifications in this guide apply to the specific products and models described at the date of issue.