Fisher & Paykel CI302DTB Installation Manual
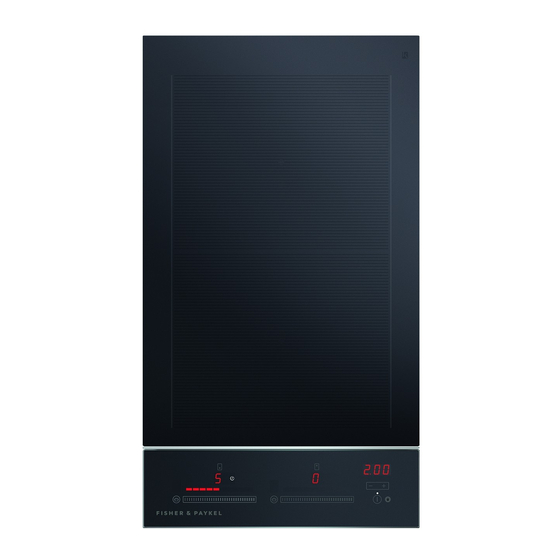
Black induction cooktop
Hide thumbs
Also See for CI302DTB:
- User manual (40 pages) ,
- Installation instructions manual (17 pages) ,
- Using manual (9 pages)

Related Manuals for Fisher & Paykel CI302DTB


Summary of Contents for Fisher & Paykel CI302DTB
- Page 1 BLACK INDUCTION COOKTOP CI302DTB, CI603DTB, CI604DTB, CI764DTB, CI905DTB models INSTALLATION GUIDE NZ AU GB IE SG HK...
-
Page 2: Safety And Warnings
SAFETY AND WARNINGS READ AND SAVE THIS GUIDE WARNING! General Use Electric Shock Hazard Read these instructions carefully before installing this product. Failure to follow this advice may result in Save these instructions for the local electrical inspector’s use. Installation must comply with your local building and local electricity regulations. electric shock or death. - Page 3 INSTALLATION CONSIDERATIONS PARTS SUPPLIED BEFORE INSTALLATION MULTIPLE PRODUCT INSTALLATION Before installation, please ensure the following: a suitable disconnection switch is incorporated in the permanent wiring, mounted and positioned to comply with the local wiring rules and regulations. A means of disconnection with at least a 3 mm air gap contact separation in all poles must be incorporated into the fixed wiring in accordance with the wiring rules, unless the local wiring rules allow for alternative means.
-
Page 4: Components Required
COMPONENTS REQUIRED PARTS SUPPLIED TOOLS REQUIRED Clamping brackets Foam tape (1) Wrench Crosshead Silicone Cutter (4) and screws (4) screwdriver Hex key Router... -
Page 5: Product Dimensions
PRODUCT DIMENSIONS — 300MM MODELS CI302DTB PRODUCT DIMENSIONS A Overall height of cooktop B Overall width of cooktop C Overall depth of cooktop D Height of chassis E Width of chassis PLAN ISOMETRIC F Depth of chassis FRONT G Height of cooktop glass*... - Page 6 PRODUCT DIMENSIONS — 600MM MODEL CI603DTB CI604DTB PRODUCT DIMENSIONS A Overall height of cooktop B Overall width of cooktop C Overall depth of cooktop D Height of chassis PLAN iSOMETRIC E Width of chassis F Depth of chassis G Height of cooktop glass* FRONT H Depth of front overhang of cooktop glass** I Depth of rear overhang of cooktop glass...
- Page 7 PRODUCT DIMENSIONS — 760MM MODEL CI764DTB PRODUCT DIMENSIONS A Overall height of cooktop B Overall width of cooktop C Overall depth of cooktop PLAN ISOMETRIC D Height of chassis E Width of chassis F Depth of chassis G Height of cooktop glass* FRONT H Depth of front overhang of cooktop glass** I Depth of rear overhang of cooktop glass...
- Page 8 PRODUCT DIMENSIONS — 900MM MODEL CI905DTB PRODUCT DIMENSIONS A Overall height of cooktop B Overall width of cooktop C Overall depth of cooktop ISOMETRIC PLAN D Height of chassis E Width of chassis F Depth of chassis G Height of cooktop glass* FRONT H Depth of front overhang of cooktop glass** I Depth of rear overhang of cooktop glass...
-
Page 9: Flush Installation
CUTOUT DIMENSIONS — 300MM MODEL PROUD INSTALLATION FLUSH INSTALLATION PLAN PLAN FRONT FRONT CI302DTB CI302DTB CUTOUT DIMENSIONS CUTOUT DIMENSIONS A Overall width of cutout A Overall width of routered recess B Overall depth of cutout B Overall depth of routered recess... - Page 10 CUTOUT DIMENSIONS — 600MM MODEL PROUD INSTALLATION FLUSH INSTALLATION PLAN PLAN FRONT FRONT CI603DTB CI604DTB CI603DTB CI604DTB CUTOUT DIMENSIONS CUTOUT DIMENSIONS A Overall width of routered recess A Overall width of cutout B Overall depth of routered recess B Overall depth of cutout C Offset overhang allowance C Corner radius of cutout max 10...
- Page 11 CUTOUT DIMENSIONS — 760MM MODEL PROUD INSTALLATION FLUSH INSTALLATION PLAN PLAN FRONT FRONT CI764DTB CI764DTB CUTOUT DIMENSIONS CUTOUT DIMENSIONS A Overall width of cutout A Overall width of routered recess B Overall depth of cutout B Overall depth of routered recess C Corner radius of cutout max 10 C Offset overhang allowance...
- Page 12 CUTOUT DIMENSIONS — 900MM MODEL PROUD INSTALLATION FLUSH INSTALLATION PLAN PLAN FRONT FRONT CI905DTB CI905DTB CUTOUT DIMENSIONS CUTOUT DIMENSIONS A Overall width of cutout A Overall width of routered recess B Overall depth of cutout B Overall depth of routered recess C Corner radius of cutout max 10 C Offset overhang allowance...
-
Page 13: Clearance Dimensions
CLEARANCE DIMENSIONS — 300MM MODEL CI302DTB CLEARANCE DIMENSIONS A Minimum clearance from glass surface to rangehood B Minimum clearance below top of countertop to top of any appliance, companion product or obstruction below cooktop C Minimum clearance from side edges of cutout to nearest... - Page 14 CLEARANCE DIMENSIONS — 600MM MODEL CI603DTB CI604DTB CLEARANCE DIMENSIONS A Minimum clearance from glass surface to rangehood B Minimum clearance below top of countertop to top of any appliance, companion product or obstruction below cooktop C Minimum clearance from side edges of cutout to nearest combustible surface D Maximum distance from right edge of cutout to center of junction box...
- Page 15 CLEARANCE DIMENSIONS — 760MM MODEL CI764DTB CLEARANCE DIMENSIONS A Minimum clearance from glass surface to rangehood B Minimum clearance below top of countertop to top of any appliance, companion product or obstruction below cooktop C Minimum clearance from side edges of cutout to nearest combustible surface D Maximum distance from right edge of cutout to center of junction box E Minimum clearance below top of countertop to junction box...
- Page 16 CLEARANCE DIMENSIONS — 900MM MODEL CI905DTB CLEARANCE DIMENSIONS A Minimum clearance from glass surface to rangehood B Minimum clearance below top of countertop to top of any appliance, companion product or obstruction below cooktop C Minimum clearance from side edges of cutout to nearest combustible surface D Maximum distance from right edge of cutout to center of junction box E Minimum clearance below top of countertop to junction box...
-
Page 17: Venting Clearances
VENTING CLEARANCES DRAWER OR OTHER OBSTRUCTION OVEN WITH COOLING FAN This cooktop requires adequate supply of cool air to fully function. The base of the cooktop must have direct unrestricted ventilation to the room where the cooktop is installed. There must be a 4mm air gap at the front of the cooktop. - Page 18 PROUD INSTALLATION Gently lower the cooktop into the Turn the cooktop upside down cutout ensuring you have access on a protective cover. below the countertop to fit and secure the brackets. Apply adhesive foam seal around Locate the side brackets* to the the glass overhang, 5mm from appropriate slots on the cooktop the edge of the glass.
- Page 19 FLUSH INSTALLATION Prepare the countertop for flush installation. Use a router to cut Tighten all screws to secure the out the edges of the countertop cooktop to the countertop. to specified depth (5mm). Ensure cooktop is level. Attach an adhesive tape along Adhesive tape the edges of the routered recess.
-
Page 20: Electrical Connection
380 – 415V 2N ~ 220 – 240V 3N ~ CI905DTB 9800W Single-phase connection (220 – 240 V~) Three-phase connection (380 – 415V 3N~) 380 – 415V 3N ~ *The CI302DTB is supplied with a cable. This must be wired into a suitably rated plug, permanent connection outlet or power isolator. -
Page 21: Installer Checklist
INSTALLER CHECKLIST TO BE COMPLETED BY THE INSTALLER GENERAL ELECTRICAL … Read safety and warnings in the user guide before operating the cooktop. … Receptacle with correctly rated over-current protection is provided for service cord connection. … Specified clearance maintained. …... - Page 24 FISHERPAYKEL.COM © Fisher & Paykel Appliances 2020. All rights reserved. The models shown in this guide may not be available in all markets and are subject to change at any time. The product specifications in this guide apply to the specific products and models described at the date of issue.