
Related Manuals for FujiFilm CX 3240


Summary of Contents for FujiFilm CX 3240
- Page 1 FUJIFILM CX 3240 Creative Duplex Printer User Guide FUJIFILM CX 3240 Creative Duplex Printer is distributed and supported by FUJIFILM Corporation.
- Page 2 Always read and follow the instructions before performing the required procedures. The data saved in the printer may be lost if there is any problem in the data storage space. FUJIFILM is not responsible for any direct and indirect damages arising from or caused by such data loss.
-
Page 3: Table Of Contents
Table of Contents Table of Contents Before Using the Printer....................9 Preface........................10 Types of Manuals.......................11 Important Security Instructions...................12 Using This Guide......................13 Organization of This Guide..................13 Conventions ......................14 Safety Notes.......................15 Legal Notice .......................19 Warning and Caution Labels..................20 Printer Setup......................21 Connecting and Setting Up Your Printer ..............22 Connecting to a Computer or a Network ...............22 Turning On/Off the Printer ..................24 Configuring Initial Settings on the Touch Screen ..........25... - Page 4 Printing ........................51 Printing........................52 Sending a Job to Print................... 52 Canceling a Print Job .................... 52 Borderless Printing....................53 Duplex Printing...................... 54 Using Stored Print ....................55 Setting Menus on Touch Screen ................59 Device App ........................ 60 Language ......................60 About........................
- Page 5 Table of Contents Login/Logout Settings....................95 Password Rules.....................97 System ........................98 Date & Time ......................98 Power Saver ......................98 Timeouts........................99 Security .........................99 Defaults and Policies ...................105 PDL Settings .......................106 Logs........................110 Software Update....................110 Plug-in Settings ....................110 Measurements.....................111 Sounds ........................111 Encryption and Digital Signature Settings ............113 Encryption and Digital Signature Overview..............114 Types of Certificate....................114 Requesting another CA to issue a certificate ............114...
- Page 6 Color Registration ....................145 Color Calibration - Automatic ................145 Advanced Color Calibration - Automatic ............. 145 Adjusting Paper Registration................146 Transfer Voltage Adjustment................148 Adjusting the Fusing Unit ..................149 Adjusting the Altitude ..................149 Performing a Developer and Transfer Roller Cleaning Procedure...... 149 Fusing Unit Speed Adjustment................
- Page 7 Table of Contents “081-001”–“091-999” ...................204 “092-001”–“092-999” ...................205 “093-001”–“093-999” ...................205 “094-001”–“098-999” ...................206 “099-001”–“101-999” ...................206 “102-001”–“115-999” ...................207 “116-001”–“116-999” ...................207 “117-001”–“117-999” ...................211 “118-001”–“122-999” ...................212 “123-001”–“126-999” ...................213 “127-001”–“132-999” ...................214 Other Errors......................214 Paper Jams ......................216 Paper Jams in the Bypass Tray................217 Paper Jams in Tray 1 ..................219 Paper Jams in Trays 2 to 4..................221 Paper Jams in the Fusing Unit ................223 Paper Jams in the Duplex Unit ................225...
-
Page 9: Before Using The Printer
Before Using the Printer... -
Page 10: Preface
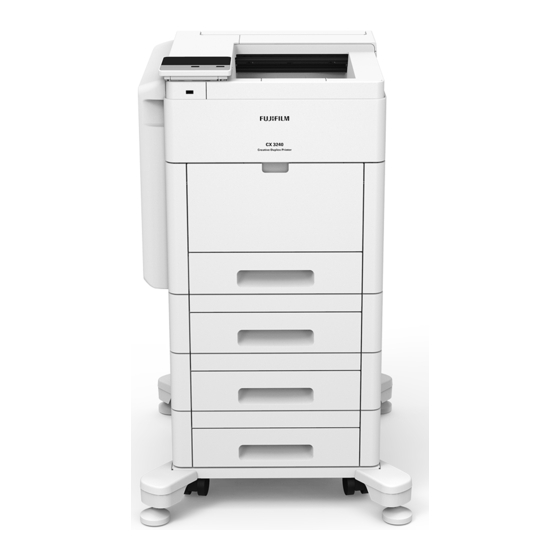
Before Using the Printer Preface Thank you for selecting the FUJIFILM CX 3240 Creative Duplex Printer (hereafter referred to as “the printer”). This guide describes how to operate the printer and the precautions you should follow during operation. To get the most out of the printer and to use it effectively, be sure to read this guide before use. -
Page 11: Types Of Manuals
Types of Manuals Types of Manuals The following guides are provided with the printer. Accompanying Manuals Software/Product Manual (CD) The guides in this media describe how to operate and maintain the printer. Safety Notes The guide describes precautions you should follow for safe use of the printer. Be sure to read this guide first. -
Page 12: Important Security Instructions
Before Using the Printer Important Security Instructions The Security Warning screen is displayed before the Home screen when any one of the following conditions is fulfilled and you enter the System Administration mode. The system administrator's passcode is the default value. ... -
Page 13: Using This Guide
Using This Guide Using This Guide Organization of This Guide This guide consists of the following chapters: 1 Before Using the Printer Describes how to use this guide. 2 Printer Setup Describes how to connect the printer to your computer and network, and how to install the software into your computer. -
Page 14: Conventions
Before Using the Printer Conventions The screen shots and illustrations used in this guide vary depending on the printer configuration and optional components installed. Some of the items in the screen shots may not be displayed or available depending on your printer configuration. The procedures in this guide may vary depending on the driver and utility software ... -
Page 15: Safety Notes
Please read the following instructions carefully before operating the machine and refer to them as needed to ensure the continued safe operation of your machine. Your FUJIFILM product and supplies have been designed and tested to meet strict safety requirements. These include safety agency evaluation and certification, and compliance with electromagnetic regulations and established environmental standards. - Page 16 Always switch off and unplug the machine when it is not used over an extended period of time. Your FUJIFILM machine is equipped with an energy saving device to conserve power when the machine is not in use. The machine may be left on continuously.
- Page 17 Safety Notes Never place this equipment where people might step on or trip on the power cord. This equipment should not be placed in a room unless proper ventilation is provided. Please contact your local Authorized dealer for further information. Never locate the machine near a radiator or any other heat source.
- Page 18 Operation of this equipment in a residential area is likely to cause harmful interference in which case the user will be required to correct the interference at his own expense. Changes or modifications to this equipment not specifically approved by the FUJIFILM Corporation may void the user’s authority to operate this equipment.
-
Page 19: Legal Notice
Legal Notice Legal Notice Copying or printing certain documents may be illegal in your country. Penalties of fines or imprisonment may be imposed on those found guilty. The following are examples of items that may be illegal to copy or print in your country. Currency ... -
Page 20: Warning And Caution Labels
Before Using the Printer Warning and Caution Labels Always follow all warning instructions marked on or supplied with this product. To avoid the risk of burn injuries and electric shock, never touch the area with the “High Temperature” or “High Voltage” marks on. Two-dimensional bar codes on these labels are used for control of quality, evaluation and inspection. -
Page 21: Printer Setup
Printer Setup... -
Page 22: Connecting And Setting Up Your Printer
Printer Setup Connecting and Setting Up Your Printer To connect your printer to a computer or device, the following specification must be met for each of the connection type: Connection type Connection specifications Ethernet 10BASE-T/100BASE-TX/1000BASE-T USB3.0 To connect the printer properly and use safely, ensure that there is sufficient clearance on all sides of the printer, as shown below. - Page 23 Connecting and Setting Up Your Printer Connect the smaller end of the USB cable to the USB port at the rear of the printer. Connect the other end of the cable to a USB port of the computer. Important Do not connect the printer USB cable to a USB port located on the keyboard. ...
-
Page 24: Turning On/Off The Printer
Printer Setup Turning On/Off the Printer Turning On the Printer or Exiting Low Power or Sleep Mode To turn on the printer, or to exit Low Power mode or Sleep mode, press the Power button. Note The printer exits Low Power mode or Sleep mode automatically by receiving data from a connected ... -
Page 25: Configuring Initial Settings On The Touch Screen
Connecting and Setting Up Your Printer Configuring Initial Settings on the Touch Screen When you turn on the printer for the first time, the install wizard screen to perform the initial setup appears on the touch screen. Follow the wizard to configure the initial settings, including the following: Language ... -
Page 26: Setting The Ip Address
Printer Setup Setting the IP Address Assigning an IP Address You can select the IP mode from Dual Stack, IPv4, and IPv6. If your network supports both IPv4 and IPv6, select Dual Stack. Select the IP mode of your environment, and then set IP address, subnet mask (for IPv4 only), and gateway address. -
Page 27: Verifying The Ip Settings
Setting the IP Address Verifying the IP Settings You can confirm the settings by using the touch screen or printing the configuration report. Verifying the IPv4 Settings Using Touch Screen Press the Home button. Touch [Device] > [About]. Verify the IP address displayed in [IPv4:] under [Network]. Verifying the IPv4 Settings Using Configuration Report Print the configuration report. -
Page 28: Installing Printer Driver On The Computer
Printer Setup Installing Printer Driver on the Computer Configuration on the Computer To print from the printer, you need to install a print driver on your computer. Reference For information on the driver installation procedures, refer to the Media Information contained in the ... -
Page 29: Product Overview
Product Overview... -
Page 30: Machine Components
Product Overview Machine Components The following describes machine components and their functions. Front and Rear Views Front View (With All Options Installed) 1 Tray 1 2 Tray 2 3 Tray 3 4 Tray 4 5 Caster 6 Right-Side Door 7 Output Tray Extension 8 Output Tray 9 Touch Screen 10 Front Door... - Page 31 Machine Components Rear View 1 Filter 2 Transfer Roller 3 Fusing Unit 4 Rear Door 5 USB Port, Type B 6 Ethernet Port 7 Power Connector...
-
Page 32: Control Panel
Product Overview Control Panel 1 Touch Screen Display 2 Power Button 3 Home Button 4 Status LED Internal Parts 1 Toner Cartridges 2 Transfer Belt 3 Drum Cartridges 4 Waste Cartridge 5 Cleaning Rod 6 Right-Side Door... -
Page 33: Touch Screen
Touch Screen Touch Screen About the Home Screen 1 Log In 2 Reset 3 Tiles 4 Customize Log In Select this button to log in. Reset Resets the printer. Tiles Displays the tiles of the functions you can select from. Customize ... -
Page 34: Moving, Adding Or Removing The Tiles
Product Overview Moving, Adding or Removing the Tiles Touch [Customize] to change the tile layout. To Move the Tiles Touch and hold the tile you want to move, and drag it to the desired place. Touch [Done] to save the changes. To Add the Tiles Touch [Add] and select the item you want to add. -
Page 35: Changing The Language And Keyboard Layout
Touch Screen Changing the Language and Keyboard Layout To change the language and keyboard layout used on the touch panel: On the Home screen, select [Device]. Select [Language]. See "Language" (P.60) to change the language and keyboard layout. Select [OK] on the [Language] screen to save the settings. Setting the Power Saver Timers You can set the power saver timers for the printer. - Page 36 Product Overview...
-
Page 37: Paper
Paper... -
Page 38: Paper Types
Paper Paper Types This section describes the kinds of paper available for this printer. Use of unrecommended paper may result in paper jams, lower print quality, malfunctions, or damage to the printer. To use the printer at its best performance, use the suggested paper that is recommended here. -
Page 39: Unsupported Paper
Paper Types To print as clear as possible, we recommend the following paper. Product Name Size GSM (g/m Mohawk Everyday Digital Smooth white 3.5″ × 5″ Mohawk Everyday Digital Smooth white 5″ × 7″ Mohawk Everyday Digital Smooth white 7″ × 10″ Mohawk Everyday Digital Coated Silk white 7″... -
Page 40: Loading Paper
Paper Loading Paper This section describes how to load paper. Loading Paper in Trays 1 to 4 The following describes the procedure for loading paper in Trays 1 to 4. You need to install the adaptors to paper trays before loading paper depending on the paper size. - Page 41 Loading Paper Loading paper without adaptors Pull out the tray until it stops, and then lift the front of the tray slightly. Now you can remove the tray from the printer. Important Do not pull out multiple trays at the same time. Otherwise, the printer gets inclined and turns over, ...
- Page 42 Paper Adjust the paper guides as illustrated. When you use paper longer than 297 mm (length of A4), you need to extend the front of the tray. Press the release latch, then pull the front part out. Note that, in this case, the paper tray protrudes from the front of the printer. Fan the paper well, and align the edges of the paper stack on a level surface to avoid paper jams and mis-feeds.
- Page 43 Loading Paper Load paper into the tray with the print side face up. Note Do not load paper above the maximum fill line. It may cause paper jams or machine malfunction. Adjust the paper guides to align the edges of the paper loaded. Insert the tray into the printer.
- Page 44 Paper Loading paper with adaptors Pull out the tray until it stops, and then lift the front of the tray slightly. Now you can remove the tray from the printer. Important Do not pull out multiple trays at the same time. Otherwise, the printer gets inclined and turns over, ...
- Page 45 Loading Paper Mount the side guide adaptors on the paper guides on the right and left sides of the tray interior (if necessary). Note The shapes of two side guide adaptors are different. Be sure not to mistake right and left parts, as ...
- Page 46 Paper Load paper into the tray with the print side face up. Note Do not load paper above the maximum fill line. It may cause paper jams or machine malfunction. Adjust the paper guides to align the edges of the paper loaded. Insert the tray into the printer.
-
Page 47: Loading Paper In Bypass Tray
Loading Paper Loading Paper in Bypass Tray Open the Bypass Tray. If the Bypass Tray is loaded with paper already, remove any different size or type of paper. Pull out the extension tray for larger sizes. Move the paper guides toward the outside edges of the tray. - Page 48 Paper Fan the paper well, and align the edges of the paper stack on a level surface to avoid paper jams and mis-feeds. Note Do not unpack paper until you are ready to use the paper. Load the paper in the tray. Note Do not load paper above the maximum fill line on the paper guides.
- Page 49 Loading Paper For 2-sided printing, load letterhead and pre-printed paper face down with the top edge going into the printer. Adjust the paper guides to align the edges of the paper loaded. Set the paper setting after a confirmation screen appears on the touch screen. For details, see "Paper Tray Confirmation Screen"...
-
Page 50: Setting The Tray Mode
Paper Setting the Tray Mode Tray Mode defines the printer behavior when a paper conflict or mismatch occurs. Configuring the Tray Mode for Trays 1 to 4 Press the Home button. Note Perform the operation with administrator authentication. Select [Device] > [Paper Trays]. Select the desired tray. -
Page 51: Printing
Printing... -
Page 52: Printing
Printing Printing This section covers tips for printing, how to send print data to the printer from your computer, and how to cancel a job. Sending a Job to Print Install the printer driver to use all the features of the printer. When you choose [Print] from an application, a window representing the printer driver opens. -
Page 53: Borderless Printing
Printing Canceling a Job From the Banner Touch the banner which is displayed during the printing process. Note The banner will be hidden if you touch the arrow button on the right end of the banner. When the banner is not displayed on the screen, cancel the job from the [Jobs] screen. -
Page 54: Duplex Printing
Printing Examples of commonly used sizes: Paper Size Values to Set Width (mm) Length (mm) A4 (210 × 297 mm) 214.0 301.0 7″ × 10″ (177.8 × 254 mm) 181.8 258.0 4″ × 8″ (101.6 × 203.2 mm) 105.6 207.2 5″... -
Page 55: Using Stored Print
Printing Using Booklet Print To use the booklet print feature, select the [Booklet Layout] check box in the [Layout/ Watermark] tab. Note When the XML Paper Specification (XPS) is used, booklet print is not available. 2-Sided Print Assumes binding along the long edge of the page (left edge for portrait orientation and top edge for landscape orientation). - Page 56 Printing Overview You can specify the following job types in the printer driver. Secure Print You can temporarily store print jobs secured with a password in the memory. Users with the password can print them from the touch screen. This feature can be used to print confidential documents.
- Page 57 Printing In case of you are not logged in If authentication is not enabled or you are logged in using Simple authentication, use following procedure. Press the Home button. Select [Jobs]. Select [Secure Jobs]. Secure print users’ folders are displayed. Select your folder. Enter the passcode that you specified on the printer driver and select [OK].
- Page 58 Printing...
-
Page 59: Setting Menus On Touch Screen
Setting Menus on Touch Screen... -
Page 60: Device App
Setting Menus on Touch Screen Device App The [Device] app allows you to view the printer status and set the general settings of the printer. Note The displayed features may vary depending on your settings. Some setting menus are available only when logging in as the system administrator. For information ... -
Page 61: Supplies
Device App Supplies See "Supplies" (P.76). Billing/Usage Selecting [Billing/Usage] allows you to check the billing information. The [Billing/ Usage] screen shows [Serial Number], [Counter] and [Usage Counters]. In the [Usage Counters] screen, you can check the detailed usage counters. You can filter the counters by setting the filter (set to [All] by default) over the counter. - Page 62 Setting Menus on Touch Screen Daylight Savings Time Select this to enable daylight saving time. Date Format Select a date format. [mm/dd/yyyy] [dd/mm/yyyy] [yyyy/mm/dd] Use 24 Hour Clock Select this to use 24-hour clock. To use 12-hour clock, deselect this. System Timeout Specify the time lapsed without any operation on the touch screen until the printer resets the settings automatically.
-
Page 63: Connectivity
Device App Sleep Timeout Specify a time period to enter the Sleep mode after entering the Low Power mode. Auto Power Off Select this to automatically turn the printer off after a specified time has elapsed from the Sleep mode. Use the slider bar to specify a value for turning the printer off. [Always Allowed] ... - Page 64 Setting Menus on Touch Screen [DHCP] The address, subnet mask, and gateway address will automatically be set via DHCP. Host Name Enter a host name. IPv4 Address Displays the IP address. Gateway Address Displays the gateway address. Subnet Mask ...
- Page 65 Device App IPv6 Servers Touch this to set addresses. Mode Select a mode from [DHCP] and [STATIC]. Primary Server, Alternate Server 1, Alternate Server 2 Set DNS server addresses. Rated Speed Select a communication speed for the Ethernet interface. [Auto] ...
-
Page 66: Support
Setting Menus on Touch Screen LDAP When LDAP is turned on You can set the LDAP server settings in the [LDAP Server] screen. Item Description Test Connection To test the connection to the server, select [Test Connection]. Initially [Not Tested] is displayed. [Success] or [Failed] is displayed as a result of the test. - Page 67 Image Position Adjust the image position. Paper Blocking Prevention See "Paper Blocking Prevention" (P.152). Non-Fujifilm Toner Cartridge Enable or disable the non-genuine toner mode. Developer & Transfer Roller Cleaning See "Performing a Developer and Transfer Roller Cleaning Procedure" (P.149). Fusing Unit Temperature Adjustment Adjust the temperature of the fusing unit.
-
Page 68: Resets
Setting Menus on Touch Screen Glossy Cardstock Printing See "Glossy Cardstock Printing" (P.152). Toner Refresh See "Refreshing the Toner" (P.151). Belt Cleaning Mode See "Performing a Transfer Belt Cleaning Mode Procedure" (P.150). Fusing Unit Cleaning See "Fusing Unit Cleaning" (P.151). Fusing Unit Replacement See "Fusing Unit Replacement"... -
Page 69: Printer Configuration Web Tool
Printer Configuration Web Tool... -
Page 70: Overview
Printer Configuration Web Tool Overview Use Printer Configuration Web Tool to monitor the status of your network printer without leaving your desk. You can view and/or change the printer settings, monitor toner level, and acknowledge the timing of ordering replacement consumables. If you are a network administrator, you can copy the printer settings to one or all printers on the network using your web browser. -
Page 71: Setting Up The Printer Configuration Web Tool
Setting Up the Printer Configuration Web Tool Setting Up the Printer Configuration Web Tool Ensure that you activate JavaScript in your browser before using the Printer Configuration Web Tool. Follow the procedures below to configure the environment settings of your web browser before using the Printer Configuration Web Tool. -
Page 72: Starting The Printer Configuration Web Tool
Printer Configuration Web Tool Starting the Printer Configuration Web Tool To launch the Printer Configuration Web Tool, enter the IP address of your printer in your web browser. Note See "Verifying the IP Settings" (P.27). ... -
Page 73: Overview Of The Menu Items
Overview of the Menu Items Overview of the Menu Items The Printer Configuration Web Tool consists of the following menus: Note The displayed features may vary depending on your settings. Some setting menus are available only when logging in as the system administrator. For information ... -
Page 74: Page Display Format
Printer Configuration Web Tool Page Display Format The layout of the page is divided into three sections: Top Frame Left Frame Right Frame Top Frame The top frame is located at the top of all pages. The printer name and the [Log In] button are displayed in the top frame on every page. -
Page 75: Home
Home Home The header part of the Home screen shows the status and basic information of the printer. Select [Details] to open [Device Details]. Device Details Allows you to view and edit the following items. Item Description Device Name Set the name of the printer. Asset Tag Used to identify the printer. -
Page 76: Supplies
Printer Configuration Web Tool Auto Select Specify whether to set the tray as a target of automatic tray selection. Priority Specify the priority order of the tray for automatic tray selection. Supplies Displays the status of supplies. Select [Details] to display more information and configure the settings related to supplies. -
Page 77: Quick Links
Home Usage Counters You can check the detailed usage counters. Note “Impressions” in Usage Counters means the counts of images. For example, 2-sided printing increases the impressions by two. Item Description Total Impressions Displays the total number of [Color Impressions] and [Black Impressions]. - Page 78 Printer Configuration Web Tool Create Clone File To download a setting information file, select the items to copy and then select [Create]. Note The clone file is downloaded in a format which cannot be edited by users. Support Displays the support information.
-
Page 79: Apps
Apps Apps Allows you to configure the settings related to the apps used on the touch screen. Preferences Walkup Screen Set the screen displayed after powering on the printer or canceling the Power Saver mode. Installed Apps The list of installed apps is displayed. Select each app to confirm or change the app information and settings. -
Page 80: Jobs
Printer Configuration Web Tool Jobs The [Jobs] page displays the list of active jobs and completed jobs. Select each job to see its detailed status. Note The jobs stored as Secure Print jobs are not listed here. Find them at the [Jobs] app on the touch ... -
Page 81: Connectivity
Connectivity Connectivity The [Connectivity] page allows you to set the network connection and data transmission protocols Note The displayed features may vary depending on your settings. Connections Ethernet MAC Address: Displays the MAC address. Rated Speed Select a communication speed for the Ethernet interface. [Auto (Default)] ... - Page 82 Printer Configuration Web Tool DHCP with Auto IP The address, subnet mask, and gateway address will automatically be set via DHCP/ AutoIP. If the printer fails to communicate with the DHCP server, the AutoIP function is automatically enabled and an IP address (169.254.xxx.xxx) is assigned to the printer. When communication between the printer and the DHCP server recovers, the printer obtains an IP address, a subnet mask, and a gateway address by the DHCP server.
- Page 83 Connectivity [Address Assignment and Configuration Data] [Configuration Data] DHCPv6 Address: Displays the DHCPv6 address. Manual Address: Allows you to select whether or not to configure the IPv6-address settings manually. Manual Address Enter an address. Note Enter the address in the format "xxxx:xxxx:xxxx:xxxx:xxxx:xxxx:xxxx:xxxx", where "xxxx"...
-
Page 84: Protocols
Printer Configuration Web Tool Primary Domain, Alternate Domain 1, Alternate Domain 2 Enter domains when you disable [Generate Domain Search List Automatically]. 802.1X Configure the IEEE 802.1x settings. Enable 802.1X Set whether or not to use IEEE 802.1X authentication. Authentication Method ... - Page 85 Connectivity Wide-Area Bonjour Select this to enable the Wide-Area Bonjour protocol. Note In multi-interface environment, this setting is for primary interface only. Host Name Enter the host name. Printer Name Enter the printer name. HTTP Enable HTTP Select this to enable HTTP.
- Page 86 Printer Configuration Web Tool Type For [Manual], select a type to specify the proxy server. According to the type you selected, enter an address or a host name with up to 255 alphanumeric characters, underscore, period, or colon, and enter the port number between 1 and 65535.
- Page 87 Connectivity Spool Select [On] to enable spooling. IPsec Configure the IPsec settings. Note For [IKE Authentication Method], [Preshared Key], [DH Group], and [PFS], consult your network administrator. Item Description Enable Select whether or not to enable IPsec communications. IKE Authentication Method Set the IKE authentication method.
- Page 88 Printer Configuration Web Tool LDAP Configure the LDAP servers, LDAP Authentication, and custom filters settings. LDAP Servers Item Description Server Information IP Address/Host Enter the server IP address and the port Name: Port number. Note For IPv4, enter the address in the format ...
- Page 89 Connectivity LDAP Authentication Item Description Authentication Method Select the method for authentication from [Direct Authentication] and [Authentication of User Attributes]. Common Name Enter the attribute of user name. Up to 32 ASCII characters can be entered. This attribute is used to search user name in the LDAP Server.
- Page 90 Printer Configuration Web Tool Maximum Number of Sessions Enter the maximum number of client sessions using LPD. You can enter a number from 1 to 10 in 1 session increments. Parameter Text String Encoding Select an encoding format for parameter text strings. [Follow Device Settings] ...
- Page 91 Connectivity Port Select this to enable the port. WINS Server Address Acquisition by DHCP Select this to get a WINS server address through DHCP. This is effective when the [Mode] setting for [IPv4] is set to [DHCP]. Primary WINS Server Address, Secondary WINS Server Address When disabling [WINS Server Address Acquisition by DHCP], enter a server address.
- Page 92 Printer Configuration Web Tool SNMP Port Select this to use SNMP, when you use any web applications to control the printer on the network. Send Authentication Error Traps Select this to notify authenticate error traps. SNMPv1/v2 Select this to change the settings for [SNMPv1/v2]. Enable (Read) ...
- Page 93 Connectivity Encryption Password, Retype Password Enter a password with 8 to 32 ASCII characters. Print Drivers Account Message Digest Algorithm Displays the type of algorithm. Message Encryption Method Displays the message encryption algorithm: [DES] or [AES-128]. Reset to Default Password ...
- Page 94 Printer Configuration Web Tool Time Synchronization Interval Enter a time interval value to connect to the time server. SOAP Port Select this to enable the SOAP port. Web Services on Devices (WSD) WSD Print This feature is for Web Services on Devices (WSD) Print, and is enabled by factory default.
-
Page 95: Permissions
Permissions Permissions The [Permissions] page allows you to set how users access the printer and make an authentication. Guest Access A Guest is anyone who is not currently logged in to the printer. Select [Edit] to change the range of operation you permit for guest users. ... - Page 96 Printer Configuration Web Tool Kerberos (Windows ADS) Item Description Default Server Realm Specify the realm. Server Address Specify the server address. Add Alternate Server Clicking [Add Alternate Server] adds the [Alternate Server] section to the screen. Set [Realm] and [Server Address] for the alternate server.
-
Page 97: Password Rules
Permissions Advanced Settings Input Settings Item Description Case Sensitive User Name Select whether or not to ignore the case for log-in user name. Authentication Settings Item Description Log Failed Login Attempts Set the failure count to detect unauthorized access. An error is logged if authentication fails the number of times specified in [Failed Login Attempt Limit] within a predetermined time (10 minutes). -
Page 98: System
Printer Configuration Web Tool System Date & Time Set the date and time for the system clock of the printer. The date and time set here will be printed on all lists and reports. Date Date Format Select a date format. [Year/Month/Day] ... -
Page 99: Timeouts
System Low Power Timeout Specify a time period to enter the Low Power mode after the last operation. Sleep Timeout Specify a time period to enter the Sleep mode after entering the Low Power mode. Auto Power Off ... - Page 100 Printer Configuration Web Tool Software Option This feature is for service representative use. For more information, contact your local dealer. Note This item appears when HTTP communications are encrypted. For details, see "Configuration of HTTP Communications Encryption" (P.116). ...
- Page 101 System Creating a certificate signing request (CSR) Select [Device Certificates] from the drop down menu, and click [Create]. Then select [Create Certificate Signing Request (CSR)]. Set the following for the CSR. Item Description Hash Algorithm Select from [RSA/SHA-1] and [RSA/SHA-256]. Public Key Length Select from [1024 Bits] and [2048 Bits].
- Page 102 Printer Configuration Web Tool Automatic Self-Signed Certificate Creation This feature automatically creates a self-signed certificate when no device certificate is available, and also automatically updates the certificate before expiration. Note Manually created self-signed certificates are not automatically updated. ...
- Page 103 System Device Certificate - Server Select a certificate for SSL/TLS communications. HTTP - SSL/TLS Communication Select whether or not to enable HTTP SSL/TLS communications. HTTP - SSL/TLS Port Number Set the port number used for HTTP SSL/TLS communication from 1 to 65535. The default value is 443.
- Page 104 Printer Configuration Web Tool IPv4 Address Filtering Select this to register IPv4 addresses that the printer accepts connection from. Allowed IP Address/Subnet Mask Select [Add], and then enter an IP address and an IP mask (Subnet Mask). To set an IP mask, enter a number from 0 through 32. The number range corresponds to the 32-bit binary number comprising IP addresses.
-
Page 105: Defaults And Policies
System Defaults and Policies Common Startup Page Select whether to automatically print a startup page every time the printer is powered Default Print Paper Size You can set the most commonly-used paper size, A4 or Letter, as the default paper size. -
Page 106: Pdl Settings
Printer Configuration Web Tool When Paper Jam Occurs Specify how the printer handles print jobs after a paper jam is cleared. Resume Print After Jam Clearance When a paper jam is cleared, the printer automatically resumes printing from the next page of the page which was output correctly. - Page 107 System Print Quantity Set the default print quantity. Set the number of copies required for a specific job from the print driver. Values selected from the print driver always override values selected from the touch screen. Paper Tray Specify the default paper tray.
- Page 108 Printer Configuration Web Tool Lines per Page Specify the number of lines on page. CR=CR, LF=CR+LF, FF=CR+FF Set line termination processing. The line termination command is not added. The LF/FF command is added. CR+LF/CR+FF CR=CR+LF, LF=LF, FF=FF Set line termination processing.
- Page 109 System Print Quantity Specifies the number of copies to print. Paper Size Specifies the output paper size for the PDF file. Output Color Specifies the default output color. 2-Sided Specifies whether to print on one side or both sides of a sheet of print media. For a two-sided printing, you can specify the printout to be bound by the long edge or short edge.
-
Page 110: Logs
Printer Configuration Web Tool Paper Size Specifies the paper size. XPS (XML Paper Specification) Displays the version of XPS. Logs Audit Log Allows you to enable the [Audit Log] feature which logs the operations on the printer, and retrieve the audit log. Software Update You can update the software of the printer when an update is available. -
Page 111: Measurements
System Measurements Units Allows you to select a unit of measurement displayed on the screen from [Millimeters] or [Inches]. Paper Size Preference Allows you to select the unit of default paper size to be used for printer settings. To use the A4 size paper for the following printer settings by default and to set the [Units] setting to [Millimeters], select [Metric]. - Page 112 Printer Configuration Web Tool...
-
Page 113: Encryption And Digital Signature Settings
Encryption and Digital Signature Settings... -
Page 114: Encryption And Digital Signature Overview
Encryption and Digital Signature Settings Encryption and Digital Signature Overview Types of Certificate To use the Encryption feature and the Signature feature on the printer, a certificate is required. The following two types of device certificate can be used on the printer: A self-signed certificate created by Printer Configuration Web Tool (The valid period ... - Page 115 Encryption and Digital Signature Overview Encrypting HTTP Communications from a Client to the Printer (SSL/TLS Server) The SOAP, Internet Services (HTTP), IPP, and WebDAV ports use the HTTP server of the printer. The SSL/TLS protocol is used to encrypt the HTTP communications between a client and the printer.
-
Page 116: Configuration Of Http Communications Encryption
Encryption and Digital Signature Settings Configuration of HTTP Communications Encryption This section describes the settings to encrypt HTTP communications. Step1 Configuration on the Printer Configure a certificate on the printer. When [Automatic Self-Signed Certificate Creation] is set to [On], a self-signed certificate is automatically created as the SSL server certificate. -
Page 117: Step2 Configuration On The Computer
Configuration of HTTP Communications Encryption Step2 Configuration on the Computer To encrypt communications between a web browser and the printer, enter an address beginning with “https” instead of “http” in the address box of the web browser. Example of IP address entry: ... -
Page 118: Configuration Of Encryption Using Ipsec
Encryption and Digital Signature Settings Configuration of Encryption using IPsec This section describes how to encrypt communications using IPsec. Step1 Import and Configuration of a Certificate The following describes configuration procedures to set up a certificate with Printer Configuration Web Tool. When [IKE Authentication Method] is set to [Digital Signature], configure a certificate on the printer. -
Page 119: Authentication Features
Authentication Features... -
Page 120: User Authentication
Authentication Features User Authentication Types of User The Authentication feature restricts operations according to the user type. System Administrator The system administrator can register and change system settings to adapt to the environment to be used. A system administrator uses a specific user ID called a system administrator’s user ID. To login as the system administrator, enter the system administrator’s user ID in the user ID entry field on the screen. -
Page 121: User Authentication Operations
User Authentication Network Authentication Authentication is performed for a remote server. User information is not registered on the printer. The [Network] authentication uses the user information registered on a remote authentication server (LDAP, Kerberos, or SMB) to perform authentication. Note When you change [Login Method], user information registered on the printer will be deleted. -
Page 122: Creating And Editing User Accounts
Authentication Features Select the user account from the list, or enter the user name. Note Enter the user name for the Network authentication. For the Local and Simple authentication, the user identification varies depending on the settings. When the Network authentication system is Kerberos or SMB, entering the realm or domain is ... - Page 123 User Authentication Select [Delete] on the confirmation screen. Changing User Password from the Printer Configuration Web Tool In the [Permission] screen, select [Admin] or desired user name under [User Accounts]. Select [Change Password]. Set the new password on the displayed screen and select [OK].
- Page 124 Authentication Features...
-
Page 125: Maintenance
Maintenance... -
Page 126: Replacing Consumables
Maintenance Replacing Consumables The printer is provided with the following consumables and periodic replacement parts. We recommend the use of the following consumables as they are manufactured to meet the specifications of the printer. Reference For the replacement procedures which are not described in this section, refer to the instructions ... -
Page 127: Periodic Replacement Parts
Replace the toner cartridge according to the message. Important The use of toner cartridges not recommended by FUJIFILM may degrade image quality and performance. Use toner cartridges recommended by FUJIFILM. Make sure that the printer is not operating, and open the front door. - Page 128 Maintenance Hold the handle and pull out the toner cartridge slowly. Take the new toner cartridge out of the box, and shake the cartridge up and down and left and right for five or six times. Push the cartridge in slowly until it stops. Close the front door.
-
Page 129: Replacing Drum Cartridge
The printer displays a message when a drum cartridge needs to be replaced. When the message is displayed, replace the drum cartridge. Important The use of drum cartridges not recommended by FUJIFILM may degrade image quality and performance. Use drum cartridges recommended by FUJIFILM. - Page 130 Maintenance Place the removed waste cartridge on a level surface, with the openings facing up. Note To avoid toner spills or malfunction, do not lay the waste cartridge on its side, or with the openings facing down. Pull down the release lever of the drum cartridge Y, M, C, or K. Slide out the drum cartridge gently while holding its bottom, and pull it out from the printer.
- Page 131 Replacing Consumables Take the new drum cartridge out of the box, and insert the used drum cartridge into the supplied plastic bag and place it into the box. Important Do not place the new drum cartridge in an upright position. ...
- Page 132 Maintenance Remove the cleaning rod from inside the printer. Insert the cleaning rod into one of the four cleaning holes until it stops, then pull out the rod. Repeat this two more times. Repeat the procedure for the holes in the other three slots. Return the cleaning rod to its original location.
-
Page 133: Replacing Waste Cartridge
Replacing Consumables To reinsert the waste cartridge, lower the bottom of the cartridge into position. To lock the cartridge into place, push the top forward until the latch clicks into place. Close the right-side door. Note If the right-side door is not closed completely, a message appears and the printer will remain ... - Page 134 Maintenance Unlock the waste cartridge, pinch the latch, to remove the waste cartridge. To prevent toner spills, keep the openings facing up. Note To avoid toner spills or malfunction, do not lay the waste cartridge on its side, or with the openings ...
- Page 135 Replacing Consumables Close the right-side door.
-
Page 136: Cleaning The Printer
Maintenance Cleaning the Printer WARNING Do not use aerosol cleaners. Aerosol cleaners can be explosive or flammable when used on electromechanical equipment. Before cleaning this product, unplug the product from the electrical outlet. Always use materials specifically designated for this product. The use of other materials may result in poor performance and create a hazardous situation. -
Page 137: Cleaning The Led Lenses
Cleaning the Printer Cleaning the LED Lenses The following describes how to clean the LED lenses of the printer. If you have image quality problems such as white or colored stripes appearing on printed outputs, clean the LED lenses. Switch the power off. Open the right-side door. - Page 138 Maintenance To remove the waste cartridge, pinch the latch and then lower the top of the cartridge and lift it away from the printer. Note To prevent toner spills, keep the openings facing up. After removing the waste cartridge, do not touch the area shown in the illustration. ...
- Page 139 Cleaning the Printer Place the removed waste cartridge on a level surface, with the openings facing up. Note To avoid toner spills or malfunction, do not lay the waste cartridge on its side, or with the openings facing down. Remove the cleaning rod from inside the printer.
- Page 140 Maintenance Insert the cleaning rod into each of the four slots until it stops, then pull out the rod. Move the rod in and out three times for each slot. Return the cleaning rod to its original location. Set the bottom of the waste cartridge into its position, and push the top forward until the latch clicks into place.
-
Page 141: Cleaning The Color-Density Sensors
Cleaning the Printer Close the right-side door. Cleaning the Color-Density Sensors The following describes how to clean the color-density sensors of the printer. If you have image quality problems such as print or color density, missing parts, or foggy background on printed outputs, clean the color-density sensors. Switch the power off. - Page 142 Maintenance Open the right-side door. Pull down the release levers of the drum cartridges Y, M, C, and K. Pull up the release lever of the belt unit. Slide out the belt unit gently while holding its handles, and pull it out from the printer.
- Page 143 Cleaning the Printer Use a dry cotton swab to clean the color-density sensors. Insert the belt unit straight in the housing until it clicks into place. Pull down the release lever of the belt unit.
- Page 144 Maintenance Pull up to return the release levers of the drum cartridges Y, M, C, and K. Close the right-side door. Close the rear door.
-
Page 145: Adjustments And Maintenance Procedures
Adjustments and Maintenance Procedures Adjustments and Maintenance Procedures Color Registration The printer automatically adjusts the color registration when automatic adjustment is enabled. You can also adjust color registration manually any time the printer is idle. You must adjust the color registration any time the printer is moved. If you are having printing problems, adjust the color registration. -
Page 146: Adjusting Paper Registration
Maintenance Touch [Device] > [Support] > [Advanced Color Calibration - Automatic]. Touch [Start] to run Color Calibration automatically. At the successfully completed prompt, touch [Close]. To exit the menu, touch [X]. Press the Home button. Adjusting Paper Registration Use Adjust Paper Registration to adjust the placement of the printed image on the page. - Page 147 Adjustments and Maintenance Procedures On the sample pages, use a ruler to measure the distance of the printed image from the top, bottom, left, and right edges. Note For identification, a single dot is printed on Side 1, and two dots are printed on Side 2. ...
-
Page 148: Transfer Voltage Adjustment
Maintenance For Side Registration, a positive value shifts the image to the left. To save your settings, touch [OK]. As needed, to enter additional values, repeat the previous steps. Print another sample page, then repeat the process until you complete the registration corrections. -
Page 149: Adjusting The Fusing Unit
Adjustments and Maintenance Procedures Adjusting the Fusing Unit Use Adjust Fusing Unit for optimum print quality across a wide range of paper types. If the toner on a print is smearing or can be rubbed off the paper, increase the temperature for the paper you are using. -
Page 150: Fusing Unit Speed Adjustment
Maintenance Touch [Start]. At the successfully completed prompt, touch [Close]. To exit the menu, touch [X]. Press the Home button. Fusing Unit Speed Adjustment You can adjust fusing speed to prevent occurrence of smearing. Note Depending on the printer settings, you may need to log in as the system administrator. ... -
Page 151: Adjusting The Density
Adjustments and Maintenance Procedures Adjusting the Density The Adjust Density feature controls how much toner is used to print. Adjust the density for lighter toner use for saving toner, or adjust for heavier density to make prints bolder. A positive adjustment makes the prints darker, while a negative adjustment makes the prints lighter. -
Page 152: Fusing Unit Replacement
Maintenance Load 5 sheets or more of Letter (8.5×11″) paper in Bypass Tray, and touch [Start]. At the successfully completed prompt, touch [Close]. To exit the menu, touch [X]. Press the Home button. Fusing Unit Replacement You can replace the fusing unit following instructions on the screen. Important If you have removed the fusing unit without this procedure, you cannot set a new fusing unit into the ... - Page 153 Adjustments and Maintenance Procedures Select [Optimize for Image Quality] or [Optimize for Speed], then touch [OK]. To exit the menu, touch [X]. Press the Home button.
-
Page 154: Removing And Installing Optional Components
Maintenance Removing and Installing Optional Components Important To lift the printer, always use at least three people to grasp the hand holds on each side of the printer. To prevent you from dropping the printer or injury, lift the printer firmly by gripping the recessed areas ... - Page 155 Removing and Installing Optional Components Remove the paper stored in the tray(s). Release the lock switch of the main body and then lift the main body. Note Make sure not to lose the lock switch you have removed. ...
-
Page 156: Installing The Sheet Feeders And The Caster
Maintenance Release the lock switches of sheet feeders and remove from the top feeder to the lower ones. Pull out the legs. Installing the Sheet Feeders and the Caster To install the Sheet Feeders and the Caster, see "Removing the Sheet Feeders and the Caster"... - Page 157 Problem Solving...
-
Page 158: Problem Solving
Problem Solving Troubleshooting This section describes troubles that may occur with the printer and their solutions. Follow the troubleshooting procedure below to solve the problems. The printer does not work properly. Action Refer to "Machine Trouble" (P.159). A message is displayed. Cause Has a paper jam occurred? Action Refer to "Paper Jams"... -
Page 159: Machine Trouble
Machine Trouble Machine Trouble Before you conclude that the printer is defective, check the printer status again. Symptom Cause Remedy The printer is not Is the power switch turned Switch the power on. powered on. Is the power cord plugged Switch the power off, and then firmly into the power outlet? plug the power cord into the connector... - Page 160 Problem Solving Symptom Cause Remedy Paper is often Is the paper damp? Replace the paper with a new one. jammed or wrinkled. Reference Refer to "Loading Paper" (P.40). Is the paper curled? Turn over the paper in the tray, or replace the paper with a new one.
-
Page 161: Image Quality Trouble
Image Quality Trouble Image Quality Trouble If the image quality of printed documents is poor, identify the symptom in the following table to perform the remedy. If image quality does not improve even after performing the remedy, contact your local dealer. - Page 162 Problem Solving Symptom Cause Remedy Dirt appears at equal The paper path is dirty. Print a few pages to remove the dirt. intervals. The drum cartridge has Replace the drum cartridge with a new deteriorated or is damaged. one. Paper Feed Direction White dots appear in The paper is unsuitable.
- Page 163 Image Quality Trouble Symptom Cause Remedy Nothing is printed. Two or more sheets of Fan the paper well and load it again. paper are being fed Reference simultaneously (double- Refer to "Loading Paper" (P.40). feed). Power supply or high- Contact your local dealer.
- Page 164 Problem Solving Symptom Cause Remedy White or color The drum cartridge has Replace the drum cartridge with a new patches appear deteriorated or is damaged. one. vertically. No toner remains in the Replace the toner cartridge with a new toner cartridge. one.
-
Page 165: Trouble During Printing
Trouble during Printing Trouble during Printing This section describes how to resolve print problems. Unable to Print If you cannot print a document, identify the symptom in the following table to perform the remedy. Symptom Cause Remedy Data remains in the The printer is not powered Switch the power on. -
Page 166: Network-Related Problems
Problem Solving Symptom Cause Remedy The image on the The image is larger than the Expand the printable area of the printer, document edges is printable area. or reduce the image size on the missing on the printout. output. The printed font Font replacement is set on Check the font replacement table. -
Page 167: Printer Configuration Web Tool Problems
Network-related Problems Cause Check point Remedy The printer is not set to the Confirm the transport Select the transport protocol transport protocol protocol selected on the corresponding to the computer. corresponding to the printer. computer. The printer is trying to Set not to output Ctrl-D. -
Page 168: Internet/Intranet Connection Problems
Problem Solving Symptom Remedy Pressing [OK] does not apply the Are the entered values correct? Enter the values with new settings. supported characters and numbers. This may occur when the touch screen is being operated or the operation has just been completed. When the automatic reset function is set, any setting configure with Printer Configuration Web Tool is not applied until setting the time set for automatic reset. -
Page 169: Ipv4 And Ipv6 Connection Problems
Network-related Problems Cause Remedy The address of the address that Confirm whether only addresses that do not use a proxy does not use a proxy server is server are set. Even if addresses not through a proxy incorrect. server are specified using the FQDN, if a server is directly accessed using its IP address, the registered server is not excluded. - Page 170 Problem Solving Unable to connect using an IPv6 address Symptom Remedy You cannot connect to the printer When you specify the printer's link-local address, a scope with the link-local address. ID must be appended to the address. For example, when you use Internet Explorer 11 on Windows 7 to access the address “fe80::203:baff:fe48:9010”, you must append the Ethernet adapter local area connection number (for...
-
Page 171: Error Code
Error Code Error Code This section describes error codes. An error message and error code (***-***) are displayed on the touch screen if printing terminated abnormally because of an error, or a malfunction occurred in the printer. Refer to the error codes in the following table to resolve problems. Important If an error code is displayed, any print data remaining in the printer and information stored in the ... - Page 172 Problem Solving “016-001”–“016-999” Error Code Cause/Remedy [Cause] An error occurred in the software. 016-210 016-211 [Remedy] Switch off the printer power, make sure that the touch screen 016-212 is blank, and then switch on the printer power. If the error still 016-213 is not resolved, contact your local dealer.
- Page 173 Error Code Error Code Cause/Remedy [Cause] An error occurred in the printer. 016-345 016-347 [Remedy] Switch off the printer power, make sure that the touch screen 016-348 is blank, and then switch on the printer power. If the same 016-349 message is displayed again, contact your local dealer.
- Page 174 Problem Solving Error Code Cause/Remedy [Cause] An error occurred in the certificate stored in the printer. 016-405 [Remedy] Initialize the certificate. [Cause] An error occurred in the SSL client certificate. 016-406 [Remedy] Take one of the following measures: Store an SSL client certificate in the printer, and set it as ...
- Page 175 Error Code Error Code Cause/Remedy [Cause] Unable to retrieve the IP address from DNS. 016-454 [Remedy] Confirm the DNS configuration and IP address retrieve setting. [Cause] Connection to the SNTP server timed out. 016-455 [Remedy] Confirm the network cable connection and the IP address of the SNTP server are correct.
- Page 176 If your application usage and print instruction are correct, check with the application manufacturer that sent the print job for operations of the application, not with FUJIFILM. If the error still is not resolved, contact your local dealer. Note XPS stands for XML Paper Specification.
- Page 177 Error Code Error Code Cause/Remedy [Cause] An error occurred when connecting to the Remote Download 016-529 server. There was no response from the server within the specified time (45 seconds). [Remedy] Confirm the network connection. Check whether the Remote Download server is correctly set on the network. [Cause] Kerberos server authentication protocol error 016-533 [Remedy] The time difference between the printer and the Kerberos...
- Page 178 Problem Solving Error Code Cause/Remedy [Cause] The printer is not registered in your authentication 016-548 management software. [Remedy] Register the printer in your authentication management software. For more information on the process, refer to the manual for your authentication management software. [Cause] Your authentication management software does not support 016-553 the interface version of the printer.
- Page 179 Error Code Error Code Cause/Remedy [Cause] Failed to authenticate the Remote Download server. 016-564 [Remedy] Confirm the login name and password to access the Remote Download server. If the error still is not resolved, contact your local dealer. [Cause] Backup failed. 016-565 [Remedy] Make sure that the USB memory device is inserted securely.
- Page 180 Problem Solving Error Code Cause/Remedy [Cause] The job was suspended because the number of the digits for 016-700 the Secure Print or Charge Print passcode set on the print driver was less than the minimum passcode length for stored jobs specified on the printer. [Remedy] On the print driver, set the passcode string equal to or longer than the specified minimum passcode length for stored jobs.
- Page 181 Error Code Error Code Cause/Remedy [Cause] Unable to print because the number of colors or the resolution 016-729 of the TIFF file exceeds the allowed range. [Remedy] Change the number of colors or resolution for the TIFF file, and execute the operation again. [Cause] Unable to print TIFF data because it was interrupted.
- Page 182 Problem Solving Error Code Cause/Remedy [Cause] Probable causes are as follows: 016-751 1. During the PDF Bridge processing, a syntax or parameter error occurred, an undefined command was used, and a PDF file was damaged. 2. When [Print Processing Mode [408])] for the PDF Direct Print feature has been set to [PS([1])], a PDF file including OpenType fonts is processed.
- Page 183 Error Code Error Code Cause/Remedy [Cause] Unable to connect to the SMTP server because the printer's 016-768 mail address is incorrect. [Remedy] Confirm the printer's mail address. [Cause] The SMTP server does not support delivery receipts (DSN). 016-769 [Remedy] Send e-mail without setting delivery receipts (DSN). [Cause] The DNS server address is not set.
- Page 184 Problem Solving Error Code Cause/Remedy [Cause] The direct print feature is disabled on the printer. 017-507 [Remedy] Enable the direct print feature. [Cause] The estimated number of sheets for Job Limit is zero. 017-508 [Remedy] Confirm that the job parameters and the print data are correct, and then perform the process again.
- Page 185 Error Code Error Code Cause/Remedy [Cause] When the printer is used as a print job storage device, print 017-729 job sending was stopped temporarily because the number of jobs in the printer exceeded the maximum receivable volume or the space for spool data was insufficient. [Remedy] Take one of the following measures: Enable Spool for IPP on Printer Configuration Web Tool of ...
- Page 186 Problem Solving Error Code Cause/Remedy [Cause] You are not permitted to print. 017-792 017-793 [Remedy] Consult your system administrator to change your 017-794 authorization. 017-795 017-796 017-797 017-798 017-799 “018-001”–“020-999” Error Code Cause/Remedy [Cause] IPsec setting error. 018-400 [Remedy] Remove the inconsistency of the IPsec settings, and enable IPsec again.
- Page 187 Error Code Error Code Cause/Remedy [Cause] A client-side error occurred. (Received HTTP Status 4xx other 018-562 than 401 and 404). [Remedy] Check the following: The destination HTTP server for the scanned document is accessible by PC. The server settings ...
- Page 188 Problem Solving Error Code Cause/Remedy [Cause] An error occurred during LDAP server authentication. 018-596 [Remedy] Execute the operation again. If the error still is not resolved, contact your local dealer. [Cause] The network for Web Applications is being initialized. 018-700 [Remedy] Wait for a while, and then execute the operation again.
- Page 189 Error Code “023-001”–“025-999” Error Code Cause/Remedy [Cause] An error occurred in the printer. 024-312 024-313 [Remedy] Switch off the printer power, make sure that the touch screen 024-314 is blank, and then switch on the printer power. If the same 024-315 message is displayed again, contact your local dealer.
- Page 190 Problem Solving Error Code Cause/Remedy [Cause] Unable to print because the number of booklet pages exceeds 024-703 the maximum number allowed. [Remedy] Use paper of less weight. Or, cancel the booklet creation. [Cause] The paper type is not supported for duplex or inversion. 024-707 [Remedy] Change the paper type, or change to 1-sided printing.
- Page 191 Error Code Error Code Cause/Remedy [Cause] The printer configuration information at a print job 026-726 specification does not match the actual machine configuration. [Remedy] Modify the printer configuration information in the print driver screen to match the actual machine configuration. [Cause] The size of paper loaded in the specified tray is unknown.
- Page 192 Problem Solving Error Code Cause/Remedy [Cause] The IP address of IPv6 network already exists. 027-447 [Remedy] Change the [Link-local Address] for IPv6 on the printer, or the IP address of IPv6 on the network device, to remove the duplication of addresses. [Cause] IPv4 address duplication on the network.
- Page 193 Error Code Error Code Cause/Remedy [Cause] The received e-mail has been discarded because the address 027-714 in its From field is different from the mail address in the S/ MIME signature mail. [Remedy] Inform the sender that the mail addresses differ, and ask the sender to send the e-mail again.
- Page 194 Problem Solving Error Code Cause/Remedy [Cause] The data transfer using SSL is specified, but the SSL setting 027-735 of the printer is disabled. [Remedy] Enable the SSL setting, or specify HTTP for the transfer protocol. [Cause] The server certificate verification feature of the printer is 027-736 disabled when the server certificate verification is required.
- Page 195 Error Code Error Code Cause/Remedy [Cause] An on-demand print job was sent to the printer using the Web 027-761 Applications feature, but the time interval from receiving the print job until starting the print processing exceeded the time limit specified on the printer. [Remedy] When multiple documents are to be printed, reduce the number of documents, and then execute the operation again.
- Page 196 Problem Solving Error Code Cause/Remedy [Cause] Certificate validation error 027-768 Check if the destination WebDAV server is accessible from [Remedy] a computer. Check if the SSL server certificate for the destination WebDAV server is registered in the printer. Check if the SSL server certificate for the destination ...
- Page 197 Error Code Error Code Cause/Remedy [Cause] Failed to authenticate the SMTP server. 027-779 [Remedy] Confirm the login name and password set to SMTP-AUTH. [Cause] Network interface error. 027-780 [Remedy] Check the network interface. 027-782 [Cause] Maximum redirects have been reached. [Remedy] Check the re-direct setting in the WebDAV server to see if a re-direct loop occurs.
- Page 198 Problem Solving Error Code Cause/Remedy [Cause] An internal error occurred. 027-794 Check the WebDAV server is working correctly. [Remedy] Check if the destination WebDAV server is accessible from a computer. [Cause] Unknown method 027-795 Check if the destination is a WebDAV server. [Remedy] ...
- Page 199 Error Code Error Code Cause/Remedy [Cause] Ethernet error. An error occurred when the printer obtains a 029-714 proxy auto-config (PAC) file. [Remedy] When [Setup] in [Enable Proxy Server] is set to [Manual], check the location setting. When [Setup] in [Enable Proxy Server] is set to [Configuration Script], the location setting on the DHCP server may have a problem.
- Page 200 Problem Solving Error Code Cause/Remedy [Cause] An error occurred in the SSL connection. 029-723 [Remedy] Confirm the access privilege for the server or SSL settings. [Cause] An error occurred during data reception. 029-724 [Remedy] Turn the device off and then on, and then execute the operation again.
- Page 201 Error Code Error Code Cause/Remedy [Cause] An error occurred in the printer. 041-363 [Remedy] Switch off the printer power, make sure that the touch screen is blank, and then switch on the printer power. If the same message is displayed again, contact your local dealer. [Cause] An error occurred in the printer.
- Page 202 Problem Solving “055-001”–“058-999” Error Code Cause/Remedy [Cause] An error occurred in the printer. 058-310 058-311 [Remedy] Switch off the printer power, make sure that the touch screen 058-313 is blank, and then switch on the printer power. If the error still is not resolved, contact your local dealer.
- Page 203 Error Code “061-001”–“061-999” Error Code Cause/Remedy [Cause] An error occurred. 061-354 061-355 [Remedy] Switch off the printer power, make sure that the touch screen 061-356 is blank, and then switch on the printer power. If the same 061-357 message is displayed again, contact your local dealer. 061-358 061-359 061-360...
- Page 204 Problem Solving Error Code Cause/Remedy [Cause] Tray 3 malfunction 073-310 073-311 [Remedy] Switch off the printer power, make sure that the touch screen is blank, and then switch on the printer power. If the error still is not resolved, contact your local dealer. [Cause] The sheet feeder (Tray 3) may not be supported.
- Page 205 Error Code “092-001”–“092-999” Error Code Cause/Remedy [Cause] An error occurred. 092-312 092-313 [Remedy] Switch off the printer power, make sure that the touch screen 092-314 is blank, and then switch on the printer power. If the same 092-315 message is displayed again, contact your local dealer. [Cause] Density of Yellow color is low.
- Page 206 Problem Solving Error Code Cause/Remedy [Cause] An error occurred in the toner cartridge [Y] (yellow). 093-441 [Remedy] Pull out the toner cartridge [Y] (yellow), shake the cartridge up and down and left and right, and then insert the cartridge again. [Cause] An error occurred in the toner cartridge [M] (magenta).
- Page 207 Error Code “102-001”–“115-999” Error Code Cause/Remedy [Cause] An error occurred. 102-356 103-314 [Remedy] Switch off the printer power, make sure that the touch screen is blank, and then switch on the printer power. If the same message is displayed again, contact your local dealer. “116-001”–“116-999”...
- Page 208 Problem Solving Error Code Cause/Remedy [Cause] An error occurred. 116-343 116-345 [Remedy] Switch off the printer power, make sure that the touch screen 116-348 is blank, and then switch on the printer power. If the same 116-349 message is displayed again, contact your local dealer. 116-353 116-354 116-355...
- Page 209 Error Code Error Code Cause/Remedy [Cause] Unable to use the 2 Sided Printing feature because of 116-701 insufficient memory. [Remedy] Increase memory, or install the hard disk on the models of which hard disk drive is an option. For information on installing the hard disk, contact your local dealer.
- Page 210 Problem Solving Error Code Cause/Remedy [Cause] The printer has processed the preset operation printing in 116-728 black and white or in 2-sided due to the restriction settings. [Remedy] Consult your system administrator to change your authorization. [Cause] The size and orientation of the form specified are not matched 116-738 with the paper to be printed.
- Page 211 Error Code Error Code Cause/Remedy [Cause] The process has been canceled because the data storage 116-751 space is full. [Remedy] Delete stored data from the data storage space. If the error still is not resolved, split the file and send the job again. [Cause] The descriptions of the PDF or XPS printing job ticket have a 116-752 problem.
- Page 212 Problem Solving Error Code Cause/Remedy [Cause] The unformatted SD card used in the other machine is 117-348 installed. [Remedy] Switch off the printer power, make sure that the touch screen is blank, and then switch on the printer power. If the error still is not resolved, contact your local dealer.
- Page 213 Error Code “123-001”–“126-999” Error Code Cause/Remedy [Cause] An error occurred in the printer. 124-310 124-311 [Remedy] Switch off the printer power, make sure that the touch screen 124-312 is blank, and then switch on the printer power. If the same 124-313 message is displayed again, contact your local dealer.
-
Page 214: Other Errors
Problem Solving Error Code Cause/Remedy [Cause] An error occurred in the printer. 124-360 124-361 [Remedy] Switch off the printer power, make sure that the touch screen 124-362 is blank, and then switch on the printer power. If the same 124-363 message is displayed again, contact your local dealer. - Page 215 Error Code Error Message Cause and Remedy [Cause] An error occurred, and the operation terminated Completed with an error. abnormally. (xxx-yyy) [Remedy] Execute the operation again.
-
Page 216: Paper Jams
Problem Solving Paper Jams When a paper jam occurred, the printer stops and an alarm beeps. A message is also displayed on the touch screen. Follow the instructions displayed to remove the jammed paper. Gently remove the paper to avoid it to be torn. If the paper is torn, remove all the torn pieces, making sure that none remain inside the printer. -
Page 217: Paper Jams In The Bypass Tray
Paper Jams Paper Jams in the Bypass Tray The following describes how to clear paper jams occurring in the Bypass Tray. Remove any paper from the Bypass Tray. Hold both sides of the Bypass Tray, then pull it straight out of the printer. Remove Tray 1 from the printer. - Page 218 Problem Solving Remove the jammed paper. Insert Tray 1 into the printer, then push it all the way in. Note If the tray is extended for large size paper, the tray protrudes when it is inserted into the printer. Insert the Bypass Tray completely into the printer.
-
Page 219: Paper Jams In Tray 1
Paper Jams Paper Jams in Tray 1 The following describes how to clear paper jams occurring in Tray 1. Remove any paper from the Bypass Tray. Hold both sides of the Bypass Tray, then pull it straight out of the printer. Remove Tray 1 from the printer. - Page 220 Problem Solving Remove any crumpled paper from the tray and any remaining paper jammed in the printer. Insert Tray 1 into the printer, then push it all the way in. Note If the tray is extended for large size paper, the tray protrudes when it is inserted into the printer. ...
-
Page 221: Paper Jams In Trays 2 To 4
Paper Jams Paper Jams in Trays 2 to 4 The following describes how to clear paper jams occurring in Trays 2 to 4. For the tray reported on the touch screen display, pull out the tray until it stops. Lift the front of the tray slightly, and remove the tray from the printer. Remove any crumpled paper from the tray and any remaining paper jammed at the front of the printer. - Page 222 Problem Solving For the same tray, at the back of the printer, locate the jam-access door. Open the door to remove any jammed paper. Insert the tray into the printer, then push the tray in until it stops. Note If the tray is extended for large size paper, the tray protrudes when it is inserted into the printer. ...
-
Page 223: Paper Jams In The Fusing Unit
Paper Jams Paper Jams in the Fusing Unit The following describes how to clear paper jams occurring in the Fusing Unit. Lift the rear door release and pull open the door. Check whether any jammed paper is exposed under the fusing unit or not, and follow the procedure depending on each case: When any jammed paper is exposed under the fusing unit: 1) Remove any jammed paper. - Page 224 Problem Solving 2) Remove any jammed paper. Important The fusing unit is hot. Do not touch it, doing so may cause burns. 3) Close the paper guide on the fusing unit. Pull the lever at the lower right part of the interior to open the flap. Remove any remaining paper jammed in the printer.
-
Page 225: Paper Jams In The Duplex Unit
Paper Jams Close the rear door. Paper Jams in the Duplex Unit The following describes how to clear paper jams occurring between the duplex module and the rear door. Lift the rear door release and pull open the door. Remove any jammed paper. Important Be sure to pull the jammed paper downward, otherwise unfixed toner sticks onto the fusing unit. - Page 226 Problem Solving Pull the lever at the lower right part of the interior to open the flap. Remove any remaining paper jammed in the printer. Bring up the duplex module by pulling the lever and put it to the main body. Remove any jammed paper caught between the duplex module and the rear door.
- Page 227 Paper Jams Close the rear door.
- Page 228 Problem Solving...
-
Page 229: Appendix
Appendix... -
Page 230: Specifications
Appendix Specifications This section lists the main specifications of the printer. Note that the specifications and the appearance of the product may change without prior notice. Basic Specifications Type Desktop/Console Printing Method LED Xerography Note LED + LED electrophotographic system ... - Page 231 2 Sided Print: 140 to 324 gsm Important The use of paper recommended by FUJIFILM is suggested. Printing may not be performed correctly depending on the paper type, paper quality, or paper size. When using custom-size paper, check the paper feeding performance in advance.
- Page 232 Appendix ® Windows 8.1 (32bit) ® Windows 8.1 (64bit) ® Windows 7 (32bit) ® Windows 7 (64bit) Interface USB 3.0, Ethernet 10BASE-T/100BASE-TX/1000BASE-T Protocol TCP/IP, lpd, IPP, Port9100 Power Supply AC 100 to 127 V ±10 %, 12 A, 50/60 Hz ±3 % ...
-
Page 233: Optional Components
Optional Components Optional Components The following table shows the optional components available. To purchase these options, contact your local dealer. Product Name Description Sheet Feeder Allows you to add a paper tray. Caster Provides four legs for machine installation. Note The optional components are subject to change without notice. - Page 234 Appendix...
- Page 235 FUJIFILM CX 3240 Creative Duplex Printer User Guide ME8576E9-1 (Edition 1) June 2019 FUJIFILM Corporation...