FujiFilm ApeosPro C810 Reference Manual
Optional units
Hide thumbs
Also See for ApeosPro C810:
- Reference manual (46 pages) ,
- User manual (12 pages) ,
- Reference manual (43 pages)

Related Manuals for FujiFilm ApeosPro C810


Summary of Contents for FujiFilm ApeosPro C810
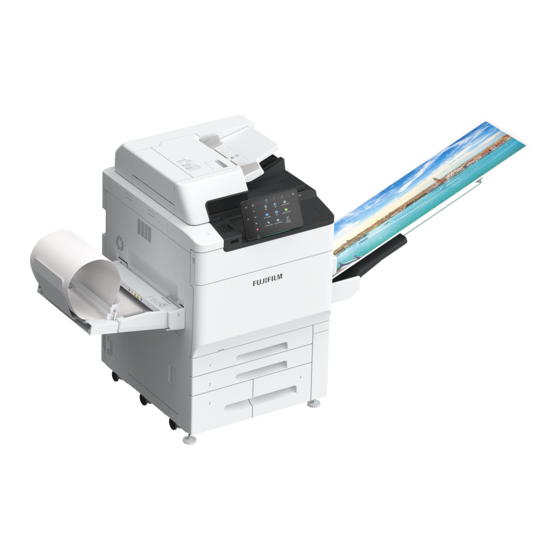
- Page 1 Reference Guide Optional Units ApeosPro C810 ApeosPro C750 ApeosPro C650 March 2022 GM1035E1-3 Edition1 FUJIFILM Business Innovation Corp.
-
Page 2: Table Of Contents
Contents High Capacity Feeder B1 Loading Paper;Paper Jams High Capacity Feeder B1-S/C3-DS Loading Paper;Paper Jams;Cleaning Machine Interface Decurler Module Curl Correction;Paper Jams Inserter Loading Paper;Paper Jams High Capacity Stacker Outputting Paper;Paper Jams Crease / Two-Sided Trimmer Waste Container;Paper Jams Folder Unit Paper Jams Finisher C Staple Cartridge;Paper Jams... - Page 3 Preface A guide describing the operations for optional units, such as the Finisher. Refer • Descriptions for the following optional products are provided in different guides. - Offset catch tray, Simple catch tray: “Reference Guide- Main Unit” - Wireless kit, Print / scan / FAX function-related products: “Reference Guide - Operations” - Print server and related products: Manual included in the product - Face authentication system, finger vein authentication system, •...
-
Page 4: High Capacity Feeder B1
High Capacity Feeder B1 Device Components Component Function Remaining Volume Display You can check the remaining paper volume. High Capacity Tray (Paper Tray 6) Load paper here. Top Cover Open this cover to clear paper jams. Main Specifications Item Specification Paper size , Letter (8.5 x 11") , JIS B5... - Page 5 Loading Paper After loading paper, configure the Paper Tray settings on the Home screen. Refer For details, refer to “Setup” in “Reference Guide - Operations”. Images are printed on the face side of the loaded paper. Pull out the Paper Tray toward you until it stops. Remove any paper remaining in the Paper Tray.
- Page 6 Insert the protrusions under the guide into the Paper Size holes. Insert the Paper Tray protrusions into the Paper Size holes on top of the guide and tighten the screw. Pull the handle for the end guide up ( 1 ), align with the Paper Size while moving the handle along the groove ( 2 ), and lower the handle ( 3 ).
- Page 7 Paper Jams If paper is jammed, the machine stops and an alarm sounds. Follow the instructions displayed on the screen to remove the jammed paper. Gently remove the paper being careful not to tear it. If paper is torn while it is being removed from the machine, remove all the torn pieces making sure that none remain inside the machine.
- Page 8 Inside of the Upper Cover Hold the handle and move the unit all the way to the left. Pull the handle ( ) and open the cover ( Remove the jammed paper. Close the cover. Move the unit to the right and connect it with the main unit.
-
Page 9: High Capacity Feeder B1-S/C3-Ds
High Capacity Feeder B1-S/C3-DS Device Components / Caution Labels B1-S C3-DS High Capacity Feeder B1-S/C3-DS... - Page 10 Component Function Bypass Tray (Paper Tray 5) Load paper here. Error Indicator When paper jam occurs, the indicator is turned on. When the priority device indicator (top lamp) blinks, first of all perform the paper jam operation. Right Cover Open this cover to clear paper jams. Remaining Volume Indicator When the Paper Tray is in operation, the top lamp is turned on.
- Page 11 Main Specifications Item Specification Paper size Standard A3, 11 x 17" size Postcard (100 x 148 mm) Custom size Width 100 to 330 (mm) Length 148 to 488 (when Bypass Tray for Long Paper is installed: 660) Paper weight B1-S Bypass Tray Uncoated 52 to 300...
- Page 12 Loading Paper After loading paper, configure the Paper Tray settings on the Home screen. Refer For details, refer to “Setup” in “Reference Guide - Operations”. Loading to High Capacity Tray Images are printed on the face side of the loaded paper. Important ...
- Page 13 Load remaining sheets with the printed side facing up, and align the paper edges in the direction of the arrow ( Adjust the short-side paper guide to the correct pa- per size ( To leave a space, pinch the paper guide grip to move. To narrow, push the paper guide to move.
- Page 14 Load about 100 to 500 sheets of paper with the printed side facing up, and align the paper edges in the direction of the arrow ( Note • Be sure to set them in short edge feed. • The right side short edge of the set postcard will be the front edge. Pinch the long-side paper guide grip and adjust to the correct paper size ( Load remaining sheets with the printed side facing...
- Page 15 ■Load • Loading side: Load sheets with the printed side facing • Direction with the flap open: Place the flap of Envelope on the left side when you face the front side of machine. • Direction with the flap closed: Place the flap of Envelope on the right or near side when you face the front side of machine.
- Page 16 Pull out the Paper Tray until it stops. Move the lever at the top of the long-side paper guide to the rightmost position (<I> position) to en- able the changing. Note To reset the setting, move the lever to the leftmost position. If the accuracy of paper feeding is not improved even if 2 is performed, move the lever at the right front to the rearmost position (<I>...
- Page 17 Fan the paper well and insert it along the paper guide all the way until it touches the back, with the printed side facing up. When custom size paper is loaded, make fine-ad- justment of the paper guide based on the paper size. Flexible Type (for Long Paper) Loosen the 4 screws of the paper guide.
- Page 18 Paper Jams Note The error indicator at the top of the machine is turned on. When the priority device indicator (top lamp) blinks, first of all perform the paper jam operation. If paper is jammed, the machine stops and an alarm sounds. Follow the instructions displayed on the screen to remove the jammed paper.
- Page 19 ■When Indicator E6 is Turned on (B1-S), when Indicator E7 is Turned on (C3-DS) Pull out the Paper Tray 6 (or 7) toward you until it stops. Note Confirm that no paper is jammed inside the Right Cover before pulling it out. Remove the jammed paper.
- Page 20 ■When Indicator E3 is Turned on Open lever [1b] to the right ( 1 ), turn knob [1c] clock- wise ( 2 ), and remove the jammed paper ( 3 ). Return lever [1b]. ■When Indicator E4 is Turned on Open lever [1a] to the right ( 1 ), turn knob [1c] clock- wise ( 2 ), and remove the jammed paper ( 3 ).
- Page 21 Cleaning Machine • When you clean machine products, use the cleaning materials designated in every step. • To wipe with a wet cloth, use the soft cloth tightly wrung out of water. If the parts are not com- pletely dry, the machine may malfunction. •...
- Page 22 Wipe the surface of roller 1 with the soft cloth tightly wrung out of water. Reinstall roller 1. Note Make sure that roller 1 is installed in the holder completely. Remove roller 2 by picking up the both ends of its pin. Wipe the surface of roller 2.
- Page 23 Cleaning the Paper Feeding Unit in the High Capacity Tray Note • Do not press a roller during the cleaning, otherwise the roller may drop off. • Non-woven dry type fabric can be used effectively for cleaning paper dust. Open the Right Cover. Open lever [1a] to the right.
- Page 24 Open lever [1d] upward. Clean behind lever [1d]. Wipe the roller surface with the soft cloth tightly wrung out of water. Lightly wipe paper dust off on the surface of the paper path. Return lever [1d]. Paper path surface Roller Close the cover.
-
Page 25: Interface Decurler Module
Interface Decurler Module Device Components Component Function Error Indicator When paper jam occurs, the indicator is turned on. When the indicator blinks, first of all perform the paper jam operation. Curl correction button Press the button to correct paper curl. This curl correction function can be used during printing. - Page 26 Curl Correction The curl correction button is used to correct paper curl caused by heat and/or pressure. The curl correction button can be operated regardless of the machine state when the machine is Note • This curl correction function can be used during printing. Fine correction according to the paper properties can be made from control panel.
- Page 27 Operations and Functions of Curl Correction Press the AUTO button to enter the [AUTO] mode. Indicator Mode Function AUTO Curl correction is automatically performed. It is recommended to use this mode basically. Optimum curl correction is per- formed according to the paper size and output direction.
- Page 28 Paper Jams Note The error indicator at the top of the machine is turned on. When the indicator blinks, first of all perform the paper jam operation. If paper is jammed, the machine stops and an alarm sounds. Follow the instructions displayed on the screen to remove the jammed paper.
-
Page 29: Inserter
Inserter Device Components Component Function Error Indicator When paper jam occurs, the indicator is turned on. When the priority device indicator (top lamp) blinks, first of all perform the paper jam operation. Curl correction button Use this button when curl cannot be corrected even if the highest correction (or lowest correction) of Interface Decurler Module is performed. - Page 30 Main Specifications Item Specification Paper size Standard size A3, 11 x 17" Note Can be used by inputting the size. Custom size (mm) Width 182 to 330 Length 148 to 488 Paper weight (g/m 52 to 350 Note If Saddle stitch / Single fold is used for the following papers, folding displacement and/or paper wrinkles occur.
- Page 31 Loading Paper Load paper (blank paper or printed paper) to be used as an interleaf or cover. Inserter Tray is used to load paper used as an interleaf or cover, and print cannot be performed. Note • After removing all the paper from the Tray, and then load the paper again together with the paper you want to add.
- Page 32 Paper Jams Note The error indicator at the top of the machine is turned on. When the priority device indicator (top lamp) blinks, first of all perform the paper jam operation. If paper is jammed, the machine stops and an alarm sounds. Follow the instructions displayed on the screen to remove the jammed paper.
- Page 33 If you have difficulty in removing the papers, open lever [1c] to the right ( 1 ), turn knob [1b] counterclockwise ( 2 ), and remove the jammed paper ( 3 ). Return lever [1c]. Close the cover. ■When Indicator E3 is Turned on Open the Cover.
-
Page 34: High Capacity Stacker
High Capacity Stacker Device Components Component Function Error Indicator When paper jam occurs, the indicator is turned on. When the priority device indicator (top lamp) blinks, first of all perform the pa- per jam operation. Sample button Press the button to output a sample to the Top Output Tray. Paper eject button Press the button to stop printing and take out outputs. - Page 35 Main Specifications Item Specification Tray capacity Top Output Tray (sheets) Stacker Tray 5,000 Paper size Top Output Tray Standard size A3, 11 x 17" Postcard (100 x 148 mm) Custom size Width 100 to 330 (mm) Length 148 to 488 (when Banner Print Extension Kit is in- stalled: 1,300) Stacker Tray Standard size...
- Page 36 Outputting Paper Top Output Tray Banner Print Extension Kit Long paper can be loaded without its lead edge sticking out. Paper size (mm) Tray capacity (sheets) Width: 210 to 330 Up to 729 mm: 100 Length: 489 to 1,300 More than 730 mm: 10 Important ...
- Page 37 Note As holding the U-shaped bar with a hand, insert the fixing devices firmly, and check that the wires will not come off from the U-shaped bar. Adjust the wire positions according to the size of paper to be output. Note ...
- Page 38 Paper Jams Note The error indicator at the top of the machine is turned on. When the priority device indicator (top lamp) blinks, first of all perform the paper jam operation. If paper is jammed, the machine stops and an alarm sounds. Follow the instructions displayed on the screen to remove the jammed paper.
- Page 39 ■When Indicator E3 is Turned on Open the front upper cover. Open lever [1b] upward ( 1 ), turn knob [1a] counter- clockwise ( 2 ), and remove the jammed paper ( 3 ). Return lever [1b]. Open lever [2b] upward ( 1 ), turn knob [2c] counter- clockwise ( 2 ), and remove the jammed paper ( 3 ).
- Page 40 ■When Indicator E6 is Turned on Press the paper eject button. When lock is released, open the front lower cover. Pull out the stacker cart slowly and remove the jammed paper. Return the stacker cart slowly. Close the cover. ■When Indicator E7 is Turned on Remove the jammed paper that sticks out from the exit of the Top Output Tray.
- Page 41 ■When Indicator E8 is Turned on Open the front upper cover. Open lever [3b] upward ( 1 ), turn knob [3a] clockwise ( 2 ), and remove the jammed paper ( 3 ). Return lever [3b]. Close the cover. Check the curl direction of the jammed paper and correct the curl. Refer ...
-
Page 42: Crease / Two-Sided Trimmer
Crease / Two-Sided Trimmer Device Components / Caution Labels Component Function Error Indicator When paper jam occurs, the indicator is turned on. When the priority device indicator (top lamp) blinks, first of all perform the paper jam operation. Waste full indicator When cut pieces need to be disposed, the indicator is turned on. - Page 43 Main Specifications Item Specification Two-sided Trim Paper size Standard size A3, 11 x 17" A4, Letter (8.5 x 11") Custom size Width 194 to 330 (mm) Length 210 to 488 (Cutting and crease: up to 386) Paper weight (g/m Uncoated 52 to 350 Coated 106 to 350...
- Page 44 Cutting and Crease Area 210 to 488 mm 386 mm or less (trim and crease) 194 to 330 mm (trim) Trim 182 to 330 mm (crease) Feed direction a: 12 mm or more A=B: 6 to 25 mm b - e: 25 mm or more Crease Printing is not possible when less than 45 mm from the front edge.
- Page 45 Waste Container When cut pieces need to be disposed, the waste full indicator is turned on. When it is turned on, dispose cut pieces. Note • Cut pieces can be disposed even during printing. • When cut pieces in the waste container become full, the waste full indicator changes from ON to blinking. Open the lower cover.
- Page 46 Paper Jams Note The error indicator at the top of the machine is turned on. When the priority device indicator (top lamp) blinks, first of all perform the paper jam operation. If paper is jammed, the machine stops and an alarm sounds. Follow the instructions displayed on the screen to remove the jammed paper.
-
Page 47: When Indicator E2 Is Turned On
■When Indicator E2 is Turned on Turn knob [2] counterclockwise and align the marks. Open lever [1a] downward ( 1 ) and open lever [1b] downward ( 2 ). Turn knob [1c] clockwise ( 1 ) and remove the jammed paper ( 2 ). -
Page 48: When Indicator E3 Is Turned On
■When Indicator E3 is Turned on Turn knob [2] counterclockwise and align it with the mark position. Open lever [2c] downward ( 1 ) and remove the jammed paper ( 2 ). Note Jammed paper may be hidden at the upper section. Return lever [2c]. -
Page 49: When Indicator E5 Is Turned On
■When Indicator E5 is Turned on Open lever [3a] to the right ( 1 ) and open lever [3b] to the left ( 2 ). Turn knob [3c] clockwise ( 1 ) and remove the jammed paper ( 2 ). Turn knob [2f] counterclockwise ( 1 ) and remove the jammed paper ( 2 ). -
Page 50: When Indicator E7 Is Turned On
Open lever [4a] to the right ( 1 ), turn knob [2f] counter- clockwise ( 2 ), and remove the jammed paper ( 3 ). Note As holding the lever [4a] with a hand, turn knob [2f] and remove the paper. Turn knob [3c] clockwise ( 1 ) and remove the jammed paper ( 2 ). - Page 51 Open lever [3a] to the right ( 1 ) and open lever [3d] to the right ( 2 ). Collect cut pieces around the trimmer unit in the waste container using the waste collecting bar. If cut pieces cannot be collected in the waste container, move them by the waste collecting bar and remove them with hands.
-
Page 52: Folder Unit
Folder Unit Device Components / Caution Labels Bottom Component Function Tri-Fold Output Tray Button Press the button to remove paper from the Tri-Fold Output Tray. The Tri-Fold Output Tray is opened when the lamp stops blinking and comes on and the lock is released. Cover Open this cover to clear paper jams. - Page 53 Paper Jams Note On CD2, the error indicator at the top of the Finisher is turned on. When the priority device indicator (top lamp) blinks, first of all perform the paper jam operation. If paper is jammed, the machine stops and an alarm sounds. Follow the instructions displayed on the screen to remove the jammed paper.
- Page 54 ■When Indicator E11 is Turned on Open lever [2g] to the right ( 1 ), turn knob [2c] counter- clockwise ( 2 ), and remove the jammed paper ( 3 ). Return lever [2g]. ■When Indicator E12 is Turned on Pull out the Tri-Fold Output Tray [2d].
-
Page 55: Finisher C
Finisher C In this guide, “Finisher C4/C5” and “Finisher C4/C5 with Booklet Maker” are generally referred to as “Finisher C”. Device Components / Caution Labels Component Function Transport unit V Front Cover Open this cover to clear paper jams. Hole Punch Waste Container Punched pieces go in here. - Page 56 Main Specifications Item Specification Type Top Output Tray Sort (Offset available)/ Stack (Offset available) Finisher Tray Sort (Offset available) / Stack (Offset available) Booklet Tray Sort / Stack Paper size Top Output Tray Standard A3, 11 x 17" size Postcard (100 x 148 mm) Custom size Width 100 to 330...
- Page 57 Item Specification Staple Maximum number of 10 (Same weight, same size) Staple-free sheets of paper (sheets) Paper size Standard A3, 11 x 17" size Paper weight (g/m 60 to 105 (Uncoated) Stapled location 1 location, 2 locations Hole Punch Paper size Standard A3, 11 x 17"...
- Page 58 Number of Sheets That can be Stapled (Approximation) Side Stitch Saddle stitch Paper weight (g/m Staple Staple-Free Staple Uncoated Coated Uncoated Coated Uncoated Coated 52 to 59 50/65 60 to 71 72 to 80 81 to 90 91 to 105 106 to 128 129 to 150 151 to 176...
- Page 59 Staple Cartridge Replacing Staple Cartridge Consumables recommended by our company are manufactured under the standards suitable for this machine. Using consumables not recommended by our company may affect print quality or performance provided by the product. Use consumables that our company recommends for this machine.
- Page 60 Staple Jams If paper is not being stapled or if staples are bent, follow the procedures mentioned in the follow- ing pages. If the issue isn't resolved even after the procedure, contact our customer support center or sales agency. Paper is not stapled Staple is bent If the staple looks like any of the following images, contact our customer support center or sales agency.
- Page 61 Hold the handle and remove the Staple Cartridge. When using the Staple Unit 65 Sheets, flip the handle down and remove the Staple Cartridge. Check to make sure that there is no staple inside of the Finisher. Push the metal part of the Staple Cartridge up. Remove the jammed staples ( ) and return the pushed up metal part back to the original position...
- Page 62 Staple Cartridges for Saddle Stitch Confirm that the machine is not operating, and open the Cover. Pull out Booklet Maker [4]. Hold the handle of the Staple Cartridge (R2) (R3) and pull it out. Remove the jammed staples. Insert the Staple Cartridge into the original position. Hold the handle and lightly press it up until you hear a click.
- Page 63 Paper Jams If paper is jammed, the machine stops and an alarm sounds. Follow the instructions displayed on the screen to remove the jammed paper. Gently remove the paper being careful not to tear it. If paper is torn while it is being removed from the machine, remove all the torn pieces making sure that none remain inside the machine.
- Page 64 ■Booklet Tray Open the Cover. Remove the jammed paper that sticks out from the exit of the Tray to the right direction. If you have difficulty in removing the papers, turn knob [4a] clockwise ( 1 ), and remove the jammed paper that sticks out from the exit of the Tray ( 2 ).
- Page 65 ■Booklet Marker Pull out Booklet Maker [4]. Turn knob [4a] counterclockwise ( 1 ) and remove the jammed paper( 2 ). Push in the Booklet Maker [4]. Close the cover. Finisher C...
-
Page 66: Finisher D
Finisher D In this guide, “Finisher D6” and “Finisher D6 with Booklet Maker” are generally referred to as “Finisher D”. Device Components / Caution Labels Finisher Component Function Hole Punch Waste Container Punched pieces go in here. Refer For the discard method of waste in the waste container, refer to the label affixed on the machine. - Page 67 Component Function Booklet Tray Saddle stitch and Single fold paper is ejected. Note When the Square Back Fold Trimmer is equipped, it is installed to the Square Back Fold Trimmer. Cover Open this cover to clear paper jams, replace the Staple Cartridge, remove jammed staples or dispose of cut pieces for punched holes.
- Page 68 Main Specifications Item Specification Type Top Output Tray Sort / Stack Finisher Tray Sort (Offset available) / Stack (Offset available) Booklet Tray Sort / Stack Paper size Top Output Tray Standard A3, 11 x 17" size Postcard (100 x 148 mm) Custom size Width 100 to 330...
- Page 69 Item Specification Hole Punch Paper size Standard A3, 11 x 17" (with Punch Unit) size JIS B5 Paper weight (g/m Uncoated 52 to 220 Coated 106 to 220 Number of punched 2 holes / 4 holes or holes 2 holes / 3 holes (US Specifications) Note ...
- Page 70 Number of Sheets That can be Stapled (Approximation) Side Stitch Saddle stitch Paper weight (g/m When A4 size or less When exceeding A4 size Uncoated Coated Uncoated Coated Uncoated Coated 52 to 59 60 to 71 72 to 80 81 to 90 91 to 105 106 to 128 129 to 150...
- Page 71 Outputting Paper Top Output Tray Loading Guide Place it on the Top Output Tray when using an envelope. Changing Angle Change the angle when output paper remains at the exit and paper full is detected immediately. Especially in the following case, paper full is likely to be detected, change the angle to the B posi- tion.
- Page 72 ■Banner Print Extension Kit Long paper can be loaded without its lead edge sticking out. Paper size (mm) Tray capacity (sheets) Width: 210 to 330 Up to 660 mm: 150 Length: 489 to 1,300 Up to 729 mm: 100 More than 730 mm: 10 Important ...
- Page 73 Change the angle of the Top Output Tray to the lower fixed position (A). Install the wires on the extension trays. Note As holding the extension tray with a hand, insert the fixing devices firmly, and check that the wires will not come off from the exten- sion tray.
- Page 74 Staple Cartridge Replacing Staple Cartridge / Staple Waste Container Consumables recommended by our company are manufactured under the standards suitable for this machine. Using consumables not recommended by our company may affect print quality or performance provided by the product. Use consumables that our company recommends for this machine.
- Page 75 Staple Jams If paper is not being stapled or if staples are bent, follow the procedures mentioned in the follow- ing pages. If the issue isn't resolved even after the procedure, contact our customer support center or sales agency. Paper is not stapled Staple is bent If the staple looks like any of the following images, contact our customer support center or sales agency.
- Page 76 Open the cover of the unit and remove the jammed staples. Insert the unit into the original position. Close the cover. Staple Cartridges for Saddle Stitch Confirm that the machine is not operating, and open the Cover. Pull out Booklet Maker [3]. Hold the handle of the Staple Cartridge (R2) (R3) and pull it out.
- Page 77 Insert the Staple Cartridge into the original position. Hold the handle and lightly press it up until you hear a click. Note Align the “” marks. Push in the Booklet Maker [3]. Close the cover. When Staple Cartridge for Side Stitch Comes off If the Staple Cartridge comes off from the unit due to fall during operation, etc., perform the fol- lowing steps.
- Page 78 Turn it over as the handle is at the moved position and take out the Staple Cartridge from the unit. Remove the staples that stick out from the Staple Cartridge. Caution Please be very careful not to hurt your fingers, etc. when separating staples. Insert the Staple Cartridge into the unit.
-
Page 79: When Indicator E1 Is Turned On
Paper Jams Note The error indicator at the top of the machine is turned on. When the priority device indicator (top lamp) blinks, first of all perform the paper jam operation. If paper is jammed, the machine stops and an alarm sounds. Follow the instructions displayed on the screen to remove the jammed paper. - Page 80 ■When Indicator E2 is Turned on Open lever [1c] to the right ( 1 ), turn knob [1e] clock- wise ( 2 ), and remove the jammed paper ( 3 ). Note Jammed paper may be hidden at the upper section. Return lever [1c].
- Page 81 ■When Indicator E6 is Turned on Remove the jammed paper that sticks out from the exit of the Finisher Tray. Open and close the cover. Close the cover. Check the curl direction of the jammed paper and correct the curl. Refer ...
- Page 82 ■When Indicator E8 is Turned on Pull out Booklet Maker [3]. Note Confirm that paper is not jammed at the lever [3a] before pulling it out. Turn knob [3b] counterclockwise ( 1 ) and remove the jammed paper ( 2 ). Push in the Booklet Maker [3].
- Page 83 Interface Module Open the Cover. Open lever [1a] to the right ( ), turn the knob [1c] counterclockwise ( ), and remove the jammed pa- per( Return lever [1a]. If you have difficulty in removing the papers, open lever [1b] upward ( ), turn the knob [1c] clockwise ), and remove the jammed paper( Return lever [1b].
-
Page 84: Square Back Fold Trimmer
Square Back Fold Trimmer Device Components / Caution Labels Component Function Left Cover Open this cover to clear paper jams. Right Cover Open this cover to clear paper jams. Booklet Tray Outputs are delivered here. Note When Square Back is performed, a thin press mark parallel to the back is made. - Page 85 Main Specifications Item Specification Paper size According to Saddle stitch / Single fold of Finisher D Paper weight Booklet Tray capacity 20 copies (15 sheets or less per copy), 15 copies (16 sheets or more per copy) Note Storing may not be possible up to this value depending on your use conditions, such as of paper type. Fore Edge Trim Maximum number of Saddle stitch...
- Page 86 Waste Container Note Dispose cut pieces while the machine is on. Confirm that the machine is not operating, and pull out the waste container. Hold the belt of the waste container and pull it out with both hands. Note Do not apply excessive load on the belt by twirling the container as holding the belt, etc.
- Page 87 Paper Jams Note The error indicator at the top of the machine is turned on. If paper is jammed, the machine stops and an alarm sounds. Follow the instructions displayed on the screen to remove the jammed paper. Gently remove the paper being careful not to tear it. If paper is torn while it is being removed from the machine, remove all the torn pieces making sure that none remain inside the machine.
- Page 88 Turn knob [3b] clockwise and remove the paper. Close the Left Cover. ■When Indicator E2 is Turned on Open the Left Cover. Remove the jammed paper. Close the Left Cover. ■When Indicator E3 is Turned on Open the Right Cover. Remove the jammed paper.