IBM TS2900 Setup, Operator, And Service Manual
System storage tape autoloader
Hide thumbs
Also See for TS2900:
- Product manual (8 pages) ,
- Setup, operator, and service manual (286 pages) ,
- Manual (131 pages)

Related Manuals for IBM TS2900


Summary of Contents for IBM TS2900
- Page 1 IBM System Storage TS2900 Tape Autoloader Setup, Operator, and Service Guide Machine Type 3572 GC27-2212-00...
- Page 3 IBM System Storage TS2900 Tape Autoloader Setup, Operator, and Service Guide Machine Type 3572 GC27-2212-00...
- Page 4 To ensure that you have the latest publications, visit the web at http://www.ibm.com/storage/lto. This edition applies to the IBM System Storage TS2900 Tape Autoloader Setup, Operator, and Service Guide, GC27-2212-00, and to the subsequent releases and modifications until otherwise indicated in new editions.
-
Page 5: Read This First
2. Click Get support. 3. Click My support. Sending Us Your Comments Your feedback is important in helping IBM provide accurate and useful information. If you have comments or suggestions for improving this publication, send your comments by: • E-mailing IBM: –... - Page 6 In all countries/regions: Visit http://www.ibm.com, and complete all the steps in “Contacting IBM Technical Support” on page 7-1. To open a Service Request online: Under Support & downloads, click on Open a service request. TS2900 Tape Autoloader Setup, Operator, and Service Guide...
-
Page 7: Table Of Contents
User Privileges ......2-8 Contacting IBM Technical Support ....iii Chapter 3. - Page 8 Obtaining Error Information From an IBM™ Contacting IBM Technical Support ....7-1 System p ........E-1 SCSI Sense Data Definition .
- Page 9 Appendix F. Library Configuration Notices ......H-1 Form ......F-1 Electronic Emission Notices .
- Page 10 TS2900 Tape Autoloader Setup, Operator, and Service Guide...
-
Page 11: Figures
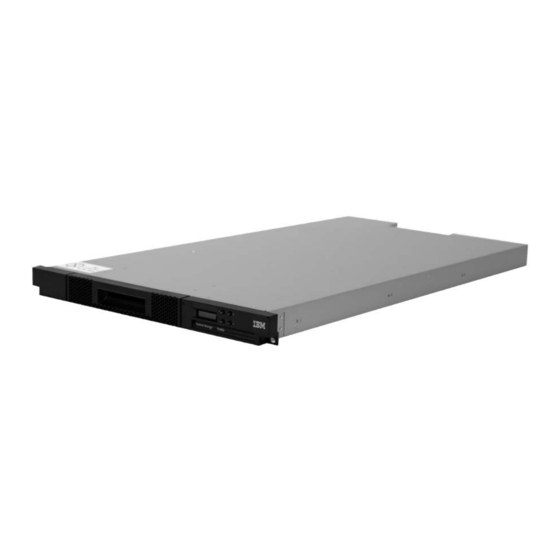
Figures TS2900 Tape Autoloader ....1-1 3-33 Cartridge orientation ....3-32 Front panel components . - Page 12 Attaching the front brackets to the library IBM LTO Ultrium 800 GB Data Cartridge . . . 5-1 chassis ....... . . 8-9 Ultrium WORM Tape Cartridge .
- Page 13 Library sense data example ....E-3 Drive sense data example ....E-5 © Copyright IBM Corp. 2008...
- Page 14 TS2900 Tape Autoloader Setup, Operator, and Service Guide...
-
Page 15: Safety And Environmental Notices
Most danger or caution notices contain a reference number (Dxxxx or Cxxxx). Use the reference number to check the translation in the IBM Systems Safety Information Manual (G229-9054) publication included in your ship group. The sections that follow define each type of safety notice and give examples. -
Page 16: Laser Safety And Compliance
8. Check the cover of the library for proper fit. It should be in place and secure. 9. Check the product label at the rear of the library to make sure it matches the voltage at your outlet. TS2900 Tape Autoloader Setup, Operator, and Service Guide... -
Page 17: Rack Safety
Rack Safety The following general safety information should be used for all rack mounted devices. DANGER • Always lower the leveling pads on the rack cabinet. • Always install stabilizer brackets on the rack cabinet. • To avoid hazardous conditions due to uneven mechanical loading, always install the heaviest devices in the bottom of the rack cabinet. -
Page 18: Power Cords
Power cords used in the United States and Canada are listed by Underwriter’s Laboratories (UL), are certified by the Canadian Standards Association (CSA), and comply with the plug standards of the National Electrical Manufacturers Association (NEMA). TS2900 Tape Autoloader Setup, Operator, and Service Guide... -
Page 19: Product Recycling And Disposal
(TI) que reciclen responsablemente sus equipos cuando éstos ya no les sean útiles. IBM dispone de una serie de programas y servicios de devolución de productos en varios países, a fin de ayudar a los propietarios de equipos a reciclar sus productos de TI. -
Page 20: Battery Return Program
United States, go to http://www.ibm.com/ibm/environment/ products/index.shtml or contact your local waste disposal facility. In the United States, IBM has established a return process for reuse, recycling, or proper disposal of used IBM sealed lead acid, nickel cadmium, nickel metal hydride, and other battery packs from IBM Equipment. - Page 21 For proper collection and treatment, contact your local IBM representative. This notice is provided in accordance with Royal Decree 106/2008 of Spain: The retail price of batteries, accumulators, and power cells includes the cost of the environmental management of their waste.
- Page 22 TS2900 Tape Autoloader Setup, Operator, and Service Guide...
-
Page 23: Preface
• IBM TotalStorage LTO Ultrium Tape Drive SCSI Reference (GA32-0450) provides SCSI supported commands and protocol governing the behavior of the SCSI interface. • IBM Encryption Key Manager component for the Java platform: Quick Start Guide (GA76-0420) gets you started with a basic configuration for encryption on LTO 4 tape drives.*... - Page 24 TS2900 Tape Autoloader Setup, Operator, and Service Guide...
-
Page 25: Ts2900 Tape Autoloader
IBM Ultrium 4 Half-High Tape Drive (Model S4H) or an IBM Ultrium 3 Half-High Tape Drive (Model S3H). It is equipped with a SAS (Serial Attached SCSI) host adapter attachment that has a data transfer rate of up to 3.0 Gbps. -
Page 26: Front Panel Components
IBM LTO Ultrium Tape Cartridge (Ultrium 4), 400 GB Tape Cartridge (Ultrium 3), 200 GB Tape Cartridge (Ultrium 2), 100 GB Tape Cartridge (Ultrium 1), and WORM (Ultrium 4 and Ultrium 3). The library data storage capacity can be further increased using hardware compression. -
Page 27: Chapter 1. Product Description
The machine type and serial number of the library are located on the front bezel of the library. The serial number is the number that links the library to IBM entitlement for service. Air vents These vents draw cooler air into the library enclosure and allow warm air to escape which helps keep the library at a normal operating temperature. -
Page 28: Rear Panel
Ultrium 4 SAS drives use the SFF-8088 connection at the drive end and SFF-8088 or SFF-8470 at the host adapter end. Ethernet port This port is used to connect the library to a network. TS2900 Tape Autoloader Setup, Operator, and Service Guide... -
Page 29: Bar Code Reader
(up to 128) of different sizes and types to be connected simultaneously with thinner and longer cables; its full-duplex signal transmission supports 3.0 Gb/s. In addition, the TS2900 Tape Autoloader can be hot-plugged. SAS drives will auto-negotiate speed. -
Page 30: Supported Internet Protocols
When using SNMP to monitor your TS2900 Tape Autoloader, make sure that the IBM TS2900 MIB file is loaded on your SNMP monitoring station. SNMP traps will be sent to the SNMP monitoring station(s) that are defined for your library (see “Configuring SNMP... -
Page 31: Network Time Protocol (Ntp)
Ultrium Tape Drives The TS2900 Tape Autoloader supports the Ultrium 3 (3572-3SH) and Ultrium 4 (3572-S4H) Half-High Tape Drives. The Ultrium 3 and Ultrium 4 Half-High Tape Drives support the Serial Attached SCSI (SAS) interface. -
Page 32: Media
For more detailed information, see Chapter 5, “Media,” on page 5-1. Logical Unit Number (LUN) Scanning The TS2900 Tape Autoloader uses a single SCSI ID and dual LUNs to control the tape drive (LUN 0) and library accessor (LUN 1). The library requires a Host Bus Adapter (HBA) that supports LUN scanning. -
Page 33: Library Specifications
Front Rear Reserved slot Column 5 Column 4 Column 3 Column 2 Column 1 Tier 2 Tier 2 Tier 2 Tier 2 Tier 2 Column 5 Column 4 Column 3 Column 2 Column 1 Drive Tier 1 Tier 1 Tier 1 Tier 1 Tier 1 Accessor... -
Page 34: Product Environment
Maximum acoustical noise sound power level LwAD in Bels (1 Bel = 10 dB) Product Environment The TS2900 Tape Autoloader is designed to operate in a general business environment. The library meets the acoustical requirements for general business area category 2D. -
Page 35: Software
Ensure that the machine covers are always kept closed to minimize any contamination from airborne particles. Supported Servers, Operating Systems, and Software The TS2900 Tape Autoloader is supported by a wide variety of servers (hosts), operating systems, and adapters. These attachments can change throughout the life cycle of the product. - Page 36 1-12 TS2900 Tape Autoloader Setup, Operator, and Service Guide...
-
Page 37: Chapter 2. User Interfaces
Button used to display a submenu or to select a user action Ready/Activity LED Green LED lit when the unit is powered ON. The LED flashes when there is any library activity or the library is offline. © Copyright IBM Corp. 2008... -
Page 38: Front Panel Leds
All LEDs are updated during power ON and reset sequences. At power ON or software reset, all LEDs turn ON as soon as POST allows. When initialization starts, all LEDs turn OFF and the Ready/Activity LED flashes at a rate of approximately two TS2900 Tape Autoloader Setup, Operator, and Service Guide... -
Page 39: Input Modes
seconds per cycle. When the mechanical initialization is complete, the Ready/Activity LED stops flashing and turns ON. If a library failure occurs, the Ready/Activity LED turns OFF and the Error LED turns ON. The Operator Panel also displays an appropriate error code to help identify the failure. -
Page 40: Logging In
I/O Station is currently enabled. When changing a configuration setting, the confirmation screen in Figure 2-5 appears. Press the Enter key to confirm, or Cancel to return to the previous screen. TS2900 Tape Autoloader Setup, Operator, and Service Guide... -
Page 41: Web User Interface
Before the TS2900 Tape Autoloader can be managed over a network using the Web User Interface, you must set up the initial network configuration of the library using the Operator Panel. -
Page 42: Common Header Elements
All Web User Interface windows (except for the Login screen) contain the following common elements in the header: • Help — Click to read context-sensitive help for the associated page. • Logoff — Click to log out of the Web User Interface. TS2900 Tape Autoloader Setup, Operator, and Service Guide... -
Page 43: Menus Available From The Web User Interface
Menus Available from the Web User Interface Figure 2-8 shows the Web User Interface window for a User account, Figure 2-9 shows the window for a Superuser account, and Figure 2-10 shows the window for an Administrator account. Figure 2-8. User account window Figure 2-9. -
Page 44: User Privileges
• Multiple users can be logged in at one time on the Web User Interface. • Any user can be logged in to only one interface at a time. For a comparison of user privileges, see “User Privilege Comparison” on page A-3. TS2900 Tape Autoloader Setup, Operator, and Service Guide... -
Page 45: Verifying The Shipment
“Taking the Library Online” on page 3-33 “Registering for My Notification” on page 3-33 To install and configure a desktop or rack-mounted TS2900 Tape Autoloader, perform the procedures in this chapter in the order they are presented. Verifying the Shipment Verify that the following items are included in the library shipment: •... -
Page 46: Choosing A Location
Table 3-2 lists the parts in the deskside assembly kit. A Phillips head screwdriver (preferably with a magnetic head) will be needed to assemble the deskside kit. Table 3-2. Deskside kit Number Part Number Quantity Description Part 45E3240 1U desktop foot TS2900 Tape Autoloader Setup, Operator, and Service Guide... -
Page 47: Attaching Side Rails To The Library Chassis
Table 3-2. Deskside kit (continued) Number Part Number Quantity Description Part 45E3798 Deskside cover 45E3799 Bracket, 1U library right rail Screw, cross-recessed binding 45E3749 head, M4x4 (for securing the rear of the cover to the library) 45E3801 Bracket, 1U library left rail Screw, cross-recessed flat head, M3x6 (6 for securing left and right 45E3802... -
Page 48: Attaching The Feet
3 flat-head screws on each side (Figure 3-3). Figure 3-3. Attaching the cover to the library chassis (side screws) TS2900 Tape Autoloader Setup, Operator, and Service Guide... -
Page 49: Installing In A Rack
Installing in a Rack The TS2900 Tape Autoloader can be easily installed into a standard 19-inch rack system. A standard 19-inch rack system contains multiple mounting locations called EIA units as defined by the Electronics Industries Association. Each EIA unit contains three square or round holes used to mount rack designed equipment. - Page 50 Right front bracket 45E3745 Left front rail 45E3746 Right front rail 45E3747 Rear rail Screw, cross-recessed flat head, 45E5909 M3x4 Screw, flat head, self locking, 45E3748 M6x10 Screw, cross-recessed binding 45E3749 head TS2900 Tape Autoloader Setup, Operator, and Service Guide...
- Page 51 Table 3-3. Rack mount assembly kit (continued) Number Part Number Quantity Description Part Screw, cross-recessed pan head, 45E3867 M6x10 07H6655 Hook and loop fastener strap 39M5378 Rack device to PDU line cord When deciding on a location in your rack for the library, remember that the Operator Panel has a small LCD screen and should be positioned to allow for easy viewing.
-
Page 52: Rack Mount Screw Locations For Front
3. Attach the left and right (Figure 3-7) front brackets to the front of the library chassis using two flat-head screws on each side. Use the bottom two screw holes on each side. TS2900 Tape Autoloader Setup, Operator, and Service Guide... -
Page 53: Attaching The Rear Brackets To The Rails
Figure 3-7. Attaching the front brackets to the library chassis 4. Attach the left and right rear brackets to the left and right front rails using two round-head screws on each side (Figure 3-8). Note: Run the hook and loop fastener strap through the slot on the right rear bracket and attach it back upon itself. -
Page 54: Installing The Rail Assemblies
Use both of the two screw locations on the rear of the rack rail (Figure 3-6). Use the top and middle screw locations on the front of the rack rail (Figure 3-5). Figure 3-10. Installing the rail assemblies 3-10 TS2900 Tape Autoloader Setup, Operator, and Service Guide... -
Page 55: Securing The Rear Of The Library In The Rack
7. Slide the library chassis into the rack. Secure the front of the library to the rack using the large black screws in the bottom holes on each front bracket (Figure 3-11). Figure 3-11. Securing the front of the library in the rack 8. -
Page 56: Removing The Accessor Locking Screw
To remove the Accessor locking screw, unscrew the Accessor locking screw ( Figure 3-14) that is attached to a label and is fastened in place on the rear panel of the library. Figure 3-14. Accessor locking screw 3-12 TS2900 Tape Autoloader Setup, Operator, and Service Guide... -
Page 57: Attaching The Library To A Server
Attaching the Library to a Server The drive is attached to a server using the Serial Attached SCSI (SAS) interface and the Web User Interface accesses the library using an Ethernet interface. Connecting the Host Interface Cables To connect the host interface cable to the library: 1. -
Page 58: Connecting The Power Cord
Panel. The recommended method for configuring your library is using the Web User Interface. See “Configuring Your Library using the Operator Panel” on page 3-28 and “Configuring Your Library using the Web User Interface” on page 3-16. 3-14 TS2900 Tape Autoloader Setup, Operator, and Service Guide... -
Page 59: Default Library Configuration Settings
For complete detailed information on all of the functions available on the library using both the Operator Panel and the Web User Interface, see Chapter 4, “Operations,” on page 4-1. The default library configuration settings are listed in the Table 3-4. Table 3-4. - Page 60 7. “Configuring Encryption Settings” on page 3-22 8. “Configuring E-mail Notifications” on page 3-24 9. “Configuring Trap Notifications” on page 3-25 10. “Managing User Access” on page 3-27 11. “Saving the Library Configuration” on page 3-28 3-16 TS2900 Tape Autoloader Setup, Operator, and Service Guide...
-
Page 61: Interface
Logging in to the Web User Interface To log in to the Web User Interface, follow the steps below: 1. If necessary, obtain the IP address of the library on the Operator Panel. a. From the top menu of the Operator Panel, press the Minus key to select View Current Information, and press Enter. -
Page 62: Checking Firmware Level
• Sequential — In sequential mode, the library’s firmware predefines the selection of the cartridges. After initialization, the firmware causes the library to select the first available cartridge found (counting from the lowest Column/ 3-18 TS2900 Tape Autoloader Setup, Operator, and Service Guide... -
Page 63: Cartridge Assignment Settings
Tier position through the highest cartridge position in your library) for loading into the drive. See “Location Coordinates and Element Addresses” on page 1-8. – Loop — Sequential mode with loop mode ON loads the cartridge in the lowest Column/Tier cartridge position after the cartridge in the highest Column/Tier cartridge position has been filled and sent back to its home position. -
Page 64: Configuring Network Settings
– IPv6 address — Sets the TCP/IPv6 address of the library on the network. – Prefix length — Decimal value indicating the number of contiguous, high-order bits comprising the network portion of the address. – Gateway — Allows access outside the local network. 3-20 TS2900 Tape Autoloader Setup, Operator, and Service Guide... -
Page 65: Configuring Date And Time Settings
Once the network settings have been entered on the Operator Panel, the current date and time can be modified using the Web User Interface. The TS2900 Tape Autoloader communicates with an NTP server with the following conditions: • client-server basis operation •... -
Page 66: Configuring Encryption Settings
Before you can use the encryption capability of the tape drive, you must be sure that certain software and hardware requirements are met. Refer to the IBM Encryption Key Manager component for the Java platform, Introduction, Planning, and User’s Guide before continuing to the next step. -
Page 67: Encryption Enabled Settings
IBM device driver. • Library Managed Encryption — For transparent encryption by the TS2900 Tape Autoloader tape drive. Note: System managed tape encryption and library managed tape encryption are transparent to one another. -
Page 68: Configuring E-Mail Notifications
NetBackup™. 8. Skip over the Advanced Encryption Settings. The purpose of these advanced encryption settings is to allow only IBM Support personnel (under the direction of the drive development team) to provide a solution to an unforeseen problem or to support a unique configuration. These options are not intended for use by the customer without the guidance of IBM Technical Support. -
Page 69: Configuring Trap Notifications
Figure 3-26. Trap notifications Note: This is an optional procedure. The traps supported by the TS2900 Tape Autoloader are listed in “Trap Definitions (Types)” on page B-12. To set up trap notifications for an SNMP server, complete the following procedure: 1. -
Page 70: Trap List Settings
• User name — SNMPv3 unique user name. • Authentication — Authentication algorithm, MD5 or SHA. When an algorithm is specified, an authentication password and confirmation of the password are required. 3-26 TS2900 Tape Autoloader Setup, Operator, and Service Guide... -
Page 71: Managing User Access
• Privacy — Privacy service encryption and decryption algorithm, DES or AES. When an algorithm is specified, a privacy password and confirmation of the password are required. 6. Select the event level to report in the Trap event field. 7. Click Test to send a test trap notification to the enabled IP addresses. 8. -
Page 72: Saving The Library Configuration
2. Enter 0000, the default password. The top menu screen appears. 3. When finished using the Operator Panel, press Cancel to return to the top menu screen. 4. When finished, press the Minus key to select Logout, and press Enter. 3-28 TS2900 Tape Autoloader Setup, Operator, and Service Guide... -
Page 73: Configuring Network Settings
Configuring Network Settings In many environments, the default network settings may be sufficient to access your tape library on a network. To change the default network settings using the Operator Panel, complete the following procedure: 1. From the top menu screen, press the Minus key to select Configuration, and press Enter. -
Page 74: Configuring Library Settings
6. Date/Time – Enter the local time and date manually if you do not plan to use a network-based time server. a. Select Configure Library → Configure Date/Time. b. Select Set Date or Set Time, and press Enter. 3-30 TS2900 Tape Autoloader Setup, Operator, and Service Guide... -
Page 75: Populating The Library With Cartridges
• Date — Enter the date using the MM/DD/YYYY format. • Time — Enter the time using the HH:MM:SS format. c. Press Cancel to backtrack through the menu hierarchy. 7. Auto Cleaning (Default: Disabled) a. Select Configuration → Configure Auto Cleaning. b. -
Page 76: Verifying Library And Drive Operation
I/O Station. The bar code is read again and compared with the value stored earlier. 5. When prompted, remove the cartridge from the I/O Station. 3-32 TS2900 Tape Autoloader Setup, Operator, and Service Guide... -
Page 77: Taking The Library Online
To register for My Notification: • Visit the web at http://www.ibm.com/, click Get support, and then click My support. • Enter your user name and password on the Appendix F, “Library Configuration Form,”... - Page 78 3-34 TS2900 Tape Autoloader Setup, Operator, and Service Guide...
- Page 79 “Configuring Operator Panel Settings” on page 4-11 “Setting the Library to Factory Defaults” on page 4-11 Servicing the Library “Checking the Library Error Status” on page 4-12 “Running Library Verify Diagnostics” on page 4-12 “Running Drive Diagnostics” on page 4-13 © Copyright IBM Corp. 2008...
-
Page 80: Operator Panel Top Level Menus
Using the Operator Panel Figure 4-1 shows the top level menu tree structure of the Operator Panel on the front of the TS2900 Tape Autoloader. For details on how to select commands and options, see the description in “Operator Panel” on page 2-1. -
Page 81: Chapter 4. Operations
Monitoring the Library Viewing Configuration Settings Configuration View Settings Figure 4-2. Configuration settings Use Configuration → View Settings to display a list of the library configuration settings. The settings displayed comprises the following: • Library settings – I/O Station – Auto cleaning –... -
Page 82: Unlock I/O Station Command
When the cartridge magazine is fully inserted, the magazine locks into place. After closing the magazine, wait for the library to complete its inventory before proceeding with normal library operations. TS2900 Tape Autoloader Setup, Operator, and Service Guide... -
Page 83: Move Cartridge Command
Note: A blue release gate in the top left corner of each column in the cartridge magazine prevents each cartridge from falling out of the front of the magazine. When manually releasing the gate with one hand, position your other hand in front of the column opening to prevent cartridges being ejected by the internal column spring. -
Page 84: Inventory Command
Figure 4-13. Move to Ship Position command Use Commands → Move to Ship Position when preparing to move the library to a new location. The Accessor must be placed in a parked position within the library TS2900 Tape Autoloader Setup, Operator, and Service Guide... -
Page 85: Reboot Drive Command
housing. Move to Ship Position finishes all active commands received from the host application, does not process any new commands, and moves the Accessor to the parked position before the power is turned OFF. Select Execute to unlock the cartridge magazine to remove the cartridges. Reinsert the cartridge magazine before moving the tape library. -
Page 86: Auto Cleaning Settings
Configure Library Mode Set Random Mode Set Sequential Mode Configure Loop Mode Enable Loop Mode Disable Loop Mode Configure Autoload Mode Enable Autoload Mode Disable Autoload Mode Figure 4-20. Library access mode settings TS2900 Tape Autoloader Setup, Operator, and Service Guide... - Page 87 Use Configuration → Configure Library → Configure Library Mode to set the logical library access mode. Configure the library access mode using the following settings: • Random Mode — In random mode, the library allows the server’s (host’s) application software to select any data cartridge in any order. •...
-
Page 88: Configuring Network Settings
Use Configuration → Configure Network Settings to set the network settings for the library. Note: The internet protocol (IPv4, IPv6 or dual IPv4/IPv6) selection is used for the TS2900 Tape Autoloader IP address, subnet mask, gateway address, time server address, mail server address, SNMP trap address, and EKM server addresses. -
Page 89: Using The Operator Panel
• IP Address — If DHCP is disabled, set the IP address of the library manually. – IPv4 — Select to enter the library IP address using the IPv4 protocol. – IPv6 — Select to enter four library IP addresses using the IPv6 protocol. •... -
Page 90: Error Status Menu
The scratch cartridge is then moved to the tape drive, where the drive runs its own write/read/verify test. When the test is done, the library tells the drive to 4-12 TS2900 Tape Autoloader Setup, Operator, and Service Guide... -
Page 91: Drive Diagnostics
eject the scratch cartridge, and then the cartridge is moved back to the I/O Station. The bar code is read again and compared with the value stored earlier. 3. When prompted, remove the scratch cartridge from the I/O Station. The result of the test (PASSED or error message) is reported on the Operator Panel. -
Page 92: Sas Wrap Tool
View Library Logs Library State Network Traces Inventory Encryption Download Drive Logs Date and Time Download Library Logs Notifications Reset Library/Drive Save/Restore Firmware Update Usage Statistics Figure 4-29. Web User Interface menu 4-14 TS2900 Tape Autoloader Setup, Operator, and Service Guide... -
Page 93: Monitoring The Library
Monitoring the Library Viewing the System Summary Figure 4-30. System Summary screen Use Monitor Library → System Summary to display a summary of the current status of the tape drive and the library, and the current configuration of the library, comprising: •... -
Page 94: Library Map Screen
– IP addresses – Addressing method – Subnet mask – Gateway address – Library Worldwide node name – MAC address – Link speed – NTP server – SNMP trap – E-mail address 4-16 TS2900 Tape Autoloader Setup, Operator, and Service Guide... -
Page 95: Managing The Library
• Cartridge – Cartridge label detected by the bar code reader – Encryption setting (for data cartridges – Model S4H only) – Media status (OK, Degraded, or Failed) – Remaining uses (for cleaning cartridge) • Column n, Tier n – Slot type (storage, I/O Station, or cleaning) –... -
Page 96: Unload Drive Screen
Use Manage Library → Clean Drive to clean a drive manually. Select a cleaning cartridge to use (from the magazine or from the I/O Station), and click Clean. The cleaning cartridge is returned to its home position when cleaning is finished. 4-18 TS2900 Tape Autoloader Setup, Operator, and Service Guide... -
Page 97: Library State Screen
Taking the Library Online/Offline Figure 4-35. Library State screen Use Manage Library → Library State to take the library online or offline. Check the current library status, and click the button displayed to change the library status. It is sometimes necessary to take the library offline before performing some servicing functions for the library. -
Page 98: User Access Screen
Enter all user IDs and passwords on the Library Configuration form in Appendix F, “Library Configuration Form,” on page F-1. Click Submit to transfer the settings to the library. A dialog message is displayed when the settings have been updated successfully. 4-20 TS2900 Tape Autoloader Setup, Operator, and Service Guide... -
Page 99: Physical Library Settings Screen
Click Refresh to read the current settings from the library. Configuring Physical Library Settings Figure 4-39. Physical library settings screen Use Configure Library → Physical to configure the I/O Station and auto cleaning. Configure the I/O Station and Auto cleaning cartridge assignment using the following settings: •... -
Page 100: Network Settings Screen
Use Configure Library → Network to set the network settings for the library. Note: The internet protocol (IPv4, IPv6 or dual IPv4/IPv6) selection is used for the TS2900 Tape Autoloader IP address, subnet mask, gateway address, time server address, mail server address, SNMP trap address, and EKM server addresses. -
Page 101: Encryption Settings Screen
• Security — Select Enable SSL for Web to provide secure communications between the web browser and the tape library. • IPv4 setting — Select Use IPv4 to enable the IPv4 Internet Protocol. Select the corresponding radio button to obtain an IP address automatically (DHCP) or use static IP address settings. -
Page 102: Encryption Settings Enabled Screen
(IBM Ultrium 4 Half-High Tape Drive Model 3572-S4H only) if you have purchased the Encryption Activation Key feature, relieving the host of the burden of managing encryption applications and systems. Note: Application Managed Encryption (AME) does not require a key. Library Managed Encryption (LME) and System Managed Encryption (SME) require a license key which is available by purchasing Feature Code 5901. -
Page 103: Date And Time Settings Screen
NetBackup™. • Advanced Encryption Settings — The purpose of these advanced encryption settings is to allow only IBM Support personnel (under the direction of the drive development team) to provide a solution to an unforeseen problem or to support a unique configuration. -
Page 104: E-Mail Settings Screen
• Sender address — E-mail message header information • Subject — E-mail message header information • Mail to — E-mail addresses of contacts to be notified of the event • Mail event — Event level notification threshold 4-26 TS2900 Tape Autoloader Setup, Operator, and Service Guide... -
Page 105: Snmp Settings Screen
SNMP Version 3. The traps supported by the TS2900 Tape Autoloader are listed in “Trap Definitions (Types)” on page B-12. -
Page 106: Saving And Restoring Configuration Settings
IP address. The following flowchart illustrates how VPD data is saved from and restored to a library using cookies. 4-28 TS2900 Tape Autoloader Setup, Operator, and Service Guide... -
Page 107: Configuration Using Cookies
Does Auto Saved VPD Data exist for Library IP Address? VPD Data is Saved Does Library S/N = Auto Saved S/N? VPD Data is Saved Write Auto Saved VPD Data to Library? Auto Saved VPD Data is written to Library Overwrite Auto Saved VPD Data? Auto Saved... -
Page 108: Key Path Diagnostics Screen
Figure 4-50. Operator Interventions screen Use Service Library → Operator Interventions to display a log history summary of information, warning, and error events that have occurred for the selected library component units. 4-30 TS2900 Tape Autoloader Setup, Operator, and Service Guide... -
Page 109: View Library Logs Screen
The summary can be filtered to display the operator intervention log for a specific hardware component and specific event levels. The log is stored in memory on the library control board. When the memory buffer is full, new events overwrite the oldest events. -
Page 110: Traces Screen
Click Refresh to read the system trace data from the tape library. The information displayed in the system trace data comprises: • Index number • Date and time of event • Sense data 4-32 TS2900 Tape Autoloader Setup, Operator, and Service Guide... -
Page 111: Download Drive Logs Screen
Downloading Drive Logs Figure 4-53. Download Drive Logs screen Use Service Library → Download Drive Logs to download a tape drive dump to file for use by support personnel to help troubleshoot a problem. You can choose to create normal dump data (currently stored in flash) or force dump data (currently stored in memory and moved to flash). -
Page 112: Firmware Update Screen
Do not attempt to interrupt the process in any way, or the upgrade will not be successful. Note: The IBM TotalStorage Tape Diagnostic Tool (ITDT) is a tool provided by IBM that offers multiple functional capabilities, including updating drive and library firmware. -
Page 113: Usage Statistics Screen
Viewing Accessor Statistics Figure 4-57. Usage Statistics screen Use Service Library → Usage Statistics to view statistics information about the movement of the robotics of the library. The information presented is: • Motion counts — Lists the accumulated operation count for all movements, accessor movements, picker movements, and X-axis movements. - Page 114 4-36 TS2900 Tape Autoloader Setup, Operator, and Service Guide...
-
Page 115: Chapter 5. Media
LTO-certified data cartridges, but they may not meet the standards of reliability that are established by IBM. Neither the IBM LTO Ultrium 400 GB Data Cartridge (Ultrium 3) nor the IBM LTO Ultrium 800 GB Data Cartridge can be interchanged with the media used in other IBM non-LTO Ultrium tape products. -
Page 116: Data Cartridges
Data Cartridges The different generations of IBM Ultrium data cartridges can be identified by color: Table 5-1. Ultrium data cartridges Type Color Ultrium 4 Green Ultrium 4 WORM Green and Silvery gray Ultrium 3 Slate Blue Ultrium 3 WORM Slate Blue and Silvery gray... -
Page 117: Cartridge Compatibility
Read/Write Read/Write Ultrium 1 Read/Write Note: The TS2900 Tape Autoloader supports the Ultrium 3 (3572-3SH) and Ultrium 4 (3572-4SH) Tape Drives only. Capacity Scaling To control the capacity of the cartridge (for example, to obtain a faster seek time) issue the SCSI command SET CAPACITY. -
Page 118: Data Security On Worm Media
Media Supplies” on page 5-19). Cleaning Cartridge An IBM Ultrium Universal Cleaning Cartridge is required to clean the tape drive. The drive itself determines when it needs to be cleaned and notifies the library. When notified, the library indicates that the drive needs cleaning by turning ON the “Clean Drive”... -
Page 119: Cartridge Memory Chip (Lto-Cm)
Important: It is recommended that the drive be cleaned only when it is requested by the drive. The IBM Ultrium Universal Cleaning Cartridge is valid for 50 uses. The cartridge’s LTO-CM (Cartridge Memory) chip tracks the number of times that the cartridge is used. -
Page 120: Sample Bar Code Label On The Lto Ultrium
WORM cartridge. To determine the complete specifications of the bar code and the bar code label, visit the web at http://www.ibm.com/storage/lto, (select LTO Support), or contact your IBM Sales Representative. When attaching a bar code label to a tape cartridge, place the label only in the recessed label area ( in Figure 5-1 on page 5-1). -
Page 121: Guidelines For Using Bar Code Labels
Guidelines for Using Bar Code Labels Apply the following guidelines whenever using bar code labels: • Use only IBM-approved bar code labels on cartridges to be used in an IBM tape library. • Do not reuse a label or reapply a used label over an existing label. -
Page 122: Cartridge Care And Handling
Incorrect handling or an incorrect environment can damage cartridges or their magnetic tape. To avoid damage to your tape cartridges and to ensure the continued high reliability of your IBM LTO Ultrium Tape Drives, use the following guidelines: Provide Training •... -
Page 123: Tape Cartridges In A Turtlecase
Figure 5-5. Tape cartridges in a Turtlecase • Never ship a cartridge in a commercial shipping envelope. Always place it in a box or package. • If you ship the cartridge in a cardboard box or a box of a sturdy material, ensure the following: –... -
Page 124: Provide Proper Acclimation And Environmental Conditions
Figure 5-8). • If you suspect that the cartridge has been mishandled but it appears usable, copy any data onto a good cartridge immediately for possible data recovery. Discard the mishandled cartridge. 5-10 TS2900 Tape Autoloader Setup, Operator, and Service Guide... -
Page 125: Handle The Cartridge Carefully
If the leader pin in your cartridge becomes dislodged from its pin-retaining spring clips or detaches from the tape, you must use the IBM Leader Pin Reattachment Kit (part number 08L9129) to reposition or reattach it. (Do not reattach the pin if you must remove more than seven meters (23 feet) of leader tape.) The sections that follow... -
Page 126: Repositioning A Leader Pin
2. With plastic or blunt-end tweezers, grasp the leader pin and position it in the pin-retaining spring clips 3. Press the leader pin gently into the clips until it snaps into place and is firmly seated. 4. Close the cartridge door. 5-12 TS2900 Tape Autoloader Setup, Operator, and Service Guide... -
Page 127: Reattaching A Leader Pin
Figure 5-9. Placing the dislodged leader pin into the correct position The cartridge door is open to show the leader pin. 5. To rewind the tape, insert the cartridge manual rewind tool ( in Figure 5-10) into the cartridge’s hub and turn it clockwise until the tape becomes taut. - Page 128 Figure 5-11). Leader pins and C-clips. Note: • Use only the IBM Leader Pin Reattachment Kit to reattach the leader pin to the tape. Other methods of reattaching the pin will damage the tape, the drive, or both. • Use this procedure on your tape cartridge only when the leader pin detaches from the magnetic tape and you must copy the cartridge’s data onto another cartridge.
-
Page 129: Attaching The Leader Pin Attach Tool To The Cartridge
Figure 5-12. Attaching the leader pin attach tool to the cartridge To hold the cartridge door open, hook the tool into the door and pull the tool back. 2. To find the end of the tape inside the cartridge, attach the cartridge manual rewind tool ( in Figure 5-13) to the cartridge’s hub by fitting the tool’s teeth... -
Page 130: Winding The Tape Out Of The Cartridge
10. Fold the tape over the leader pin and hold it with your fingers (see Figure 5-15). Note: Use care to ensure that the tape is centered over the leader pin. Failure to properly center the tape on the pin will cause the repaired cartridge to fail. 5-16 TS2900 Tape Autoloader Setup, Operator, and Service Guide... -
Page 131: Attaching The Leader Pin To The Tape
When the tape is properly centered, a 0.25-mm (0.01-in.) gap exists on both sides of the pin. Figure 5-15. Attaching the leader pin to the tape 11. Close the pivot arm of the leader pin attach tool by swinging it over the leader pin so that the C-clip snaps onto the pin and the tape. -
Page 132: Environmental And Shipping Specifications For Tape Cartridges
The tape should make two passes through the field at 90 degree orientation change for each pass to achieve complete erasure. Some commercial degaussers have two magnetic field regions 5-18 TS2900 Tape Autoloader Setup, Operator, and Service Guide... -
Page 133: Ordering Media Supplies
Table 5-7 lists the cartridges and media supplies that you can order for the drive. Table 5-7. Media supplies Supply Item Methods of Ordering 20-PACK IBM LTO Ultrium 800 GB Data Order the cartridge from your IBM Sales Cartridge (with attached labels) Representative or any authorized IBM Business Partner by specifying Machine Type 3589 Model 010. -
Page 134: Leader Pin Reattachment Kit
Order as part number 08L9129 through an IBM-authorized distributor. Manual Rewind Tool Order as part number 08L9130 through an IBM-authorized distributor. To find the closest IBM-authorized distributor, visit the web at http://www.ibm.com/storage/media) or call 1-888-IBM-MEDIA. 5-20 TS2900 Tape Autoloader Setup, Operator, and Service Guide... -
Page 135: Ordering Bar Code Labels
The LTO Ultrium 3 and 4 Tape Drives do not require cartridge bar code labels. However, if you use your data cartridges or cleaning cartridges in an IBM tape library product, you may need cartridge bar code labels if your tape library product requires them. - Page 136 5-22 TS2900 Tape Autoloader Setup, Operator, and Service Guide...
-
Page 137: Chapter 6. Troubleshooting
Warranty replacement of the TS2900 Tape Autoloader, if required, is provided by exchanging the old unit with a new unit. The customer will be charged for on-site service if a service contract is not in place. -
Page 138: Library Error Message Content
Customers can frequently resolve a simple problem themselves by using the information found in “Diagnosing a Problem” on page 6-3. If the problem is unrecoverable, the customer must contact IBM Technical Support (see “Contacting IBM Technical Support” on page 7-1). -
Page 139: Diagnosing A Problem
(as if something is blocking the magazine library… inside the library). 3. If the magazine still cannot be removed from the library, see “Contacting IBM Technical Support” on page 7-1. Communication You are experiencing 1. If you have a recent backup of your configuration, proceed to... - Page 140 Refer to the IBM Tape Device Drivers and the IBM LTO encryption operation, if the Ultrium Tape Drive SCSI Reference for the Sense Data problem occurred while the returned for an encryption operation.
- Page 141 If no errors are reported, resume normal library operations. 3. If the library still fails, reset factory defaults. If no errors are reported, resume normal library operations. 4. If the problem persists, see “Contacting IBM Technical Support” on page 7-1. You are experiencing a 1.
-
Page 142: Isolating Problems
(see “Replacing the Library” on page 8-13). Isolating Drive Problems 1. Ensure that the drive firmware is at the latest level (visit http://www.ibm.com/ storage/). 2. Cycle library power. -
Page 143: Isolating Web User Interface Problems
8. Check the Ethernet cable carefully (or try another cable) and, if the cable is connected to a network hub or switch, try a different port. 9. If the Web User Interface is still malfunctioning, refer to “Contacting IBM Technical Support” on page 7-1. -
Page 144: Installation And Configuration Problems
“Contacting IBM Technical Support” on page 7-1. Important: Do not disassemble the library. The warranty on your library is voided if the unit is disassembled without the approval of IBM Technical Support. Interpreting Front Panel LEDs Light emitting diodes (LEDs) on the front panel of the library provide a visual indication about the status of certain library components. -
Page 145: I/O Station Unlocked
Ready/Activity LED Attention LED Cleaning LED Error LED Table 6-1. Front Panel LED indicators Ready/ Library Condition Cleaning LED Attention LED Error LED Message on Display Activity LED POST (Power ON Self Blinks 2 times INITIALIZING...INVENTORY... Test) per second Blinks 2 times Magazine open PLEASE INSERT MAGAZINE per second... -
Page 146: Reseating Cables
3. Download the current drive log from the Web User Interface by selecting Service Library → Download Drive Logs, click Refresh, and click Download. 4. When requested by IBM, attach the log to an e-mail message and send it to IBM Technical Support for further diagnosis. -
Page 147: Chapter 7. Service Procedures
• Scans the host interface to find and display all IBM LTO devices. The tool will not display nor allow selection of any non-IBM devices. - Page 148 Verify that your device drivers are at the most recent level (see your server (host) manual for instructions). • For the latest release of IBM device drivers, visit the web. • For the latest release of device drivers by Independent Software Vendors (ISVs), visit the appropriate third-party web site.
-
Page 149: Required Tools
8-1. If you are unable to remove the defective cartridge magazine from the library using either of the above methods, see “Contacting IBM Technical Support” on page 7-1. 2. After removing the defective magazine from the library, remove all cartridges from the defective magazine and insert them into the replacement magazine. -
Page 150: Moving The Library From A Rack To A Desktop
I/O Station lock. 4. Remove the cartridge magazine from the front of the library. If the magazine is stuck in the library and does not eject, see “Contacting IBM Technical Support” on page 7-1. 5. Examine the magazine and cartridges for damage. -
Page 151: Remove Cables At The Rear Of The Library
6. From the Operator Panel top menu, select Logoff, and press Enter. 7. On the rear panel of the library: a. Power OFF the library by toggling the power supply switch to the OFF (O) position. b. Disconnect the power cable from the library power supply. c. -
Page 152: Installing The Library On A Desktop
For details on the deskside kit components, see “Installing the Deskside Cover” on page 3-2. 1. Attach the left and right rails to the chassis using 3 flat-head screws each side (Figure 8-7). TS2900 Tape Autoloader Setup, Operator, and Service Guide... -
Page 153: Attaching Side Rails To The Library Chassis
Figure 8-7. Attaching side rails to the library chassis 2. Turn the library over and attach the feet to the designated locations on the bottom of the library (Figure 8-8). Return the library to the upright position. Figure 8-8. Attaching the feet 3. -
Page 154: Removing Accessor Locking Screw
Chapter 6, “Troubleshooting,” on page 6-1. 11. Take the library online. Important: Do not stack objects on top of the library. For more detailed instructions, see Chapter 3, “Installation and Configuration,” on page 3-1. TS2900 Tape Autoloader Setup, Operator, and Service Guide... -
Page 155: Moving The Library From A Desktop To A Rack
Moving the Library from a Desktop to a Rack This procedure is used to relocate a library mounted on the desktop using the deskside kit to a rack using the rack mount kit. Removing Library from a Desktop 1. Take the library offline. Note: If the library is processing queued requests, wait for the library to finish the current library task. -
Page 156: Removing The Cover From The Library
Figure 8-14. Removing the cover from the library chassis 11. Turn the library over and remove the feet from the bottom of the library (Figure 8-15). Return the library to the upright position. Figure 8-15. Removing the feet TS2900 Tape Autoloader Setup, Operator, and Service Guide... -
Page 157: Installing The Library In A Rack
12. Remove the flat-head screws on each side to remove the left and right rails from the chassis (Figure 8-16). Figure 8-16. Removing side rails from the library chassis Installing the Library in a Rack For details on the rack mount kit components, see “Installing in a Rack” on page 3-5. 1. -
Page 158: Attaching The Rear Brackets To The Rails
Use both of the two screw locations on the rear of the rack rail. Use the top and middle screw locations on the front of the rack rail. 8-10 TS2900 Tape Autoloader Setup, Operator, and Service Guide... -
Page 159: Installing The Rail Assemblies
Figure 8-20. Installing the rail assemblies 6. Slide the library chassis into the rack. Secure the front of the library to the rack using the large black screws in the bottom holes on each front bracket (Figure 8-21). Figure 8-21. Securing the front of the library in the rack 7. -
Page 160: Securing The Rear Of The Library In The
Power ON the library by toggling the power supply switch to the ON (|) position. 11. Insert the cartridge magazine if previously removed. 12. Restore the library configuration. See “Saving and Restoring Configuration Settings” on page 4-28. 8-12 TS2900 Tape Autoloader Setup, Operator, and Service Guide... -
Page 161: Replacing The Library
IBM entitlement to service. If the static IP address of the new library matches the static IP address saved in the cookie, the Web User Interface checks the serial number of the new library against the serial number saved in the cookie. -
Page 162: Auto Saved Data Confirmation
4. It is necessary to change the serial number on the new library to the serial number of the old library to preserve your entitlement to IBM service. • If you are using a static IP address, complete the following steps. - Page 163 Contact IBM Technical Support for the service password. In the USA: 1-800-IBM-SERV (1-800-426-7378) All other countries and regions: http://www.ibm.com/planetwide/. c. Log in to the Web User Interface. Use the username service and the password from IBM Technical Support. d. Go to Configure Library → Save/Restore. Enter the serial number to match the serial number of your old library and click Restore Serial.
-
Page 164: Applying A Rid Tag To A Library
2. Copy the Worldwide Name (WWN) from the old library onto the WWN ID label in Figure 8-29). 3. Place the RID tag close to, but not covering, the serial number on the new library. Repeat for the WWN ID label. 8-16 TS2900 Tape Autoloader Setup, Operator, and Service Guide... -
Page 165: Chapter 9. Parts List
The TS2900 Tape Autoloader has customer replaceable units (CRUs) that must be added, removed, and replaced by the customer. If you choose to have the CRU added, removed, or replaced by an IBM Service Representative, there will be a charge for the service. -
Page 166: Power Cords And Receptacles
Figure 9-1 shows the receptacles that are used by the power cords in Table 9-3. Match the index number that is beside each plug to the index number in the table. Figure 9-1. Types of power cord receptacles TS2900 Tape Autoloader Setup, Operator, and Service Guide... -
Page 167: Power Cords
Table 9-3. Power cords Description, Feature Code Plug Standard Reference Country or Region Index Number in Figure 9-1 (FC), and Part Number (PN) US/Canada NEMA 5-15P Aruba, Bahamas, Barbados, Bermuda, Bolivia, Brazil, • 2.8 m, 125V Canada, Cayman Islands, • FC 9800 Colombia, Costa Rica, •... - Page 168 • AAS PN 39M5151 Guyana, India, Iraq, Ireland, • HVEC/SAP PN 23R7148 Jordan, Kenya, Kuwait, Malaysia, Malawi, Malta, Nepal, Nigeria, Oman, Polynesia, Qatar, Sierra Leone, Singapore, Tanzania, Uganda, UK, United Arab Emirate (Dubai), Yemen, Zambia TS2900 Tape Autoloader Setup, Operator, and Service Guide...
- Page 169 Table 9-3. Power cords (continued) Description, Feature Code Plug Standard Reference Country or Region Index Number in Figure 9-1 (FC), and Part Number (PN) Switzerland SEV SN 416534 Liechtenstein, Switzerland • 2.8 m, 250V • FC 9828 • AAS PN 39M5158 •...
- Page 170 • AAS PN 39M5233 • HVEC/SAP PN 23R6986 InMetro NBR 14136 Brazil Brazil HV** • 2.8 m, 250V • FC 9847 • AAS PN 39M5240 • HVEC/SAP PN 23R6987 * Low Voltage ** High Voltage TS2900 Tape Autoloader Setup, Operator, and Service Guide...
-
Page 171: Appendix A. Information For Trained Ibm Service Personnel
Before the TS2900 Tape Autoloader can be managed over a network using the Web User Interface, you must set up the initial network configuration of the library using the Operator Panel. -
Page 172: Java Security Warning Message
Click Run to launch the Web User Interface. Figure A-2. Login window The factory default account login and password for a Service account is • Account: service • Password: Contact your next level of support. TS2900 Tape Autoloader Setup, Operator, and Service Guide... -
Page 173: Common Header Elements
• Users are allowed to monitor the library, but not perform actions that affect the physical library. • Superusers are allowed to operate the physical and logical library, but not perform actions that affect the library configuration. Appendix A. Information for Trained IBM Service Personnel... -
Page 174: Menu Commands And Access Privileges
– – (3572-S4H only) Operator Interventions View Library Logs Traces – – Download Drive Logs – – Download Library Logs Reset Library/Drive – – Firmware Update – – Usage Statistics – – TS2900 Tape Autoloader Setup, Operator, and Service Guide... -
Page 175: Service Port
Drive/Cartridge Removal Important: • It is strongly recommended that the drive and stuck tape be returned to IBM for removal and recovery. • These procedures must be performed only by a trained IBM service provider. SSRs should claim their time against service code 33 ECA 013 when performing this procedure. -
Page 176: Removing Screws From The Rear Of The
• For a rack mounted library, remove the library from the rack. a. Remove the two round-head screws on each rear bracket securing the rear of the library to the rack (Figure A-7). TS2900 Tape Autoloader Setup, Operator, and Service Guide... -
Page 177: Removing Screws At The Front Of The Library
(Figure A-8). Figure A-8. Removing screws at the front of the library 5. Remove the screws securing the library chassis cover (Figure A-9). Appendix A. Information for Trained IBM Service Personnel... -
Page 178: Library Chassis Cover Removal
Figure A-9. Library chassis cover screw locations 6. Lift the library chassis cover off vertically (Figure A-10). Figure A-10. Library chassis cover removal TS2900 Tape Autoloader Setup, Operator, and Service Guide... -
Page 179: Internal Component Descriptions
Accessor calibration backup data. Power supply The power supply is the sole source of power for the library. Tape Drive The library supports the Ultrium 3 Half-High Tape Drive and Ultrium 4 Half-High Tape Drive. Appendix A. Information for Trained IBM Service Personnel... -
Page 180: Cover
7. Remove the drive mounting screws from the sides of the tape drive housing. Two screws are located on each side of the drive (Figure A-13). Figure A-13. Drive housing screw locations 8. Lift the tape drive out of the library chassis (Figure A-14). A-10 TS2900 Tape Autoloader Setup, Operator, and Service Guide... -
Page 181: Manually Removing A Tape Cartridge From
Note: • The best solution for recovering data on a damaged cartridge is to send it to IBM for professional data recovery. • Before using this procedure, you must have exhausted all other means of removing the tape cartridge from the drive. -
Page 182: Internal Components
To remove the cover of the internal drive, remove the four cover-mounting screws ( in Figure A-15). Two screws are located on each side of the drive. Remove the cover by lifting it up. A-12 TS2900 Tape Autoloader Setup, Operator, and Service Guide... -
Page 183: Removing The Bezel And The Cover From
(inside the cartridge). 5. Turn the supply reel ( in Figure A-16) clockwise, allowing the moistened tape to adhere to the hub as it winds around the supply reel (inside the cartridge). A-13 Appendix A. Information for Trained IBM Service Personnel... - Page 184 Ensure that you do not stretch the tape. 7. Reassemble the drive, reversing the steps in “Beginning Procedure” on page A-12. 8. Reassemble the library chassis. See “Ending Procedure” on page A-21. A-14 TS2900 Tape Autoloader Setup, Operator, and Service Guide...
-
Page 185: Drive With Cover Removed To Reveal Gear
LBA leader pin. 7. Rotate the threader intermediate gear ( in Figure A-17) counterclockwise until the leader block is in front of the Read/Write head. This moves the LBA out of the cartridge. A-15 Appendix A. Information for Trained IBM Service Personnel... -
Page 186: Leader Block Assembly (Lba
Continue spooling into the cartridge until the tape is taut. The tape must remain within the flanges of the tape guiding rollers. Turn the supply reel in Figure A-19) 10 additional turns. Ensure that you do not stretch the tape. A-16 TS2900 Tape Autoloader Setup, Operator, and Service Guide... - Page 187 • “Tape Pulled from or Broken near Leader Pin” on page A-15 • “Tape Broken in Mid-tape” on page A-16 2. Set the drive on its left side with the head and tape path facing up. A-17 Appendix A. Information for Trained IBM Service Personnel...
- Page 188 ( in Figure A-20) 10 turns. Ensure that you do not stretch the tape. 5. Reassemble the library chassis. See “Ending Procedure” on page A-21. A-18 TS2900 Tape Autoloader Setup, Operator, and Service Guide...
- Page 189 You can use your finger to rotate the threader intermediate gear ( Figure A-22) and slowly rotate the threader mechanism gear ( in Figure A-22) clockwise. This draws the tape leader block assembly (LBA) into the cartridge. A-19 Appendix A. Information for Trained IBM Service Personnel...
-
Page 190: Leader Block Assembly (Lba
Read/Write head. This moves the LBA out of the cartridge. Figure A-23. Leader Block Assembly (LBA) Loader motor worm gear Leader block assembly (LBA) A-20 TS2900 Tape Autoloader Setup, Operator, and Service Guide... -
Page 191: Removing A Stuck Cartridge Magazine
5. Remove the magazine from the library and check for any damaged cartridges. 6. Reassemble the library, reversing the steps used to disassemble the library. 7. Return the defective library to IBM. A-21 Appendix A. Information for Trained IBM Service Personnel... - Page 192 A-22 TS2900 Tape Autoloader Setup, Operator, and Service Guide...
-
Page 193: Appendix B. Error Codes
0002 RAM (base area) error was ON and Error LED before resuming normal library operations. detected. • If the problem persists, see “Contacting IBM Technical Support” on page 7-1. At power-on initialization, a 0003 RAM (buffer area) error was CHK 0003 detected. - Page 194 • If the problem is corrected, run Library Verify limit. before resuming normal library operations. • If the problem persists, see “Contacting IBM Technical Support” on page 7-1. TS2900 Tape Autoloader Setup, Operator, and Service Guide...
- Page 195 ACK IU event timeout • If the problem is corrected, run Library Verify detected. before resuming normal library operations. • If the problem persists, see “Contacting IBM LDI I/F error. Technical Support” on page 7-1. 002D Response IU event timeout detected.
- Page 196 2. Cycle the power supply and try again. command. Suspect the drive. • If the problem is corrected, run Library Verify before resuming normal library operations. • If the problem persists, see “Contacting IBM Technical Support” on page 7-1. TS2900 Tape Autoloader Setup, Operator, and Service Guide...
- Page 197 PUT command. before resuming normal library operations. Suspect the drive or X motor. • If the problem persists, see “Contacting IBM Drive does not enter SET Technical Support” on page 7-1. state within 3 seconds of a...
- Page 198 00B8 CHK 00B8 detected or FWD position • If the problem persists, see “Contacting IBM detected). Suspect the P Technical Support” on page 7-1. origin sensor, FWD sensor, or P motor. TS2900 Tape Autoloader Setup, Operator, and Service Guide...
- Page 199 (Accessor origin before resuming normal library operations. 00B9 CHK 00B9 detected or FWD not • If the problem persists, see “Contacting IBM detected). Suspect the P Technical Support” on page 7-1. origin sensor, FWD sensor, or P motor. Accessor error #3.
- Page 200 CHK 00E2 memory. Checksum error detected in 00E3 CHK 00E3 flash memory. Sensor error #1. Accessor encoder sensor B 00F0 CHK 00F0 error detected during blink check. Suspect the Accessor encoder sensor B. TS2900 Tape Autoloader Setup, Operator, and Service Guide...
-
Page 201: Drive Error Codes
00F1 CHK 00F1 error detected during blink before resuming normal library operations. check. Suspect the Accessor • If the problem persists, see “Contacting IBM encoder sensor A. Technical Support” on page 7-1. Sensor error #3. X encoder sensor error 00F2 CHK 00F2 detected during blink check. -
Page 202: Web User Interface Error Messages
Download Drive Logs “Force Dump” command execution failure:[****]. Download Drive Logs Restore failure. Save/Restore Library serial number is unmatched Writing to cookie was failure. The configuration data was not saved to cookie. B-10 TS2900 Tape Autoloader Setup, Operator, and Service Guide... - Page 203 Table B-3. Web user error messages (continued) Title Message Issuing Panel Cleaning Command Illegal medium loaded. Clean Drive Error Source element empty. Clean Drive Destination element full. Clean Drive Drive failure. Clean Drive Prevent medium removal. Clean Drive During import/export element access. Clean Drive Gap detected.
-
Page 204: Trap Definitions (Types
Trap Definitions (Types) The TS2900 Tape Autoloader supports the following types of SNMP traps. Table B-4. Trap list Clean Drive Attention Trap ID Event Type Description Error LED Emergency • Drive error – – • Library error – – Error •... -
Page 205: Appendix C. Tapealert Flags
1. Reset the library. For details, see fault that requires a reset to recover. “Rebooting the Drive” on page 4-7. 2. Restart the operation. 3. If the problem persists, see “Contacting IBM Technical Support” on page 7-1. © Copyright IBM Corp. 2008... - Page 206 The library cannot operate without the magazine. 1. Insert the magazine into the library. 2. Restart the operation. Library Offline Library manually turned offline. The library has been manually turned offline and is unavailable for use. TS2900 Tape Autoloader Setup, Operator, and Service Guide...
-
Page 207: Tapealert Flags Supported By The Ultrium Tape
Power Supply PSU failure inside the library The power supply has failed inside subsystem. the library. See “Contacting IBM Technical Support” on page 7-1. 1. C = Critical: Needs immediate action. W = Warning: Action to be taken. I = Information: Information for user. -
Page 208: Drive
“Contacting IBM Technical Support” on page 7-1. Interface Set when the tape drive detects a See “Contacting IBM Technical Support” problem with the host interface. on page 7-1. TS2900 Tape Autoloader Setup, Operator, and Service Guide... - Page 209 FMR drive via the SAS interface. image. Drive temperature Set when the drive temperature sensor See “Contacting IBM Technical Support” indicates that the drive’s temperature on page 7-1. exceeds the recommended temperature of the library. Drive voltage Set when the drive detects power See “Contacting IBM Technical Support”...
- Page 210 WORM writes have not been met. Data non-WORM cartridge. can only be appended to WORM media. Overwrites to WORM media are not allowed. TS2900 Tape Autoloader Setup, Operator, and Service Guide...
-
Page 211: Appendix D. Sense Data
“Library Sense Data” on page D-2 “Tape Drive Sense Data” on page D-3 When a drive encounters an error, it makes sense data available. You can use IBM device drivers to examine the sense data and determine errors. Instructions for downloading, installing, and properly configuring the IBM device drivers are available in the IBM Ultrium Device Drivers Installation and User’s Guide. -
Page 212: Library Sense Data
Exchange slot full Unit Not-ready to ready transition, media may have changed Attention Import or export element accessed (06) Power ON occurred Log parameter changed Microcode has been changed Drive error message detected* TS2900 Tape Autoloader Setup, Operator, and Service Guide... -
Page 213: Tape Drive Sense Data
Table D-2. Library sense data (continued) Sense Key ASCQ Description Aborted LDI command failure** Command (0B) * This code is preserved only in the library log when “FID” or “ATTN DRV” message is received from the tape drive. This code is not reported to the host server. - Page 214 Logical Unit has not Self-Configured - The drive has just powered on and has not completed its self test sequence and can not process commands. TS2900 Tape Autoloader Setup, Operator, and Service Guide...
- Page 215 Table D-3. Ultrium Tape drive sense data (continued) Bit Address or Name Byte 12–13 Additional Sense Code (ASC) Additional Sense Code Qualifier (ASCQ) Byte 12 Byte 13 ASCQ Code Download - The firmware in the drive has just been changed by a Write Buffer command.
- Page 216 Sense Key 7 (Data Protect) Encryption - Key Required Encryption - Key Generation Encryption - Key Translate Encryption - Key Optional Encryption - No Operation Encryption - Data Decryption Key Fail Limit TS2900 Tape Autoloader Setup, Operator, and Service Guide...
- Page 217 Table D-3. Ultrium Tape drive sense data (continued) Bit Address or Name Byte 12–13 Additional Sense Code (ASC) Additional Sense Code Qualifier (ASCQ) Byte 12 Byte 13 ASCQ Encryption - Data Encryption Key Instance Counter Changed Security Error Encryption - Unable to Decrypt Data Encryption - Unencrypted Data Encountered While Decrypting Encryption - Incorrect Data Encryption Key Encryption - Cryptographic Integrity Validation Failed...
- Page 218 A1h means that the current direction is towards the physical beginning of the tape. 12.Relative LPOS fields (Bytes 30-33) reports the current physical position on the tape. TS2900 Tape Autoloader Setup, Operator, and Service Guide...
- Page 219 00h to 0Fh. 14.This field (Byte 35) contains the frame and drive number, passed across the RS-422 serial interface. For additional information, refer to the IBM TotalStorage LTO Ultrium Tape Drive SCSI Reference. Appendix D. Sense Data...
- Page 220 D-10 TS2900 Tape Autoloader Setup, Operator, and Service Guide...
-
Page 221: Appendix E. Message Retrieval At The
Obtaining Error Information From an IBM™ System p IBM device drivers for the System p operating system logs error information when an error occurs on a tape drive or library. The error information includes the following: •... - Page 222 The ASC/ASCQ points to a “Mechanical Positioning Error” while attempting a “Move Medium” command (“A5”). For more information about Sense Data, refer to the IBM TotalStorage LTO Ultrium Tape Drive SCSI Reference. TS2900 Tape Autoloader Setup, Operator, and Service Guide...
-
Page 223: Library Sense Data Example
Class: Type: PERM Resource Name: smc0 Resource Class: tape Resource Type: 3572 Location: P1.1-I3/Q1-W5003013D38321011-L1000000000000 VPD: Manufacturer....IBM Machine Type and Model..3572-TL Serial Number....X2U78B0384 Device Specific.(FW)..4.09 (Firmware Level) Description TAPE DRIVE FAILURE Probable Causes TAPE DRIVE Failure Causes TAPE TAPE DRIVE Recommended Actions... -
Page 224: Scsi Sense Data - Tape Drive Error
In this case, the FID should be followed to make a repair. For more information about Sense Key and ASC/ASCQ fields, refer to the IBM TotalStorage LTO Ultrium Tape Drive SCSI Reference. LABEL:... -
Page 225: Retrieving From A Sun System
Chapter 6, “Troubleshooting,” on page 6-1. Retrieving From an IBM System i™ with RISC Processor IBM device drivers for the System i operating system logs error information when an error occurs on a tape drive or library. The error information includes the following: •... - Page 226 SCSI sense data, if available. • F6=Hexadecimal report. Pressing F6 will display the device hexadecimal data (for support use). • F9=Address Information. Pressing F9 will display the SCSI address information. TS2900 Tape Autoloader Setup, Operator, and Service Guide...
-
Page 227: Appendix F. Library Configuration
Update the form each time changes are made to the library. The information on this form is very important. Having the information on this form will be helpful if a call to IBM Service is necessary. Store this form in a secure location. Physical Library... -
Page 228: Encryption Settings (S4H Only
Encryption License Key Encryption Method Encryption Policy SSL Security Primary EKM Server IP Address Primary EKM TCP Port Address Primary EKM SSL Port Address Secondary EKM IP Address Secondary EKM TCP Port Address TS2900 Tape Autoloader Setup, Operator, and Service Guide... -
Page 229: Library And Drive Firmware
Secondary EKM SSL Port Address Advanced Encryption Settings Library and Drive Firmware Type of Firmware Current Firmware Level Library Drive Users Accounts The Administrator (admin) password is listed in the table below. Modify and add additional Administrator, Superuser and User names and passwords that are created. User name Access Level Password... - Page 230 TS2900 Tape Autoloader Setup, Operator, and Service Guide...
-
Page 231: Accessibility
Features These are the major accessibility features for the HTML version of the IBM System Storage TS2900 Tape Autoloader Setup, Operator, and Service Guide: • You can use screen-reader software and a digital speech synthesizer to hear what is displayed on the screen. - Page 232 TS2900 Tape Autoloader Setup, Operator, and Service Guide...
-
Page 233: Notices
The materials at those web sites are not part of the materials for this IBM product and use of those web sites is at your own risk. -
Page 234: Electronic Emission Notices
IBM is not responsible for any radio or television interference caused by unauthorized changes or modifications to this equipment. Unauthorized changes or modifications could void the user’s authority to operate the equipment. -
Page 235: European Union (Eu) Electromagnetic Compatibility Directive
States relating to electromagnetic compatibility. IBM cannot accept responsibility for any failure to satisfy the protection requirements resulting from a non-recommended modification of the product, including the fitting of non-IBM option cards. This product has been tested and found to comply with the limits for Class A Information Technology Equipment according to European Standard EN 55022. -
Page 236: Japan Vcci Class A Ite Electronic Emission Statement
Grenzwerte der EN 550022 Klasse A ein. Um dieses sicherzustellen, sind die Geräte wie in den Handbüchern beschrieben zu installieren und zu betreiben. Des Weiteren dürfen auch nur von der IBM empfohlene Kabel angeschlossen werden. IBM übernimmt keine Verantwortung für die Einhaltung der Schutzanforderungen, wenn das Produkt ohne Zustimmung der IBM verändert bzw. -
Page 237: Korean Class A Electronic Emission Statement
Richtlinie 2004/108/EG) für Geräte der Klasse A. Dieses Gerät ist berechtigt, in Übereinstimmung mit dem Deutschen EMVG das EG-Konformitätszeichen - CE - zu führen. Verantwortlich für die Konformitätserklärung des EMVG ist die IBM Deutschland GmbH 70548 Stuttgart. Generelle Informationen: Das Gerät erfüllt die Schutzanforderungen nach EN 55024 und EN 55022 Klasse A. - Page 238 TS2900 Tape Autoloader Setup, Operator, and Service Guide...
-
Page 239: Glossary
A code representing characters by sets of packets. parallel bars of varying thickness and separation which are read optically by transverse scanning. AIX. Advanced Interactive Executive. IBM’s ® implementation of the UNIX operating system. The bar code label. Paper bearing a bar code and having an RS/6000 system, among others, uses AIX as it’s... - Page 240 A tape cartridge dedicated to storing data. Contrast with cleaning cartridge. channel command. An instruction that directs a data channel, control unit, or device to perform an operation or set of operations. TS2900 Tape Autoloader Setup, Operator, and Service Guide...
- Page 241 data check. A synchronous or asynchronous indication download. (1) To transfer programs or data from a of a condition caused by invalid data or incorrect computer to a connected device, typically a personal positioning of data. computer. (2) To transfer data from a computer to a connected device, such as a workstation or dc.
- Page 242 Gigabit Interface Converter (GBIC). Converts copper to inhibit unauthorized access to, contamination of, or interface to optic interface. deletion of a file. gnd. Ground. TS2900 Tape Autoloader Setup, Operator, and Service Guide...
- Page 243 IOP. Input/output processor. IP. Internet protocol IP address. An identifier for a computer or device on a IBM Ultrium Tape Drive. Located within the library, a TCP/IP network. Networks using the TCP/IP protocol data-storage device that controls the movement of the route messages based on the IP address of the magnetic tape in an IBM LTO Ultrium Tape Cartridge.
- Page 244 Tape encryption data. controlled by the tape library. media-type identifier. Part of the bar code on an IBM library recovery. Library firmware function that Ultrium Tape Cartridge that identifies the type of generally retries failed operations up to three times cartridge (for example “L1”).
- Page 245 microprogram. A group of microinstructions that online. Pertaining to the operation of a functional unit when executed performs a preplanned function. The that is under the continual control of a computer. term microprogram represents a dynamic arrangement Contrast with offline. or selection of one or more groups of microinstructions OPER.
- Page 246 • Fast/Wide SCSI: Uses a 16-bit bus, and supports data rates of up to 20 MBps. RSA key. Encryption key type. • SCSI-1: Uses an 8-bit bus, and supports data rates of 4 MBps. R/W. Read/write. TS2900 Tape Autoloader Setup, Operator, and Service Guide...
-
Page 247: Tape Cartridge
A certain portion of data, together with its sync. Synchronous, synchronize. Occurring with a data carrier, that can be handled conveniently as a unit. regular or predictable time relationship. system-managed encryption. Tape encryption is set up implicitly through the IBM device driver. Glossary... - Page 248 World Wide Node Name (WWNN). A unique character string identifying Fiber Channel Host Bus Adapters (HBA) Write. Write command. WT. world trade. XR. External register. XRA. External register address register. I-10 TS2900 Tape Autoloader Setup, Operator, and Service Guide...
-
Page 249: Index
Index CE log, dumping 4-33 changing passwords access mode, library data cartridges 1-8, 5-2 Operator Panel 4-11 configuration 3-18 date settings Web User Interface 4-20 Accessor A-9 configuration 3-21, 3-31, 4-26 channel calibration 1-7 viewing statistics 4-35 Operator Panel 4-9 Clean Drive LED 2-2 Accessor locking screw 1-5 default settings... - Page 250 Accessor locking Web User Interface 4-26, 4-27 configuration 3-23 screw 3-12 NTP 1-7 Web User Interface 4-24 verifying library, diagnostics 3-32 NTP address 3-21, 4-26 library map 4-16 TS2900 Tape Autoloader Setup, Operator, and Service Guide...
- Page 251 NTP server sense data, definition E-2 configuration 3-21, 4-26 sequential access mode parts list 9-1 Operator Panel 4-10 configuration 3-18, 3-30 passwords Operator Panel 4-8 changing 4-11, 4-20 serial attached SCSI 1-4 Web User Interface 2-5, A-1 Serial attached SCSI (SAS) 1-5 performance R/W test drive serial number label 1-3 offline/online icon, Operator Panel 2-1...
- Page 252 4-15 gateway 3-20, 4-23 viewing trace data 4-32 I/O Station 4-22 weight of library 1-9 inventory 4-19 width of library 1-9 IP address 4-23 WORM cartridges 5-3 IPv4 configuration 4-23 TS2900 Tape Autoloader Setup, Operator, and Service Guide...
- Page 253 IBM business partner, or your authorized remarketer. When you send comments to IBM, you grant IBM a nonexclusive right to use or distribute your comments in any way it believes appropriate without incurring any obligation to you. IBM or any other organizations will only use the personal information that you supply to contact you about the issues that you state on this form.
- Page 254 Readers’ Comments — We’d Like to Hear from You Cut or Fold Along Line GC27-2212-00 Fold and Tape Please do not staple Fold and Tape _ _ _ _ _ _ _ _ _ _ _ _ _ _ _ _ _ _ _ _ _ _ _ _ _ _ _ _ _ _ _ _ _ _ _ _ _ _ _ _ _ _ _ _ _ _ _ _ _ _ _ _ _ _ _ _ _ _ _ _ _ _ _ _ _ _ _ _ _ _ _ _ _ _ _ _ _ _ _ _ _ _ _ _ _ _ _ _ _ NO POSTAGE NECESSARY IF MAILED IN THE...
- Page 256 Part Number: 45E3877 Printed in USA GC27-2212-00...