Stihl RMA 235 Instruction Manual
Hide thumbs
Also See for RMA 235:
- Instruction manual (240 pages) ,
- Instruction manual (80 pages) ,
- Instruction manual (208 pages)

Related Manuals for Stihl RMA 235


Summary of Contents for Stihl RMA 235
- Page 1 Instruction Manual Manual de instrucciones STIHL RMA 235 Manual de instruções de serviços 取扱説明書...
- Page 2 G Instruction Manual 1 - 30 E Manual de instrucciones 31 - 61 b Manual de instruções de serviços 62 - 92 J 取扱説明書 93 - 121...
-
Page 3: Table Of Contents
English Contents Inserting and Removing the Activation Key ..16 Introduction ......... 2 9.1 Inserting the Activation Key . -
Page 4: Introduction
20.3 STIHL AK Battery ........27 requirements. -
Page 5: Warning Notices In Text
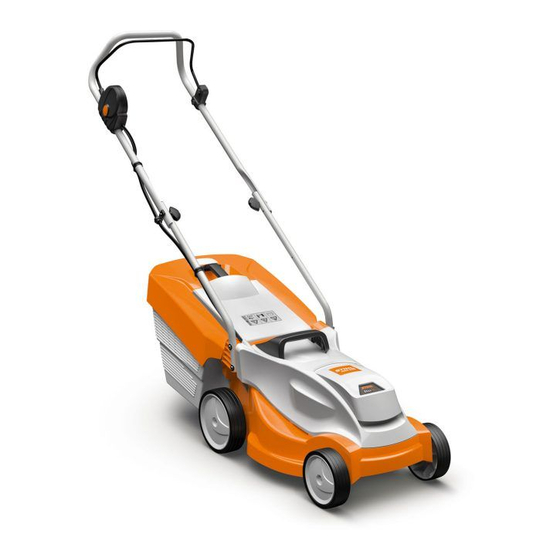
English 3 Overview Warning Notices in Text 3 Overview DANGER This notice refers to risks which result in serious or fatal Lawn Mower and Battery injury. ► Serious or fatal injuries can be avoided by taking the precautions mentioned. WARNING This notice refers to risks which can result in serious or fatal injury. -
Page 6: Symbols
English 3 Overview Symbols 3 Locking button The locking button switches the blades on and off The symbols can be on the lawn mower or battery and have together with the control bar for mowing. the following meaning: 4 Rotary knob This symbol identifies the activation key. -
Page 7: Safety Precautions
Observe the safety instructions on high-velocity objects and their measures. Intended Use Do not touch a turning blade. The STIHL RMA 235 lawn mower is used to mow dry grass. The lawn mower is supplied with power by a STIHL AK battery. WARNING Remove the battery during work stoppages, transport, storage, maintenance or repair. -
Page 8: Requirements For The User
► Wear work gloves made from resistant material. specialist dealer or a competent person before using the lawn mower for the first time. – The user is not impaired by alcohol, medicines or drugs. ► If anything is unclear: consult a STIHL specialist dealer. 0478-131-9541-A... -
Page 9: Work Area And Surroundings
English 4 Safety Precautions Work Area and Surroundings 4.5.2 Battery WARNING 4.5.1 Lawn Mower WARNING ■ Bystanders, children and animals cannot recognize or assess the dangers of the battery. Bystanders, children ■ Bystanding people, children and animals cannot and animals may be seriously injured. recognise or evaluate the dangers posed by the lawn ►... - Page 10 – The blade is correctly sharpened. – The blade is correctly attached. – The blade is burr-free. – Only genuine STIHL accessories for this lawn mower are – The blade is correctly balanced. attached. – The minimum thickness and minimum width of the blade –...
-
Page 11: Working
English 4 Safety Precautions ► Do not modify the battery. ► If signs of fatigue occur: take a break. ► Do not insert objects into the apertures in the battery. ► If mowing on a slope: mow across the slope. ►... -
Page 12: Transporting
English 4 Safety Precautions DANGER ■ The battery may turn over or shift during transport. This may result in personal injuries and damage to property. ■ If working near live wires, the blade may come into contact ► Pack the battery in packaging in such a way that it with the live wires and damage them. -
Page 13: Cleaning, Maintenance And Repair
► If the lawn mower or battery need to be maintained or ► Store the battery in a clean and dry condition. repaired: consult a STIHL specialist dealer. ► Store the battery in an enclosed location. ► Maintain the blade as described in this instruction manual. -
Page 14: Preparing The Lawn Mower For Operation
► Recharge the battery fully as described in the instruction – Lawn mower, @ 4.6.1. manual for the STIHL AL 101, 300, 500 chargers. – Blade, @ 4.6.2. – Battery, @ 4.6.3. State of Charge ► Check the battery, @ 11.3. -
Page 15: Assembling The Lawn Mower
English 7 Assembling the Lawn Mower 7 Assembling the Lawn Mower Attaching the Handlebar ► Switch the lawn mower off, pull out the activation key and remove the battery. ► Place the lawn mower on a level surface. ► Hold upper handlebar (5) against lower handlebars (1) so the bores align. -
Page 16: Folding Up And Folding The Handlebar
English 7 Assembling the Lawn Mower The handlebar must not be dismantled again. ► Switch the lawn mower off, pull out the activation key and remove the battery. ► Place the lawn mower on a level surface. Folding Up and Folding the Handlebar 7.2.1 Folding Up the Handlebar ►... -
Page 17: Assembling, Attaching And Detaching The Grass
English 8 Removing and Fitting the Battery Assembling, Attaching and Detaching the Grass ► Set down discharge flap (1) on grass catcher box (2). Catcher Box 7.3.3 Detaching the Grass Catcher Box 7.3.1 Assembling the Grass Catcher Box ► Switch the lawn mower off. ►... -
Page 18: Inserting And Removing The Activation Key
► Wait until the blade is no longer turning. ► Close flap (1). ► If the blade continues to turn: pull out the activation key, remove the battery and consult a STIHL specialist dealer. Removing the Activation Key The lawn mower is defective. -
Page 19: Checking The Lawn Mower And Battery
@ 20.2. ► Fit the battery. ► If anything is unclear: consult a STIHL specialist dealer. ► Press the locking button with the right hand and hold. ► Pull the control bar with the left hand fully in the direction 11.3 Testing the Battery... -
Page 20: Operating The Lawn Mower
English 12 Operating the Lawn Mower 12 Operating the Lawn Mower 12.1 Holding and Guiding the Lawn Mower ► Hold the lawn mower at the handle. ► Press lever (2) outwards and hold. ► Move the lawn mower to the desired position by raising and lowering the lever. -
Page 21: Mowing
► Switch the lawn mower off. ► Detach the grass catcher box. 12.4 ECO Mode The STIHL cordless lawn mower detects the current working conditions and adjusts the blade speed automatically. This may extend the battery life. ► Open tab (1). -
Page 22: After Finishing Work
English 13 After Finishing Work ► Fold up upper part of grass catcher box (2) at handle (3) and hold. ► Hold the lower handle with the second hand. ► Empty the grass catcher box. ► Close the grass catcher box. ►... -
Page 23: Storing
16.2 Cleaning the Lawn Mower 15.2 Storing the Battery ► Switch the lawn mower off, pull out the activation key and STIHL recommends that you store the battery with a charge remove the battery. between 40% and 60% (2 LEDs glow green). -
Page 24: Cleaning The Battery
17.2 Sharpening and Balancing the Blade Sharpening and balancing the blade correctly requires a lot of practice. STIHL recommends having the blade sharpened and balanced by a STIHL specialist dealer. ► Hold blade (1) with one hand. ► Unscrew screw (2) in the direction of the arrow and remove together with coupler (3). -
Page 25: Repairing
@ 20.2. Bluing of the blade during sharpening is not permitted. ► Attach the blade. ► If anything is unclear: consult a STIHL specialist dealer. 18 Repairing 18.1 Repairing the Lawn Mower The user should not repair the lawn mower or blade themselves. -
Page 26: Troubleshooting
► Fit the battery. ► Switch the lawn mower on. ► If 3 LEDs still flash red: do not use the lawn mower and consult a STIHL specialist dealer. 3 LEDs illuminate The lawn mower is too ► Pull out the activation key. - Page 27 English 19 Troubleshooting Fault LEDs on the Cause Remedy battery The lawn mower or battery ► Pull out the activation key. are damp. ► Remove the battery. ► Clean the lawn mower. ► Allow the lawn mower or battery to dry. The resistance at the blade ►...
- Page 28 English 19 Troubleshooting Fault LEDs on the Cause Remedy battery The blade is blunt or worn. ► Sharpen and balance the blade. The resistance at the blade ► Set a higher cutting height. is too great. ► Mow shorter grass. The battery gets The guides or electric ►...
-
Page 29: Specifications
20 Specifications – Permissible temperature range for operation and storage: -10°C to +50°C 20.1 STIHL RMA 235.0 Lawn Mower 20.4 Sound Values and Vibration Values – Permissible battery: STIHL AK The K value for the sound pressure level is 2 dB(A). The K –... -
Page 30: Reach
23.3 Preparatory Measures 22.1 Disposing of the Lawn Mower a) Always wear sturdy shoes and long trousers when Information on disposal is available from a STIHL specialist operating the machine. Never operate the machine dealer. barefoot or in lightweight sandals. Avoid wearing loose ►... -
Page 31: Handling
English 23 Safety Information for Lawn Mowers c) Before using the machine, always visually inspect the o) Never lift or carry a lawn mower with the motor running. cutting blade, the retaining pins and the entire cutting unit p) Stop the motor and pull out the starting key. Ensure that for wear or damage. - Page 32 English 23 Safety Information for Lawn Mowers h) In the interests of safety, replace all worn or damaged parts. Only use genuine spare parts and accessories. 0478-131-9541-A...
- Page 33 español Índice 8.2 Sacar la batería ........46 Prólogo .
-
Page 34: Prólogo
20.3 Acumulador STIHL AK ......58 clientes. -
Page 35: Marca De Las Indicaciones De Advertencia En El
3 Sinopsis – Indicaciones de seguridad para batería STIHL AK 3 Sinopsis – Manual de instrucciones para cargadores STIHL AL 101, 300, 500 – Información de seguridad para baterías STIHL y Cortacésped y batería productos con baterías incorporadas: www.stihl.com/safety-data-sheets... -
Page 36: Símbolos
español 3 Sinopsis 3 Botón de bloqueo # Placa de características con número de serie El botón de bloqueo conecta y desconecta las cuchillas junto con el estribo de mando para corte de césped. Símbolos 4 Botón giratorio Los símbolos pueden encontrarse en el cortacésped y en la El botón giratorio fija la parte superior del manillar batería y significan lo siguiente: firmemente a la parte inferior y sirve para plegar el... -
Page 37: Indicaciones Relativas A La Seguridad
Tener en cuenta las indicaciones de seguridad Uso de acuerdo a lo previsto respecto a los objetos lanzados al aire y las El cortacésped STIHL RMA 235 sirve para cortar hierba medidas a tomar. seca. Una batería STIHL AK suministra energía al cortacésped. -
Page 38: Obligaciones Del Usuario
únicamente bajo supervisión o tras ■ Las baterías que no han sido autorizadas por STIHL para haber sido instruido por una persona responsable. el cortacésped pueden provocar incendios y explosiones. -
Page 39: Sector De Trabajo Y Entorno
español 4 Indicaciones relativas a la seguridad ■ Durante la limpieza, el mantenimiento o el transporte, el ■ El cortacésped no está protegido contra el agua. Si se usuario puede entrar en contacto con la cuchilla. El trabaja con lluvia o en entornos húmedos, puede usuario puede resultar lesionado. -
Page 40: Estado Seguro
► Trabajar solo con una cuchilla en buen estado y piezas ► Si los mandos no funcionan: no trabajar con el de montaje que no estén dañadas. cortacésped. ► Montar la cuchilla correctamente. ► Montar solo accesorios originales STIHL para este ► Afilar la cuchilla correctamente. cortacésped. 0478-131-9541-A... -
Page 41: Trabajo
15 minutos con agua abundante y visitar a un médico. ► Encargar a un distribuidor especializado STIHL que equilibre la cuchilla. ■ Una batería defectuosa o dañada puede oler raro, humear o arder. Personas pueden ser gravemente lesionadas o ►... -
Page 42: Transporte
español 4 Indicaciones relativas a la seguridad Transporte ■ Durante el trabajo pueden producirse vibraciones ocasionadas por el cortacésped. 4.8.1 Cortacésped ► Utilizar guantes. ADVERTENCIA ► Hacer pausas para descansar del trabajo. ► Si se presentan señales de un trastorno circulatorio: ■... -
Page 43: Almacenamiento
español 4 Indicaciones relativas a la seguridad Almacenamiento ► Sacar la batería. 4.9.1 Cortacésped ADVERTENCIA ■ Los niños no pueden reconocer ni estimar los peligros del cortacésped. Los niños pueden sufrir graves lesiones. 4.9.2 Acumulador ► Retirar la llave de seguridad. ADVERTENCIA ■... -
Page 44: Preparar El Cortacésped Para El Trabajo
► Si se corta el césped y la hierba cortada ha de ser un mantenimiento o reparación: consultar a un recogida en el recogedor: enganchar el recogedor de distribuidor especializado STIHL. hierba; @ 7.3.2. ► Revisar la cuchilla de la manera descrita en este ►... -
Page 45: Cargar El Acumulador Y Leds
► Apagar el cortacésped, retirar la llave de seguridad y ► Cargar el acumulador tal como se describe en el manual sacar la batería. de instrucciones de los cargadores STIHL AL 101, 300, 500. ► Colocar el cortacésped sobre una superficie llana. Indicar el estado de carga 80-100%... -
Page 46: Desplegar Y Plegar El Manillar
español 7 Ensamblar el cortacésped ► Introducir los tornillos (3) junto con las arandelas (2) de ► Colocar el botón giratorio (9) en ambos lados sobre los afuera hacia dentro por los orificios de la parte inferior del tornillos (6) y enroscarlo. manillar (1) y del cortacésped (4), y apretarlos a 3 Nm. -
Page 47: Ensamblar, Enganchar Y Desenganchar El
español 7 Ensamblar el cortacésped Ensamblar, enganchar y desenganchar el ► Desplegar la parte superior del manillar (2) y sujetarla con una mano. Tener cuidado de que no se dañe el cable (4). recogedor de hierba ► Enroscar las empuñaduras giratorias (1). 7.3.1 Ensamblar el recogedor de hierba El manillar (2) está... -
Page 48: Colocar Y Sacar El Acumulador
español 8 Colocar y sacar el acumulador ► Agarrar el recogedor de hierba (2) por la empuñadura (3) ► Abrir la tapa (1) hasta el tope y mantenerla abierta. y fijarlo con los ganchos en los alojamientos (4). ► Depositar el deflector (1) sobre el recogedor de hierba (2). -
Page 49: Conectar Y Desconectar El Cortacésped
► Si la cuchilla sigue girando: Retirar la llave de seguridad, sacar el acumulador y consultar a un distribuidor ► Cerrar la tapa. especializado STIHL. ► Guardar la llave de seguridad fuera del alcance de los El cortacésped está defectuoso. -
Page 50: Comprobar La Cuchilla
► Si no se ha respetado el ángulo de afilado: afilar la cuchilla; @ 20.2. Las posiciones se indican en el cortacésped. ► En caso de dudas: consultar a un distribuidor especializado STIHL. 11.3 Comprobar el acumulador ► Pulsar la tecla en el acumulador Los LEDs lucen o parpadean. -
Page 51: Corte
► Empujar el cortacésped hacia delante lentamente y en forma controlada. 12.4 Modo ECO El cortacésped de batería STIHL reconoce las condiciones de trabajo actuales y ajusta la velocidad adecuada de la cuchilla automáticamente. De esta manera se puede prolongar el tiempo de funcionamiento de la batería. -
Page 52: Vaciar El Recogedor De Hierba
español 13 Después del trabajo 12.5 Vaciar el recogedor de hierba ► Abrir la parte superior del recogedor de hierba (2) con la empuñadura (3) y mantenerla abierta. ► Sujetar el recogedor con la segunda mano por el asa inferior. ►... -
Page 53: Transportar El Acumulador
15.2 Guardar el acumulador Transportar el cortacésped en un vehículo STIHL recomienda guardar el acumulador en un estado de ► Asegurar el cortacésped de pie sobre sus cuatro ruedas carga de entre el 40 % y el 60 % (2 LEDs luciendo en de tal manera que no pueda volcar ni moverse. -
Page 54: Limpiar
español 16 Limpiar 16 Limpiar 16.1 Colocar el cortacésped en posición de limpieza ► Apagar el cortacésped, retirar la llave de seguridad y sacar la batería. ► Colocar el cortacésped sobre una superficie llana. ► Desenganchar el recogedor de hierba. ►... -
Page 55: Afilar Y Equilibrar La Cuchilla
Se requiere mucha práctica para afilar y equilibrar una cuchilla correctamente. ► Sujetar la cuchilla (1) con una mano. STIHL recomienda encargar el afilado y equilibrado de la ► Desenroscar el tornillo (2) en la dirección de la flecha y cuchilla a un distribuidor especializado STIHL. - Page 56 ► Si el cortacésped o la cuchilla tuvieran algún daño: no utilizar el cortacésped o la cuchilla y consultar a un distribuidor especializado STIHL. ► Su hubiera rótulos ilegibles o dañados: encargar a un distribuidor especializado STIHL que sustituya los rótulos. 0478-131-9541-A...
-
Page 57: Subsanar Las Perturbaciones
► Colocar la batería. ► Conectar el cortacésped. ► Si 3 LED siguen parpadeando en rojo: no utilizar el cortacésped y consultar a un distribuidor especializado STIHL. 3 LED se El cortacésped está ► Extraer la llave de seguridad. encienden en rojo. - Page 58 español 19 Subsanar las perturbaciones Anomalía LED en batería Causa Solución El cortacésped o la batería ► Extraer la llave de seguridad. están húmedos. ► Sacar la batería. ► Limpiar el cortacésped. ► Dejar que se seque el cortacésped o la batería. La resistencia en la ►...
- Page 59 español 19 Subsanar las perturbaciones Anomalía LED en batería Causa Solución La cuchilla está desafilada ► Afilar y equilibrar la cuchilla. o desgastada. La resistencia en la ► Ajustar una altura de corte mayor. cuchilla es excesiva. ► Cortar hierba más baja. La batería se atasca Hay suciedad en las guías ►...
-
Page 60: Datos Técnicos
En www.stihl.com/vib se puede encontrar información sobre el cumplimiento de la directiva 2002/44/EC sobre vibraciones. -
Page 61: Reach
STIHL recomienda emplear piezas de repuesto STIHL y en el futuro. accesorios originales STIHL. Las piezas de repuesto y los accesorios originales STIHL se pueden adquirir en un distribuidor especializado STIHL. 23.2 Formación a) Lea el manual de instrucciones concienzudamente. -
Page 62: Preparativos
español 23 Indicaciones técnicas de seguridad para cortacéspedes 23.3 Preparativos j) Nunca utilice el cortacésped con dispositivos de protección o rejillas protectoras que presenten algún daño a) Durante el servicio de la máquina hay que utilizar siempre o sin que estén montados los dispositivos de protección calzado resistente y pantalones largos. -
Page 63: Mantenimiento Y Almacenamiento
español 23 Indicaciones técnicas de seguridad para cortacéspedes 23.5 Mantenimiento y almacenamiento a) Asegúrese de que todas las tuercas, pernos y tornillos estén firmemente apretados y que el equipo se encuentre en un estado de trabajo seguro. b) Verifique con regularidad si el recogedor de hierba está desgastado o si ha perdido su funcionalidad. - Page 64 brasileiro Índice Conectar e desconectar a chave de ativação ..78 Prefácio ..........63 9.1 Inserir a chave de ativação .
-
Page 65: Prefácio
Isso resulta em produtos com alta 20.3 Bateria STIHL AK ........89 confiabilidade, mesmo em condições extremas. -
Page 66: Informações Sobre Este Manual De Instruções
► Adicionalmente a este manual de instruções, ler, entender e guardar os seguintes documentos: – Indicações de segurança da bateria STIHL AK – Manual de instruções do carregador STIHL AL 101, 300, 500 – Informações de segurança para baterias STIHL e produtos com bateria integrada STIHL: www.stihl.com/safety-data-sheets... -
Page 67: Símbolos
brasileiro 3 Visão geral 2 Alavanca de acionamento 16 Botão de pressão A alavanca de acionamento, junto com o botão de O botão de pressão ativa os LEDs na bateria. bloqueio, liga e desliga as lâminas. # Plaqueta de potência com o número da máquina 3 Botão de bloqueio O botão de bloqueio junto com o guidão liga e desliga as lâminas para cortar grama. -
Page 68: Indicações De Segurança
Observar as indicações de segurança para Utilização prevista objetos lançados e as medidas a serem O cortador de grama STIHL RMA 235 serve para cortar a adotadas. grama seca. O cortador de grama é alimentado com energia por uma Não tocar na lâmina que está... -
Page 69: Requisitos Ao Usuário
– O usuário está ciente que ele é responsável por ► Usar o cortador de grama com uma bateria STIHL AK. acidentes e danos. ■ Se o cortador de grama ou a bateria não forem utilizados –... -
Page 70: Área De Trabalho E Arredores
brasileiro 4 Indicações de segurança ■ Durante a limpeza, manutenção ou transporte, o usuário ■ O cortador de grama não é à prova de água. Se ele for pode entrar em contato com a lâmina. O usuário pode utilizado na chuva ou em ambientes úmidos, há risco de sofrer ferimentos. -
Page 71: Situação Segura De Funcionamento
– A lâmina está montada corretamente. – A lâmina está instalada corretamente. – A lâmina está afiada corretamente. – Há somente acessórios originais STIHL instalados neste cortador de grama. – A lâmina está sem rebarbas. – Os acessórios estão instalados corretamente. -
Page 72: Trabalho
15 minutos com bastante água e procurar um médico. ► Deixar que as lâminas sejam balanceadas em um Ponto de Vendas STIHL. ■ Uma bateria danificada ou com defeito pode ter cheiro incomum, emitir fumaça ou queimar. Pessoas podem ►... -
Page 73: Transporte
brasileiro 4 Indicações de segurança PERIGO ► Não tocar na lâmina que está girando. ► Se a lâmina estiver bloqueada por um ■ Se o trabalho for realizado em ambiente onde há fios de objeto: desligar o cortador de grama, tirar a transmissão de energia elétrica, a lâmina pode entrar em chave de ativação e retirar a bateria. -
Page 74: Armazenagem
brasileiro 4 Indicações de segurança 4.8.2 Bateria ■ Os contatos elétricos no cortador de grama e componentes metálicos podem apresentar corrosão ATENÇÃO devido à umidade. O cortador de grama pode ser danificado. ■ A bateria não está protegida contra todos os agentes ►... -
Page 75: Limpeza, Manutenção E Reparo
► Caso seja necessário fazer manutenção ou reparo na bateria ou no cortador de grama: contatar um Ponto de e do carregador. Vendas STIHL. ► Guardar a bateria em uma embalagem que não seja ► Fazer a manutenção da lâmina conforme descrito neste condutora de eletricidade. -
Page 76: Preparar O Cortador De Grama
LEDs na bateria ► Se não for possível seguir as etapas: não utilizar o cortador de grama e procurar um Ponto de Vendas STIHL. Os LEDs podem indicar a carga da bateria ou possíveis distúrbios. Os LEDs podem estar acesos ou piscando na cor verde ou vermelha. -
Page 77: Montar O Cortador De Grama
brasileiro 7 Montar o cortador de grama ► Se os LEDs vermelhos estiverem acesos ou piscando: ► Inserir os parafusos (3) junto com as arruelas (2), de fora solucionar distúrbios, @ 19.1. para dentro, através dos furos na parte inferior do Existe um distúrbio no cortador de grama ou na bateria. -
Page 78: Abrir E Fechar A Barra De Direção
brasileiro 7 Montar o cortador de grama ► Encaixar o botão giratório (9) nos dois lados dos ► Abrir a parte superior do guidão (2) e segurar com uma parafusos (6) e rosquear. das mãos. Tomar cuidado para não danificar o cabo (4). A parte superior do guidão (5) está... -
Page 79: Montar A Cesta De Coleta De Grama, Pendurar E
brasileiro 8 Inserir e tirar a bateria Montar a cesta de coleta de grama, pendurar e ► Segurar a cesta de coleta de grama (2) no apoio (3) e enganchar com os ganchos nos alojamentos (4). afixar. ► Colocar a tampa de expulsão (1) na cesta de coleta de 7.3.1 Montar a cesta de coleta de grama grama (2). -
Page 80: Conectar E Desconectar A Chave De Ativação
brasileiro 9 Conectar e desconectar a chave de ativação Tirar a chave de ativação ► Abrir a tampa (1) até o encosto e segurá-la. ► Abrir a tampa até o encosto e segurá-la. ► Tirar a chave de ativação. ► Fechar a tampa. ►... -
Page 81: Verificar O Cortador De Grama E A Bateria
► Aguardar, até que a lâmina não gire mais. ► Se a lâmina continuar girando: tirar a chave de ativação, remover a bateria e procurar um Ponto de Vendas STIHL. ► Se a lâmina continuar girando: tirar a chave de O cortador de grama está... -
Page 82: Trabalhar Com O Cortador De Grama
brasileiro 12 Trabalhar com o cortador de grama 12 Trabalhar com o cortador de grama 12.1 Segurar e conduzir o cortador de grama ► Segurar o cortador de grama no apoio. ► Pressionar a alavanca (2) para fora e mantê-la pressionada. -
Page 83: Cortar A Grama
► Desligar o cortador de grama. ► Desenganchar a cesta de coleta de grama. 12.4 Modo ECO O cortador de grama movido a bateria da STIHL reconhece a condição de trabalho atual e ajusta automaticamente a rotação adequada da lâmina. -
Page 84: Após O Trabalho
brasileiro 13 Após o trabalho ► Abrir a parte superior da cesta de coleta (2) pelo apoio (3) e segurar. ► Com a outra mão, segurar no apoio inferior. ► Esvaziar a cesta de coleta de grama. ► Fechar a tampa da cesta de coleta de grama. ►... -
Page 85: Armazenagem
15.2 Guardar a bateria ► Segurar o cortador de grama no guidão (1), incliná-lo lateralmente e deitá-lo. A STIHL recomenda guardar a bateria com uma carga entre 40 % e 60 % (2 LEDs verdes acesos). 16.2 Limpar o cortador de grama ►... -
Page 86: Limpar A Bateria
brasileiro 17 Manutenção ► Limpar as fendas de suspiro (1) e (2) com um pincel. ► Nunca segurar a lâmina (1) com uma das mãos. ► Posicionar o cortador de grama. ► Desenroscar o parafuso (2) no sentido da seta e removê-lo junto com o arrastador (3). -
Page 87: Afiar E Balancear A Lâmina
17.2 Afiar e balancear a lâmina Afiar e balancear a lâmina corretamente é uma tarefa muito exigente. A STIHL recomenda que a lâmina seja afiada e balanceada em um Ponto de Vendas STIHL. ATENÇÃO Os gumes da lâmina são afiados. O usuário pode se cortar. -
Page 88: Solucionar Distúrbios
► Ligar o cortador de grama. ► Se 3 LEDs continuarem piscando em vermelho: não utilizar o cortador de grama e procurar um Ponto de Vendas STIHL. 3 LEDs vermelhos O cortador de grama está ► Tirar a chave de ativação. - Page 89 brasileiro 19 Solucionar distúrbios Falha LEDs na bateria Causa Solução O cortador de grama ou a ► Tirar a chave de ativação. bateria estão úmidos. ► Retirar a bateria. ► Limpar o cortador de grama. ► Deixar o cortador de grama ou a bateria secarem. A resistência na lâmina ►...
- Page 90 brasileiro 19 Solucionar distúrbios Falha LEDs na bateria Causa Solução A lâmina perdeu o fio ou ► Afiar e balancear a lâmina. está gasta. A resistência na lâmina ► Ajustar uma altura de corte maior. está muito alta. ► Cortar grama mais baixa. A bateria fica presa As guias ou contatos ►...
-
Page 91: Dados Técnicos
20 Dados técnicos – Faixa de temperatura permitida para utilização e armazenagem: - 10 °C até + 50 °C 20.1 Cortador de grama STIHL RMA 235.0 20.4 Valores acústicos e nível de vibração – Bateria permitida: STIHL AK O valor K para o nível de pressão acústica é de 2 dB(A). -
Page 92: Peças De Reposição E Acessórios
ATENÇÃO STIHL e acessórios originais STIHL. Ler as indicações de segurança, orientações, ilustrações e As peças de reposição e os acessórios originais STIHL dados técnicos que acompanham este cortador de grama. podem ser adquiridos em um Ponto de Vendas STIHL. -
Page 93: Medidas Preparatórias
brasileiro 23 Instruções de segurança para o cortador de grama 23.3 Medidas preparatórias j) Nunca utilizar o cortador de grama com dispositivos de segurança ou grades de proteção danificados ou sem os a) Ao operar a máquina, sempre usar calçados firmes e dispositivos de proteção instalados, como defletores de calças compridas. -
Page 94: Manutenção E Armazenamento
brasileiro 23 Instruções de segurança para o cortador de grama 23.5 Manutenção e armazenamento a) Certificar-se que todas as porcas, pinos e parafusos estejam bem apertados e que o aparelho se encontre em estado de funcionamento seguro. b) Inspecionar regularmente o dispositivo de coleta de grama quanto à... - Page 95 日本語 目次 始動キーの抜き差し ....... 108 ごあいさつ ......... 94 9.1 起動キーの挿入...
-
Page 96: ごあいさつ
20.2 ブレード ......... .119 す。 弊社は、お客様のご要望を満たす高品質の製品を開発 20.3 STIHL AK バッテリー ......119 し製造しております。 製品は、極端な条件の下でもご信頼... -
Page 97: 本文中の警告通知
日本語 3 概要 本文中の警告通知 3 概要 危険 この通知は、重傷または致命的な傷害をもたらすリスクを 芝刈機とバッテリー 意味します。 ► 重傷または致命的な傷害は、記載された予防措置を取る ことによって回避することができます。 警告 この通知は、重傷または致命的な傷害をもたらすおそれが あるリスクを意味します。 ► 重傷または致命的な傷害は、記載された予防措置を取る ことによって回避することができます。 注記 この通知は、器物損壊等をもたらすおそれがあるリスクを 意味します。 ► 器物損壊等は、記載された予防措置を取ることによって 回避することができます。 本文中の記号 この記号は、本取扱説明書の章を示します。 1 ハンドルバー ハンドルバーは、芝刈機を保持、操作、運搬するために 使用します。 2 コントロールバー コントロールバーをロックボタンと組み合わせて使用す ることにより、ブレードのオンとオフを切り替えること ができます。 0478-131-9541-A... - Page 98 日本語 3 概要 3 ロックボタン # 機械番号のある銘板 ロックボタンをコントロールバーと組み合わせて使用す ることにより、ブレードのオンとオフを切り替えること 記号 ができます。 芝刈機またはバッテリーに示されている記号は、次のよう 4 回転ノブ な意味を持っています。 回転ノブは、上部ハンドルバーと下部ハンドルバーを固 この記号は起動キーを示します。 定しており、ハンドルバーを折り畳むために使用しま す。 この記号はキーの差し込み口を示します。 5 排出板 排出板によって排出口をふさぎます。 6 輸送ハンドル この記号は芝刈機の重量を示します。 輸送ハンドルは、芝刈機を運搬するために使用します。 7 フラップ フラップはバッテリーと起動キーの蓋です。 8 起動キー 起動キーは芝刈機を起動します。 1つのLEDが赤色に点灯する バッテリーが高温 または低温になっていることを示します。 9 ロックレバー ロックレバーは、バッテリーコンパートメントにバッテ リーを保持します。 4つのLEDが赤色に点滅する場合、...
-
Page 99: 安全に関する重要事項
警告記号 バッテリーを熱や炎から保護してください。 芝刈機またはバッテリーに示されている警告記号は、次の ような意味を持っています。 安全上の注意事項と対処方法に従ってくださ い。 バッテリーを雨や湿気から保護し、 液体に浸け ないでください。 取扱説明書を読み、内容を理解し、保管してく ださい。 バッテリーの許容温度範囲に従ってください。 芝刈機から高速で飛散する飛来物に関する安全 上の注意事項とその対処方法に従ってください。 適切な使用 回転中のブレードに触れないでください。 STIHL RMA 235芝刈機は乾燥した芝を刈るために使用する ものです。 本芝刈機では、STIHL AKバッテリーを電源として使用しま す。 休憩中や、輸送、保管、メンテナンス、修理の 警告 際にはバッテリーを取り外してください。 ■ STIHLが芝刈機用として承認していないバッテリーを使 用すると、発火や爆発の原因になる場合があります。 そ の結果、大けがや命にかかわる重傷、資産の損害につな 芝刈機を雨や湿気から保護してください。 がる場合があります。 ► 本芝刈機では、STIHL AKバッテリーを使用してくださ い。 ■ 芝刈機またはバッテリーを適切に使用しないと、大けが 作業停止、輸送、保管、メンテナンス、修理の... -
Page 100: 使用者の条件
– 芝刈機やバッテリーの危険性を認識または判断する ■ 作業に適さない履物を履いていると、足元が滑る原因に ことができる。 なります。 けがをしないように注意してください。 – 事故や損傷の責任を使用者が負うことを理解してい ► 丈夫で、つま先が覆われていて、滑りにくい靴を履い る。 てください。 – 法定年齢に達しているか、国内規制に従って専門家 ■ ブレードを研磨する際に、物質粒子が飛散する場合があ の指導下でトレーニングを受けている。 ります。 けがをしないように注意してください。 ► サイズの合った安全メガネを着用してください。 適切 – 芝刈機を初めて使用する前に、STIHL販売店または な安全メガネは、EN 166または国内規制に従って試験 有資格者から指導を受けたことがある。 が行われており、該当するマークが付いた製品が市販 – アルコール、医薬品、薬物による不調が発生してい されています。 ない。 ► 丈夫な素材でできた作業手袋を使用してください。 ► ご不明な点がございましたら、 STIHL販売店にお問い 合わせください。 0478-131-9541-A... -
Page 101: 作業エリアおよび周辺環境
あります。 可燃性雰囲気や爆発性雰囲気では、火花は発 火や爆発の原因になります。 その結果、大けがや命にか かわる重傷、資産の損害につながる場合があります。 安全に関する条件 ► 引火または爆発が起きやすい環境下では作業しないで 4.6.1 芝刈機 ください。 次の条件を満たす場合、芝刈機は安全な状態です。 4.5.2 バッテリー – 芝刈機が損傷していない。 警告 – 芝刈機が清潔で濡れていない。 – 操作部が正常に機能し、改造されていない。 ■ 見物人、子供、動物はバッテリーの危険性を認識/判断で きません。その結果、見物人、子供、動物が重傷を負う – ブレードが正しく取り付けられている。 おそれがあります。 – 本芝刈機用のSTIHL純正アクセサリーのみが取り付けら ► 作業エリアに見物人、子供、動物を近付けないでくだ れている。 さい。 – アクセサリーが正しく取り付けられている。 ► バッテリーを無人のまま放置しないでください。 ► 子供がバッテリーで遊ばないよう注意してください。 0478-131-9541-A... - Page 102 ► ブレードは正しく取り付けてください。 ► 芝刈機を改造しないでください。 ► ブレードは適切に研磨してください。 ► コントロールが機能しない場合、 芝刈機を使用しない ► ブレードの厚さまたは幅が最小値未満の場合、 ブレー でください。 ドを交換してください。 ► 本芝刈機用のSTIHL純正アクセサリーのみを取り付け ► ブレードのバランス調整はSTIHL販売店に依頼してく てください。 ださい。 ► 本取扱説明書の指示に従って、ブレードを取り付けて ► ご不明な点がございましたら、 STIHL販売店にお問い ください。 合わせください。 ► 本取扱説明書またはアクセサリーの取扱説明書の指示 4.6.3 バッテリー に従って、アクセサリーを取り付けてください。 バッテリーは、以下の条件が満たされている場合、安全な ► 芝刈機の開口部に物を差し込まないでください。 状態です: ► キーの差し込み口には絶対に金属を接触させないでく – バッテリーが損傷していない。...
- Page 103 日本語 4 安全に関する重要事項 ► バッテリーを分解しないでください。 ► 急な斜面では芝刈りをしないでください。 ► 摩耗したり、損傷したりした警告標示は交換してくだ ■ 使用中はブレードが回転し、大変危険です。 大けがにつ さい。 ながるおそれがありますので注意してください。 ► 回転中のブレードに触れないでください。 ■ 損傷したバッテリーから液が漏れ出すことがあります。 液が皮膚に付着したり、目に入ったりすると、炎症を起 ► ブレードに物が詰まった場合、 芝刈機のス きることがあります。 イッチを切り、起動キーを抜いて、バッテ ► バッテリー液に触れないよう注意してください。 リーを取り外します。 詰まりを除去するの は、必ずその後にしてください。 ► 皮膚に付着したときは、患部を大量の水と石鹸ですす いでください。 ■ 作業中の芝刈機は振動する場合があります。 ► 手袋を着用してください。 ► 目に入ったときは、大量の水で 15 分以上すすぎ、治療 を受けてください。...
- Page 104 日本語 4 安全に関する重要事項 危険 4.8.2 バッテリー 警告 ■ 通電している電線の近くで作業すると、ブレードが電線 に接触して、電線が損傷する可能性があります。 その結 ■ バッテリーは、すべての周囲条件に対して保護されてい 果、大けがや命にかかわる重傷につながる場合がありま るわけではありません。特定の周囲条件にさらされると、 す。 バッテリーは損傷し、器物損壊が生じるおそれがありま ► 通電している電線の近くでは、作業しないでください。 す。 ■ 雷が発生しやすい天候の場合は、落雷に遭う可能性があ ► 損傷したバッテリーは絶対に運搬しないでください。 ります。 その結果、大けがや命にかかわる重傷につなが ► バッテリーは、非導電性のパッケージを使用して保管 る場合があります。 してください。 ► 雷が発生しやすい状況では、作業しないでください。 ■ バッテリーは運搬中に倒れたり、ずれたりするおそれが あります。その結果、負傷したり、器物が損壊したりす 運搬 るおそれがあります。 ► バッテリーは、内部で固定が可能なパッケージを使用 4.8.1 芝刈機...
-
Page 105: 清掃、メンテナンス、および修理
警告 果、大けがにつながるおそれがありますので注意してく ださい。 ■ 子供はバッテリーの危険性を認識または判断することが ► 本取扱説明書の指示に従って、芝刈機、ブレード、バ できません。 そのため、大けがをするおそれがあります。 ッテリーを清掃してください。 ► バッテリーは、子供の手の届かない場所に保管してく ■ 芝刈機、ブレード、バッテリーを適切にメンテナンスま ださい。 たは修理しないと、コンポーネントが正常に作動せず、 安全装置が機能しない場合があります。 その結果、大け ■ バッテリーは、すべての環境条件に対して保護されてい がや命にかかわる重傷につながるおそれがあります。 るわけではありません。 環境条件によっては、バッテリ ーが損傷する場合があります。 ► 芝刈り機やバッテリーをご自分でメンテナンスまたは 修理しないでください。 ► バッテリーは清潔で乾燥した状態に保ってください。 ► 芝刈り機やバッテリーをメンテナンスまたは修理する ► バッテリーは鍵のかかる部屋に保管してください。 必要がある場合は、 STIHL販売店にお問い合わせくだ ► バッテリーは、芝刈機や充電器とは別の場所に保管し さい。 てください。 0478-131-9541-A... -
Page 106: 芝刈機の運転準備
6 バッテリーの充電、LED しないように注意してください。 ► ブレードが冷めるまで待ってください。 ► 丈夫な素材でできた作業手袋を使用してください。 バッテリーの充電 充電時間は、バッテリーの温度、周囲温度などの複数の要 5 芝刈機の運転準備 因によって変化します。実際の充電時間は、規定の充電時 間とは異なる場合があります。規定の充電所要時間につい ては、右記を参照してください:www.stihl.com/charging- times 芝刈機の運転準備 ► STIHL AL 101、300、500 充電器の取扱説明書に従ってバ 作業を始める前に、以下の手順を実施してください。 ッテリーを完全に充電します。 ► 次のコンポーネントが安全な状態であることを確認しま す。 充電状態 – 芝刈機(@ 4.6.1) – ブレード(@ 4.6.2) 80-100% – バッテリー(@ 4.6.3) 60-80% 40-60% ► バッテリーを点検します(@ 11.3)。... -
Page 107: バッテリーのLed
日本語 7 芝刈機の組み立て バッテリーのLED ► 下部ハンドルバー(1)の穴を芝刈機の穴と一致させま す。 LEDは、バッテリーの充電状態や不具合を示します。 LED ► スクリュー(3)をワッシャー(2)とともに、外側から は、緑色または赤色に点灯または点滅する場合があります。 下部ハンドルバー(1)の穴と芝刈機(4)の穴に入れて LEDが緑色に点灯または点滅する場合、充電状態を示して ねじ込み、3 Nmのトルクで締め付けます。 います。 下部ハンドルバー(1)の両側が芝刈機(4)にしっかり ► LEDが赤色に点灯または点滅する場合、 不具合を解決す と取り付けられていることを確認します。 る必要があります(@ 19.1)。 芝刈機またはバッテリーに不具合があります。 7 芝刈機の組み立て ハンドルバーの取り付け ► 芝刈機のスイッチを切り、起動キーを抜いて、バッテリ ーを取り外します。 ► 芝刈機を平な場所に置きます。 ► 上部ハンドルバー(5)の穴を下部ハンドルバー(1)の 穴と一致させます。 ► ケーブル(10)をケーブルクリップ(8)に取り付けま す。 ► ケーブルのある側で、スクリュー(6)を外側からケーブ ルクリップ(8)の穴、上部ハンドルバー(5)と下部ハ... -
Page 108: ハンドルバーの展開と折り畳み
日本語 7 芝刈機の組み立て ► 両側で、回転ノブ(9)をスクリュー(6)に取り付け、 ねじ込みます。 上部ハンドルバー(5)が下部ハンドルバー(1)にしっ かりと取り付けられていることを確認します。 ► ケーブルクリップ(7)、(12)をケーブルに取り付けま す。 ► ケーブルクリップ(7)を上部ハンドルバー(5)に押し 付けて、はめ込みます。 ► ケーブルクリップ(12)を下部ハンドルバー(1)に押 し付けて、はめ込みます。 いったん取り付けたハンドルバーは、分解しないでくださ い。 ハンドルバーの展開と折り畳み 7.2.1 ハンドルバーの展開 ► 芝刈機のスイッチを切り、起動キーを抜いて、バッテリ ーを取り外します。 ► 芝刈機を平な場所に置きます。 ► 上部ハンドルバー(2)を展開し、片手で保持します。 ケ ーブル(4)が損傷していないことを確認します。 ► 回転ハンドル(1)を締め付けます。 ハンドルバー(2)が芝刈機にしっかりと取り付けられて いることを確認します。 上部ハンドルバー(2)が下部ハンドルバー(3)にしっか りと取り付けられていることを確認します。 7.2.2 ハンドルバーの折り畳み 運搬時や保管時に、ハンドルバーを折り畳んでコンパクト にすることができます。... - Page 109 日本語 7 芝刈機の組み立て 収草ボックスの組み立て、取り付けおよび取 り外し 7.3.1 収草ボックスの組み立て ► 収草ボックス上部(1)を収草ボックス下部(2)に取り 付けます。 ► 内側から穴(4)にピン(3)を押し込みます。 ► 収草ボックス上部(1)を下方へ押し込みます。 カチッという音がして、収草ボックス上部がはめ込まれ ます。 ► 回転ハンドル(1)を緩め、簡単に回転する状態にしま 7.3.2 収草ボックスの取り付け す。 ► 芝刈機のスイッチを切ります。 ► ケーブル(3)を損傷しないように注意しながら、上部ハ ► 芝刈機を平な場所に置きます。 ンドルバー(2)を前方に折り畳みます。 ► 排出板(1)を開き、開いたままにします。 ► 収草ボックス(2)のハンドル(3)をつかみ、フック (4)をマウント(5)に取り付けます。 0478-131-9541-A...
-
Page 110: バッテリーの取り外しと取り付け
日本語 8 バッテリーの取り外しと取り付け ► 排出板(1)を収草ボックス(2)の上に下ろします。 7.3.3 収草ボックスの取り外し ► 芝刈機のスイッチを切ります。 ► 芝刈機を平な場所に置きます。 ► 排出板を開き、開いたままにします。 ► ハンドルを上方向に引いて、収草ボックスを取り外しま す。 ► 排出板を閉じます。 8 バッテリーの取り外しと取り付け ► ロックレバー(2)を押します。 バッテリー(3)のロックが解除されます。 ► バッテリー(3)を取り外します。 バッテリーの取り付け ► フラップ(1)を閉じます。 9 始動キーの抜き差し 起動キーの挿入 ► 芝刈機を平な場所に置きます。 ► フラップ(1)を完全に開きます。 ► バッテリー(2)をバッテリーコンパートメント(3)の 奥まで押し込みます。 バッテリー(2)がはまるとカチッという音が聞こえ、ロ ックされます。 ►... -
Page 111: 芝刈機のスイッチの操作
10 芝刈機のスイッチの操作 ロックボタンとコントロールバー ► 起動キーを抜いてください。 10.1 ブレードの作動と停止 ► バッテリーを取り外してください。 ► ロックボタンを押して、放します。 10.1.1 ブレードの作動 ► コントロールバーをハンドルバーの方向に完全に引いて ► 芝刈機を平な場所に置きます。 から、放します。 ► ロックボタンまたはコントロールバーの動きが悪い場合 や元の位置に戻らない場合は、 芝刈機の使用を中止し、 STIHL販売店にご連絡ください。 ロックボタンまたはコントロールバーに不具合がありま す。 ブレードの作動 ► 起動キーを差し込みます。 ► バッテリーを取り付けます。 ► 右手でロックボタンを押し、そのまま保持します。 ► 左手でコントロールバーをハンドルバーの方向に完全に ► 右手でロックボタン(1)を押し、そのまま保持します。 引き、親指をハンドルバーにかけた状態で保持します。 ブレードが回転します。 ► 左手でコントロールバー(2)をハンドルバー(3)の方... -
Page 112: バッテリーのテスト
– 刃付け角c ► ブレードの厚さまたは幅が最小値未満の場合、 ブレード ► ハンドルバーを両手で握り、親指をハンドルバーにかけ を交換してください(@ 20.2)。 た状態で保持します。 ► 刃付け角が適切になっていない場合、 ブレードを研磨し ます(@ 20.2)。 12.2 刈高の調整 ► ご不明な点がございましたら、 STIHL販売店にお問い合 刈高は次の5段階に設定できます。 わせください。 – 25 mm = 位置1 11.3 バッテリーのテスト – 35 mm = 位置2 ► バッテリーのボタンを押します。 – 45 mm = 位置3 LED が点灯または点滅します。... -
Page 113: 芝刈り
日本語 12 芝刈機の使用 12.3 芝刈り ► ハンドルで芝刈機を保持します。 ► レバー(2)を外側に押し、そのまま保持します。 ► レバーを上げ下げして、芝刈機を希望の刈高に調整しま す。 現在の刈高は、刈高表示(3)で読み取ることができま す。 ► レバー(2)を放します。 芝刈機の設定が整います。 ► 芝刈機を適切にコントロールしながら、ゆっくりと前方 に押します。 12.4 ECOモード STIHLコードレス芝刈機は、作業時の条件を検出し、ブレ ード回転数を自動的に調整します。 これには、バッテリーの寿命を延長する効果があります。 0478-131-9541-A... -
Page 114: 収草ボックスを空ける
日本語 13 作業後 12.5 収草ボックスを空ける ► 反対の手で、下部ハンドルを保持します。 ► 収草ボックスを空にします。 ► 収草ボックスを閉じます。 ► 収草ボックスを取り付けます。 13 作業後 13.1 作業後の整備 ► 芝刈機のスイッチを切り、起動キーを抜いて、バッテリ ーを取り外します。 ブレードによって生成された空気の流れにより、インジケ ► 芝刈機が濡れている場合、 芝刈機を乾かします。 ーター(1)が持ち上がります。 収草ボックスがいっぱいに ► バッテリーが濡れている場合、 バッテリーを乾かします。 なると、空気の流れが停止します。 空気の流れが非常に少 ► 芝刈機を清掃します。 なくなると、インジケーター(2)は静止状態に戻ります。 ► バッテリーを清掃します。 これは、収草ボックスを空にする必要があることを示しま。 空気の流れが弱まると、インジケーターの機能が制限され ます。 湿った芝、密集した芝、丈の長い芝などの外的な影 14 運搬... -
Page 115: バッテリーの運搬
► 芝刈機のスイッチを切り、バッテリーを取り外します。 ► バッテリーが安全な状態にあることを確認します。 ► 次の条件に従って、バッテリーを梱包してください。 16.1 清掃時の芝刈機の置き方 – 電気を通さないパッケージを使用する。 ► 芝刈機のスイッチを切り、起動キーを抜いて、バッテリ – バッテリーがパッケージ内で動かない。 ーを取り外します。 ► パッケージが動かないように固定します。 ► 芝刈機を平な場所に置きます。 バッテリーには、危険物の輸送要件が適用されます。 バッ ► 収草ボックスを取り外します。 テリーは、UN 3480(リチウムイオンバッテリー)に分類 され、国連勧告輸送試験(UN Manual of Tests and Criteria, Part III, subsection 38.3)に従って試験済みです。 輸送手順については、 www.stihl.com/safety-data-sheets を 参照してください。 0478-131-9541-A... -
Page 116: 芝刈機の清掃
日本語 17 整備 16.3 バッテリーの清掃 ► バッテリーを、湿らせた布で拭きます。 17 整備 17.1 ブレードの取り外しと取り付け 17.1.1 ブレードの取り外し ► 芝刈機のスイッチを切り、起動キーを抜いて、バッテリ ーを取り外します。 ► ハンドルバー(1)を持って芝刈機を横に傾け、横倒しに ► 芝刈機を横に傾けて、横倒しにします。 します。 16.2 芝刈機の清掃 ► 芝刈機のスイッチを切り、起動キーを抜いて、バッテリ ーを取り外します。 ► 湿った布で芝刈機を清掃します。 ► 柔らかいブラシか湿った布で排出口を清掃します。 ► バッテリーコンパートメントから異物を除去し、湿った 布でバッテリーコンパートメントを清掃します。 ► ペンキ用のはけか柔らかいブラシで、バッテリーコンパ ートメントの電気接点を清掃します。 ► ブレード(1)を片手で保持します。 ► 矢印の方向にスクリュー(2)を緩め、カプラー(3)ご と取り外します。... -
Page 117: ブレードの研磨とバランス調整
日本語 18 修理 ► ブレードを研磨します。 刃付け角を確認し、ブレードを 冷まします(@ 20.2)。 研磨中にブレードが青く変色し(焼け)てはいけませ ん。 ► ブレードを取り付けます。 ► ご不明な点がございましたら、 STIHL販売店にお問い合 わせください。 18 修理 ► ブレードの接触面とブレード軸受けを清掃します。 18.1 芝刈機の修理 ► 湾曲した羽部分を上に向けて、芝刈ブレード(1)をブレ 芝刈り機やブレードをご自分で修理しないでください。 ード軸受けに取り付けます。 ► 芝刈機またはブレードが損傷している場合、 芝刈機また ► ブレード軸受けの位置決め突起部(4)を芝刈ブレードの はブレードの使用を中止し、STIHL販売店にご連絡くだ くぼみに合わせます。 さい。 ► 芝刈ブレード(1)を片手で保持し、新しいカプラー ► 警告ラベルが読みにくいまたは損傷している場合、 STIHL (3)を取り付けます。... -
Page 118: トラブルシューティング
► バッテリーを取り外してください。 ます。 ► バッテリーを冷ますか温めます。 3つのLEDが赤色 芝刈機に不具合がありま ► 起動キーを抜いてください。 に点滅する す。 ► バッテリーを取り外してください。 ► バッテリーコンパートメントの電気接点を清掃し ます。 ► バッテリーを取り付けます。 ► 芝刈機のスイッチを入れます。 ► 依然として3つのLEDが赤色に点滅する場合、 芝 刈機の使用を中止し、STIHL販売店にご連絡くだ さい。 3つのLEDが赤色 芝刈機が高温になっていま ► 起動キーを抜いてください。 に点灯する す。 ► バッテリーを取り外してください。 ► 芝刈機を冷まします。 4つのLEDが赤色 バッテリーに不具合がある ► バッテリーを取り外して、再度取り付けます。 に点滅する ことを示します。... - Page 119 日本語 19 トラブルシューティング 不具合 バッテリーのLED 原因 対処方法 芝刈機またはバッテリーが ► 起動キーを抜いてください。 湿っています。 ► バッテリーを取り外してください。 ► 芝刈機を清掃します。 ► 芝刈機またはバッテリーを乾かします。 ブレードにかかる抵抗が大 ► 刈高を高く設定します。 きすぎます。 ► 草丈が低い場所で芝刈機のスイッチを入れます。 ブレードの周囲に詰まりが ► 芝刈機を清掃します。 あります。 運転中に芝刈機が停 3つのLEDが赤色 芝刈機が高温になっていま ► 起動キーを抜いてください。 止する に点灯する す。 ► バッテリーを取り外してください。 ► 芝刈機を冷まします。 ► 芝刈機を清掃します。 ►...
- Page 120 日本語 19 トラブルシューティング 不具合 バッテリーのLED 原因 対処方法 ブレードの切れ味が悪くな ► ブレードを研磨し、バランスを調整します。 っているか、ブレードが摩 耗しています。 ブレードにかかる抵抗が大 ► 刈高を高く設定します。 きすぎます。 ► 短い芝を刈ります。 バッテリーコンパー バッテリーコンパートメン ► 芝刈機を清掃します。 トメントに取り付け トのガイド部または電気接 たバッテリーを取り 点が汚れています。 外せない バッテリーを充電器 1つのLEDが赤色 バッテリーが高温または低 ► バッテリーを充電器に挿入したまま放置します。 に取り付けたが、充 に点灯する 温になっていることを示し バッテリーの温度が許容温度範囲に達すると、充 電が始まらない ます。 電が自動的に始まります。 芝がきれいに刈れな ブレードの切れ味が悪くな...
-
Page 121: 技術仕様
日本語 20 技術仕様 – 重量(kg):定格ラベルを参照 20 技術仕様 – 運転/保管時の許容温度範囲:-10°Cから+50°Cまで 20.1 STIHL RMA 235.0芝刈機 20.4 騒音値と振動値 音圧レベルのK値は2.0 dB(A)です。 音響出力レベルの – 使用可能バッテリー: STIHL AK K値は1.5 dB(A)です。 振動値のK値は0.9 m/s²です。 – 重量(バッテリーを除く): 14 kg – EN 60335-2-77に従って測定された音圧レベルL : – 収草ボックスの最大容量: 30 l 76 dB(A)... -
Page 122: スペアパーツおよびアクセサリー
従わないと、感電、火災、あるいは重傷につながるおそれ があります。 すべての安全上の注意事項と手順を今後も参 これらの表示は、STIHL 純正の交換部品と 照できるように保管してください。 STIHL 純正のアクセサリーに付けられていま す。 STIHL 社は、STIHL純正の交換部品とアクセサリーの使用 23.2 トレーニング をお勧めしています。 a) 取扱説明書をよくお読みになり、 機械のコントロールお STIHL 純正の交換部品とSTIHL 純正のアクセサリーは、 よび正しい使用方法を十分に理解してください。 STIHLサービス店から入手できます。 b) 子供や使用手順を理解していない人には芝刈機を使用さ せないでください。 地域の規制により使用者の最低年齢 21.2 重要な交換部品 が規定されている場合があります。 c) 他の人、特に子供、または動物の付近では、絶対に芝刈 – ブレード: 6311 702 0110 りを行わないでください。 – ブレード固定スクリュー: 9018 321 1800 d) 機械を操作する人または使用者は、第三者や第三者の資... -
Page 123: 取り扱い
日本語 23 芝刈機の安全情報 23.4 取り扱い – 排出口などの詰まりを除去する前 – 芝刈機の点検、清掃、その他の作業を行う前 a) 必ず日中か、適切な人工照明の下で芝刈りを行ってくだ – 異物にぶつかった後。 この場合、芝刈機に損傷がない さい。 か点検し、必要な修理を行ってから芝刈機を再始動し b) 芝が湿っているときは、機械の使用をできる限り避けて て使用します。 ください。 c) 斜面では安定性を常に確保してください。 芝刈機が過度に振動し始めたら、すぐに点検する必要が あります。 d) 歩く速さで機械を前進させてください。 – 損傷がないか点検します。 e) 斜面での芝刈りでは、傾斜に沿った方向ではなく、斜面 – 損傷している部分に必要な修理を行います。 を横切る方向に刈り進んでください。 – すべてのナット、ピン、ボルトがしっかりと固定され f) 斜面で向きを変えるときは、特に注意してください。 ていることを確認します。 g) 急な斜面での芝刈りに使用しないでください。 h) 自分を中心にして芝刈機の向きを変えるときや、芝刈機... - Page 124 0478-131-9541-A GEbJ www.stihl.com *04781319541A* 0478-131-9541-A...