Table of Contents
Advertisement
Quick Links
Advertisement
Table of Contents

Related Manuals for NCR POS XR8


Summary of Contents for NCR POS XR8
- Page 1 User Guide NCR POS XR8/XR8c (7607) B005-0000-2436 Issue C...
- Page 2 The product described in this document is a licensed product of NCR Corporation. NCR is a registered trademark of NCR Corporation. NCR POS is a trademark of NCR Corporation in the United States and/or other countries. Other product names mentioned in this publication may be trademarks or registered trademarks of their respective companies and are hereby acknowledged.
- Page 3 Audience This book is written for hardware installer/service personnel, system integrators, and field engineers. Notice: This document is NCR proprietary information and is not to be disclosed or reproduced without consent. Safety Requirements The NCR POS XR8/XR8c (7607) conforms to all applicable legal requirements. To view the compliance statements see the NCR POS Terminals Safety and Regulatory Statements...
- Page 4 References • NCR POS XR8/XR8c (7607) User Guide (B005-0000-2436) • NCR POS XR8/XR8c (7607) Site Preparation Guide (B005-0000-2437) • NCR POS XR8/XR8c (7607) Hardware Service Manual (B005-0000-2438) • NCR POS XR8/XR8c (7607) Parts Identification Manual (B005-0000-2439) • NCR POS XR8/XR8c (7607) Power Matrix (B005-0000-2440)
-
Page 5: Table Of Contents
Front Facing I/O Features Rear Facing I/O Features Label Locations Displays X-Series Displays XL Series Displays Touch Displays NCR 5954 DynaKey Display NCR 5965 Display NCR 5966 Display NCR 5967 Display Customer Displays NCR POS 5975-1xxx Customer Display NCR POS 5976 Customer Display... - Page 6 Release 1.x and 2.x Release 3.x (XR8c) Other I/O External Connections Chapter 3: Hardware Installation Installation Restrictions Installing a Display NCR X-Series Displays (5968/5985) Video Cable Connections Data and Power Cable Connections NCR 5954 DynaKey Display Video Cable Connections Data and Power Cable Connections...
- Page 7 Keyboard and Mouse Connections NCR 5932-2800 60-Key Keyboard NCR 5932-5715 "Big Ticket" USB Keyboard NCR 5932-6574 Compact 104-Key PS/2 Keyboard NCR 5932-6674 POS Compact Alphanumeric USB Keyboard 62 NCR 5932-7200 78-Key Programmable PS/2 Keyboard Replacing the Storage Drive Release 1.x and 2.x...
- Page 8 Change Settings Change Network Settings Change Password Replace Recovery Image Change Language Creating a Disk Image Chapter 7: BIOS Setup Entering Setup How to Select Menu Options Restoring Factory Settings BIOS Default Values Main Menu Advanced Menu Chipset Security Boot Menu Chapter 8: BIOS Updating Procedure Prerequisites Creating a Bootable USB Memory Drive...
- Page 9 Touch Screen Cleaning Procedures...
- Page 10 viii Revision Record Issue Date Remarks Jan 2016 First Issue Aug 2017 Added Release 2.0 content Oct 2017 Added Release 3.0 content (XR8c/7607 Compact)
-
Page 11: Chapter 1: Product Overview
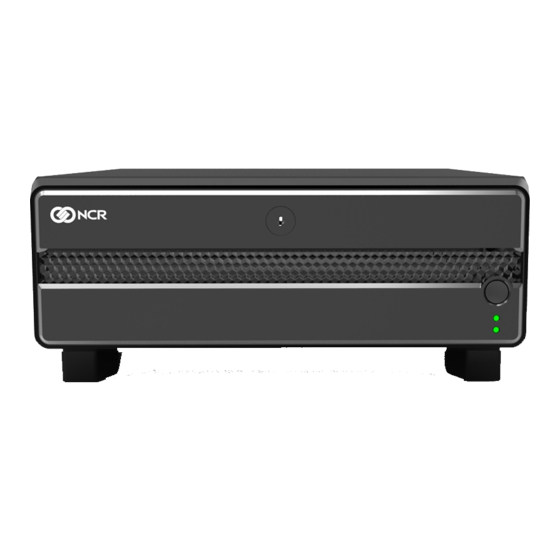
Product Overview Chapter 1: The NCR POS XR8 (also known as NCR POS 7607) is the next generation of POS. The XR8 will revolutionize the modular POS market by providing unmatched performance, the smallest cabinet in its class, and a unique cabling option for front or rear I/O, enabling retailers to enhance the checkout experience, improve operational efficiency, and reduce cost of ownership. -
Page 12: Connectivity
Product Overview Connectivity Release 1.x • 10 USB ports (11 including front panel) • 7 x 12V Powered USB • 1 x 24V Powered USB (printer) • 3 x 5V USB (2 x USB 3.0 rear, 1 USB 2.0 front (not an every unit item)) •... -
Page 13: Release 2.X With Ups Connectivity (Front I/O Only)
Product Overview Release 2.x • 10 USB ports (11 including front panel) • 7 x 12V Powered USB • 1 x 24V Powered USB (printer) • 3 x 5V USB (2x USB 3.0 rear, 1 USB 2.0 front (not an every unit item)) •... -
Page 14: Release 3.X Motherboard Base Connectivity
Product Overview Release 3.x Motherboard Base Connectivity • 4 USB ports • 1 x 12V Powered USB • 1 x 24V Powered USB (printer) • 2 x 5V USB • 2 x Powered serial ports • 2 x DisplayPort++ • 1 x Cash drawer port (Optional 2 cash drawer capability) •... -
Page 15: Product Ids
Product Overview Product IDs Release 1.x Major Model 7607-1100-8801 XR8, Celeron, No Memory, Diskless (Black) 7607-1300-8801 XR8, Core i3, No Memory, Diskless (Black) 7607-1500-8801 XR8, Core i5, No Memory, Diskless (Black) Release 2.x Major Model 7607-2100-8801 XR8 (Dual Display Port), Celeron, No Memory, Diskless (Black) 7607-2180-8801 XR8 (Dual Display Port), Celeron, No Memory, Diskless (Black), 7607-2300-8801... -
Page 16: Release 3.X
Product Overview Release 3.x Major Model 7607-3100-8801 XR8c (Dual Display Port), Celeron, No Memory, Diskless (Black) 7607-3300-8801 XR8c (Dual Display Port), Core i3, No Memory, Diskless (Black) 7607-3500-8801 XR8c (Dual Display Port), Core i5, No Memory, Diskless (Black) -
Page 17: Front And Rear Facing I/O (Release 1.X And 2.X Only)
Product Overview Front and Rear Facing I/O (Release 1.x and 2.x Only) The XR8's innovative design allows the I/O to face the front or rear depending on the needs of the customer. Note: Some features are only available for a single orientation. Front Facing I/O Features •... -
Page 18: Label Locations
Product Overview Label Locations The serial number and model number are included on the Certification Label located on the bottom of the terminal. A Microsoft Certificate of Authenticity (COA) label is included if the terminal is ordered and shipped with a pre-installed Microsoft operating system. - Page 19 Product Overview A second group of labels are located inside the front bezel plate next to the Motherboard sled.
-
Page 20: Displays
Product Overview Displays X-Series Displays The NCR RealPOS X-Series Displays (also known as NCR 5968 and NCR 5985) offer an innovative design, multi-touch capability, ruggedized packaging, and more. The X- Series displays are an ideal complement to any point-of-sale (POS) terminal. - Page 21 • Video Interface: DisplayPort, HDMI, VGA, DVI through HDMI • Physical Mounting Interface: NCR custom and VESA 75mm/100mm mounting compliance • Flexible Cable Length Options (compatibility with NCR 1m and 4m external cables) • Clean (Hidden) Cable Management • Retail hardened display •...
-
Page 22: Xl Series Displays
XL Series Displays NCR XL15 Display (5915) The NCR XL15 Display offers flexibility and ultra–thin design that will look great in any retail environment. The XL15 display features bright, high contrast LCD to make it easy to read. This stylish display is available as a 15–inch, projected capacitive (PCAP) or resistive touchscreen, or LED backlight non–touch. -
Page 23: Touch Displays
1-13 Touch Displays NCR 5954 DynaKey Display The NCR POS 5954 DynaKey is a Point-of-Sale (POS) keypad with a built-in 15- inch flat panel Liquid Crystal Display (LCD). Unique to the DynaKey is a set of ATM-style keys (DynaKeys), which are located beside the display. The functions of these keys... -
Page 24: Ncr 5965 Display
Product Overview NCR 5965 Display The NCR 5965 is a 15-inch TFT Liquid Crystal Display with a capacitive Touch Screen. The display accepts industry-standard RGB video images from a PC motherboard and dynamically resizes VGA (640x480), SVGA (800x600), XGA (1024x768) & SXGA... -
Page 25: Ncr 5966 Display
The NCR 5966 is a 15-inch low cost XGA (1024x768) Liquid Crystal Display with a 5-wire resistive touch screen for operator input. -
Page 26: Customer Displays
It supports both RS232 and USB interfaces. NCR POS 5976 Customer Display The NCR POS 5976–1xxx Customer Display is a 2–line x 20–character Liquid Crystal Display (LCD), which can display any downloadable code page of single byte characters. -
Page 27: Chapter 2: External Connectors
External Connectors Chapter 2: Motherboard Release 1.x Release 2.x Display Port Connections... -
Page 28: Release 3.X (Xr8C)
2-18 External Connectors Release 3.x (XR8c) - Page 29 External Connectors 2-19 The 7607 Motherboard provides 10/100/1000 Base T Ethernet support using Intel I219 “Jacksonville”. The motherboard supports Wake on LAN. The connector features an integrated magnetic module and two LEDs. The LED on the right is yellow and indicates Link/Activity when lit/flashing.
- Page 30 2-20 External Connectors The 7607 Motherboard provides four USB ports: • two (1) Standard 3.0 +5V • one (1) USB+ Power 12V • one (1) USB+ Power 24V These connectors are described below. Standard +5V USB Each Standard +5V USB port is capable of supplying 5V at 0.5A max. •...
- Page 31 This signal is connected to a GPIO on the Super I/O. • Fuse — Polytronics Everfuse P/N: SMD2920P300TF/15 or NCR approved equivalent A single self-healing polyfuse protects the +5V of both ports (12V and 24V USB+ Power ports).
- Page 32 The 24V is fused with a socketed fuse. An overcurrent signal is used to detect when this fuse is open. This signal is connected to a GPIO on the Super I/O. • Fuse — Tyco REUF250U or NCR approved equivalent. A separate return line, 24V_ RET, is used instead of ground to provide noise isolation.
- Page 33 External Connectors 2-23 Serial RS-232 The 7607 Motherboard provides two on board RS-232 ports. • Standard 9 pin “D” shell • Color — All RS-232 ports are Teal in color (Pantone 322C) All of the ports have a shunt to select between +12V, +5V, or normal RI functionality. The default will be +12V.
- Page 34 2-24 External Connectors DisplayPort The 7607 Motherboard provides the standard DisplayPort connector: • Release 1.x – one (1) DisplayPorts • Release 2.x – two (2) DisplayPorts • Release 3.x (XR8c) – two (2) DisplayPorts Pin Signal Name ML_Lane0 (p) ML_Lane0 (n) ML_Lane1 (p) ML_Lane1 (n) ML_Lane2(p)
- Page 35 External Connectors 2-25 HDMI (Release 1.x only) The 7607 Motherboard (Release 1.x) provides one standard HDMI connector. Pin Signal Name TMDS Data2+ TMDS Data2 Shield TMDS Data2- TMDS Data1+ TMDS Data1 Shield TMDS Data1- TMDS Data0+ TMDS Data0 Shield TMDS Data0- 10 TMDS Clock+ 11 TMDS Clock Shield 12 TMDS Clock-...
- Page 36 Retail and Hospitality cash drawer families. A presence detect function signals whether Drawer A, Drawer B, or both are present. The dual drawer adapters allow differentiation of whether drawer A or drawer B is open. A 6-position RJ11 connector (Tyco 5555140-1 or NCR approved equivalent) is used.
- Page 37 External Connectors 2-27 VGA (Optional Tethered Connection) The 7607 Motherboard provides an on board 2x5 connector which is harnessed to a standard VGA connector. Signal Name Pin Pin Signal Name RED_CONN VGAGND GREEN_CONN VGAGND BLUE_CONN VGAGND GHSYNC_CONN 7 VGAGND GVSYNC_CONN 9 10 VCCVGA CRT_SDA 11 12 CRT_SCK...
-
Page 38: Daughter Card (Optional)
2-28 External Connectors Image Recovery Switch The XR8/XR8c has a recessed push-on, push-off type switch on the I/O panel. It is intended to be used for image recovery situations to boot in a separate recovery partition and return to a factory default state. Daughter Card (Optional) Release 1.x and 2.x... -
Page 39: Release 3.X (Xr8C)
External Connectors 2-29 Release 3.x (XR8c) Three 12V Powered USB Option Six 12V Powered USB Option The standard Daughter Card for the 7607 includes the following connections: • +12V USB + Power connectors • Six (6) for Release 1.x and 2.x • Six (6) or three (3) for Release 3.x •... - Page 40 2-30 External Connectors The daughter card interfaces through the Riser Card through a PCIx4 connector with the following pinouts. Note: The orientation of this connector will be 180 degrees from the standard usage of the connector to differentiate it from a standard PCIe connector. Pin Number Side B Side A SIO_FAN_TACH GND...
-
Page 41: Other I/O External Connections
External Connectors 2-31 Pin Number Side B Side A 5VSB 5VSB 5VSB 5VSB JD_DAU AGND AGND SPKR-L SPKR-R Other I/O External Connections There are several additional I/O connections available on the back of the 7607. These are provided from headers on the motherboard cabled up to the chassis. •... - Page 42 2-32...
-
Page 43: Chapter 3: Hardware Installation
Install the NCR POS XR8/XR8c near an electrical outlet that is easily accessible. Use the power cord as a power disconnect device. Do not permit any object to rest on the power cord. Do not locate the POS XR8/XR8c where the power cord can be walked on. -
Page 44: Ncr X-Series Displays (5968/5985)
3-34 Hardware Installation NCR X-Series Displays (5968/5985) The 5968/5985 Display connects to the host terminal using two cables. • DisplayPort, HDMI, or VGA cable for video. Note: Additional audio cable is needed for integrated screen speakers if the VGA cable is implemented. -
Page 45: Video Cable Connections
Hardware Installation 3-35 Video Cable Connections DisplayPort (Video and optional Audio) Connect the DisplayPort Cable to the DisplayPort connectors on both the display and host terminal. Note: Dual DisplayPort++ is only available with a XR8 Release 2.x only. - Page 46 3-36 Hardware Installation HDMI (Video and optional Audio, Release 1.x only) The 5968/5985 Display can use a HDMI Cable for video. Connect the HDMI cable to the HDMI connectors on the display and host terminal.
- Page 47 Hardware Installation 3-37 1. Connect the VGA Cable to the VGA connectors on both the display and host terminal. 2. Optional Audio Cable – Connect an Audio Cable to the Audio connectors on both the display and host terminal.
-
Page 48: Data And Power Cable Connections
3-38 Hardware Installation Data and Power Cable Connections USB12V The USB 12V Cable provides both USB and power to the display. 1. Connect the USB Power Cable to the display Power connector. 2. Connect the USB 12V Cable to 12V Powered USB Port C on the host terminal. - Page 49 Hardware Installation 3-39 External Power Brick A USB Power Cable is used to provide both USB and power to the display when the host terminal does not have a USB 12V port available, but does have an available standard USB port. 1.
-
Page 50: Ncr 5954 Dynakey Display
3-40 Hardware Installation NCR 5954 DynaKey Display The DynaKey connects to the terminal using two cables. • Digital Video Interface (DVI) or VGA cable for video • Powered Universal Serial Bus (USB) for data and power... -
Page 51: Video Cable Connections
Hardware Installation 3-41 Video Cable Connections Connect the cable to the VGA connectors on the DynaKey and terminal. -
Page 52: Data And Power Cable Connections
3-42 Hardware Installation Data and Power Cable Connections Connect the Powered USB Cable to the DynaKey and the Powered USB connector on the terminal. 1. Connect the USB Power Cable to the display Power connector. 2. Connect the USB 12V Cable to 12V Powered USB Port C on the host terminal. -
Page 53: Ncr 5966 Display
Hardware Installation 3-43 NCR 5966 Display The NCR 5966 Display connects to the host terminal using the following cables: • VGA cable for video • USB cable for data • Powered Universal Serial Bus (USB) for power • Audio cable (optional) – Connects to the Audio Connector on the 5966 and the... -
Page 54: Video Cable Connections
3-44 Hardware Installation Video Cable Connections Connect the VGA Cable to the VGA connectors on both the 5966 Touch LCD and host terminal. -
Page 55: Data Cable Connections
Hardware Installation 3-45 Data Cable Connections Connect the included USB Cable to the USB connector on the 5966 and to a USB connector on the host terminal. - Page 56 3-46 Hardware Installation Power Cable Connections Connect the Powered USB Cable to the 5966 and to the Powered 12V USB connector on the host terminal 1. Connect the USB Power Cable to the display Power connector. 2. Connect the USB 12V Cable to 12V Powered USB Port C on the host terminal.
-
Page 57: Installing A Printer
Hardware Installation 3-47 Installing a Printer Printers can be installed by connecting a 24V USB to Power and USB Y cable, or a 24V USB to Power cable and RS232 to RS232 cable. 24V Powered USB Cable 1. Plug in the 24V Powered USB to Power and USB Y cable into the terminal. 2. -
Page 58: 7167 Printer
3-48 Hardware Installation 7167 Printer The 7167 printer is a fast, quiet, relatively small, and very reliable multiple-function printer. It prints receipts, validates and prints checks, and prints on a variety of single- or multiple-part forms. There is no journal as it is kept electronically by the host computer. - Page 59 Hardware Installation 3-49 24V Powered USB and RS232 Cables...
-
Page 60: 7168 Printer
3-50 Hardware Installation 7168 Printer The 7168 printer is a fast, quiet, relatively small, and very reliable multiple-function printer with front and back printing on the receipt paper capability. It prints receipts, validates and prints checks, and prints on a variety of single- or multiple-part forms. There is no journal as it is kept electronically by the host computer. - Page 61 Hardware Installation 3-51 24V Powered USB and RS232 Cables...
-
Page 62: 7197 Thermal Receipt Printer
The 7198 POS™ Receipt on Label printer is a fast, quiet, relatively small, and very reliable printer. It is based on the currently released, and field tested 7198 2ST printer with adaptations to support the NCR Consumable’s Receipt on Label (RoL)/Linerless media. -
Page 63: Installing A Cash Drawer
Note: All NCR Cash Drawers contain circuitry to protect against the drawer solenoid spark back to the terminal. If you are not connecting an NCR Cash Drawer you may need to use the Cash Drawer Adapter Cable (1432-C395-0002), which has this protective... -
Page 64: 2181 Cash Drawer
Hardware Installation 2181 Cash Drawer The NCR 2181 has the same feature and functionality as the NCR 2189, but in a smaller footprint. It can be used as a remote cash drawer for all NCR’s POS configurations or as an integrated cash drawer for the POS XR8 terminal. -
Page 65: 2185 Cash Drawer Fliptop With Locking Lid
Hardware Installation 3-55 2185 Cash Drawer Fliptop with Locking lid The NCR 2185 is a Fliptop Cash Drawer. -
Page 66: 2186 Cash Drawer
3-56 Hardware Installation 2186 Cash Drawer The NCR 2186 POS Cash Drawer is a compact metal chassis drawer with multiple configurations. -
Page 67: Installing Two Cash Drawers
Hardware Installation 3-57 Installing Two Cash Drawers Two cash drawers can be installed to the terminal by using the Cash Drawer Connector Y Cable (497-0009394, 1416-C372-0006). -
Page 68: Keyboard And Mouse Connections
3-58 Hardware Installation Keyboard and Mouse Connections The POS XR8 supports USB and PS/2 type keyboards: • NCR 5932-2800 60-Key Keyboard • NCR 5932-5715 "Big Ticket" USB Keyboard • NCR 5932-6574 Compact 104-Key PS/2 Keyboard • NCR 5932-6674 POS Compact Alphanumeric USB Keyboard •... -
Page 69: Ncr 5932-2800 60-Key Keyboard
Hardware Installation 3-59 NCR 5932-2800 60-Key Keyboard The NCR 5932-2830 60–Key Keyboard is a PS/2 keyboard that is designed for Point–of– Service (POS) applications. It includes 48 assignable function keys and a numeric keypad with 12 keys. All keys are programmable. -
Page 70: Ncr 5932-5715 "Big Ticket" Usb Keyboard
3-60 Hardware Installation NCR 5932-5715 "Big Ticket" USB Keyboard... -
Page 71: Ncr 5932-6574 Compact 104-Key Ps/2 Keyboard
3-61 NCR 5932-6574 Compact 104-Key PS/2 Keyboard The NCR 5932-6574 Compact 104-Key Programmable POS Keyboard is one of the Point- of-Service (POS) keyboards in the NCR 5932 class. The keyboard is a multifunctional keyboard that is two keyboards built into one. -
Page 72: Ncr 5932-6674 Pos Compact Alphanumeric Usb Keyboard
3-62 Hardware Installation NCR 5932-6674 POS Compact Alphanumeric USB Keyboard... -
Page 73: Ncr 5932-7200 78-Key Programmable Ps/2 Keyboard
Hardware Installation 3-63 NCR 5932-7200 78-Key Programmable PS/2 Keyboard The NCR 5932-7200 78-Key Programmable POS Keyboard is designed for the Point-of- Service (POS) application. -
Page 74: Replacing The Storage Drive
3-64 Hardware Installation Replacing the Storage Drive Release 1.x and 2.x Removing the SSD or HDD 1. Remove the front Bezel plate. 2. Turn off the power of the terminal and any connected peripheral devices. Unplug the terminal's power cord. 3. -
Page 75: Installing The Ssd Or Hdd
Hardware Installation 3-65 Installing the SSD or HDD The SSD or HDD is attached to the Hard Drive Plate by four screws on the underside. Note: Refer to the image below for the correct screw configuration according to the Drive type. 1. -
Page 76: Release 3.X (Xr8C)
3-66 Hardware Installation Release 3.x (XR8c) Replacing the SSD 1. Disconnect the power to the terminal. 2. Remove the Sled Cover by unscrewing the two thumb screws and sliding the cover away from the sled. - Page 77 Hardware Installation 3-67 3. Disconnect the SATA Power connector from the Drive.
- Page 78 3-68 Hardware Installation 4. Unscrew the Drive from the Hard Drive chassis. Retain the screws.
- Page 79 Hardware Installation 3-69 5. Slide the drive out of the chassis bracket.
- Page 80 3-70 Hardware Installation 6. Slide in the new drive and secure with the retained screws.
- Page 81 Hardware Installation 3-71 7. Connect the SATA Power connector to the Drive.
- Page 82 3-72 Hardware Installation 8. Replace the Sled Cover and reconnect power to the terminal.
-
Page 83: Replacing The Hdd
Hardware Installation 3-73 Replacing the HDD 1. Disconnect the power to the terminal. 2. Remove the Sled Cover by unscrewing the two thumb screws and sliding the cover away from the sled. - Page 84 3-74 Hardware Installation 3. Unscrew the Bracket from the Chassis. Note: If a SSD is present, follow the steps to remove the SSD prior to removing the HDD. 4. Remove the Bracket and HDD assembly from the Chassis and disconnect the HDD SATA Connector.
- Page 85 Hardware Installation 3-75 5. Remove the HDD from the Bracket. 6. Install the new HDD to the Bracket.
- Page 86 3-76 Hardware Installation 7. Position the HDD and Bracket assembly over the Chassis and connect the SATA Connector to the HDD. 8. Reinstall the Bracket and HDD assembly.
-
Page 87: Chapter 4: Diagnostics
Diagnostics Chapter 4: LED Diagnostic Indicators The two front panel LEDs also function as diagnostic indicators, defined as follows. Note: The cell colors indicate the color of the LED at that particular time. Release 1.x and 2.x Release 3.x (XR8c) - Page 88 4-78 Diagnostics Current Suspect Disk Terminal System Component/ Activity Power LED Debug Path State Operation Failure Normal System ON Operation Normal System ON Flashing Operation with HDD (HDD Activity Access) Normal Unit in Blinking (1/Sec) Operation Suspend (S3) OFF with OFF Not in Standby Present...
- Page 89 Diagnostics 4-79 Current Suspect Disk Terminal System Component/ Activity Power LED Debug Path State Operation Failure POST CPU not • Check for correctly Operating installed CPU • Replace Motherboard POST BIOS Chip BIOS Flashing • Perform BIOS crisis Checksum (4/Sec) recovery Failure •...
- Page 90 4-80 Diagnostics Current Suspect Disk Terminal System Component/ Activity Power LED Debug Path State Operation Failure Boot Time Boot Media HDD is Boot Device: (HDD, LAN) • Check HDD status in BIOS Setup • Check connections between HDD and Motherboard •...
-
Page 91: Chapter 5: Initial Terminal Imaging
Initial Terminal Imaging Chapter 5: Factory default HDD/SSD images for the POS XR8 are distributed on bootable auto- imaging USB Flash Drive media. The following procedures describe how to apply/restore an image on the terminal. Warning: Using this procedure will replace any previously stored OS images created using the Disk Image Backup and Recovery Tool. - Page 92 5-82...
-
Page 93: Introduction
Disk Image Backup and Recovery Chapter 6: Tool Introduction This chapter discusses procedures on how to backup or recover the POS image. The terminal has a recovery tool that performs a complete backup of the whole HDD/SSD. This includes the operating system, all files, data and the database itself if it is installed on the HDD/SSD, making an exact duplicate of everything contained on the terminal. -
Page 94: Running The Recovery Tool
2. Using a pen, stylus, (or similar object) press (and hold) the recessed Recovery Tool Button. While holding the Recovery Tool Button, momentarily press the Power Button. Recovery Tool Button 3. Continue holding the until the NCR logo has flashed on the screen. -
Page 95: Main Screen
Disk Image Backup and Recovery Tool 6-85 Main Screen When the terminal boots the Main Screen is displayed. Check and Repair Disk This button runs Checkdisk, which checks the consistency of the HDD/SSD and the Windows file system. Failures can occurs in the Windows file system and prevent Windows from starting. -
Page 96: Save Or Load Image
6-86 Disk Image Backup and Recovery Tool Save or Load Image This function is used to either Save or Load an image from a device. 1. On the Main Screen, select Save or Load Image. 2. Enter the Password. The factory default password is Recovery1234. -
Page 97: Saving An Image
Disk Image Backup and Recovery Tool 6-87 Saving an Image The Select Image Location screen displays a terminal with three sets of In/Out arrow buttons, indicating the direction of data flow when selected. Arrows pointing away from the terminal are used to Save images to a device. Arrows pointing towards the terminal are used to Load an image. - Page 98 6-88 Disk Image Backup and Recovery Tool Backups to separate slots in the Recovery Tool only increase the total storage required by the amount of data added to the image. When the contents of the OS partition become too large to store in the 8GB local Recovery Partition, then one of the alternate storage methods available (USB or network) should be used to store backups.
- Page 99 Disk Image Backup and Recovery Tool 6-89 2. Select the Button. If this is the first backup performed on this POS, the image is automatically saved as a Site backup.
-
Page 100: Loading An Image
6-90 Disk Image Backup and Recovery Tool If a backup already exists, you have the choice of performing either a Site or User backup. • Site Image - Use this option immediately after all application components have been loaded and set up for initial operation or for base image updates. •... - Page 101 Disk Image Backup and Recovery Tool 6-91 1. Select the arrow that points from the desired load device to the terminal. Example: Select the USBLoad Button. 2. Select the Button.
- Page 102 If you are loading from a network, the Select a Network Drive dialog screen will open. 3. Select the Image Type. • User Image - Most recent routine backup. • Site Image - Image of the terminal after application components were loaded. • Factory Image - The NCR Base Image as shipped from the factory.
- Page 103 Disk Image Backup and Recovery Tool 6-93 4. Select to to apply the image. Caution: All the information in the current productive/working image on the drive is lost with this operation! A progress bar is displayed as the image is applied.
- Page 104 6-94 Disk Image Backup and Recovery Tool A message is displayed when the load is complete. Reboot the POS.
-
Page 105: Change Settings
Disk Image Backup and Recovery Tool 6-95 Change Settings Change Settings. On the Main Screen, Select There are four functions available on the Change Settings screen. • Change Network Settings • Change Password • Replace Recovery Image • Change Language... -
Page 106: Change Network Settings
6-96 Disk Image Backup and Recovery Tool Change Network Settings 1. On the Change Settings Screen, select Change Network Settings. 2. Enter the Password. -
Page 107: Change Password
Disk Image Backup and Recovery Tool 6-97 3. Enter the network configuration settings and then select Enter. Change Password 1. On the Change Settings Screen, select Change Password. 2. Enter the new Password. select Enter. -
Page 108: Replace Recovery Image
6-98 Disk Image Backup and Recovery Tool If you have forgotten/lost the password, select Lost Password. A unique code is generated that you can provide to NCR Support to receive a new temporary password. Replace Recovery Image This feature is used to update the Recovery Tool and the environment that it runs in. -
Page 109: Change Language
Disk Image Backup and Recovery Tool 6-99 2. Select the source of the Recovery Image. 3. Complete the image replacement in the same manner as with the POS Site/User image restore procedures. Change Language Change Language 1. On the Change Settings Screen, select... -
Page 110: Creating A Disk Image
This terminal has a Recovery Button that permits end users to quickly restore a disk backup from a hidden partition on the NCR system storage. To utilize this valuable feature, the image must be created using NCR tools. Tools are available from NCR at: http://www5.ncr.com/support/support_drivers_patches_ radiant.asp?Class=Hospitality/GenDrivers_display... -
Page 111: Chapter 7: Bios Setup
Entering Setup 1. Connect an alphanumeric USB keyboard to the terminal. 2. Apply power to the terminal. 3. When you see the NCR logo displayed, select or F2. How to Select Menu Options The following keyboard controls are used to select the menu options and to make changes to their values. -
Page 112: Bios Default Values
7-102 BIOS Setup BIOS Default Values NCR BIOS Version 2.0.4.0 Note: The following are default BIOS values for NCR BIOS Version 2.0.4.0. Discrepancies may be present if the terminal has a different or new BIOS version. Main Menu Selection Titles Descriptions System Language [English]... -
Page 113: Advanced Menu
Configuration Choice Configuration Choices Notes Settings ► Trusted Computing Configuration Configuration Security Device Support [Enabled] ► NCR POS Hide Setup Items [Yes] Port CF9 Full reset [Disabled] ACPI S5 Shutdown [Enabled] F8 BBS Boot Menu [Enabled] Video Delay in Seconds:... - Page 114 7-104 BIOS Setup Configuration Choice Configuration Choices Notes Settings S3 Video Repost [Disabled] ACPI Low Power SO Idle [Disabled] ► AMT Configuration Intel AMT [Disabled] BIOS Hotkey Pressed [Disabled] MEBx Selection Screen [Disabled] Hide Un-Configure ME [Disabled] Confirmation Prompt MEBx Debug Message [Disabled] Output Un-Configure ME...
- Page 115 BIOS Setup 7-105 Configuration Choice Configuration Choices Notes Settings ► SMART Settings SMART Self Test [Disabled] ► IT 8785 Super IO Configuration . ►Serial Port 1 Configuration . Serial Port [Enabled] . Device Settings IO=3F8h; IRQ=4; . I/O Base Address [0x3F8] .
- Page 116 7-106 BIOS Setup Configuration Choice Configuration Choices Notes Settings Fan Start temperature limit Fan Start PWM PWM Slope [2 PWM] Hardware Health Monitoring Typical (Acceptable Range) CPU VRM Temperature +51°C (less than 55°C) PCH Temperature +51°C (less than 55°C) CPU Die Temperature +46°C (less than 55°C) CPU Fan Speed...
- Page 117 BIOS Setup 7-107 Configuration Choice Configuration Choices Notes Settings Serial Port for Out-of-Band Management/ Windows Emergency Management Services (EMS) Console Redirection [Disabled] . ►Console Redirection Settings ► CPU Configuration Hyper-threading [Enabled] Active Processor Cores [All] Overclocking lock [Disabled] Intel Virtualization [Enabled] Technology Hardware Prefetcher...
- Page 118 7-108 BIOS Setup Configuration Choice Configuration Choices Notes Settings Package C state demotion [Disabled] Package C state [Disabled] undemotion CState Pre-Wake [Enabled] Package C State limit [AUTO] CFG lock [Enabled] ►Power Limit 3 Settings .Power Limit 3 Override [Disabled] ►Power Limit 4 Settings .Power Limit 4 Override [Disabled] ►CPU Thermal Configuration...
- Page 119 BIOS Setup 7-109 Configuration Choice Configuration Choices Notes Settings Major Code None Minor Code None ►Platform Misc Configuration Native PCIE Enable [Enabled] Native ASPM [Disabled] BDAT ACPI Table Support [Disabled] Intel Ready Mode [Disabled] Technology ACPI Debug [Disabled] PTID Support [Enabled] PECI Access Method [DIrect I/O]...
- Page 120 7-110 BIOS Setup Configuration Choice Configuration Choices Notes Settings SATA Test Mode [Disabled] Alternate ID [Disabled] . ►Software Feature Mask Configuration . RAID0 [Enabled] . RAID1 [Enabled] . RAID10 [Enabled] . RAID5 [Enabled] . Intel Rapid Recovery [Enabled] Technology . OROM UI and BANNER [Enabled] .
- Page 121 BIOS Setup 7-111 Configuration Choice Configuration Choices Notes Settings SATA DEVSLEP Idle Timeout [Disabled] Config Serial ATA Port 1/2/3/4/5 Empty If other Ports are in use settings have the possibility of changing. 6 Ports in total. Software Preserve Unknown Port 1/2/3/4/5 [Enabled] Hot Plug [Enabled]...
- Page 122 7-112 BIOS Setup Configuration Choice Configuration Choices Notes Settings PCI Hot-Plug Support [Enabled] PCI Buses Padding I/O Resources Padding [4 K] MMIO 32 bit Resources [16 K] Padding PFMMIO 32 bit Resources [16 K] Padding ► Network Stack Configuration Network Stack [Disabled] ►CSM Configuration CSM Support...
- Page 123 BIOS Setup 7-113 Configuration Choice Configuration Choices Notes Settings Port 60/64 Emulation [Disabled] USB hardware delays and time-outs: USB transfer time-out [20 sec] Device reset time-out [20 sec] Device power-up delay [Auto]...
-
Page 124: Chipset
7-114 BIOS Setup Chipset Configuration Choice Configuration Choices Notes Settings ► System Agent (SA) Configuration VT-d [Enabled] . ►Graphics Configuration . Graphics Turbo IMON Current . Skip Scaning of External [Disabled] Gfx Card . Primary Display [Auto] . . Primary PEG [Auto] . - Page 125 BIOS Setup 7-115 Configuration Choice Configuration Choices Notes Settings . . Spread Spectrum Clock [Off] Chip . . Acive LFP [eDP Port-A] . . Panel Color Depth [18 Bit] . ►Memory Configuation No setting changes possible . Memory RC Version 1.6.0.1 Dependent on device installed.
- Page 126 7-116 BIOS Setup Configuration Choice Configuration Choices Notes Settings . HD Audio [Audio] . Audio DSP [Disabled] . HDA-Link COde Select [Platform Onboard] . iDisplay Audio Disconnect [Disabled] . PME Enable [Disabled] .. ► HD Audio Advanced Configuration .. I/O Buffer Control: ..
- Page 127 BIOS Setup 7-117 Configuration Choice Configuration Choices Notes Settings .. Voice Activity Detection [Intel Wake on Voice] Unable to change .. Audio DSP Pre/Post- Processing Module Support: .. Waves [Disabled] .. DTS [Disabled] .. IntelSst Speech [Disabled] .. Dolby [Disabled] ..
-
Page 128: Security
7-118 BIOS Setup Security Configuration Configuration Choices Notes Choice Settings Administrator Password User Password P0:ST500DM002-1 ► Secure Boot menu Secure Boot [Disabled] Secure Boot Mode [Custom] . ►Key Management . Provision Factory [Disabled] Default keys .. ► Enroll all Factory A confirm screen will display when Default keys this option is selected... -
Page 129: Boot Menu
BIOS Setup 7-119 Boot Menu Configuration Choices Configuration Choice Settings Notes Boot Configuration Setup Prompt Timeout 1 Bootup NumLock State [On] Quiet Boot [Enabled] Boot Option Priorities Fast Boot [Disabled] New Boot Option Policy [Default] Boot mode select [Legacy] Fixed Boot Order Priorities Boot Option #1 [Network] Boot Option #2... - Page 130 7-120...
-
Page 131: Chapter 8: Bios Updating Procedure
NCR Website. The BIOS update can be performed using the following methods: • Bootable USB Memory Device • Network – Refer to the NCR PXE Image Loader User’s Guide (B005-0000-2326) for information about this procedure. Prerequisites The following are required to perform a SPI/BIOS update. -
Page 132: Creating A Bootable Usb Memory Drive
8-122 BIOS Updating Procedure Creating a Bootable USB Memory Drive The downloaded file contains the files necessary to create a bootable USB Memory Drive. 1. Insert a USB drive that is formatted as FAT (or FAT32). 2. Unzip the downloaded files. 3. -
Page 133: Spi/Bios Updating Procedures
BIOS. Note: DMI information that is currently stored in the BIOS is displayed during [Tab] [Pause] power up. Press at the NCR Logo to remove the logo. Press to freeze [Esc] the screen. Press to continue. Make a menu selection and follow the screen prompts (Option 1 is recommended). - Page 134 8-124 BIOS Updating Procedure 1 Update SPI and BIOS - No prompt for Serial/Model/Class unless invalid (Resets ME/AMT configuration/provisioning data) 2 Update BIOS only - No prompt for Serial/Model/Class unless invalid (Keeps ME/AMT configuration/provisioning data) ***** Forced Update of Serial/Model/Class Information ***** 3 Update DMI only - Serial/Model/Class update ONLY (no BIOS/SPI Update) (Only one boot - no need for AC Power removal) 4 Update of SPI and BIOS - Always prompts for Serial/Model/Class...
- Page 135 BIOS Updating Procedure 8-125 Option 3 - Update DMI only - Serial/Model/Class update ONLY (No BIOS or SPI Update) This option lets you enter the DMI information only. The SPI and BIOS are not updated. 1. Highlight Option 3 and press [ENTER]. 2.
- Page 136 8-126 BIOS Updating Procedure Option 5 - Update of BIOS only - Always prompts for Serial/Model/Class This option prompts for Class/Model/Serial information at the beginning of the program and then updates the BIOS only. 1. Highlight Option 5 and press [ENTER]. 2.
-
Page 137: Chapter 9: Configuring Amt
Configuring AMT Chapter 9: Configuring the Terminal Note: Depending on the processor chip set installed in the Terminal, the Terminal Configuration screens might differ slightly from the examples provided. 1. Boot the terminal. - Page 138 9-128 Configuring AMT 2. When you see the NCR logo select [Del] several times to start the BIOS Setup Utility. Aptio Setup Utility - Copyright (C) 2016 American Megatrends, Inc. Main , Advanced . Chipset Boot . Security . Save & Exit...
- Page 139 Chipset Boot . Security . Save & Exit AMT Parameters ► ACPI Settings ► SS RTC Settings ► Trusted Computing ► NCR POS ► CPU Configuration ► SATA Configuration ► AMT Configuration ► Info Report Configuration ► HDD S.M.A.R.T. Status ►...
- Page 140 9-130 Configuring AMT 4. Enable Intel AMT. a. Highlight Intel AMT and select [Enter]. Aptio Setup Utility - Copyright (C) 2016 American Megatrends, Inc. Main . Advanced Chipset Boot . Security . Save & Exit Intel AMT [Disabled] OEMFlag Bit 1: BIOS Hotkey Pressed [Disabled] Enable/Disable...
- Page 141 Configuring AMT 9-131 5. Enable BIOS Hotkey Pressed. a. Hightlight BIOS Hotkey Pressed and select [Enter]. Aptio Setup Utility - Copyright (C) 2016 American Megatrends, Inc. MainAdvanced ChipsetBoot Security Save & Exit Intel AMT [Enabled] OEMFlag Bit 1: BIOS Hotkey Pressed [Disabled] Enable/Disable MEBx Selection Screen...
- Page 142 Note: The first time this program is run you must use the default password, admin (lower case). [admin] [Enter] >> At the prompt, enter the new password (write it down to remember). The password must contain upper, lower, symbol, & numeric characters. Example: Ncr@2016 You must enter the password a second time for verification.
- Page 143 Configuring AMT 9-133 10. Highlight Intel(R) Standard Manageability Configuration and select [Enter]. Intel (R) Management Engine BIOS Extension v11.0.0.0005/Intel(R) ME v11.0.0.1197Copyright (C) 2003-15 Intel Corporation. All Rights Reserved MAIN MENU . MEBx Login > Intel(R) ME General Settings > Intel(R) Standard Manageability Configuration .
- Page 144 9-134 Configuring AMT 11. Highlight Activate Network Access and select [Enter] Intel (R) Management Engine BIOS Extension v11.0.0.0005/Intel(R) ME v11.0.0.1197Copyright (C) 2003-15 Intel Corporation. All Rights Reserved INTEL (R) STANDARD MANAGEABILITY CONFIGURTION . Manageability Feature Selection <Enabled> > SOL/IDER > User Consent <Anytime>...
-
Page 145: Chapter 10: Configuring A Second Hdd For Raid
Configuring a Second HDD for RAID Chapter 10: Introduction This chapter discusses how to add a second hard drive and configure a RAID system using the Intel® Rapid Storage Technology. The Intel® Rapid Storage Technology provides new levels of protection, performance, and upgradeability for the 7607 platform. -
Page 146: Configuring A Raid System
5. Both disks should be recognized in the Main Screen. Select the Create button. 6. Select the type of RAID volume you want to install. NCR supports RAID 1 and RAID 0 volume types. • RAID 1: Combines two disks to create a volume where each disk stores an exact copy of the data and provides real-time redundancy. - Page 147 Configuring a Second HDD for RAID 10-137 7. Select Next.
- Page 148 10-138 Configuring a Second HDD for RAID 8. Enter a Volume Name (user preference). 9. Select the check boxes for both disks. RAID 0 Only: Specify the amount of space to be used by the new RAID volume. Use the slider to enter a percentage. Note: If you create a volume that uses less than 100% of the hard drive space, you may create a second RAID volume to use the remaining space.
- Page 149 Configuring a Second HDD for RAID 10-139 10. Select Next. 11. Select Create Volume to start the volume migration. 12. Select to confirm the action.
- Page 150 10-140 Configuring a Second HDD for RAID 13. A window is displayed indicating the volume was created successfully. Select close the window. The status of the migration is displayed, showing the progress. This can take 1 - 3 hours to complete.
-
Page 151: Chapter 11: Maintenance
Maintenance Chapter 11: Cabinet Cleaning Procedures 1. Disconnect the unit from the power outlet before cleaning. 2. Use a cloth lightly dampened with a mild detergent. 3. Do not use alcohol (methyl, ethyl, or isopropyl) or any strong solvent. Do not use thinner or benzene, abrasive cleaners, or compressed air. - Page 152 11-142...