Table of Contents
Advertisement
Quick Links
Installation, operating and
maintenance instructions
Rooftop installation with
AluPlus installation system
Roof integration
Flat roof installation with
AluPlus installation system
High performance solar collector
CFK-1
Wolf GmbH, Postfach 1380, 84048 Mainburg, Tel. 08751/74-0, Fax 08751/741600, Internet: www.wolf-heiztechnik.de
Art. no. 3062815_0110 Subject to technical modifi cations
GB
Advertisement
Table of Contents

Related Manuals for Wolf CFK-1


Summary of Contents for Wolf CFK-1
- Page 1 Installation, operating and maintenance instructions Rooftop installation with AluPlus installation system Roof integration Flat roof installation with AluPlus installation system High performance solar collector CFK-1 Wolf GmbH, Postfach 1380, 84048 Mainburg, Tel. 08751/74-0, Fax 08751/741600, Internet: www.wolf-heiztechnik.de Art. no. 3062815_0110 Subject to technical modifi cations...
-
Page 2: Table Of Contents
Index ndex ........................Page 1. Specification ........................3 Standards and regulations / Safety instructions ............4 3. Information / Pipework examples ..................5 4. Information regarding the system hydraulics / Expansion vessels .......6 5. General preparations ....................7 - 8 6. Rooftop installation (interlocking tile, plain tile) .............9 - Standard delivery .......................9 - Standard dimensions ....................9 - Snow loads ........................9... -
Page 3: Specification
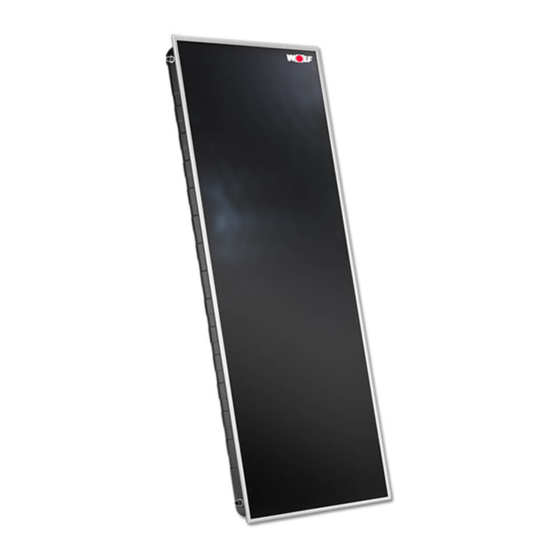
1. Specification Specification Collector CFK-1 Casing Deep-drawn aluminium tray, natural, sea-water resistant. Dimensions (L x W x H) / (external edge) 2099 x 1099 x 110 mm Gross surface area/surface exposed to wind 2.3 m² acc. to DIN 1055-4 Effective absorber area 2.0 m²... -
Page 4: Standards And Regulations / Safety Instructions
2. Standards and regulations / Safety instructions Standards and regulations Observe the following regulations, rules and guidelines during installation and operation. Installation on roofs. Observe all current Health & Safety regulations - EN 1991, 2-3 Snow loads - EN 1991, 2-4 Wind loads - DIN 1055-5 Snow loads... -
Page 5: Information / Pipework Examples
3. Information / Pipework examples Notes Ideally, the collectors should be oriented between south-east and south-west (optimum: south). Please refer to our technical advisors in case of an alternative orientation. Trees, neighbouring structures, chimneys, etc. should throw as little shade over the collectors as possible. Observe the different position of the sun (summer/winter). -
Page 6: Information Regarding The System Hydraulics / Expansion Vessels
4. System hydraulics expansion vessels Information regarding the The collectors can be operated with a high specific throughput (so-called High- system hydraulics Flow). Advantages: The collector is well cooled = high collector efficiency level, low heat losses at the flow line. Disadvantages: High pressure drop = powerful pump, large pipe cross-sections. Throughput: High-Flow (90 l/h x coll), ANRO (45/55) 20 °C Solar line Solar Expansion Collector Pump length line Cylinder number assembly vessel 2.5 bar Ø... -
Page 7: General Preparations
5. General preparations Transport and storage Only handle and store the collector pile using the packing strips and pallets. Never move more than 16 collectors in a single pile and never store more than 24 collectors in a single pile. Never move collectors with the glass facing down. - Page 8 5. General preparations Arrangement example: 3 collectors, on end, alternate connection Flow connection piece Compensators Are all gaskets in place? 1 x plug opposite the connection Sensor well pieces Return connector Grub screws M8x30 at the (compulsory for bottom of the collectors roof integration) When fitting the connection pieces, compensators and plugs, always counterhold the union nut on the collector.
-
Page 9: Rooftop Installation (Interlocking Tile, Plain Tile)
5.62 6.75 7.88 9.01 10.14 11.27 Max. snow load when installing flat-plate collectors on end with an inclination of 30° to 45° CFK-1 Without snow load extension set With snow load extension set Max. area loading 2.4 kN/m² 4 kN/m²... -
Page 10: Rooftop Installation (Interlocking Tile, Plain Tile) Roof Hooks On Battens
7. Rooftop installation (interlocking tile, plain tile) roof hooks on battens Roof hook installation on battens (example for 2 collectors) Fitted top roof hook Mounting rail Mounting If required, trim or bend rail the roof hook over Min. 3 rows M8x20 Option coach bolt... -
Page 11: Rooftop Installation (Interlocking Tile, Plain Tile) Roof Hooks On Rafters
8. Rooftop installation (interlocking tile, plain tile) roof hooks on rafters Fitting the roof hooks to the rafters (example for 2 collectors) If required, trim or bend Fitted top roof hook the roof hook over Mounting rail Mounting rail Min. 3 rows Option Snow load... -
Page 12: Rooftop Installation (Interlocking Tile, Plain Tile) Collector Installation
9. Rooftop installation (interlocking tile, plain tile) collector installation Extension of the mounting rail If more than 3 collectors are fitted, extend the mounting rails in accordance from 4 collectors with the diagram. One of the three screws can also be used to secure the collector to a roof hook. For this, the channel rail remains aligned in the centre; the screw can be manoeuvred via the slot into the correct position above the hook. -
Page 13: Special Features To Be Considered For Rooftop Installation On Slate Roofs
10. Special features for rooftop installation on slate roofs with slate hooks Distribute all roof hooks supplied evenly over the width of the collector array to spread the loads applied. 1. Remove the slates where the hooks need to be fitted. Option Snow load extension set with hooks Max. -
Page 14: Corrugated Roof / Sheet Steel Roof With Double Ended Screws
11. Rooftop installation on corrugated / sheet steel roofs with double ended screws General notes - For roofs covered in corrugated roofing sheets, drill the hole (Ø 14) for the double ended screws into the roof skin respectively at the apex of the sheet profile. Maintain the vertical clearance between the holes for the special headless screws to safeguard the rail clearance. -
Page 15: Supported On Pitched Roofs
12. Supported on pitched roofs Information regarding the The following optimum collector angle of inclination is recommended, subject optimum collector angle of to use: inclination Solar DHW heating 30° ± 5° Combined systems for solar DHW heating 45° ± 5° and solar central heating backup Solar heating backup 55°... -
Page 16: Minimum Clearance Between Several Rows Of Collectors
12. Supported on pitched roofs Minimum clearance between several rows of collectors Hole dimension "h" Minimum clearance and angle for the supports when installing the collector on end (example: Würzburg) Roof inclination Support angle Angle of inclination Hole dimension "h" Clearance Clearance α... -
Page 17: Standard Dimensions
12. Supported on pitched roofs Standard dimensions for NB: No consideration has been given to the installation location or the pipe determining the width of the connections. collector array Number of collectors Width [m] installation on end 2.23 3.36 4.49 5.62 6.75 7.88... -
Page 18: Roof Integration, Interlocking Tile
13. Roof integration, interlocking tile For safety reasons, the [German] roofing contractor's association specifies a covered substrate with bitumen sheeting or other suitable material below the collector area to prevent the ingress of moisture in case of leaks. This must terminate in the roof gutter. Standard delivery Edge Installation parts protector Top cover panels Top mounting rail... - Page 19 13. Roof integration, interlocking tile Construction Timber spacers in the thickness of the battens Triangular sealing tape Recommendation: Top panel Stuff the space below the top panel at the tile contact Collector point to prevent the tile from pushing through. Timber spacers in the thickness of the battens less 9 mm Mounting rail...
-
Page 20: Collector Installation
13. Roof integration, interlocking tile Collector installation Top mounting rail 8 x 80 Top mounting rail Combination screw M8x20 Timber spacer (batten height) Bottom mounting rail Flashing tape Washer nut M8 Timber spacer (batten height less 9 mm) - Are all gaskets in place? - Maintain the necessary clearance - Align all threaded fittings - Counterhold with a second open-ended... -
Page 21: Mounting Intermediate Panels/Frames
13. Roof integration, interlocking tile Installation of the intermediate panels Tabs Intermediate panels Flashing tape Fold Intermediate panel 1. Push in the intermediate panels as per diagram. If this should jam during the installation, correct the collector position. Then bend the tabs at the top of the intermediate panels to prevent them from sliding through. - Page 22 13. Roof integration, interlocking tile Installation of the cover frame panels Triangular sealing tape Woodscrew Clamp (2 pce. per top panel) at the top 4x60 Top panel Edge protector Timber spacer Height = batten Triangular sealing tape at the top and side Rafter Hook in side panel Batten...
-
Page 23: Roof Integration, Slate Roof
14. Roof integration, slate roof For safety reasons, the [German] roofing contractor's association specifies a covered substrate with bitumen sheeting, reinforced foil or other suitable material below the collector area to prevent the ingress of moisture into the building in case of leaks. This sub-roof must terminate in the roof gutter. Standard delivery Edge protector Top cover panels... - Page 24 14. Roof integration, slate roof Construction Timber spacers (in the thickness of the battens) Recommendation Top panel Stuff the space below the top panel at the tile Collector contact point to prevent the tile from pushing through. Timber spacers (in the thickness of the battens less 9 mm) Mounting rail...
-
Page 25: Collector Installation
4. Drill a Ø 5 mm hole through the mounting rail and the wood spacers into the rafter and secure to the rafter with hexagon head cap wood screw 8x80. 5. Secure the fittings for the flow and return. Check gaskets. 6. Carry out a tightness test in accordance with section "Tightness test" in the installation instructions "High performance solar collector" CFK-1 3062815_0110... -
Page 26: Mounting Intermediate Panels/Frames
14. Roof integration, slate roof Installation of the intermediate panels Tabs Intermediate panels Flashing tape Fold Intermediate panel 1. Push in the intermediate panels as per diagram. If this should jam during the installation, correct the collector position. Then bend the tabs over at the top of the intermediate panels to prevent them from sliding through. - Page 27 14. Roof integration, slate roof Match flashing piece / lift plates to the fold; trim with shears, if required Maintain a clearance of 65 mm (bottom) Align all flashing pieces / lift plates to 65 mm and secure each with 2 nails (top) Hook in side panel Hook in side panel Batten...
- Page 28 14. Roof integration, slate roof Calculate the height differential taking into account the slate thickness, roof slope and slate overlaps: Dim. X To compensate, push a timber wedge underneath the top rail Mark and trim flashing pieces / lift plates Fit the cover of the top panel Fitting the cover frame Woodscrew 4x60...
- Page 29 14. Roof integration, slate roof Cover Position edge protector Edge protector Cover 2 rows Push side panel upwards Firmly secure with a self-tapping screw 3062815_0110...
-
Page 30: Roof Integration, High Roof Tiles (Convex - Concave Tiles)
15. Roof integration, high roof tiles (convex - concave tiles) For safety reasons, the [German] roofing contractor's association specifies a covered substrate with bitumen sheeting, reinforced foil or other suitable material below the collector area to prevent the ingress of moisture into the building in case of leaks. This sub-roof must terminate in the roof gutter. Standard delivery Edge Top cover panels... - Page 31 15. Roof integration, high roof tiles (convex - concave tiles) Construction Timber spacers (in the thickness of the battens) Triangular sealing tape Recommendation Top panel Stuff the space below the top panel at the tile Collector contact point to prevent the tile from pushing through.
-
Page 32: Collector Installation
4. Drill a Ø 5 mm hole through the mounting rail and the wood spacers into the rafter and secure to the rafter with hexagon head cap wood screw 8x80. 5. Secure the fittings for the flow and return. Check gaskets. 6. Carry out a tightness test in accordance with section "Tightness test" in the installation instructions "High performance solar collector" CFK-1. 3062815_0110... -
Page 33: Mounting Intermediate Panels/Frames
15. Roof integration, high roof tiles (convex - concave tiles) Installation of the intermediate panels Tabs Intermediate panels Flashing tape Intermediate panel 1. Push in the intermediate panels as per diagram. If this should jam during the installation, correct the collector position. Then bend the tabs over at the top of the intermediate panels to prevent them from sliding through. - Page 34 15. Roof integration, high roof tiles (convex - concave tiles) Remove protective foil Manipulate evenly with a hammer Affix the tape end on the base and the highest point Mark and trim the entire length of the flashing tape to the depth of 2 tiles Affix the entire tape on the base, starting at the highest point Push down hard and cover at least 2 full tiles 3062815_0110...
- Page 35 15. Roof integration, high roof tiles (convex - concave tiles) Installation of the cover frame panels Triangular sealing tape, top Clamp (2 pce. per top panel) Woodscrew 4x60 Top panel Edge protector Timber spacer Batten height Triangular sealing tape at the top and side Rafter Hook in side panel Batten...
-
Page 36: Flat Roof Installation
16. Flat roof installation Fixing information Unsecured support frames can be pushed over and damaged by the force of the wind. Therefore secure the collectors on the roof. First check the static suitability of the sub-structure and the permissible area loading for the roof skin (if necessary call on the services of a structural engineer). -
Page 37: Standard Dimensions
16. Flat roof installation Standard dimensions for NB: No consideration has been given to the installation location or the pipe determining the width of the connections. collector array Number of collectors Width [m] installation on end – 2.23 3.36 4.49 5.62 6.75 7.88... -
Page 38: Pipework / Filling The System / Safety Datasheet
Info Only ready-mixed ANRO in accordance with the specification is permissible. Extract from the safety datasheet: ANRO heat transfer medium (ready-mixed, protection down to –30 °C) Trade name: Wolf GmbH, Postfach 1380, D-84048 Mainburg, Germany; Tel.: +49 8751/74-0; Company: Fax.:+49 8751/741600 +49(0)40509497-0 Emergency information: Chemical properties: 1.2 propyleneglycol with corrosion inhibitors, 45.3% by vol. -
Page 39: Leak Testing / Commissioning
NB: Observe the individual instructions of, for example, heat exchanger, pump and control unit separately. Return At the end of their useful life these collectors can be returned to Wolf GmbH. These collectors must be clearly identified (e.g. as "scrap") and be delivered expenses paid during business hours. All collector materials are either correctly recycled or disposed of by Wolf GmbH. -
Page 40: Commissioning Checklist
19. Commissioning checklist No. Installation Collectors installed safely in case of storms Solar line connected to the earthing system Blow-off line permanently secured to the safety valve of the solar circuit Drip container positioned below the blow-off line (solar circuit) Blow-off line fitted to the safety valve and connected to the drain Thermostatically controlled mixing valve installed at the DHW outlet or limiting the cylinder temperature with the control unit to 60 °C... -
Page 41: Operation / Service
20. Operation / Service Mode - A vapour film can occur particularly in the early hours of the morning due to the temperature differential between the outside air and the collector. It will disappear as the collector heats up. Where possible avoid switching off the power during solar irradiation. If vapour forms during very high solar yield, the system starts again automatically after it has cooled down. -
Page 42: Service Check List
21. Service check list Service check list Date: Date: Collector inspection - Visual collector inspection - Visual inspection of the collector fixings - Visual inspection for potential leaks in the roof - Visual inspection of the thermal insulation on pipework Solar heating circuit - Visual inspection for potential leaks in the solar circuit (joints) - Colour check of the ANRO heat transfer medium - pH value test of the ANRO heat transfer medium only in case pH_____... - Page 43 21. Service check list Service check list Date: Date: Collector inspection - Visual collector inspection - Visual inspection of the collector fixings - Visual inspection for potential leaks in the roof - Visual inspection of the thermal insulation on pipework Solar heating circuit - Visual inspection for potential leaks in the solar circuit (joints) - Colour check of the ANRO heat transfer medium - pH value test of the ANRO heat transfer medium only in case pH_____...
-
Page 44: Declaration Of Conformity
Address: Lissue Industrial Est. Moira Road Lisburn BT28 2RF Northern Ireland Product: Solar collector CFK-1 The product described above conforms to the requirements specifi ed in the following documents: DIN EN 12975-1, 06/2006 DIN EN 12975-2, 06/2006 This product is identifi ed in accordance with the following guidelines: RAL UZ 73 Solar Keymark 97/23/EC (Pressure Equipment Directive) as follows: Mr.