Table of Contents
Advertisement
Quick Links
C Series C3000 and C5000 Controller
Quick Start
March 2013
Part Number: 530-051836
Revision 01
Contents
Copyright © 2013, Juniper Networks, Inc.
This document describes how to install the Juniper Networks C Series C3000 and C5000
Controllers.
C3000 and C5000 Controllers Quick Start Description . . . . . . . . . . . . . . . . . . . . . 3
Step 1: Prepare the Site for C Series Controller Installation . . . . . . . . . . . . . . . . . . . 3
Rack Requirements . . . . . . . . . . . . . . . . . . . . . . . . . . . . . . . . . . . . . . . . . . . . . . . 3
Step 2: Install the Controller in a Rack . . . . . . . . . . . . . . . . . . . . . . . . . . . . . . . . . . . 4
Install the C Series Controller in a Two-Post Rack . . . . . . . . . . . . . . . . . . . . . . 4
Install the Controller in a Four-Post Rack . . . . . . . . . . . . . . . . . . . . . . . . . . . . . 5
Step 3: Connect External Devices and Cables . . . . . . . . . . . . . . . . . . . . . . . . . . . . . 6
Management . . . . . . . . . . . . . . . . . . . . . . . . . . . . . . . . . . . . . . . . . . . . . . . . 6
Connect the C Series Controller to a Management Console . . . . . . . . . . . . . . . 6
Step 4: Connect Power Cables . . . . . . . . . . . . . . . . . . . . . . . . . . . . . . . . . . . . . . . . . . 7
Connect Power to an AC-Powered Controller . . . . . . . . . . . . . . . . . . . . . . . . . . 7
Connect Power to a DC-Powered Controller . . . . . . . . . . . . . . . . . . . . . . . . . . . 8
Setting Up Management Access and Logging In . . . . . . . . . . . . . . . . . . . . . . . . 9
Configuring the Juniper Networks Database . . . . . . . . . . . . . . . . . . . . . . . . . . 10
Configure Hostname and Domain Parameters . . . . . . . . . . . . . . . . . . . . . . . . 10
Configure the System for Remote Access . . . . . . . . . . . . . . . . . . . . . . . . . . . . . 11
Configure the System to Accept SSH and Telnet Connections . . . . . . . . . . . . 11
Add an Admin User Account . . . . . . . . . . . . . . . . . . . . . . . . . . . . . . . . . . . . . . . 12
Safety Warnings . . . . . . . . . . . . . . . . . . . . . . . . . . . . . . . . . . . . . . . . . . . . . . . . . . . . 13
Declaration of Conformity for the C3000 and C5000 Controllers . . . . . . . . . . . . . 16
SRC Documentation and Release Notes . . . . . . . . . . . . . . . . . . . . . . . . . . . . . . . . . 17
Requesting Technical Support . . . . . . . . . . . . . . . . . . . . . . . . . . . . . . . . . . . . . . . . . 18
Self-Help Online Tools and Resources . . . . . . . . . . . . . . . . . . . . . . . . . . . . . . . 18
Opening a Case with JTAC . . . . . . . . . . . . . . . . . . . . . . . . . . . . . . . . . . . . . . . . . 18
1
Advertisement
Table of Contents

Related Manuals for Juniper C Series


Summary of Contents for Juniper C Series
-
Page 1: Table Of Contents
Step 2: Install the Controller in a Rack ........4 Install the C Series Controller in a Two-Post Rack ..... . 4 Install the Controller in a Four-Post Rack . - Page 2 C Series C3000 and C5000 Controller Quick Start Revision History ........... . . 19...
-
Page 3: C3000 And C5000 Controllers Quick Start Description
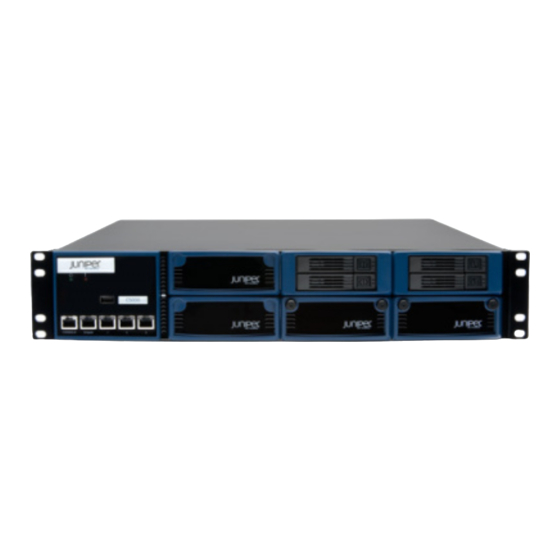
Session Resource Controller functionality. There are two C Series Controller models: the C3000 model and the C5000 model. Each model is composed of four hard drives, three fan modules, redundant power supplies, one USB port, a console management port, and four Ethernet ports. -
Page 4: Step 2: Install The Controller In A Rack
Phillips (+) screwdriver, number 2 Step 2: Install the Controller in a Rack Install the C Series Controller in a Two-Post Rack on page 4 Install the Controller in a Four-Post Rack on page 5 Install the C Series Controller in a Two-Post Rack Remove the two front mount rails from either side of the chassis. -
Page 5: Install The Controller In A Four-Post Rack
Install the Controller in a Four-Post Rack Figure 2: Install the C Series Controller in a Two-Post Rack Mounting rack Mounting bracket Install the Controller in a Four-Post Rack Insert four rack-mount screws on each side of the system to secure the front of the chassis to the equipment rack. -
Page 6: Step 3: Connect External Devices And Cables
C Series C3000 and C5000 Controller Quick Start Step 3: Connect External Devices and Cables Connect the C Series Controller to a Network for Out-of-Band Management on page 6 Connect the C Series Controller to a Management Console on page 6 Connect the C Series Controller to a Network for Out-of-Band Management Turn off the power to the management device. -
Page 7: Step 4: Connect Power Cables
Insert the coupler end of the power cord into the AC appliance inlet. If your controller contains two power supplies, plug each power cord into a separate power circuit to ensure that the device continues to receive power if one of the power circuits fails. Copyright © 2013, Juniper Networks, Inc. -
Page 8: Connect Power To A Dc-Powered Controller
C Series C3000 and C5000 Controller Quick Start Push the power cord into the slot in the adjustment nut of the power cord retainer clip. Turn the nut until it is snug against the base of the coupler and the slot in the nut is turned 90°... -
Page 9: Step 5: Perform The Initial Software Configuration For The C Series Controller
Step 5: Perform the Initial Software Configuration for the C Series Controller CAUTION: Ensure that each cable lug seats flush against the surface of the terminal block as you tighten the screws. Verify that the DC source power and grounding cabling are correct, that they are not touching or blocking access to controller components, and that they do not drape where people could trip on them. -
Page 10: Configuring The Juniper Networks Database
C Series C3000 and C5000 Controller Quick Start Start your terminal emulation program using the following settings: Bits per second: 9600 Data bits: 8 Parity: None Stop bits: 1 Flow control: none Enter the username. SRC-PE Release 4.0 [V.4.0.0.R-1] localhost login:root Enter the password. -
Page 11: Configure The System For Remote Access
To configure a list of domain names to search: [edit] root@host# set system domain-search [domain-name1, domain-name2, ...] For example: [edit] root@host# set system domain-search [my-domain.juniper.net domain.juniper2.net] To configure the domain name: [edit] root@host# set system domain-name domain-name For example: [edit] root@host# set system domain-name my-domain.juniper.net... -
Page 12: Add An Admin User Account
[edit system services ssh] user@host> set root-login (allow | deny | deny-password) where: allow — Allow users to log in to the C Series Controller as root through SSH. — Disable users from logging in to the system as through SSH. -
Page 13: Safety Warnings
Connect the system or rack to ground (earth), and ensure that a reliable grounding path is maintained in the rack. WARNING: Do not work on the system or connect or disconnect cables during lightning activity. Copyright © 2013, Juniper Networks, Inc. - Page 14 C Series C3000 and C5000 Controller Quick Start WARNING: Be sure that circuit breakers for the power source are in the OFF position before attaching power cables. WARNING: Before servicing the system, turn off the power. WARNING: Remove jewelry (including rings, necklaces, and watches) before working on equipment that is connected to power lines.
- Page 15 The attached power cable is only for this product. Do not use the cable for another product. Some Juniper Networks devices are equipped with fiber-optic ports, which emit radiation that may be harmful to the human eye. Fiber-optic ports are considered Class 1 laser or Class 1 LED ports.
-
Page 16: Declaration Of Conformity For The C3000 And C5000 Controllers
C Series C3000 and C5000 Controller Quick Start WARNING: This is a Class A product. In a domestic environment this product may cause radio interference, in which case the user may be required to take adequate measures. (VCCI-A) Declaration of Conformity for the C3000 and C5000 Controllers Figure 10 on page 17 shows the Declaration of Conformity for the controller. -
Page 17: Src Documentation And Release Notes
SRC Documentation and Release Notes For a list of related SRC documentation, see http://www.juniper.net/techpubs/software/src/ If the information in the latest release notes differs from the information in the documentation, follow the SRC Release Notes. Copyright © 2013, Juniper Networks, Inc. -
Page 18: Requesting Technical Support
7 days a week, 365 days a year. Self-Help Online Tools and Resources For quick and easy problem resolution, Juniper Networks has designed an online self-service portal called the Customer Support Center (CSC) that provides you with the following features: Find CSC offerings: http://www.juniper.net/customers/support/... - Page 19 Products made or sold by Juniper Networks or components thereof might be covered by one or more of the following patents that are owned by or licensed to Juniper Networks: U.S. Patent Nos. 5,473,599, 5,905,725, 5,909,440, 6,192,051, 6,333,650, 6,359,479, 6,406,312, 6,429,706, 6,459,579, 6,493,347, 6,538,518, 6,538,899, 6,552,918, 6,567,902, 6,578,186, and 6,590,785.