Canon imageRunner Advance 400iF Starter Manual
Hide thumbs
Also See for imageRunner Advance 400iF:
- Brochure & specs (12 pages) ,
- Specification (3 pages) ,
- Quick operation manual (3 pages)
Table of Contents
Advertisement
Starter Guide
This guide explains the procedures from unpacking
the machine through power cord connection.
Be sure to read the manual before using the machine.
The remarks for important safety instructions are
described in "User's Guide. " Read the manual also.
Keep the manual for future reference.
Chapter 1
Installation of the Machine
Chapter 2
Setting and Registering the Machine
Chapter 3
Before Using This Machine
Chapter 4
Routine Maintenance
Chapter 5
Speci cations
Appendix
Advertisement
Table of Contents

Related Manuals for Canon imageRunner Advance 400iF


Summary of Contents for Canon imageRunner Advance 400iF
- Page 1 Starter Guide Chapter 1 Installation of the Machine Chapter 2 Setting and Registering the Machine Chapter 3 Before Using This Machine Chapter 4 Routine Maintenance Chapter 5 Speci cations Appendix This guide explains the procedures from unpacking the machine through power cord connection. Be sure to read the manual before using the machine.
- Page 2 Manuals for the Machine The manuals for this machine are divided as follows. Please refer to them for detailed information. Guides with this symbol are printed manuals. Guides with this symbol are included on the accompanying CD-ROM. Starter Guide (This Manual) •...
- Page 3 How to Use This Manual (e-Manual) How to Install the e-Manual This section describes how to install the e-Manual. Windows Macintosh ● ● 1. Insert the e-Manual CD-ROM in your computer. 1. Insert the e-Manual CD-ROM into your computer. 2. Select the language for the e-Manual. 2.
-
Page 4: Table Of Contents
Contents Preface . . . . . . . . . . . . . . . . . . . . . . . . . . . . . . . . . . . . . . . . . . . . . . . . . . . . . . . . . . . . . . . . . . . . . . . . . . . . . . . . . . . . . . . . . 04 How To Use This Manual . - Page 5 Contacting Your Local Authorized Canon Dealer ........
- Page 6 Other Warnings ..................81 CANON imageRUNNER ADVANCE 500/400 SERIES LIMITED WARRANTY ......82 TERMS OF imageWARE REMOTE SERVICE .
-
Page 7: Preface
Preface Thank you for purchasing the Canon imageRUNNER ADVANCE 500iF/400iF. Please read this manual thoroughly before operating the machine to familiarize yourself with its capabilities, and to make the most of its many functions. For information on the detailed settings for the functions described in this manual, see the e-Manual. -
Page 8: Illustrations Used In This Manual
Apple Macintosh: Macintosh • Apple Mac: Mac Trademarks MEAP and the MEAP logo are trademarks of Canon Inc. This product contains the Universal Font Scaling Technology or UFST® under license from Monotype Imaging, Inc. UFST® is a trademark of Monotype Imaging, Inc. - Page 9 Except as otherwise stated, any reference to a Adobe, the Adobe logo, Adobe LiveCycle® Policy "PostScript printing device," "PostScript display device," Server, PostScript, the PostScript Logo, and PostScript 3 or similar item refers to a printing device, display are either registered trademarks or trademarks of device or item (respectively) that contains PostScript Adobe Systems Incorporated in the United States and/ technology created or licensed by Adobe Systems...
- Page 10 Installation of the Machine Installation Location and Handling . . . . . . . . . . . . . . . . . . . . . . . . . . . . . . . . . . . . . . . . . . . . . . . . . . . 08 Installation Precautions .
-
Page 11: Installation Location And Handling
Installation Location and Handling This section describes precautions for installation location and handling. We recommend that you read this section prior to using this machine. Installation Precautions Avoid poorly ventilated locations. ● This machine generates a slight amount of ozone Avoid Installing the Machine in the etc. -
Page 12: Select A Safe Power Supply
• Connecting and disconnecting the power cord frequently. Contact an authorized Canon dealer if ● • Tripping over the power cord. communication is unavailable. •... -
Page 13: Moving The Machine
● turn the main power switch OFF, disconnect the power cord from the power outlet, and then call your local authorized Canon dealer. Using the machine in this state may cause a fire or electrical shock. Also, avoid placing objects around the power plug so that the machine can be disconnected whenever necessary. - Page 14 Do not turn the main power switch OFF or open ● the front covers while the machine is in operation. This may result in paper jams. Do not use flammable sprays, such as spray glue, ● near the machine. There is a danger of ignition. This machine generates a slight amount of ozone ●...
-
Page 15: Items Included With The Machine
Items Included with the Machine In the next section "Unpacking the Machine," check each item against this list as you remove each item from the accessories box (except for the drum unit). Filters Duplex Tray Tray Rib Drum Unit Paper Size Labels Precaution Labels Power Cord Telephone Line... -
Page 16: Carrying The Machine To The Installation Site And Removing The Packing Materials
Carrying the Machine to the Installation Site and Removing the Packing Materials See the included “READ THIS SHEET FIRST!” before carrying the machine to the installation site. Remove all shipping tape from the flap side edges. Open the feeder, remove the protective sheet, and take out the drum unit. -
Page 17: Installing The Filters
Installing the Filters Install the filters on the right side of the machine. -
Page 18: Attaching The Duplex Tray And The Tray Rib
Attaching the Duplex Tray and the Tray Rib If you are attaching the optional Staple Finisher-R1 to the machine, the following steps are not necessary. Go to the next section, "Installing the Drum Unit." Lift the control panel. Attach the duplex tray by inserting its tabs into the slots on the machine. -
Page 19: Installing The Drum Unit
Installing the Drum Unit Open the front cover. 1. Lift the control panel. 2. Open the front cover. Open the right cover. Always open the right cover during installation to prevent damage to the drum unit. toner container lock lever Turn the counterclockwise 90 degrees. - Page 20 drum unit lock lever Turn the counterclockwise as far as it will go. *1: Drum Unit Lock Lever Remove the cover attached to the drum insertion slot. The removed cover is not used later on. Remove the drum unit from its protective bag. •...
- Page 21 Holding the tab and the part with the blue marking, slowly insert the drum unit until it stops. Make sure that the drum unit slides properly along the rails on the machine. drum unit lock lever Turn the clockwise to its original position.
-
Page 22: Installing The Toner Cartridge
Installing the Toner Cartridge toner cartridge lock lever Turn the counterclockwise so that the arrow marks on the lever and its axis face each other. *1: Toner Cartridge Lock Lever Remove the toner cartridge from its protective bag. Remove the protective cap. Do not touch the tip of the toner cartridge or subject it to shock by hitting it. - Page 23 Insert the toner cartridge into the machine as far as it will go. Support the new toner cartridge with your hand from underneath while pushing it into the machine with your other hand. Turn the toner cartridge lock lever clockwise so that the arrow marks on the lever and its axis face each other.
-
Page 24: Loading Paper Into The Paper Drawer
Loading Paper into the Paper Drawer This section describes how to load plain paper in the paper drawer. If you load paper other than plain paper such as recycled paper, specify the type of paper loaded in the paper drawer. (See e-Manual > Settings/Registration.) Press the open button on the paper drawer. - Page 25 Before loading paper, always fan the sheets several times, and align the edges to facilitate feeding. Load the paper stack into the paper drawer. When handling paper, take care not to cut your hands on the edges of the paper . Gently push the paper drawer back into the machine until it clicks into place in the closed position.
-
Page 26: Attaching The Precaution Label
Attaching the Precaution Label Open the feeder. Select the desired language label among the supplied precaution labels, peel off the label, then affix the label to the part indicated in the illustration. On this part, the English label is already affixed. Affix your selected label over the existing label. -
Page 27: Connecting The Power Cord
Connecting the Power Cord For Users with the Optional Finisher: See the installation manual supplied with the optional finisher to attach the finisher to the machine, then connect the power cord. Connect the power cord to the socket on the left side of the machine and to the wall outlet. - Page 28 Setting and Registrating the Machine Main Power and Energy Saver Key . . . . . . . . . . . . . . . . . . . . . . . . . . . . . . . . . . . . . . . . . . . . . . . . . . . . 26 How to Turn ON the Main Power .
-
Page 29: Main Power And Energy Saver Key
Main Power and Energy Saver Key The machine is provided with, a main power switch and the Energy Saver key. How to Turn ON the Main Power This section explains how to turn ON the main power. • You can change the default display that appears after the machine is turned ON from [Default Screen after Startup/Restoration] on the Settings/ Registration screen. -
Page 30: Energy Saver Key
Energy Saver Key You can press (Energy Saver) to make the machine • Do not turn the main power OFF while using the enter the Sleep mode and reduce power consumption. Fax/I-Fax function. Sending or receiving I-fax or fax documents cannot be done when the main power If the machine is idle for a certain period of time, the is turned OFF. -
Page 31: Using The Setup Guide To Configure The Machine
Using the Setup Guide to Configure the Machine When the power is turned ON for the first time after installing the machine, the Setup Guide screen is displayed. It is recommended that you follow the instructions that appear on the touch panel display to configure the machine. - Page 32 • Daylight Saving Time: In some countries, time is temporarily advanced throughout the summer season. This practice is called “Daylight Saving Time. ” Enter the current date and time using – (numeric keys) → press [OK]. Logging In In order to perform the following settings, it is necessary to log in as an administrator.
- Page 33 located → press [Next]. Network Settings You can perform the following IPv4 settings in order to connect to and use a TCP/IP network with the machine. 1. Set [Use IPv4] to ‘On’ → set [Use IPv6] to ‘Off’ → press [Next]. Registering Your Machine’s Fax Number You can register the fax number your machine...
- Page 34 Press [Set] → enter the unit name → press [Next]. ▼ Setting the Line Type You can set the phone line type to use for sending. You must check the type of telephone line that you are using, and make the correct setting. If you set the machine incorrectly, the phone line cannot be used for communication.
-
Page 35: Changing Specified Settings
Changing Specified Settings You can change settings registered in the Setup Guide from the items in (Settings/Registration). From [Start Setup Guide] (Settings/Registration), you can start the Setup Guide and redo all the settings from the beginning. (See e-Manual > Security.) For more information on changing the settings, see the following. - Page 36 Before Using This Machine Parts and Their Functions . . . . . . . . . . . . . . . . . . . . . . . . . . . . . . . . . . . . . . . . . . . . . . . . . . . . . . . . . . . . 34 External View .
-
Page 37: Parts And Their Functions
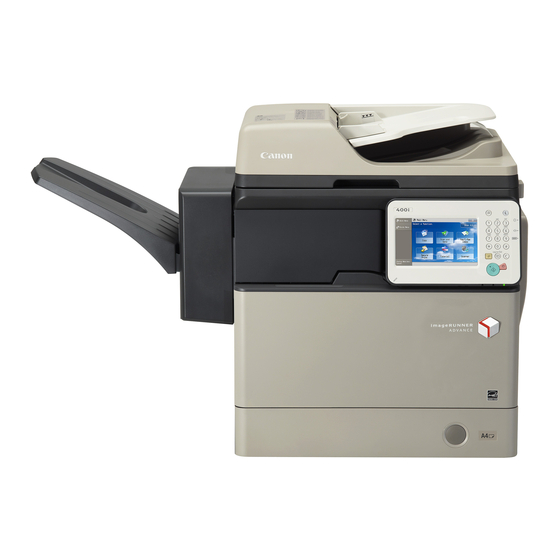
Parts and Their Functions This section provides you with the names and functions of all the parts of the machine. For more information on optional products, parts and their functions, see e-Manual > Optional Products/Software. External View Control Panel The control panel includes the keys, touch panel This section contains an external view of the display, and indicators required for operating the imageRUNNER ADVANCE 500iF. -
Page 38: Internal View
Internal View Feeder This section contains an external view of the imageRUNNER ADVANCE 500iF. When the Cassette Module-AA1 and Staple Finisher-R1 Are Attached: Feeder Cover Front Cover of the Main Unit Open this cover to remove jammed paper. Open this cover to replace the toner cartridge, the waste toner container, and the drum unit. -
Page 39: Control Panel Parts And Functions
Flashes or lights if there is an error in the machine. When the Error indicator flashes, follow the instructions that appear on the touch panel display. When the Error indicator maintains a steady red light, contact your local authorized Canon dealer. How To Use This Manual... -
Page 40: Adjusting The Angle Of The Control Panel
Adjusting the Angle of the Control Panel The angle of the control panel is adjustable as shown below. *: Adjustable Range Do not apply excess force to the control panel when adjusting its angle. How to Use This Manual (e-Manual) -
Page 41: Backing Up/Exporting Data
A malfunction in the memory may cause these data to be lost. Please regularly back up/export your important data. Please note that Canon will not be held responsible for any damages caused by the loss of data. You can backup/export data in the following ways: •... - Page 42 Contacting Your Local Authorized Canon Dealer ........
-
Page 43: Loading Paper
Loading Paper This section describes how to load paper. Loading Paper into a Paper • Paper drawers 2, 3, and 4 can be used when the optional Cassette Module-AA1 is attached to the Drawer machine. • If a message prompting you to load paper appears If the selected paper runs out, or the selected paper during printing, the remaining prints are drawer runs out of paper during printing, a screen... -
Page 44: Adjusting A Paper Drawer To Hold A Different Paper Size
If problems, such as poor print quality or paper jams occur, try turning the paper stack over and reloading • For high-quality printouts, use paper recommended by Canon. • For more information on the print direction of • Before loading paper, always fan the sheets several preprinted paper (paper which has logos or patterns times, and align the edges to facilitate feeding. - Page 45 2. Grip the handle, and pull out the paper Load the appropriate size paper into drawer until it stops. the paper drawer. 3. Remove all of the remaining paper. Adjust the position of the Side Guide. 1. Make sure that the paper size setting of the *1: Lever paper drawer matches the size of the paper *2: Side Guide...
-
Page 46: Replacing The Toner Cartridge/Waste Toner Container
If you press [Close], you can continue operations, this machine. such as setting modes and scanning originals, • For information on the supported Canon genuine even if you do not replace the toner cartridge toner, see “Consumables, ” on p.55. immediately. - Page 47 Press [ Do not burn or throw used toner cartridge into open flames, as this may cause the toner remaining inside the cartridges to ignite If the toner run out, this step is not necessary. resulting in burns or a fire . Open the front cover.
-
Page 48: Replacing The Waste Toner Container
• Use only toner cartridges intended for use with When closing the covers, be careful not to get the machine. (See “Consumables, ” on p.55.) your fingers caught, as this may result in • Do not touch the opening of the toner cartridge or personal injury . - Page 49 • Your local authorized Canon dealer will dispose of When removing the waste toner container, be used waste toner containers. Use the provided careful not to tilt it, as the toner may spill and cover to cover up the opening of the used waste get onto your hands or clothing .
- Page 50 Insert the new container in place. toner container lock lever Turn the clockwise 90 degrees to lock the container. *: Toner Container Lock Lever Close the front cover. 1. Close the front cover of the main unit. 2. Lower the control panel back in place. When closing the cover for the waste toner container, be careful not to get your fingers caught, as this may result in personal injury .
-
Page 51: Replacing The Drum Unit
Replacing the Drum Unit You can follow the procedure below to replace the drum unit. When no drum unit is installed in the machine, the message <Insert the drum.> appears on the touch panel display. If this message is displayed, follow the procedure below to install the drum unit in the machine. 2. - Page 52 Detach the cap mounted on the side Holding the part with the blue of the container, and use it to seal the marking, pull the drum unit out opening so that the waste toner does slightly upward. not spill out. Remove the drum unit from its protective bag.
- Page 53 Pull the two orange rings out, and Remove the cap from the container remove the protective cover. opening and attach it to the protrusion on the side of the container. Holding the tab and the part with the blue marking, slowly insert the drum unit until it stops.
- Page 54 Place your hand where the hand Press [Yes]. symbol ( ) is located on the right cover of the main unit, and then gently close the right cover until it clicks into place. Press [Yes] to start initializing the drum unit. •...
-
Page 55: Routine Cleaning
Routine Cleaning If the original is not copied clearly, clean the following parts of the machine. For high-quality printouts, we recommend cleaning these parts once or twice a month. Platen glass ● Underside of the feeder ● Feeder scanning area and rollers ●... - Page 56 When the feeder cover is completely opened, the inner cover is also opened. Clean the rollers (a total of eight places) inside the feeder cover with a water-moistened cloth. Then, wipe the area with a soft, dry cloth. Lift the feeder. feeder scanning area Clean the (the...
- Page 57 Clean the rollers (a total of eight Gently close the feeder cover. places) inside the cover under the feeder with a water-moistened cloth. Then, wipe the area with a soft, dry cloth. When closing the cover, be careful not to get your fingers caught, as this may result in Spin the rollers with your hand while cleaning personal injury .
-
Page 58: Consumables
Consumables The following consumables are available from Canon. For more information, contact your local authorized Canon dealer. We recommend that you order paper stock and toner from your local authorized Canon dealer before your stock runs out. Recommended Paper ●... - Page 59 For optimal print quality and for optimal machine Supported Canon Product Name performance and productivity, we recommend that Drum Unit you use Genuine Canon Toner, Parts, and Supplies. imageRUNNER ADVANCE Canon C-EXV 37 Drum Contact your Canon Authorized Dealer or Service 500iF/400iF Unit Provider for Genuine Canon Supplies.
-
Page 60: When An Error Message/Error Code Is Displayed
When an Error Message/Error Code Is Displayed When an Error Message Is When an Error Code Is Displayed Displayed Error messages may appear on the touch panel display If a job or operation does not complete successfully, of the machine or the Web browser. the error code is displayed on the Details screen for Log on the Status Monitor/Cancel screen. -
Page 61: Service Call Message
If a malfunction occurs and the machine cannot some functions may still be available. operate normally, a screen prompting you to contact For more information on the available functions, see your local authorized Canon dealer is displayed. e-Manual > Problem Solving. Contacting Your Local Authorized Canon Dealer... -
Page 62: Setting The Limited Functions Mode From The Service Call Message Screen
. The machine starts up in the Limited Functions When you contact your local authorized Canon dealer, mode. have the following information available: •... -
Page 63: Locations Of Staple/Paper Jams
Locations of Staple/Paper Jams Paper and staple jams may occur in the following parts of the machine. By following the instructions in the applicable section, you can clear staple/paper jams. For details on these procedures, see the e-Manual. Locations of Paper Jams >... - Page 64 Specifications Specifications . . . . . . . . . . . . . . . . . . . . . . . . . . . . . . . . . . . . . . . . . . . . . . . . . . . . . . . . . . . . . . . . . . . . . . . . 62 Main Unit .
-
Page 65: Specifications
Specifications are subject to change without notice for product improvement or future release. Main Unit Item Specifications Name Canon imageRUNNER ADVANCE 500iF/400iF Type Reader-printer combined, Console Resolution for Reading 600 x 600 dpi (Black-and-White) 300 x 300 dpi (Full Color) - Page 66 Item Specifications Warm-Up Time* After Powering ON (when [Quick Startup Settings for Main Power] is set to 'Off'): 38 seconds or less After Powering ON (when [Quick Startup Settings for Main Power] is set to 'On'): xx seconds or less The time until key operations can be performed on the touch panel display is xx seconds or less.
-
Page 67: Feeder
Item Specifications Power Source 120 - 127V AC, 60Hz, 10.0A Power Consumption Maximum Power Consumption: 1.5 kW When the machine is in the Sleep mode*: When the main power switch is turned OFF: When [Quick Startup Settings for Main Power] is set to 'On': xx W When [Quick Startup Settings for Main Power] is set to 'Off': xx W * Depending on the system and conditions of use, these values may differ. -
Page 68: Cassette Module-Aa1
Cassette Module-AA1 Item Specifications Paper Sizes LGL, LTR, STMT, EXEC, and Custom size (5 1/2" x 8 1/4" to 8 1/2" x 14" (139.7 mm x 210 mm to 215.9 mm x 355.6 mm)) Paper Drawers Capacity 550 sheets (21 lb bond (80 g/m²)) Power Source/Maximum Power From the main unit/Approximately 20 W Consumption... -
Page 69: Copy Card Reader-F1
Item Specifications Max. Stapling capacity/Available Corner Staple mode: Staple Size 17 to 24 lb bond (64 to 90 g/m²): 50 sheets 25 to 28 lb bond (91 to 105 g/m²): 50 sheets 29 lb bond to 34 lb cover (106 to 128 g/m²): 30 sheets Power Source/Maximum Power From the main unit/Approximately 50 W Consumption... -
Page 70: Send Function
Send Function Scan Features Item Specifications Communication Protocol FTP (TCP/IP), SMB (TCP/IP), WebDAV Data Format TIFF, JPEG, PDF, XPS, OOXML (Power Point) Resolution 100 x 100 dpi, 150 x 150 dpi, 200 x 100 dpi, 200 x 200 dpi, 200 x 400 dpi, 300 x 300 dpi, 400 x 400 dpi, 600 x 600 dpi System Environment Windows XP Professional SP3, Windows Server 2003 R2 SP2, Windows Vista... -
Page 71: E-Mail And I-Fax Features
E-Mail and I-Fax Features Item Specifications Communication Protocol SMTP, POP3 I-Fax Communication Mode Simple, Full Resolution For Sending E-mail: 100 x 100 dpi, 150 x 150 dpi, 200 x 100 dpi, 200 x 200 dpi, 200 x 400 dpi, 300 x 300 dpi, 400 x 400 dpi, 600 x 600 dpi For Sending I-Fax (Black-and-White): 200 x 100 dpi, 200 x 200 dpi, 200 x 400 dpi , 300 x 300 dpi... -
Page 72: Network Environment
Network Environment Hardware Specifications Network Interface 10Base-T/100Base-TX/1000Base-T (RJ-45) Software Specifications Protocol Supported TCP/IP Frame type: Ethernet II Print applications: LPD/Raw/IPP/IPPS/FTP/WSD/SMB IPX/SPX Frame type: Ethernet II/Ethernet 802.2/Ethernet 802.3/Ethernet SNAP/Auto Detect Print applications: Bindery PServer/NDS PServer/RPrinter/Nprinter Printer Settings Software Specifications Command Language PCL5e, PCL6, PostScript 3 Resident Fonts PCL:... - Page 73 Replacing the Toner Cartridge/Waste Toner Container...
-
Page 74: Legal Notices
U.S.A., please refer to the Safety regulations require the product's name to be “SUPPORT” page on Canon U.S.A. ’ s Web site (http:// registered. In some regions where this product is sold, www.usa.canon.com). -
Page 75: International Energy Star Program
(9) The human-readable portion (the source code) of the prior written permission of Canon Inc. the SOFTWARE is not licensed to you. This product includes software and/or software modules that are licensed by Canon Inc. or its licensors Legal Notices... -
Page 76: The Software Subjected To The Other Conditions
Equipment The information in this document is subject to change without notice. CANON INC. MAKES NO WARRANTY OF ANY KIND WITH The fax function is available only if the FAX Board is REGARD TO THIS MATERIAL, EITHER EXPRESS OR installed. - Page 77 ON until the problem is completely resolved. Users should contact their local authorized Canon Facsimile Service Dealer for the servicing of Canon recommends an individual line following equipment. industry standards, i.e., 2500 (touch-tone) or 500 If your equipment malfunctions, please contact your (rotary/pulse dial) telephones.
-
Page 78: Users In Canada
Users should not attempt to make such connections themselves, but should contact the appropriate electric inspection authority, or Canon recommends an individual line following electrician, as appropriate . industry standards, i.e., 2500 (touch-tone) or 500 (rotary/pulse dial) telephones. A dedicated extension off a PBX (Private Branch eXchange) unit without "Call... -
Page 79: Super G3
Cette précaution est particulièrement importante (si vous communiquez avec les pays étrangers) dans les zones rurales. Canon vous conseille d'utiliser une ligne individuelle Au lieu d'essayer de faire ces branchements conforme aux normes industrielles, à savoir: ligne eux-mêmes, les utilisateurs sont invités à faire téléphonique 2500 (pour appareil à... -
Page 80: Important Safety Instructions
. Then, contact your local • Insert the power plug completely into the authorized Canon dealer . power outlet, as failure to do so may result in a Necklaces and other metal objects fire or electrical shock . -
Page 81: Handling
. Then, contact your local authorized • Paper that has just been output from the Canon dealer . Continued use of the machine in machine may be hot . Be careful when removing this condition may result in a fire or electrical or aligning paper from the output tray . -
Page 82: Maintenance And Inspections
Also, turn OFF the main power regularly . If the following conditions occur, switch, and disconnect the power cord for safety contact your local authorized Canon dealer, as when the machine will not be used for an extended the condition may cause a fire: period of time, such as during consecutive holidays. -
Page 83: Consumables
The fixing unit and its surroundings inside the If you cannot remove the paper, contact your machine may become hot during use . When local authorized Canon dealer . removing jammed paper or when inspecting • When removing a used toner cartridge, remove... -
Page 84: Telephone Equipment
• Keep toner and other consumables out of the reach of small children . If these items are ingested, consult a physician immediately . • Do not dismantle the toner cartridge, as doing so may cause toner to fly out and enter your eyes or mouth . -
Page 85: Canon Imagerunner Advance 500/400 Series Limited Warranty
Separate Warranty. Non-Canon brand equipment that may be distributed with the Product is sold “AS IS” and without warranty of any kind by Canon, including any implied warranty regarding merchantability or fitness for a particular purpose, and all such warranties are disclaimed. -
Page 86: Terms Of Imageware Remote Service
THE PRODUCT AND STATES SUCH PURCHASER’S EXCLUSIVE REMEDY. CONDITIONS OF WARRANTY Defective parts must be returned to Canon or an Authorized Service Provider with all necessary documentation and will become the property of Canon. THIS WARRANTY APPLIES TO PRODUCTS SOLD AND USED IN THE U.S.A. AND CANADA ONLY. -
Page 87: Terms Of Content Delivery System
Canon USA [www.usa.canon.com] or Canon Canada [www.canon.ca.]. These materials include a Technology White Paper for the CDS Service. Your instruction to Canon USA, Canon Canada or your dealer to use CDS Service or your use of CDS Service for a Product shall be considered (i) a representation that you have an internal IP network and internet access available to Products connected to that network on a generally continuous basis;... - Page 89 CANON INC . 30-2, Shimomaruko 3-chome, Ohta-ku, Tokyo 146-8501, Japan CANON U .S .A ., INC . One Canon Plaza, Lake Success, NY 11042, U.S.A. CANON CANADA INC . 6390 Dixie Road Mississauga, Ontario L5T 1P7, Canada CANON EUROPA N .V .