Canon imageRUNNER ADVANCE DX 4751i Faq Manual
Hide thumbs
Also See for imageRUNNER ADVANCE DX 4751i:
- User's manual (notification of new and enhanced functions (40 pages) ,
- User manual (47 pages) ,
- Service manual (105 pages)
Table of Contents
Advertisement
Available languages
Available languages
Advertisement
Chapters
Table of Contents

Related Manuals for Canon imageRUNNER ADVANCE DX 4751i


Summary of Contents for Canon imageRUNNER ADVANCE DX 4751i
- Page 1 FAQ Guide...
- Page 3 Please read "Important Safety Instructions" before operating this product. P.40 After you finish reading this guide, store it in a safe place for future reference. The information in this document is subject to change without notice. https://oip.manual.canon/ English Español What is Your Question?
-
Page 4: Table Of Contents
Contents What's Your Problem? The Machine Does Not If Paper Jams Occur P.19 Operate Check the Following First ....6 Paper Jams Occur ......19 The Machine Does Not Respond to the Paper Jams Occur Frequently . - Page 5 Canceling Copy/ Printing Results Are P.30 P.15 Print Jobs Not Satisfactory Installing the P.31 Printer Driver P.32 Replacement Parts Images Are Shifted/Slanted ....15 Irregularities Appear in Images/ Images Are Faint .
-
Page 6: Check The Following First
The Machine Does Not Operate Check the Following First Check Check Is a message displayed on the touch Is the main power indicator Off ? panel display? If the main power indicator does not light when you turn the main power ON, check the power plug. -
Page 7: The Machine Does Not Respond To The Computer
The Machine Does Not Respond to the Computer Solution Solution Set the IP address again. Restart the machine. Setting an IP Address Press the main power switch to turn off the machine. User's Guide 0YAS-00K Search CAUTION! Note that turning OFF the machine deletes the data that is waiting to be printed. -
Page 8: How To Load Paper
How to Load Paper Loading Paper in the Paper Drawer Place the paper drawer back into the machine. CAUTION! Be careful not to get your fi ngers caught between the paper drawer and the machine. P O I N T When you have changed the paper size, replace the paper size label with an appropriate one, as P.36... -
Page 9: When You Have Loaded A Different Type Of Paper Than The Preset One
For available paper, see the following. AVPP-TBM Available Paper Search P.49 How to use the search number When You Have Loaded a Diff erent Type of Paper than the Preset One Select the Press paper type. Press [Preferences] [Paper Settings] [Paper Settings]. -
Page 10: Loading Paper In The Multi-Purpose Tray
How to Load Paper Loading Paper in the Multi- Purpose Tray CAUTION! When using coated paper or paper that does not feed well, load one sheet at a time. Check the paper size/ type. Press If the paper size/type setting does not Adjust the position of the paper guides. - Page 11 For available paper, see the following. AVPP-TBM Available Paper Search P.49 How to use the search number When you have loaded custom size paper Specify the paper size manually. Specifying Paper Size and Type in the Multi-purpose Tray User's Guide 0YAS-02F Search P.49...
-
Page 12: Loading Paper With Printed Logos
How to Load Paper Loading Paper with Printed Logos Refer to the table below to load paper with printed logos. Example: When printing on LTR size paper Orientation Printing result Paper Drawer Multi-Purpose Tray Logo Co. Ltd t d . Co. -
Page 13: Loading Envelopes
For available paper, see the following. AVPP-TBM Available Paper Search P.49 How to use the search number Loading Envelopes CAUTION! • You can load envelopes in the paper drawer 2 or multi-purpose tray. • Do not use envelopes that have glue attached to their fl aps, as the glue may melt due to the heat and pressure of the fi xing unit. - Page 14 How to Load Paper When loading envelopes in the multi- When loading envelopes in the paper purpose tray drawer 2 Check the orientation of the stack of envelopes, Check the orientation of the stack of envelopes, and load it in the multi-purpose tray. and load it in the paper drawer 2.
- Page 15 Printing Results Are Not Satisfactory Irregularities Appear in Images Are Shifted/Slanted Images/Images Are Faint Solution Solution Adjust the paper guides. The paper may have absorbed moisture. Replace it with paper that has not absorbed moisture. Solution Perform gradation adjustment. Adjust the guide exactly. Press Multi-purpose tray Press [Adjustment/Maintenance] [Adjust Image...
- Page 16 Printing Results Are Not Satisfactory Black Streaks Appear in Images Open the inner cover. Solution Is the document feed scanning area dirty? For the imageRUNNER ADVANCE DX 4751i/4745i : Turn OFF the machine, and unplug the power plug from the AC power outlet. Open the feeder, and clean the lower side document feed scanning area (a) and feeder white plate (b) using the supplied glass-cleaning...
- Page 17 If the DADF-BA is attached: Open the feeder, and clean the lower side document feed scanning area using the supplied glass-cleaning sheet. N O T E Do not use glass cleaner or an alcohol solution, etc., as they will strip away the stain-proof coating.
- Page 18 Printing Results Are Not Satisfactory Bleed-through Occurs Solution Set the type of original properly. If bleed-through is observed with the copy result, setting the type of original can improve the Press problem, giving a neat copy. Press [Copy (Prevent Bleed-Thru)] on the Home screen.
-
Page 19: Paper Jams Occur
If Paper Jams Occur Paper Jams Occur If paper jams occur, a screen like the following appears on the touch panel display. Follow the instructions in the screen to remove the jammed paper. Remedy Paper jam locations Use these buttons and bar to operate the video. P O I N T The screen disappears once all the jammed paper is removed and all the machine’s covers and drawers are closed correctly. -
Page 20: Paper Jams Occur Frequently
If Paper Jams Occur Paper Jams Occur Frequently Solution Solution Adjust the paper guides. Check the paper type setting. Press Press Adjust the guide exactly. Multi-purpose tray If the paper type setting does not match the loaded paper, change the setting. •... - Page 21 Loading Paper or Paper Settings Cannot Be Done Successfully Paper Is Not Fed • Remove the excess amount of paper. Solution Make sure that the paper stack does not Open the paper source to check whether exceed the load limit line ( paper has been loaded properly.
- Page 22 Loading Paper or Paper Settings Cannot Be Done Successfully If the "Load paper." Message Is Displayed Solution Solution Replenish paper. Check the paper type setting. Press Press If the paper source is vacant, replenish paper. Solution If the paper type setting does not match the loaded paper, change the setting.
- Page 23 Solution Make sure that the original size and output paper size are correct. Check the original size and possible output sizes on the [Printing Preferences] screen of the printer driver. Load paper of the size matching the original size setting. P O I N T To print on paper of a size diff erent from that of the original, manually specify the paper size...
- Page 24 Loading Paper or Paper Settings Cannot Be Done Successfully Printing Cannot Be Performed Printing Cannot Be Performed on the Expected Side of Paper with the Expected Size Solution Solution Load paper in the correct orientation Make sure that the paper size setting and with the correct side face up/ matches the size of the loaded paper.
- Page 25 In Two-Sided Printing, the Print Direction Diff ers between the Front and Back Sides of the Paper Solution Make settings for two-sided printing. In the application's print setting screen, select the print direction. In the [Printing Preferences] screen of the driver, set [Orientation] for the direction selected in step 1.
-
Page 26: Scan/Fax Cannot Be Performed Successfully
Scan/Fax Cannot Be Performed Successfully If You Cannot Send Documents Stopping Scanning/Faxing to a Server Using [Scan and Send] To stop the paper feed Solution Check the server information. If you have updated something including the login password for the server (computer), change the information registered to the address book/one- touch buttons. -
Page 27: Scanned Documents Cannot Be E-Mailed
Scanned Documents Cannot Be E-Mailed Solution Solution Check the information of the If e-mailing of documents is destination. not possible at all, make correct communication settings for the SMTP/ If any update has been done, change the DNS server. For the setting procedures, information registered to the address book/one- see the User's Guide. -
Page 28: If You Cannot Send/Forward Faxes
Scan/Fax Cannot Be Performed Successfully If You Cannot Send/Forward Faxes If no faxes can be sent If you cannot forward faxes Check if the telephone line is not connected to a Check the information of the forwarding wrong location. destination registered to the address book/one- touch buttons. -
Page 29: If You Cannot Receive Faxes
If You Cannot Receive Faxes If you are using an optical line or IP Solution telephone line Delete unnecessary documents in the Communication errors may occur depending on memory to increase the free space. the line quality. For more information, contact your telephone carrier. -
Page 30: Canceling Copy/Print Jobs
Canceling Copy/Print Jobs Canceling a Copy Job Canceling a Print Job To stop the paper feed For Windows OS In the computer screen, double-click the printer icon. Press P O I N T You can also stop the paper feed by pressing Select the file you want to cancel. -
Page 31: Installing The Printer Driver
For details of printer driver installation, see the Driver Installation Guide. The Guide can be downloaded from, or viewed on, the same page of the Canon website as for the printer driver. Latest OS support information See the Canon website (https://global. -
Page 32: Replacement Parts
2 may appear first. Prepare the consumable. Check the item number.* * This is an item number identifying a Canon genuine consumables. For high quality printouts, we recommend that you use Canon genuine consumables. N O T E P.33... - Page 33 Be careful of counterfeit toners Please be aware that there are counterfeit Canon toners in the marketplace. Use of counterfeit toner may result in poor print quality or machine performance. Canon is not responsible for any malfunction, accident or damage caused by the use of counterfeit toner.
-
Page 34: An Error Screen Is Displayed
An Error Screen is Displayed If the "Contact your service An Error Message Is Displayed representative" Message Is Displayed If an error occurs during scanning or printing or When the machine ceases to operate normally if a problem occurs with network connection or due to a trouble, a message appears, asking you setting, a message is displayed on the touch panel to contact the service representative. - Page 35 The machine enters the limited functions mode. When the problem is resolved, the [Call service representative.] message disappears in the screen at the bottom left. A Message Saying to Contact a Local Authorized Canon Dealer Is Displayed User's Guide 0YAS-0K0 Search P.49...
-
Page 36: Illustrated Index
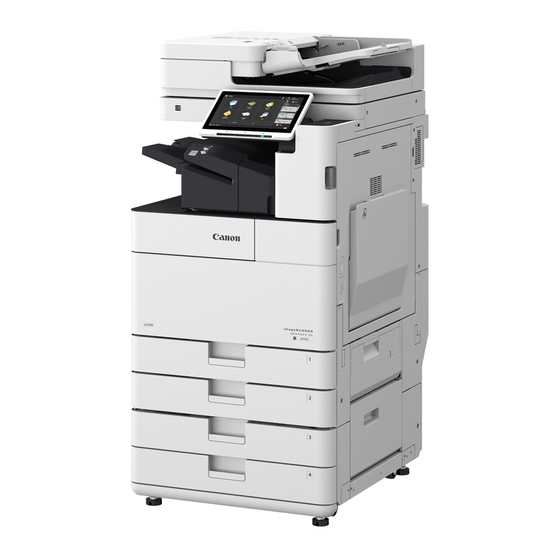
Illustrated Index You can easily identify the name of a part and find the page where that part is described. * The illustrations assume that the machine is equipped with a Cassette Feeding Unit-AN Main Unit Cassette Feeding Unit-AN Paper size label P. - Page 37 Power switch Multi-purpose tray P.10 Paper guides Tray extension Paper drawer Paper guides...
- Page 38 Illustrated Index Control Panel Home screen Onscreen number keypad Touch panel display [Energy Saver] Displays the settings screen and messages. Press to put the machine into sleep mode. Touch the panel to perform setting and other operations. [Log in]/[Log out] Press this to log in/out (when a login service [Settings/Registration] has been set).
- Page 39 Flashes or lights if there is an error in the machine. ※ When the Error indicator maintains a steady red light, contact your local authorized Canon dealer. Processing/Data indicator • Flashes when the machine is operating. • Lights when the machine is waiting for a...
-
Page 40: Appendix
Do not perform any operations not described in reactions occur • As far as possible, install in a location where this manual. Canon will not be responsible for any • A location exposed to corrosive or toxic gases communication is not blocked by intervening damages resulting from operations not described •... - Page 41 AC power outlet and contact an authorized the like found on this machine. while the paper drawer is removed, as this may Canon dealer if the machine makes an unusual Do not subject the machine to strong shocks • result in personal injury.
- Page 42 If your equipment malfunctions, please contact Touching these components may result in When using your telephone equipment, basic your local authorized Canon dealer from whom burns. Do not touch any part of the machine safety precautions should always be followed to you purchased the equipment (if under that is not indicated in the manual.
- Page 43 Cet équipement est conforme aux limites CANON INC. MAKES NO WARRANTY OF ANY The REN is used to determine the number of • d’exposition aux rayonnements énoncées pour KIND WITH REGARD TO THIS MATERIAL, devices that may be connected to a telephone un environnement non contrôlé...
- Page 44 Toute [NOTE] de l'utilisateur pour les dimensions spécifiques et réparation ou modification que pourrait faire Canon recommends an individual line following le poids. l'utilisateur de cet appareil, ou tout mauvais industry standards, i.e., 2500 (touch-tone) or 500 fonctionnement, donne à...
- Page 45 Canon published materials available from your hereby conveyed or granted by rights holders software or data files for purposes other than dealer or on the web sites of Canon USA [www. of the SOFTWARE to you for any intellectual mentioned above.
- Page 46 CANON SELLER. You will be responsible for network security and any data back-up. You will timely advise the Canon Seller of any security procedures the Canon Seller will need to use to provide CDS Services as described herein. To the extent downloads involve presenting end...
- Page 47 Product is sold "AS IS" and without warranty of any kind by Canon, including any implied warranty regarding merchantability or fitness for a particular purpose, and all such warranties are disclaimed. The sole warranty, if any, with respect to such non-Canon brand items is given by the supplier or producer thereof. For further information on software, see below.
-
Page 49: Do You Want To Know More
The User's Guide describes all functions of the machine. Opening the User's Guide Search by "Contents" Display the online manual website https://oip.manual.canon/ Search by "Search" If you notice a search number in a topic in this guide you are reading... Setting the network environment User's Guide... - Page 51 Lea "Instrucciones de seguridad importantes" antes de utilizar este producto. P.88 Al acabar de leer esta guía, guárdelo en un lugar seguro para consultas futuras. La información de este documento está sujeta a cambios sin previo aviso. English https://oip.manual.canon/ Español ¿Cuál es su pregunta?
- Page 52 Contenido ¿Qué problema tiene? El equipo no funciona Si se produce un atasco P.54 P.67 de papel Verifi que primero lo siguiente ..54 Se producen atascos de papel ....67 El equipo no responde al Se producen atascos de papel con frecuencia .
- Page 53 Cancelación de Los resultados de P.78 trabajos de copia/ P.63 impresión no son impresión satisfactorios Instalación del P.79 controlador de impresora P.80 Piezas de repuesto Las imágenes están desplazadas/inclinadas ..63 Aparecen irregularidades en las imágenes/ Las imágenes están difuminadas ... . . 63 Aparecen rayas negras en las imágenes .
-
Page 54: Verifi Que Primero Lo Siguiente
El equipo no funciona Verifi que primero lo siguiente Compruebe Compruebe ¿Aparece algún mensaje en la pantalla ¿Está apagado el indicador de táctil? alimentación principal? Si el indicador de alimentación principal no se ilumina al encender la alimentación principal, compruebe el enchufe. Indicador Alimentación principal I(ON) Mensaje simple... -
Page 55: El Equipo No Responde Al
El equipo no responde al ordenador Solución Solución Vuelva a confi gurar la dirección IP. Reinicie el equipo. Configurar una dirección IP Pulse el interruptor de alimentación principal para apagar el equipo. Guía de usuario 0YAS-00K Buscar ATENCIÓN Tenga en cuenta que si apaga el equipo, se eliminarán los datos que estén en espera de Cómo utilizar el número de búsqueda P.95... -
Page 56: Cómo Cargar Papel
Cómo cargar papel Carga de papel en el casete Vuelva a colocar el casete en el equipo. ATENCIÓN Tenga cuidado de no pillarse los dedos entre el casete y el equipo. NOTA Cuando cambie el tamaño de papel, sustituya la etiqueta de tamaño de papel por otra según P.84 corresponda. -
Page 57: Del Preestablecido
Consulte aquí el papel disponible. AVPP-TBM Papel disponible Buscar P.95 Cómo utilizar el número de búsqueda Si ha cargado un tipo de papel distinto del preestablecido Seleccione Pulse el tipo de papel. Pulse [Preferencias] [Opciones de papel] [Opciones de papel]. ATENCIÓN Asegúrese de seleccionar un tipo de papel que coincida con el peso de base del papel cargado. -
Page 58: Carga De Papel En La Bandeja Multiuso
Cómo cargar papel Carga de papel en la bandeja multiuso ATENCIÓN Cuando utilice papel tratado o papel que no se alimente bien, cargue las hojas de una en una. Compruebe el tamaño/ tipo del papel. Pulse Si el tamaño/tipo del papel no coincide con el papel que ha cargado En la pantalla de este paso 4, cambie la Ajuste la posición de las guías del papel. - Page 59 Consulte aquí el papel disponible. AVPP-TBM Papel disponible Buscar P.95 Cómo utilizar el número de búsqueda Si ha cargado papel de tamaño personalizado Especifique el tamaño de papel manualmente. Especificar el tamaño y el tipo de papel en la bandeja multiuso Guía de usuario 0YAS-02F Buscar...
-
Page 60: Carga De Papel Con Logotipos Impresos
Cómo cargar papel Carga de papel con logotipos impresos Consulte la tabla siguiente para cargar papel con logotipos impresos. Ejemplo: Cuando imprima en papel de tamaño LTR Orientación Resultado de impresión Casete Bandeja multiuso Logotipo Co. Ltd t d . Co. -
Page 61: Carga De Sobres
Consulte aquí el papel disponible. AVPP-TBM Papel disponible Buscar P.95 Cómo utilizar el número de búsqueda Carga de sobres ATENCIÓN • Podrá cargar sobres en el casete 2 o en la bandeja multiuso. • No utilice sobres que lleven pegamento en la solapa, ya que el pegamento podría derretirse con el calor y la presión de la unidad de fi jación. - Page 62 Cómo cargar papel Cuando cargue sobres en la bandeja Cuando cargue sobres en el casete 2 multiuso Compruebe la orientación del taco de sobres y cárguelo en el casete 2. Compruebe la orientación del taco de sobres y cárguelo en la bandeja multiuso. NOTA NOTA Alimentador de sobres D1...
-
Page 63: Las Imágenes Están Desplazadas/Inclinadas
Los resultados de impresión no son satisfactorios Las imágenes están Aparecen irregularidades en las imágenes/ desplazadas/inclinadas Las imágenes estan difuminadas Solución Solución Ajuste las guías del papel. El papel podría haber absorbido humedad. Sustitúyalo por papel que no haya absorbido humedad. Solución Lleve a cabo un ajuste de la gradación. -
Page 64: Aparecen Rayas Negras En Las Imágenes
Los resultados de impresión no son satisfactorios Aparecen rayas negras en las imágenes Abra la tapa interior. Solución ¿El área de lectura de alimentación de documentos está sucia? Para imageRUNNER ADVANCE DX 4751i/4745i: Apague el equipo y desconecte el enchufe de la toma de corriente de CA. - Page 65 Si estuviera acoplado el DADF-BA: Abra el alimentador y limpie el área de lectura de alimentación de documentos inferior utilizando la hoja de limpieza del cristal suministrada. NOTA No utilice limpiacristales o una solución con alcohol, etc. ya que estos podrían eliminar el revestimiento resistente contra las manchas.
-
Page 66: Se Produce Transparencia
Los resultados de impresión no son satisfactorios Se produce transparencia Solución Confi gure el tipo de original apropiadamente. Pulse Si se observara que el tóner se transparenta en el reverso en el resultado de copia, la configuración del tipo de original podría mejorar el problema y proporcionar una copia limpia. -
Page 67: Se Producen Atascos De Papel
Si se produce un atasco de papel Se producen atascos de papel Si se produce un atasco de papel, aparecerá una pantalla como la siguiente en la pantalla táctil. Siga las instrucciones de la pantalla para retirar el papel atascado. Solución Ubicaciones de atascos de papel... -
Page 68: Se Producen Atascos De Papel Con Frecuencia
Si se produce un atasco de papel Se producen atascos de papel con frecuencia Solución Solución Ajuste las guías del papel. Compruebe la confi guración del tipo de papel. Pulse Pulse Ajuste la guía exactamente. Bandeja multiuso Si el tipo de papel configurado no coincide con el papel cargado, cambie la configuración. -
Page 69: No Se Puede Cargar Papel
No se puede cargar papel o confi gurar las opciones de papel correctamente El papel no se alimenta • Retire la cantidad sobrante de papel. Solución Asegúrese de que la pila de papel no Abra el origen de papel para comprobar exceda la línea de límite de carga ( si el papel se ha cargado correctamente. -
Page 70: Aparece Un Mensaje
No se puede cargar papel o confi gurar las opciones de papel correctamente Si aparece el mensaje "Cargue papel." Aparece un mensaje Solución Solución Reponga el papel. Compruebe la confi guración del tipo de papel. Pulse Pulse Si el origen de papel está vacío, reponga el papel. - Page 71 Solución Asegúrese de que el tamaño del original y el tamaño del papel de impresión son correctos. Compruebe el tamaño del original y los posibles tamaños de impresión en la pantalla [Preferencias de impresión] del controlador de impresora. Cargue papel del mismo tamaño que la configuración de tamaño del original.
-
Page 72: No Se Puede Imprimir Con El Tamaño Previsto
No se puede cargar papel o confi gurar las opciones de papel correctamente No se puede imprimir en la No se puede imprimir con el cara prevista del papel tamaño previsto Solución Solución Cargue papel en la orientación Asegúrese de que el tamaño del papel correcta y con la cara correcta hacia confi gurado coincide con el tamaño arriba/abajo. -
Page 73: Del Papel
En la impresión de doble cara, la dirección de impresión difi ere entre el anverso y el reverso del papel Solución Confi gure las opciones de impresión a doble cara. En la pantalla de configuración de impresión de la aplicación, seleccione la dirección de impresión. -
Page 74: Si No Puede Enviar Documentos A Un Servidor Empleando [Leer Y Enviar]
No se puede escanear/enviar por fax correctamente Si no puede enviar documentos a un Detención del escaneado/envío servidor empleando [Leer y enviar] por fax Para detener la alimentación de papel Solución Consulte la información del servidor. Si ha realizado alguna actualización, incluida la contraseña de inicio de sesión para el servidor (ordenador), cambie la información registrada en la libreta de direcciones/botones de acceso directo. -
Page 75: No Se Pueden Enviar Por Correo Electrónico Los Documentos Escaneados
No se pueden enviar por correo electrónico los documentos escaneados Solución Solución Compruebe la información del Si no es posible enviar documentos por destino. correo electrónico, establezca las opciones de comunicación correctas para el servidor Si se ha realizado alguna actualización, cambie la SMTP/DNS. -
Page 76: Si No Puede Enviar/Reenviar Faxes
No se puede escanear/enviar por fax correctamente Si no puede enviar/reenviar faxes Si no puede enviarse ningún fax Si no puede reenviar faxes Compruebe que la línea telefónica no esté Compruebe la información del destino de reenvío conectada a una ubicación incorrecta. registrada en la libreta de direcciones/botones de acceso directo. -
Page 77: Si No Puede Recibir Faxes
Si no puede recibir faxes Si utiliza una línea de fi bra óptica o de Solución telefonía a través de IP Elimine los documentos innecesarios Podrían producirse errores de comunicación en de la memoria para aumentar el función de la calidad de la línea. espacio libre. - Page 78 Cancelación de trabajos de copia/impresión Cancelación de un trabajo de Cancelación de un trabajo de copia impresión Para detener la alimentación de papel Para el SO Windows En la pantalla del ordenador, haga doble clic en el icono de la impresora. Pulse NOTA También podrá...
- Page 79 Guía de instalación del controlador. Dicha guía puede descargarse de la misma página del sitio web de Canon que el controlador de impresora, o bien consultarse allí. Información más reciente de asistencia del SO Consulte el sitio web de Canon (https:// global.canon/).
-
Page 80: Piezas De Repuesto
Prepare el consumible. Consulte el número de artículo.* * Se trata de un número de artículo que identifica un consumible original de Canon. Para conseguir una alta calidad de impresión, se recomienda utilizar consumibles originales de Canon. NOTA P.81 Lista de consumibles Para consultar el número de artículo... - Page 81 Tenga cuidado con el tóner falsifi cado Le informamos que existe tóner Canon falsificado en el mercado. El uso de tóner falsificado puede producir mala calidad de impresión o un funcionamiento deficiente de la máquina. Canon no se hace responsable de posibles defectos de funcionamiento, accidentes o daños ocasionados por el uso de cartuchos de tóner Canon falsificados.
-
Page 82: Aparece Una Pantalla De Error
Aparece una pantalla de error Si aparece el mensaje "Póngase en Aparece un mensaje de error contacto con su servicio al cliente" Si se produjera un error durante la lectura o la Si el equipo dejara de funcionar con normalidad impresión, o si se produjera un problema con la debido a un problema, aparecerá... - Page 83 [Llame a un representante del servicio técnico.] en la esquina inferior izquierda de la pantalla. Aparece un mensaje que le pide que se ponga en contacto con su distribuidor autorizado de Canon Guía de usuario 0YAS-0K0 Buscar P.95...
-
Page 84: Índice Ilustrado
Índice ilustrado Podrá identificar fácilmente el nombre de una pieza y buscar la página donde se describe. * En las ilustraciones se da por supuesto que el equipo está equipado con una Unidad de Alimentación por Casete AN Unidad principal Unidad de Alimentación por Casete AN Etiqueta de tamaño de papel... - Page 85 Interruptor de alimentación P.55 Bandeja multiuso P.58 Guías del papel Extensión de la bandeja Casete P.56 Guías del papel...
- Page 86 Índice ilustrado Panel de control Pantalla Inicio Teclado numérico en pantalla Pantalla táctil [Ahorro de energía] P.54 P.54 Muestra la pantalla de opciones y mensajes. Pulse poner el equipo en el modo de reposo. Pulse el panel para configurar opciones y otras operaciones.
- Page 87 ※ Si el indicador Error estuviera iluminado en rojo fijo, póngase en contacto con su distribuidor autorizado local de Canon. Indicador Procesando/datos • P a r p a d e a c u a n d o e l e q u i p o e s t á e n funcionamiento.
-
Page 88: Apéndice
No instale el equipo en los siguientes lugares metros o más por encima del nivel del mar. los cambios no realizados por Canon o un tercero De otro modo, podrían producirse daños en el Conexión de la línea telefónica (solo para autorizado por Canon. - Page 89 De otro modo, contacto con un distribuidor autorizado de podría sufrir quemaduras por baja temperatura, Canon si el equipo hiciera algún ruido inusual, Unidad de acabado (solo en productos con una incluso si no tocara la unidad de fijación y su despidiera olores extraños o emitiera humo o...
- Page 90 ( ). manera que se evite la inhalación. Para limpiar el ATENCIÓN: Superficie caliente. No toque. tóner derramado, no utilice nunca una aspiradora imageRUNNER ADVANCE DX 4751i/4745i/4735i/4725i que no disponga de medidas de protección (F177300) Equipo de Clase II contra explosiones de polvo.
- Page 91 Consulte http://www.dtsc.ca.gov/ póngase en contacto con el distribuidor autorizado hazardouswaste/perchlorate/ para obtener una local de Canon al que adquirió el equipo (si información detallada. estuviera bajo garantía) o con quien tenga firmado un contrato de servicio técnico. Si no está seguro Usuarios de los EE.
- Page 92 ATENCIÓN 3. Solicite una línea comercial normal al de servicio de fax de Canon local autorizado para Los usuarios no deberán intentar hacer este tipo representante comercial de su compañía la reparación del equipo.
- Page 93 [NOTE] los derechos y obligaciones establecidos en manual pertenecen a imageRUNNER ADVANCE DX Canon vous conseille d'utiliser une ligne individuelle las condiciones que rigen el SOFTWARE y el 4751i con los siguientes equipamientos opcionales conforme aux normes industrielles, à savoir: ligne...
-
Page 95: Quiere Saber Más
Apertura de la Guía de usuario Búsqueda por Visualice el sitio web del "Contenido" manual en línea https://oip.manual.canon/ Buscar por "Búsqueda" Si viera un número de búsqueda en un tema de esta guía que está leyendo... Configuración del entorno de red Guía de usuario Podrá... - Page 96 Building A, The Park Estate, 5 Talavera Road, 146-8501, Japan Macquarie Park, NSW 2113, Australia CANON U.S.A., INC. CANON SINGAPORE PTE LTD One Canon Park, Melville, NY 11747, U.S.A. 1 Fusionopolis Place, #15-10, Galaxis, Singapore 138522 CANON CANADA INC. 8000 Mississauga Road Brampton ON L6Y 5Z7, Canada CANON EUROPA N.V.