Table of Contents
Advertisement
Advertisement
Table of Contents

Related Manuals for Yamaha RX-V561


Summary of Contents for Yamaha RX-V561
- Page 1 RX-V561 AV Receiver Ampli-tuner audio-vidéo OWNER’S MANUAL MODE D’EMPLOI...
-
Page 2: Important Safety Instructions
IMPORTANT SAFETY INSTRUCTIONS Important safety instructions CAUTION RISK OF ELECTRIC SHOCK DO NOT OPEN CAUTION: TO REDUCE THE RISK OF ELECTRIC SHOCK, DO NOT REMOVE COVER (OR BACK). NO USER-SERVICEABLE PARTS INSIDE. REFER SERVICING TO QUALIFIED SERVICE PERSONNEL. • Explanation of Graphical Symbols The lightning flash with arrowhead symbol, within an equilateral triangle, is intended to alert you to the presence of uninsulated “dangerous voltage”... - Page 3 This product, when installed as indicated in the instructions contained in this manual, meets FCC requirements. Modifications not expressly approved by Yamaha may void your authority, granted by the FCC, to use the product. 2 IMPORTANT: When connecting this product to accessories and/or another product use only high quality shielded cables.
- Page 4 12 Only voltage specified on this unit must be used. Using this unit with a higher voltage than specified is dangerous and may cause fire, damage to this unit, and/or personal injury. Yamaha will not be held responsible for any damage resulting from use of this unit with a voltage other than specified.
-
Page 5: Table Of Contents
INTRODUCTION Features ... 2 Getting started ... 3 Quick start guide ... 4 Preparation: Check the items ... 4 Step 1: Set up your speakers... 5 Step 2: Connect your DVD player and other components... 6 Step 3: Turn on the power and press SCENE 1 button ... -
Page 6: Features
Devices, Inc. and others. It is strictly prohibited to use this unit for use other than audiovisual purposes. Since hearing damage from loud sounds is often undetectable until it is too late, Yamaha and the Electronic Industries Association’s Consumer Electronics Group recommend you to avoid... -
Page 7: Getting Started
Checking the supplied accessories Check that you received all of the following parts. Remote control Batteries (2) (AAA, R03, UM-4) POWER POWER STANDBY POWER MULTI CH IN AUDIO SEL SLEEP MUTE MD/CD-R TUNER TV CH DTV/CBL V-AUX TV INPUT TV MUTE TV VOL SCENE BAND LEVEL... -
Page 8: Quick Start Guide
Quick start guide The following steps describe the easiest way to enjoy DVD movie playback in your home theater. Front right speaker Video monitor Subwoofer Front left speaker Center speaker DVD player Surround left speaker Step 1: Set up your speakers Step 2: Connect your DVD player and other components Step 3: Turn on the power and... -
Page 9: Step 1: Set Up Your Speakers
Step 1: Set up your speakers Place your speakers in the room and connect them to this unit. ANTENNA SPEAKERS DTV/CBL HDMI COMPONENT VIDEO VIDEO DTV/CBL MONITOR DTV/CBL MONITOR S VIDEO DIGITAL INPUT SURROUND CENTER OPTICAL UNBAL. VIDEO MULTI CH INPUT AUDIO OUTPUT FRONT... -
Page 10: And Other Components
Quick start guide Step 2: Connect your DVD player and other components ANTENNA DTV/CBL HDMI COMPONENT VIDEO VIDEO DTV/CBL MONITOR DTV/CBL MONITOR S VIDEO DIGITAL INPUT SURROUND UNBAL. OPTICAL VIDEO MULTI CH INPUT AUDIO OUTPUT FRONT SURROUND CENTER DTV/ COAXIAL SUBWOOFER Make sure that this unit and the DVD player are unplugged from the AC wall... - Page 11 Connect the FM and AM antennas to this unit. See page 20 for the details. AM loop antenna Indoor FM antenna Open the lever Insert The wire of the AM loop antenna does not have any polarity and you can connect either end of the wire to AM and GND terminal. Note The shape of the AM and GND terminals may vary depending on the unit.
-
Page 12: Step 3: Turn On The Power And Press Scene 1 Button
Quick start guide Step 3: Turn on the power and press SCENE 1 button Check the type of the connected speakers. If the speakers are 6 ohm speakers, set “SP IMP.” to “6 MIN” before using this unit (see page 13). Turn on the video monitor connected to this unit. -
Page 13: What Do You Want To Do With This Unit
Case C: “I want to listen to a music program from the FM radio station...” Press F SCENE 4 (or E SCENE 4) to select “Radio Listening”. Notes • To use the “Radio Listening” template, you must tune into the desired radio station in advance. See pages 40 to 42 for tuning information. -
Page 14: Connections
Connections Rear panel COMPONENT VIDEO DTV/CBL MONITOR S VIDEO DIGITAL INPUT OPTICAL VIDEO MULTI CH INPUT FRONT SURROUND CENTER DTV/ COAXIAL SUBWOOFER 1 COMPONENT VIDEO jacks See page 18 for connection information. 2 HDMI jacks See page 17 for connection information. 3 VIDEO jacks See pages 16 and 18 for connection information. -
Page 15: Placing Speakers
Subwoofer (SW) The use of a subwoofer with a built-in amplifier, such as the Yamaha Active Servo Processing Subwoofer System, is effective not only for reinforcing bass frequencies from any or all channels, but also for high fidelity sound reproduction of the LFE (low-frequency effect) channel included in Dolby Digital and DTS sources. -
Page 16: Connecting Speakers
Connections Connecting speakers Be sure to connect the left channel (L), right channel (R), “+” (red) and “–” (black) properly. If the connections are faulty, this unit cannot reproduce the input sources accurately. Caution • Before connecting the speakers, make sure that this unit is turned off (see page 21). •... -
Page 17: Setting The Speaker Impedance
Before connecting to the SPEAKERS terminal A speaker cord is actually a pair of insulated cables running side by side. Cables are colored or shaped differently, perhaps with a stripe, groove or ridges. Connect the striped (grooved, etc.) cable to the “+” (red) terminals of this unit and your speaker. -
Page 18: Information On Jacks And Cable Plugs
Connections Information on jacks and cable plugs Audio jacks and cable plugs AUDIO DIGITAL AUDIO COAXIAL (White) (Red) (Orange) Left and right Coaxial analog audio digital audio cable plugs cable plug Audio jacks This unit has three types of audio jacks. Connection depends on the availability of audio jacks on your other components. -
Page 19: Information On Hdmi
Information on HDMI™ Audio signals input at the HDMI jack are not output from any speaker terminals but output from the connected video monitor. To enjoy the sound from speakers connected to this unit, – make an analog or digital connection besides the HDMI connection (see page 16). –... -
Page 20: Connecting Video Components
Connections Connecting video components Connect the video components as follows. You can also connect a video monitor, DVD player, digital TV, and cable TV to this unit using the S VIDEO or COMPONENT VIDEO connections (see page 17). Connecting a video monitor and a DVD player COMPONENT VIDEO DTV/CBL... -
Page 21: Connecting To Component Video Jacks
Connecting to the HDMI, COMPONENT VIDEO or S VIDEO jacks You can enjoy high-quality pictures by connecting your video monitor and video source components to this unit using HDMI, COMPONENT VIDEO or S VIDEO connections. Note Be sure to connect your video components in the same way you connect your video monitor to this unit. For example, if you connect your video monitor to this unit using a HDMI connection, connect your video components to this unit using the HDMI connection. - Page 22 Connections COMPONENT VIDEO connection Video monitor DVD player COMPONENT VIDEO DTV/CBL MONITOR MULTI CH INPUT FRONT SURROUND CENTER SUBWOOFER Cable TV or satellite tuner S VIDEO connection DVD player DVD recorder Video monitor Cable TV or satellite tuner DTV/CBL HDMI VIDEO DTV/CBL MONITOR...
-
Page 23: Connecting Audio Components
Connecting audio components Connect the audio components as follows. Connecting a CD player and a CD recorder/MD recorder Note When you connect your CD player via analog and digital connection, priority is given to the signal input at the DIGITAL INPUT jack. -
Page 24: Using The Video Aux Jacks On The Front Panel
• A properly installed outdoor antenna provides clearer reception than an indoor one. If you experience poor reception quality, install an outdoor antenna. Consult the nearest authorized Yamaha • The AM loop antenna should always be connected, even if an outdoor AM antenna is connected to this unit. -
Page 25: Connecting The Power Cable
Connecting the power cable Once all connections are complete, plug the power cable into the AC wall outlet. AC OUTLETS Power cable AC OUTLETS (SWITCHED) Use these outlets to supply power to any connected components. Connect the power cable of your other components to these outlets. -
Page 26: Front Panel Display
Connections Front panel display VIRTUAL ENHANCER DIGITAL 1 Decoder indicator The respective indicator lights up when any of the decoders of this unit functions. 2 ENHANCER indicator Lights up when the Compressed Music Enhancer mode is selected (see page 37). 3 VIRTUAL indicator Lights up when Virtual CINEMA DSP is active (see page 38). -
Page 27: Using The Remote Control
Using the remote control The remote control transmits a directional infrared ray. Be sure to aim the remote control directly at the remote control sensor on this unit during operation. VOLUME OPTIMIZER MIC STANDBY EDIT PRESET/TUNING FM/AM A/B/C/D/E PRESET/TUNING MEMORY TUNING AUTO/MAN'L SCENE VIDEO AUX... -
Page 28: Optimizing The Speaker Setting For Your Listening Room
Optimizing the speaker setting for your listening room Optimizing the speaker setting for your listening room This unit employs the YPAO (Yamaha Parametric Room Acoustic Optimizer) technology which lets you avoid troublesome listening-based speaker setup and achieves highly accurate sound adjustments automatically. The supplied optimizer microphone collects and this unit analyzes the sound your speakers produce in your actual listening environment. - Page 29 Make sure that “SETUP” is set to “AUTO” and the pointer is pointing at “START”. You can also select the following setup methods. In this k to select “SETUP”, press case, press select the one of the following choises and then select “START”.
- Page 30 Optimizing the speaker setting for your listening room Press G ENTER to display the setup results in detail. Press G l / h repeatedly to toggle between the setup result displays. Results of the speaker connection and wiring Results of the speaker distance from the listening position Results of the speaker...
- Page 31 If an error screen appears Press G k / n / l / h to select “RETRY” or “EXIT” and then press G ENTER. The following display is an example where “E-5:USER CANCEL” appears in the OSD. AUTO:ERROR . E-5:USER CANCEL Don't operate any function >...
-
Page 32: Selecting The Scene Templates
SELECTING THE SCENE TEMPLATES Selecting the SCENE templates This unit is equipped with 15 preset SCENE templates for various situations of using this unit. As the initial factory setting, the following SCENE templates are assigned to each SCENE button: SCENE 1: DVD Viewing SCENE 2: Disc Listening SCENE 3: TV Viewing SCENE 4: Radio Listening... - Page 33 Which SCENE template would you like to select? Which source do you like to play back? Video sources (DVD video, Recorded video) Music discs (CD, SACD or DVD-Audio) Radio programs USB memory device or USB portable audio player TV programs Video games You can create your original SCENE templates by editing the preset SCENE templates.
- Page 34 Selecting the SCENE templates Preset SCENE templates descriptions SCENE template Features Input source DVD Viewing (SCENE 1 as the default setting) Select this SCENE template when you play back general contents on your DVD player. DVD Movie Viewing Select this SCENE template when you play back movies on your DVD player.
-
Page 35: Creating Your Original Scene Templates
Creating your original SCENE templates You can create your original SCENE templates for each SCENE button. You can refer to the preset 15 SCENE templates to create the original SCENE templates. Customizing the preset SCENE templates Use this feature to customize the preset SCENE templates. Create the original SCENE Select a SCENE template SCENE template library... -
Page 36: Playback
PLAYBACK Caution Extreme caution should be exercised when you play back CDs encoded in DTS. If you play back a CD encoded in DTS on a DTS-incompatible CD player, you will only hear some unwanted noise that may damage your speakers. Check whether your CD player supports CDs encoded in DTS. -
Page 37: Additional Operations
Additional operations Selecting the component connected to the MULTI CH INPUT jacks as the input source Press D INPUT l / h repeatedly (or press A MULTI CH IN) so that “MULTI CH” appears in the front panel display. Use “MULTI CH SET” menu in “INPUT MENU” to set the parameter for MULTI CH INPUT (see page 54). -
Page 38: Adjusting The Tonal Quality
Playback Enjoying pure hi-fi stereo sound The DIRECT STEREO mode allows sources to bypass the decoders and DSP processors of this unit so that you can enjoy pure hi-fi sound from 2-channel PCM and analog sources. Press C DIRECT STEREO (or press D AMP and then press V DIRECT ST.) to select “DIRECT STEREO”. - Page 39 Selecting the night listening mode The night listening modes are designed to improve listenability at lower volumes or at night. Press D AMP and then press L NIGHT repeatedly to select “NIGHT:CINEMA” or “NIGHT:MUSIC”. Choices: NIGHT:CINEMA, NIGHT:MUSIC, OFF • Select “NIGHT:CINEMA” to reduce the dynamic range of film soundtracks and make dialog easier to hear at lower volumes.
-
Page 40: Muting The Audio Output
Playback Playing video sources in the background You can combine a video image from a video source with sound from an audio source. For example, you can enjoy listening to classical music while viewing beautiful scenery from the video source on the video monitor. Press the input selector buttons on the remote control to select a video source and then an audio source. -
Page 41: Sound Field Programs
This unit is equipped with a variety of precise digital decoders that allow you to enjoy multi-channel playback from almost any stereo or multi-channel sound source. Press A PROGRAM l / h (or press D AMP and then press J PROG l / h repeatedly). The name of the selected sound field program appears in the front panel display. - Page 42 Sound field programs Enjoying 2-channel sources using the standard decoders Signals input from 2-channel sources can also be played back on multi-channels. Press D AMP and then press K SUR. DECODE repeatedly to select a decoder. You can select from the following decoders depending on the type of source you are playing and your personal preference.
- Page 43 Editing sound fields parameters You can enjoy good quality sound with the factory preset parameters. Although you do not have to change the initial settings, you can change some of the parameters to better suit the input source or your listening room. While listening to a source, press D AMP and then press Gk / n to select the desired parameter.
-
Page 44: Fm/Am Tuning
FM/AM TUNING There are 2 tuning methods: automatic and manual. Automatic tuning is effective when station signals are strong and there is no interference. If the signal from the station you want to select is weak, tune into it manually. You can also use the automatic and manual preset tuning features to store up to 40 stations. -
Page 45: Automatic Preset Tuning
Automatic preset tuning You can use the automatic preset tuning feature to store FM stations with strong signals up to 40 (A1 to E8: 8 preset station numbers in each of the 5 preset station groups) of those stations in order. You can then recall any preset station easily by selecting the preset station number. -
Page 46: Selecting Preset Stations
FM/AM tuning Selecting preset stations You can tune into any desired station simply by selecting the preset station group and number under which it was stored. When performing this operation with the remote control, press C TUNER to select “TUNER” as the input source. Press 4 A/B/C/D/E (or G A/B/C/D/E l / h) repeatedly to select the desired preset station group (A to E). -
Page 47: Using A Usb Memory Device Or A Usb Portable Audio Player
Using a USB memory device or a USB portable audio player Use this feature to enjoy WAV (PCM format only), MP3 and WMA files saved on your USB memory device or USB portable audio player connected to the USB port on the front panel of this unit. Supported USB devices This unit supports USB mass storage class devices (except USB hard disk drives) using FAT16 or FAT32 format. - Page 48 Using a USB memory device or a USB portable audio player Press G k / n / l / h on the remote control to select the desired file. k / n to select the desired file/folder. • Press h to enter the selected G ENTER •...
-
Page 49: Recording
Recording adjustments and other operations are performed from the recording components. Refer to the operating instructions for those components. Notes • When this unit is set to the standby mode, you cannot record between other components connected to this unit. •... -
Page 50: Set Menu
SET MENU You can use the following parameters in “SET MENU” to adjust a variety of system settings and customize the way this unit operates. Change the initial settings (indicated in bold under each parameter) to reflect the needs of your listening environment. -
Page 51: Using Set Menu
Option menu 3 OPTION MENU Use this menu to manually adjust the optional system parameters. Parameter A)DISPLAY SET Adjusts the brightness of the front panel display. B)MEMORY GUARD Locks sound field program parameters and other “SET MENU” settings. Designates the default audio input jack select setting for the input sources connected to the C)AUDIO SELECT DIGITAL INPUT jacks when you turn on the power of this unit. -
Page 52: Sound Menu
SET MENU 1 SOUND MENU Use this menu to manually adjust any speaker settings or compensate for video signal processing delays. ;MANUAL SETUP ;MANUAL SETUP 1 SOUND MENU 1 SOUND MENU . A)SPEAKER SET . F)D.RANGE B)SP LEVEL G)AUDIO SET C)SP DISTANCE D)CENTER GEQ E)LFE LEVEL... - Page 53 Surround left/right speakers SUR. L/R SP Choices: NONE, SML, LRG 1 SOUND MENU A)SPEAKER SET SUR. L/R SP NONE >SML When the surround speakers are large Select “LRG” (large). When the surround speakers are small Select “SML” (small). When you do not use the surround speakers Select “NONE”...
- Page 54 SET MENU Speaker level B)SP LEVEL Use this feature to manually adjust the output level of each speaker. Control range: –10 to +10 dB Control step: 1 dB Initial setting: 0 dB 1 SOUND MENU B)SP LEVEL - __________ + [ ]/[ ]:Up/Down [ ]/[ ]:Adjust SP LEVEL...
- Page 55 Center speaker equalizer Use this feature to adjust the built-in 5-frequency band (100Hz, 300Hz, 1kHz, 3kHz and 10kHz) graphic equalizer for the center channel so that the tonal quality of the center speaker matches that of the front speakers. You can make adjustments while listening to the currently selected source component or a test tone.
-
Page 56: Input Menu
SET MENU Maximum volume MAX VOL. Use this feature to set the maximum volume level. This feature is useful to avoid the unexpected loud sound by mistake. For example, the original volume range is 16 dB to –80 dB. However, when “MAX VOL.” is set to –5 dB, the volume range becomes –5.0 dB to –80.0 dB. - Page 57 Input rename B)INPUT RENAME Use this feature to change the name of the input source that appears in the OSD and in the front panel display. 2 INPUT MENU B)INPUT RENAME DVD -> [ ]/[ ]:Position [ ]/[ ]:Chara. Press one of the input selector buttons ( C ) or A MULTI CH IN to select the input source you want to change the name of.
-
Page 58: Option Menu
SET MENU Multi channel input setup E)MULTI CH SET 2 INPUT MENU E)MULTI CH SET BGV;;;;;;;;;LAST [ ]/[ ]:Select Background Video BGV Use this feature to select the video source played in the background of the sources input at the MULTI CH INPUT jacks. - Page 59 Memory guard B)MEMORY GUARD Use this feature to prevent accidental changes to DSP program parameter values and other system settings. Choices: OFF, ON 3 OPTION MENU B)MEMORY GUARD >OFF [ ]/[ ]:Select • Select “OFF” to turn off the “MEMORY GUARD” feature.
-
Page 60: Remote Control Features
Remote control features In addition to controlling this unit, the remote control can also operate other audiovisual components made by Yamaha and other manufacturers. To control your TV or other components, you must set up the appropriate remote control code for each input source (see page 59). -
Page 61: Controlling This Unit, A Tv, Or Other Components
Controlling this unit, a TV, or other components Controlling this unit Press D AMP to control this unit. POWER POWER STANDBY POWER MULTI CH IN AUDIO SEL SLEEP MUTE MD/CD-R TUNER TV CH DTV/CBL V-AUX TV VOL TV INPUT TV MUTE SCENE BAND LEVEL VOLUME... -
Page 62: Controlling Other Components
Remote control features Controlling other components Press one of the input selector buttons (C) or other components. You must set the appropriate remote control code for each input source in advance (see page 59). The following table shows the function of each control button used to control other components assigned to each input selector button. -
Page 63: Setting Remote Control Codes
– – Note You may not be able to operate your Yamaha component even if a Yamaha remote control code is preset as listed above. In this case, try setting another Yamaha remote control code. While pressing and holding one of the input... -
Page 64: Advanced Setup
Advanced setup This unit has additional menus that are displayed in the front panel display. The advanced setup menu offers additional operations to adjust and customize the way this unit operates. Change the initial settings (indicated in bold under each parameter) to reflect the needs of your listening environment. -
Page 65: Troubleshooting
Refer to the table below when this unit does not function properly. If the problem you are experiencing is not listed below or if the instruction below does not help, turn off this unit, disconnect the power cable, and contact the nearest authorized Yamaha dealer or service center. General... - Page 66 Troubleshooting Problem The sound suddenly The protection circuitry has been activated goes off. because of a short circuit, etc. The sleep timer has turned off this unit. The sound is muted. Sound is heard from Incorrect cable connections. the speaker on one side only.
- Page 67 Problem Dolby Digital or DTS The connected component is not set to sources cannot be output Dolby Digital or DTS digital played. (Dolby Digital signals. or DTS indicator in Audio input jack select is set to the front panel “ANALOG”. display does not light up.) A humming sound is...
-
Page 68: Auto Setup
Troubleshooting Tuner Problem FM stereo reception is The characteristics of FM stereo noisy. broadcasts may cause this problem when the transmitter is too far away or the antenna input is poor. There is distortion, and There is multi-path interference. clear reception cannot be obtained even with a good FM antenna. - Page 69 • If a warning message “W-1” appears, corrections are made, but they may not be optimal. • If a warning message “W-2” or “W-3” appears, no corrections are made. • If an error message “E-6” occurs repeatedly, please contact a qualified Yamaha service center. Cause Check the front L/R speaker connections.
- Page 70 Troubleshooting Problem The music files and The music files and directories are placed directories in the USB in locations other than the FAT area. device cannot be You are attempting to browse directory viewed. hierarchies of over 8 levels or a directory with more than 500 files.
-
Page 71: Remote Control
Remote control Problem The remote control Wrong distance or angle. does not work nor function properly. Direct sunlight or lighting (from an inverter type of fluorescent lamp, etc.) is striking the remote control sensor of this unit. The batteries are weak. The remote control code is not correctly set. -
Page 72: Glossary
Glossary Audio information Dolby Digital Dolby Digital is a digital surround sound system that gives you completely independent multi-channel audio. With 3 front channels (front L/R and center), and 2 surround stereo channels, Dolby Digital provides 5 full-range audio channels. With an additional channel especially for bass effects, called LFE (Low Frequency Effect), the system has a total of 5.1-channels (LFE is counted as 0.1 channel). - Page 73 Based on a wealth of actually measured data, Yamaha CINEMA DSP uses Yamaha original DSP technology to combine Dolby Pro Logic, Dolby Digital and DTS systems to provide the audiovisual experience of movie theater in the listening room of your own home.
-
Page 74: Specifications
Specifications AUDIO SECTION • Minimum RMS Output Power for Front, Center, Surround 1 kHz, 0.9% THD, 8 ... 100 W • Maximum Power for Front, Center, Surround (JEITA) 1kHz, 10% THD, 8 ... 135 W • Dynamic Power (IHF, 8/6/4/2 ... -
Page 75: Index
Numerics 1 SOUND MENU, Manual setup ... 46 2 INPUT MENU, Manual setup ... 46 2ch Stereo, Sound field program ... 37 3 OPTION MENU ... 54 3 OPTION MENU, Manual setup ... 47 5ch Stereo, Sound field program ... 37 A)DISPLAY SET, Option menu ... - Page 76 G)AUDIO SET, Sound menu ... 51 Game ... 37 Hall ... 37 HDMI ... 15 HDMI jack, HDMI cable plug ... 15 HDMI jacks, Rear panel ... 10 Headphone, Dynamic range ... 51 HEADPHONE, Low-frequency effect level ... 51 Headphone, Low-frequency effect level ...
- Page 77 W-2:DISTANCE ERROR, Auto setup error message ...65 W-3:LEVEL ERROR, Auto setup error message ...65 WIRING/LEVEL ...25 WIRING/LEVEL, Auto setup ...25 Yamaha Parametric Room Acoustic Optimizer ...24 YPAO ...24 YPAO (Yamaha Parametric Room Acoustic Optimizer) ...24 YPAO indicator, Front panel display ...22...
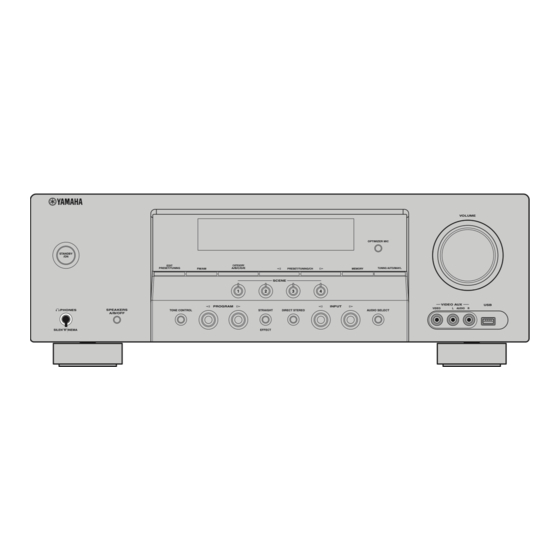
- Page 78 Front panel/Face avant STANDBY EDIT PRESET/TUNING PHONES SPEAKERS TONE CONTROL A/B/OFF SILENT CINEMA FM/AM A/B/C/D/E PRESET/TUNING SCENE PROGRAM STRAIGHT DIRECT STEREO EFFECT VOLUME OPTIMIZER MIC MEMORY TUNING AUTO/MAN'L VIDEO AUX INPUT VIDEO AUDIO AUDIO SELECT...
- Page 79 Remote control/Boîtier de télécommande POWER POWER STANDBY POWER MULTI CH IN AUDIO SEL SLEEP MUTE MD/CD-R TUNER TV CH DTV/CBL V-AUX TV VOL TV INPUT TV MUTE SCENE BAND LEVEL TITLE MENU VOLUME ENTER DISPLAY RETURN FREQ/TEXT MODE – PTY SEEK – START PROG h ENHANCER STRAIGHT...
-
Page 80: List Of Remote Control Codes
List of remote control codes Liste des codes de commande BELL & HOWELL ACER 0093 BENQ ACME 0207 BEON ACURA 0208 BESTAR 0255 BINATONE 0206 BLACK STAR 0214 ADMIRAL 0058, 0205, 0206, BLAUPUNKT 0255 0210, 0211 BLUE SKY ADYSON 0200, 0207 BONDSTEC AGASHI 0200... - Page 81 INTERNATIONAL MANESTH 0200 MARANTZ INTERVISION 0206, 0207, 0218 IRRADIO 0201, 0208, 0209, 0213, 0217, 0218 MARELLI MARK ISUKAI 0209, 0218 0207, 0215 MATSUI 0200, 0209, 0213, MEDIATOR 0218 0129, 0208, 0211 MEDION 0208, 0217 MEGATRON 0063 MELECTRONIC JC PENNEY 0057, 0060, 0061 0059 JENSEN 0060, 0061...
- Page 82 WELTBLICK TASHIKO 0200, 0207, 0210 WESTON TATUNG 0127, 0204, 0207, WHITE WESTINGHOUSE 0213, 0217, 0237 0206, 0208 TEAC 0127 WINCOM 0207, 0208, 0214, YAMAHA 0215 TECHWOOD 0060, 0061 TEKNIKA 0058, 0060, 0061, YAMISHI 0062 YOKO TELEAVIA 0216 TELECOR 0218 TELEFUNKEN...
- Page 83 1044, 1048 VIDEOSONIC 1002, 1014 WARDS 1002, 1003, 1004, 1005, 1006, 1008, 1010, 1014 WELTBLICK 1045 WHITE WESTINGHOUSE 1013 XR-1000 1004, 1005, 1006 YAMAHA 1000, 1001, 1007 YAMISHI 1050 YOKAN 1050 YOKO 1045, 1050 ZENITH 1013, 1026, 1037 ACOUSTIC SOLUTIONS 2078...
- Page 84 YAMAHA ELECTRONICS (UK) LTD. YAMAHA HOUSE, 200 RICKMANSWORTH ROAD WATFORD, HERTS WD18 7GQ, ENGLAND YAMAHA SCANDINAVIA A.B. J A WETTERGRENS GATA 1, BOX 30053, 400 43 VÄSTRA FRÖLUNDA, SWEDEN YAMAHA MUSIC AUSTRALIA PTY, LTD. 17-33 MARKET ST., SOUTH MELBOURNE, 3205 VIC., AUSTRALIA...
- Page 86 Remote control/Boîtier de télécommande POWER POWER STANDBY POWER MULTI CH IN AUDIO SEL SLEEP MUTE MD/CD-R TUNER TV CH DTV/CBL V-AUX TV VOL TV INPUT TV MUTE SCENE BAND LEVEL VOLUME TITLE MENU ENTER DISPLAY RETURN FREQ/TEXT MODE – PTY SEEK – START PROG h ENHANCER STRAIGHT...