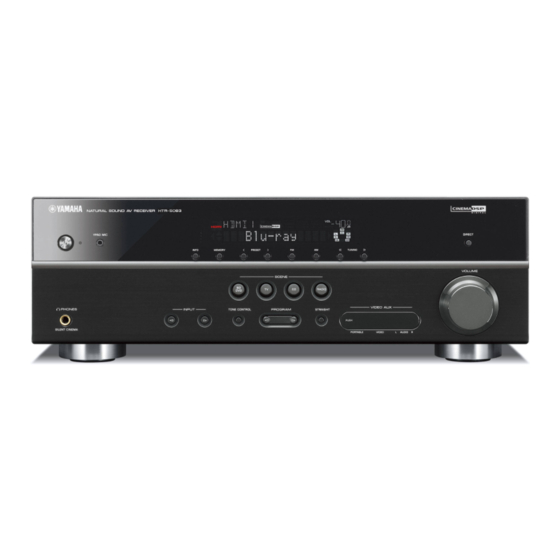
Yamaha HTR-5063 Owner's Manual
Av receiver
Hide thumbs
Also See for HTR-5063:
- Service manual (130 pages) ,
- Owner's manual (98 pages) ,
- Quick reference manual (9 pages)
Table of Contents
Advertisement
Quick Links
Advertisement
Table of Contents

Related Manuals for Yamaha HTR-5063


Summary of Contents for Yamaha HTR-5063
- Page 1 Owner’s Manual AV Receiver English...
-
Page 2: Table Of Contents
Playing back tunes from your iPod™/iPhone™ ... 40 Rear panel................. 6 Avoiding crossing remote control signals when using Connecting the Yamaha iPod universal dock ....40 Front panel display ............7 multiple Yamaha receivers ..........66 Controlling an iPod™/iPhone™ ........40 Remote control .............. -
Page 3: Features And Capabilities
– External component operation with this unit’s remote control..............63 – Playback from an iPod/iPhone (iPod/iPhone and components sold separately) ........40 – Multiple Yamaha receiver operation without signal interference <Remote ID Switching>....66 – Playback from a Bluetooth component (Bluetooth and components sold separately) ......43 ■... -
Page 4: About This Manual
INTRODUCTION Features and capabilities About this manual ■ Attaching the VIDEO AUX input cover (supplied) ■ Installing batteries in the remote control To protect against dust, attach the supplied VIDEO AUX input When inserting batteries in the remote control, remove the cover to the VIDEO AUX jacks when you do not use the jacks. -
Page 5: Part Names And Functions
(☞p. 56). or right key repeatedly to cycle through the input sources in order. Front panel display • When an iPod is charging in the Yamaha iPod universal dock STRAIGHT Displays information on this unit (☞p. during the standby mode (☞p. -
Page 6: Rear Panel
(☞p. 22). (☞p. 12). DOCK jack ANTENNA jacks SUBWOOFER jack For connecting an optional Yamaha iPod universal dock (such as For connecting AM and FM antennas (☞p. 23). For connecting a subwoofer with a built-in amplifier (☞p. 13). YDS-12) or Bluetooth wireless audio receiver (YBA-10) (☞p. -
Page 7: Front Panel Display
INTRODUCTION Part names and functions Front panel display Cursor indicators ■ Changing the front panel display Light up if corresponding cursors on the remote control are available for operations. The front panel can display sound field programs and surround HDMI indicator Multi information display decoder names as well as the active input source. -
Page 8: Remote Control
[ A ] [ B ] DOCK without changing inputs. Sets remote control codes for external component operations (☞p. DOCK A Yamaha iPod universal dock or Bluetooth TUNER 67). wireless audio receiver connected to the DOCK RECEIVER A (RECEIVER Power) jack. PRESET TUNING Switches this unit between on and standby mode. -
Page 9: Connections
CONNECTIONS Connecting speakers This unit uses acoustic field effects and sound decoders to bring you the impact of a real movie theater or concert hall. These effects will be brought to you with ideal speaker positioning and connections in your listening environment. ■... -
Page 10: Speaker Layout
CONNECTIONS Connecting speakers Speaker layout ■ 7.1-channel speaker layout ■ 6.1-channel speaker layout ■ 5.1-channel speaker layout (7 speakers + subwoofer) (6 speakers + subwoofer) (5 speakers + subwoofer) Front speaker R Front speaker R Front speaker R Subwoofer Subwoofer Subwoofer Front speaker L Front speaker L... -
Page 11: Connecting Speakers And Subwoofer
CONNECTIONS Connecting speakers Connecting speakers and subwoofer Connect your speakers to their respective terminals on the rear panel. CAUTION • Remove the AC power cable of this unit from the power outlet before connecting the speakers. • Generally speaker cables consist of two parallel insulated cables. One of these cables is a different color, or has a line running along it, to indicate different polarity. Insert the different colored (or lined) cable into the “+” (positive, red) terminal on this unit and the speakers, and the other cable into the “-”... - Page 12 CONNECTIONS Connecting speakers ■ (U.S.A. and Canada models only) Connecting the banana plug (Except U.K., Europe, Press STRAIGHT repeatedly to select a “6ΩMIN.” Changing speaker impedance Asia and Korea models) This unit is configured for 8Ω speakers as the factory setting. Tighten the knob, and then insert the banana plug into the end of When connecting to 6Ω...
-
Page 13: Connecting The Subwoofer
CONNECTIONS Connecting speakers ■ ■ Connecting the subwoofer Bi-amp connection for front speakers To activate a bi-amp connection, connect the power cable, and then set the following. This unit can connect speakers that support bi-amp connections. When connecting speakers, connect the FRONT jacks and the Check that the unit power is in standby mode. -
Page 14: Connecting External Components
CONNECTIONS Connecting external components Cable plugs and jacks S VIDEO jack (U.K. and Europe models VIDEO jack only) This jack transmits conventional analog video To transmit S-video signals that include luminance signals. This unit is equipped with the following input/output jacks. Use jacks and cables appropriate for (Y) and chrominance (C) components. -
Page 15: Connecting A Tv Monitor
CONNECTIONS Connecting external components Connecting a TV monitor When connecting to an HDMI compatible TV Video signal such as component video and video received by this unit is converted to HDMI and output to the TV. Just select HDMI input on the TV to view video from any external source connected to this This unit is equipped with the following three types of output jack for connection to a TV. -
Page 16: Connecting A Video Monitor
CONNECTIONS Connecting external components ■ ■ Connecting an HDMI video monitor Connecting a video monitor Connect the HDMI cable to the HDMI OUT jack. Connect the video pin cable to the VIDEO (MONITOR OUT) jack. HDMI (BD/DVD) HDMI OUT DOCK HDMI 1 HDMI 2 HDMI input... - Page 17 CONNECTIONS Connecting external components ■ Listening to TV audio When using other TVs To transmit sound from the TV to this unit, connect its AV1-6 or AUDIO1-2 jacks to the TV’s audio To transmit sound from the TV to this unit, connect as followings according to the TV: output jacks.
-
Page 18: Connecting Bd/Dvd Players And Other Devices
CONNECTIONS Connecting external components TRANSMIT CODE SET Connecting BD/DVD players and other devices SOURCE RECEIVER ■ Receiving video signals from the HDMI jack and audio signals SLEEP HDMI from a jack other than HDMI This unit has the following input jacks. Connect them to the appropriate output jacks on This unit can use the AV1-6 or AUDIO1-2 input jacks to receive audio signals from the playback devices such as BD/DVD players. - Page 19 CONNECTIONS Connecting external components ■ Connecting BD/DVD players and other devices with component ■ Component connections to analog audio output devices cables Connect the device with a component video cable to one of the AV1-2 input jacks. Component video / Audio output Using optical digital audio output sources Select the AV1 input that the playback device is connected to for playback.
- Page 20 CONNECTIONS Connecting external components ■ Connecting BD/DVD players and other devices with S-video Using coaxial digital audio output sources cables (U.K. and Europe models only) Select the AV3 input that the playback device is connected to for playback. Connect the S-video cable to the AV5 input jack. Connect the output audio to the AV5 analog audio jack.
- Page 21 CONNECTIONS Connecting external components ■ Connecting CD players and other audio devices Using coaxial digital output sources Select the AV input (AV2 or AV3) that the playback device is connected to for playback. Using analog stereo output sources Select the audio input (AUDIO1-2) that the playback device is connected to for playback. (BD/DVD) HDMI OUT DOCK...
-
Page 22: Connecting Video Cameras And Portable Audio Players
CONNECTIONS Connecting external components Connecting video cameras and portable audio players Transmitting input A/V to external components Use the VIDEO AUX jacks on the front panel to temporarily connect video cameras, video game units, This receiver can transmit selected incoming analog audio/video signals to external components or portable audio devices to the receiver. -
Page 23: Connecting The Fm/Am Antennas
CONNECTIONS Connecting the FM/AM antennas An indoor FM antenna and an AM loop antenna are supplied with this receiver. Connect these antennas properly to their respective jacks. AM loop antenna Indoor FM antenna Position the AM antenna away from the receiver. The wires of the AM antenna have no polarity. -
Page 24: Set Up The Speaker Parameters Automatically (Ypao)
Set up the speaker parameters automatically (YPAO) This unit is equipped with a YPAO (Yamaha Parametric Room Acoustic Optimizer) that adjusts the status, size, and volume balance of the speakers in order to provide an optimal sound field. Using YPAO allows you to automatically configure settings for which specialist knowledge is usually needed, such as adjusting speaker output and acoustic parameters to suit your listening room (the room in which this unit is placed). - Page 25 CONNECTIONS Set up the speaker parameters automatically (YPAO) TRANSMIT CODE SET SOURCE RECEIVER NOTE SLEEP qOPTION iSETUP If necessary, press repeatedly Press to start measurement. HDMI When a problem occurs, an error message or report and select the measuring acoustic appears either during or after measurement.
- Page 26 CONNECTIONS Set up the speaker parameters automatically (YPAO) TRANSMIT CODE SET ■ ■ When an error message appears When “E-5,” “E-7,” “E-8” or “E-9” is When a warning message appears SOURCE RECEIVER SLEEP during measurement displayed: after measurement HDMI Check the content of the message from the “Error Check the content of the message from the “Warning Check that the environment is suitable for message”...
-
Page 27: Message List
Carry out the measuring to continue measuring. INTERNAL ERROR occurred. process again. Contact a However, we recommend Yamaha service center if resolving the problem and “E-10” appears again. measuring again, as continuing measurement without doing so will not give accurate results. - Page 28 CONNECTIONS Set up the speaker parameters automatically (YPAO) ■ Warning message W-1: The speakers displayed Depending on the type of OUT OF PHASE are connected with the speakers, “W-1” may opposite polarity. display even if the Depending on the type of speakers are connected speakers you are using correctly.
-
Page 29: Playback
PLAYBACK TRANSMIT CODE SET Basic playback procedure SOURCE RECEIVER SLEEP HDMI Adjusting high/low-frequency sound Press PROGRAM l / h to adjust the output Turn on external components (TV, DVD (Tone control) AUDIO player, etc.) connected to this unit. level in those frequency ranges. V-AUX [ A ] [ B ]... -
Page 30: Changing Input Settings With A Single Key (Scene Function)
Enjoying sound field programs This unit is also equipped with a Yamaha digital sound field processing (DSP) chip. You can enjoy multi-channel playback for almost any sound source using various sound field programs stored on the chip, and a range of sound decoders. - Page 31 PLAYBACK Enjoying sound field programs TRANSMIT CODE SET ■ ■ Selects sound field program: Enjoying unprocessed playback Enjoying stereo playback SOURCE RECEIVER SLEEP gMOVIE MOVIE category: Press repeatedly (Straight decoding mode) Select “2ch Stereo” from the surround field programs HDMI gMUSIC MUSIC category: Press repeatedly...
-
Page 32: Direct Mode
PLAYBACK Enjoying sound field programs TRANSMIT CODE SET ■ Enjoying sound field programs SOURCE RECEIVER SLEEP without surround sound speakers HDMI This unit allows you to use virtual surround speakers to enjoy sound field surround effects, even without any AUDIO surround speakers (Virtual CINEMA DSP mode). -
Page 33: Sound Field Programs
PLAYBACK Enjoying sound field programs Sound field programs Action Game This sound field is suitable for action games such as car racing and FPS games. It uses reflection data that limits the effects range per channel in order to offer a powerful playing environment that makes the listener feel as if they are right there by enhancing various in the table indicates the sound field program for CINEMA DSP. - Page 34 PLAYBACK Enjoying sound field programs ■ Category: STEREO Suitable for listening to stereo sources. 2ch Stereo Use this program to mix down multi-channel sources to 2-channels. When multi-channel signals are input, they are down mixed to 2-channels and output from the front left and right speakers.
-
Page 35: Fm/Am Tuning
PLAYBACK FM/AM tuning TRANSMIT CODE SET SOURCE RECEIVER SLEEP Selecting a frequency for reception HDMI When using the FM/AM tuner, adjust the direction of Press PROGRAM h repeatedly to display (Normal tuning) the FM/AM antenna connected to this unit to get the “TU.”... -
Page 36: Registering And Recalling A Frequency (Preset Tuning)
PLAYBACK FM/AM tuning TRANSMIT CODE SET Registering and recalling a SOURCE RECEIVER ■ When signal reception is poor SLEEP eTUNING H / I to set a frequency to frequency (Preset tuning) HDMI receive. When you are receiving an FM broadcast and cannot obtain a stable stereo broadcast, you can force this TUNING H AUDIO... - Page 37 PLAYBACK FM/AM tuning TRANSMIT CODE SET ■ ■ Designating a preset number for Registering stations manually SOURCE RECEIVER SLEEP ePRESET F / Press jENTER, then press (Manual Preset) registration HDMI jCursor B / C to choose the present eMEMORY Press once, to display “Manual Preset”...
-
Page 38: Recalling A Preset Station
PLAYBACK FM/AM tuning TRANSMIT CODE SET Recalling a preset station Clearing preset stations Radio Data System tuning SOURCE RECEIVER SLEEP (U.K. and Europe models only) HDMI You can call preset stations registered by automatic dTUNER Press to switch to the tuner input. station preset or manual station preset. - Page 39 PLAYBACK FM/AM tuning TRANSMIT CODE SET Front panel display (When “Program Type” SOURCE RECEIVER SLEEP fINFO jENTER Press repeatedly until the desired Press to start the search function. selected) HDMI information is displayed. Frequency Information on the display changes as you press the Status AUDIO 10800...
-
Page 40: Playing Back Tunes From Your Ipod™/Iphone
RECEIVER SLEEP Once you have connected a Yamaha iPod universal dock (such as the YDS-12, sold separately) to this unit, you can enjoy playback of your iPod/iPhone using the remote HDMI control supplied with this unit. When playing back from an iPod/iPhone, you can also use the compressed music enhancer sound field programs (☞p. - Page 41 Cursor B / C / D / E ENTER DISPLAY Controls on the iPod/iPhone can also be operated in simple playback mode. Videos will not be displayed when your iPod or Yamaha iPod universal dock do not support the browser function for browsing video files.
- Page 42 PLAYBACK Playing back tunes from your iPod™/iPhone™ TRANSMIT CODE SET ■ Shuffle/Repeat playback When the repeat function is enabled, “ (One)” or SOURCE RECEIVER SLEEP “ (All)” appears on the TV screen. You can use special playback functions such as shuffle HDMI dDOCK Press...
-
Page 43: Playing Back Tunes From Bluetooth™ Components
TRANSMIT CODE SET SOURCE RECEIVER SLEEP You can connect a Yamaha Bluetooth wireless audio receiver (such as the YBA-10, sold separately) to this unit and enjoy wireless playback from Bluetooth-compatible HDMI portable music players. AUDIO NOTE When playing back from a Bluetooth component for the first time, you must first pair the devices (register the Bluetooth components). When establishing a wireless connection... -
Page 44: Using Bluetooth™ Components
PLAYBACK Playing back tunes from Bluetooth™ components TRANSMIT CODE SET Using Bluetooth™ components SOURCE RECEIVER SLEEP jCursor B / C to select “Connect” and HDMI press jENTER. When pairing is complete, carry out the following procedure to achieve a wireless connection between this When wireless connection is complete AUDIO unit and the Bluetooth component. -
Page 45: Setup
SETUP TRANSMIT CODE SET Configuring the settings specific for each input source (Option menu) SOURCE RECEIVER SLEEP HDMI This receiver has a unique option menu specific for each type of input source, such as volume trim for compatible input sources, audio/video data display for signals from playback devices, and other frequently used menu items. - Page 46 SETUP Configuring the settings specific for each input source (Option menu) ■ ■ Adjusting volume between input sources Selecting the 5.1-channel signal playback method Volume Trim Extended Surround Input source: Reduces any change in volume when switching between input Input source: HDMI1-4, AV1-4 sources by correcting volume differences in each input source.
-
Page 47: Video And Audio
SETUP Configuring the settings specific for each input source (Option menu) ■ Combining HDMI/AV1-2 input source Audio information • For details of settings, refer to “Receiving video signals from the video and audio HDMI jack and audio signals from a jack other than HDMI” Format Format of audio signals. - Page 48 SETUP Configuring the settings specific for each input source (Option menu) ■ ■ Changing FM mode (Stereo/Monaural) Shuffle playback with iPod/iPhone FM Mode Shuffle Input source: TUNER Input source: DOCK (iPod) Sets this unit to automatically match FM broadcast frequencies in Changes the shuffle playback style on iPod (☞p.
-
Page 49: Setting Various Functions (Setup Menu)
SETUP Setting various functions (Setup menu) TRANSMIT CODE SET SOURCE RECEIVER SLEEP You can configure various function settings of this unit using the Setup menu. HDMI Setup menu display and settings AUDIO jCursor B / C iSETUP Use the to select the desired Press to exit the Setup menu. -
Page 50: Manual Speaker Setup
SETUP Setting various functions (Setup menu) ■ Setup menu items Manages settings for speakers Manual speaker setup Config Setup menu Adjusts the output characteristics of the speakers based on Speaker Setup manually set parameters. Some items in the “Config” submenu Speaker Setup Subwoofer jCursor B /... - Page 51 SETUP Setting various functions (Setup menu) Front SP Sur.B L/R SP Subwoofer Phase Selects the size (sound reproduction capacity) of the front Selects the size of the surround back speakers. Sets the phase of the subwoofer if the bass audio is lacking or speakers.
- Page 52 SETUP Setting various functions (Setup menu) ■ ■ ■ Controlling the volume of each speaker Manually setting speaker distance Adjusting sound quality with the equalizer Level Distance Equalizer jCursor B / C Separately adjusts the volume of each speaker. Use Adjusts the timing at which the speakers produce audio so that Adjusts sound quality of tone using a parametric or graphic jCursor...
- Page 53 SETUP Setting various functions (Setup menu) ■ Generating test tones ■ Adjusting the graphic equalizer jCursor C Press repeatedly to select the Test Tone jCursor D frequency you want to adjust, then use When “EQ Type Select” is displayed, use Turns the test tone generator on or off.
-
Page 54: Setting The Audio Output Function Of This Unit
SETUP Setting various functions (Setup menu) ■ ■ Setting the audio output function of this Synchronizing audio/video output Auto-adjusting the sound level to make even low volumes more audible unit Lipsync Adaptive DRC Adjusts the delay between audio and video output (Lipsync function). -
Page 55: Setting Hdmi Functions
SETUP Setting various functions (Setup menu) ■ ■ Auto-adjusting Dolby Digital and DTS Setting the startup volume Setting HDMI functions dynamic range Init.Volume Dynamic Range Sets the initial volume for when this receiver is turned on. When HDMI Setup Selects the dynamic range adjustment method for audio bitstream this parameter is set to “Off,”... - Page 56 SETUP Setting various functions (Setup menu) ■ ■ Receiver operation via TV (HDMI Control) Transmitting HDMI audio/video to the TV • “TV Audio In” is only displayed with the HDMI Control function during standby mode (Standby Through) (Control) is set to “On.” Control •...
-
Page 57: Setting The Aspect Ratio
SETUP Setting various functions (Setup menu) ■ ■ ■ Changing the output destination of HDMI Setting resolution of analog video signals Setting the aspect ratio input audio signals converted to HDMI Aspect Audio Output Resolution Sets the horizontal-to-vertical ratio (aspect ratio) of analog video Choose whether to playback audio from an external component Sets the resolution during up-scaling (when analog video input is converted to HDMI video signals. -
Page 58: Making The Receiver Easier To Use
SETUP Setting various functions (Setup menu) TRANSMIT CODE SET Making the receiver easier to use SOURCE RECEIVER SLEEP HDMI Select the input source that you want to Select the input source that you want to jCursor B / jCursor B / rename using rename using Function Setup... -
Page 59: Setting The Sound Field Program
SETUP Setting various functions (Setup menu) ■ ■ Goes enter standby mode automatically Setting the brightness of the front panel Setting the sound field program when you leave it without operating display You can set the parameters for the sound field programs (☞p. -
Page 60: Setting Sound Field Program Parameters
SETUP Setting sound field program parameters TRANSMIT CODE SET SOURCE RECEIVER SLEEP Although the sound field programs would satisfy you as they are with the default parameters, you can arrange the effect by setting the sound field elements (parameters). HDMI To adjust the sound effects suitable for acoustical conditions of audio/video sources or rooms, perform the following operations. -
Page 61: Cinema Dsp Parameters
SETUP Setting sound field program parameters CINEMA DSP parameters Parameters usable in certain sound field SR Level programs Adjusts the volume of the surround R channel. SUR. Adjustable range 0 to 100% 2ch Stereo only Selects a surround decoder to be used with a sound field program Default setting 100% in the MOVIE category. -
Page 62: Parameters Usable In Surround Decoder
SETUP Setting sound field program parameters Parameters usable in surround decoder When Neo:6 Music is selected C.Image Dolby PLIIx Music and Dolby PLII Music only Adjusts the front left and right channel output relative to the center channel to make the center channel more or less dominant as Panorama necessary. -
Page 63: Controlling Other Components With The Remote Control
Input Category Manufacturer control code SETUP OPTION Switches an external component on and off. CD player HDMI1 Blu-ray player/ Yamaha 2064 Cursor, ENTER, RETURN recorder ENTER VOLUME Selecting input source connected to CD Operates the menus of external components. RETURN... -
Page 64: Registering Remote Control Codes For External Component Operations
V-AUX [ A ] [ B ] DOCK remote control codes of a Yamaha BD player connected Once the remote control code is registered successfully TUNER the remote control will blink twice. to HDMI2 jack. -
Page 65: Resetting All Remote Control Codes
SETUP Controlling other components with the remote control TRANSMIT CODE SET Resetting all remote control codes SOURCE RECEIVER SLEEP lNumeric Enter “9981” using keys. HDMI Resetting all remote control codes for external components to the initial factory settings. AUDIO Perform each of the following steps within 1 minute. V-AUX [ A ] [ B ]... -
Page 66: Extended Functionality That Can Be Configured As Needed (Advanced Setup Menu)
ID (remote control ID). When using Release the keys when “ADVANCED SETUP” is displayed on Press STRAIGHT repeatedly to select the value you multiple Yamaha AV receivers, you can set each remote control the front panel display. want to change. -
Page 67: High Quality Playback Using Bi-Amplification Connections
SETUP Extended functionality that can be configured as needed (Advanced Setup menu) TRANSMIT CODE SET High quality playback using bi- Changing FM/AM frequency steps SOURCE RECEIVER ■ To change the remote control ID SLEEP amplification connections (Asia and General models only) HDMI Perform each of the following steps within 1 minute. -
Page 68: Using The Hdmi Control Function
SETUP Using the HDMI Control function This unit supports the HDMI Control function, which allows you to Connect the TV, DVD recorder supporting HDMI If DVD recorder that supports the HDMI Control operate external components via HDMI. If you connect devices Control to this unit’s HDMI output jack. - Page 69 SETUP Using the HDMI Control function TRANSMIT CODE SET ■ Switching the input source on this To use other jacks to input audio signals from TV, carry SOURCE RECEIVER SLEEP jCursor B / C to select “HDMI Setup” unit automatically when listening out the following procedure.
- Page 70 SETUP Using the HDMI Control function TRANSMIT CODE SET ■ Single HDMI cable input to TV SOURCE RECEIVER SLEEP jCursor B / C iSETUP to select “HDMI Setup” Press when you have finished audio with Audio Return Channel HDMI and press jENTER. changing the settings.
-
Page 71: Appendix
Refer to the table below when this unit does not function properly. If the problem you are experiencing is not listed below, or if the instructions below do not help, turn off this unit, disconnect the power cable, and contact the nearest authorized Yamaha dealer or service center. - Page 72 APPENDIX Troubleshooting Problem Cause Remedy Problem Cause Remedy page page No sound. Incorrect input or output cable Connect the cables properly. If the problem No sound is output The speaker is malfunctioning. If sound is not output, the unit may be connections.
- Page 73 APPENDIX Troubleshooting Problem Cause Remedy Problem Cause Remedy page page No sound is heard This unit is in straight decoding Press STRAIGHT to exit straight decoding Noise/hum noise is Incorrect cable connection. If the problem persists, the cables may be —...
-
Page 74: Hdmi
APPENDIX Troubleshooting HDMI™ Tuner (FM/AM) Problem Cause Remedy page Problem Cause Remedy page The front panel An error with the HDMI Try re-inserting the HDMI cable. — display HDMI connection has occurred. FM stereo reception You are too far from the station Check the antenna connections. -
Page 75: Ipod™/Iphone
The supplied AM loop antenna is Connect the AM loop antenna correctly Connect error There is a problem with the signal Turn off the unit and reconnect the Yamaha crackling and not connected. even if you use an outdoor antenna. -
Page 76: Bluetooth
When the key does not work during Option – check if the Bluetooth component is menu/Setup menu operation: press the key within 10 m (32 feet) of the Yamaha corresponding to the current menu operation Bluetooth wireless audio receiver. again. -
Page 77: Glossary
APPENDIX Glossary Audio information Dolby Pro Logic IIx DTS Digital Surround Dolby Pro Logic IIx is a new technology enabling discrete multichannel DTS Digital Surround was developed to replace the analog soundtracks of playback from 2-channel or multi-channel sources. There are three modes movies with a 5.1-channel digital sound track, and is now rapidly gaining Audio and video synchronization (lip sync) available: “Music mode”... -
Page 78: Sound Field Program Information
100 kHz, with a dynamic range of 120 dB. This unit can depth allows HDTVs and other displays increase from millions of colors to Based on a wealth of actually measured data, Yamaha CINEMA DSP uses transmit or receive DSD signals via the HDMI jack. -
Page 79: Information On Hdmi
– 576p/50 Hz About trademarks Bluetooth™ Bluetooth is a registered trademark of the Bluetooth SIG and is used by Yamaha in accordance with a license agreement. Manufactured under license from Dolby Laboratories. Dolby, Pro Logic and the double-D symbol are trademarks of Dolby Laboratories. -
Page 80: Specifications
APPENDIX Specifications ■ Input jacks ■ HDMI ■ Compatible Decoding Formats • Analog audio • HDMI Specification: Deep Color, “x.v.Color,” Auto Lips Sync, • Decoding Format ARC (Audio Return Channel) - Dolby True HD, Dolby Digital Plus Audio x 5 (AV5, AV6, AUDIO1, AUDIO2, V-AUX) •... - Page 81 APPENDIX ■ VIDEO SECTION ■ AM SECTION • Dynamic Headroom [U.S.A. and Canada models] 8 Ω ..................0.23 dB • Video Signal Type • Tuning Range • Input Sensitivity/Input Impedance [U.S.A., Canada, Korea and General models] ......NTSC [U.S.A. and Canada models] ........530 to 1710 kHz AV5, etc ..............200 mV/47 kΩ...
-
Page 82: Index
APPENDIX Index Numerics Config, Speaker Setup..............50 Connect, Option menu ..............48 5.1-channel speaker connection ........... 11 INIT, Advanced Setup menu............67 Connecting speakers..............11 5.1-channel speaker layout............10 Init.Volume, Sound Setup ............55 Connections................... 9 6.1-channel speaker connection ........... 11 Input Rename, Function Setup ............ - Page 83 APPENDIX Index Preset tuning................. 36 Tone control ................29 TrafficProgram, Option menu............. 48 TU, Advanced Setup menu ............67 Tuner indicator ................7 Radio Data System tuning ............38 TV Audio In, HDMI Setup ............56 Rear panel ..................6 TV monitor connection ...............
- Page 84 © 2010 Yamaha Corporation All rights reserved. YC507A0/OMEN...