Yamaha RX-V563 Owner's Manual
Hide thumbs
Also See for RX-V563:
- Owner's manual (120 pages) ,
- Service manual (114 pages) ,
- Owner's manual (114 pages)
Table of Contents
Advertisement
Available languages
Available languages
Quick Links
Advertisement
Chapters
Table of Contents

Related Manuals for Yamaha RX-V563


Summary of Contents for Yamaha RX-V563
- Page 1 RX-V563 AV Receiver OWNER’S MANUAL MANUAL DE INSTRUCCIONES...
- Page 2 As the colours of the wires in the mains lead of this apparatus cause fire, damage to this unit, and/or personal injury. Yamaha may not correspond with the coloured markings identifying...
-
Page 3: Table Of Contents
Connecting other components ......... 17 2 INPUT MENU............65 Connecting audio components......... 19 3 OPTION MENU........... 67 Connecting a Yamaha iPod™ universal dock or Remote control features........71 Bluetooth™ adapter..........20 Controlling this unit, a TV, or other components..71 Using REMOTE IN/OUT jacks....... 20 Setting remote control codes ........ -
Page 4: Features
Built-in 7-channel power amplifier DOCK terminal ◆ Minimum RMS output power ◆ DOCK terminal to connect a Yamaha iPod universal dock [U.S.A. and Canada models] (such as YDS-10, sold separately) or Bluetooth adapter (such (1 kHz, 0.9% THD, 8 Ω) as YBA-10, sold separately). -
Page 5: Getting Started
Getting started Getting started ■ Supplied accessories ■ Installing batteries in the remote control Check that you received all of the following parts. ❏ Remote control ❏ Batteries (2) (AAA, R03, UM-4) ❏ Optimizer microphone ❏ AM loop antenna ❏ Indoor FM antenna ■... -
Page 6: Quick Start Guide
Quick start guide Quick start guide The following steps describe the easiest way to enjoy Preparation: Check the items DVD movie playback in your home theater. Front right Prepare the following items. speaker Video monitor Subwoofer ❏ Speakers Front left Surround right speaker ❏... -
Page 7: Step 1: Set Up Your Speakers
Quick start guide Be sure to connect the left channel (L), right channel Step 1: Set up your speakers (R), “+” (red) and “–” (black) properly. Front and center speakers Place your speakers in the room and connect them to this unit. -
Page 8: Step 2: Connect Your Dvd Player And Other Components
CD recorder/MD recorder • Connecting a multi-format player ☞ P. 19 or an external decoder Digital coaxial audio • Connecting a Yamaha iPod/Bluetooth dock cable DVD DIGITAL INPUT ☞ P. 20 COAXIAL jack • Connecting the REMOTE IN/OUT jacks ☞... -
Page 9: Step 3: Press Scene 1 Button
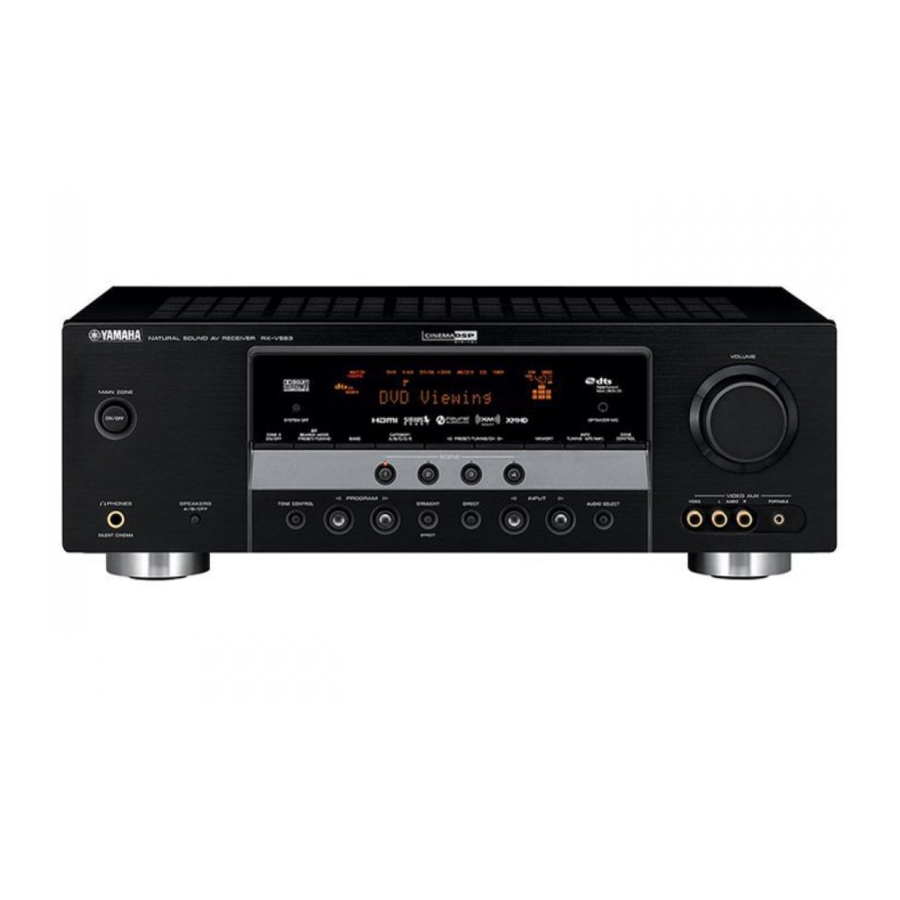
Press T SCENE 1. If you connect a Yamaha product that has capability of the SCENE control signals, this unit can automatically activate the This unit is turned on. “DVD Viewing” appears in the component and start playback. Refer to the instruction manual of front panel display, and this unit automatically the DVD player for further information. -
Page 10: What Do You Want To Do With This Unit
Quick start guide ■ After using this unit... What do you want to do with this Press A MAIN ZONE ON/OFF on the front unit? panel to set this unit to the standby mode. ■ Customizing the SCENE templates ☞ P. 30 •... -
Page 11: Connections
Connections Connections Rear panel SPEAKERS COAXIAL OPTICAL DTV/CBL MD/CD-R MD/CD-R DIGITAL DTV/CBL OUTPUT HDMI DIGITAL INPUT DOCK REMOTE COMPONENT VIDEO ANTENNA DTV/CBL SURROUND BACK/BI-AMP SURROUND SINGLE MONITOR OUT +12V VIDEO VIDEO 15mA MAX. AC OUTLETS SWITCHED UNBAL. TRIGGER MONITOR MONITOR S VIDEO DTV/CBL DTV/CBL... -
Page 12: Placing Speakers
Subwoofer (SW) The use of a subwoofer with a built-in amplifier, such as the Yamaha Active Servo Processing Subwoofer System, is effective not only for reinforcing bass frequencies from any or all channels, but also for high fidelity sound reproduction of the LFE (low-frequency effect) channel included in Dolby Digital and DTS sources. -
Page 13: Connecting Speakers
Connections Connecting speakers Be sure to connect the left channel (L), right channel (R), “+” (red) and “–” (black) properly. If the connections are faulty, this unit cannot reproduce the input sources accurately. Caution • Before connecting the speakers, make sure that the AC power plug is disconnected from the AC wall outlet. •... -
Page 14: Connecting To The Front A Terminals
Connections ■ Before connecting to the SPEAKERS ■ Using bi-amplification connections terminal Caution A speaker cord is actually a pair of insulated cables Remove the shorting bars or bridges to separate the running side by side. Cables are colored or shaped LPF (low pass filter) and HPF (high pass filter) differently, perhaps with a stripe, groove or ridges. -
Page 15: Information On Jacks And Cable Plugs
Connections Information on jacks and cable plugs Connect one of the type of the audio jack(s) and/or video jack(s) that your input components are equipped with. Audio jacks and cable plugs Video jacks and cable plugs COMPONENT VIDEO AUDIO DIGITAL AUDIO DIGITAL AUDIO VIDEO S VIDEO... -
Page 16: Information On Hdmi
Connections Information on HDMI™ ■ HDMI compatibility with this unit ■ HDMI jack and cable plug Compatible HDMI Audio signal Audio signal HDMI types formats components 2ch Linear PCM 2ch, 32-192 kHz, CD, DVD-Video, 16/20/24 bit DVD-Audio, etc. Multi-ch Linear 8ch, 32-192 kHz, DVD-Audio, etc. -
Page 17: Audio And Video Signal Flow
Connections Audio and video signal flow ■ Audio signal flow ■ Video signal flow Input Output Input Output HDMI HDMI DIGITAL AUDIO (COAXIAL) DIGITAL AUDIO COMPONENT (OPTICAL) VIDEO AUDIO S VIDEO Digital output VIDEO Through Analog output Video conversion ON (see page 67) Notes Notes •... -
Page 18: Connecting Video Components
Connections Connecting video components Connect your TV (or projector) to the HDMI OUT jack, Notes the COMPONENT VIDEO MONITOR OUT jacks, the S VIDEO MONITOR OUT jack or the VIDEO MONITOR • Some video monitors connected to this unit via a DVI OUT jack of this unit. -
Page 19: Connecting Other Components
Connections Connecting other components • When “VIDEO CONV.” is set to “ON” (see page 67), the converted video signals are output only at the MONITOR OUT Make sure that this unit and other jacks. To record a source, make the same type of video components are unplugged from the connections between each component. - Page 20 Connections ■ Connecting a DVD recorder, PVR or VCR DTV/CBL MD/CD-R MD/CD R DIGITAL DTV/CBL OUTPUT HDMI DIGITAL INPUT REMOTE COMPONENT VIDEO COMPONENT VIDEO DTV/CBL MONITOR OUT +12V VIDEO VIDEO VIDEO VIDEO 15mA MAX. TRIGGER MONITOR MONITOR DVR OUT DVR OUT S VIDEO S VIDEO DTV/CBL...
-
Page 21: Connecting Audio Components
Connections Connecting audio components Connect the audio components as follows. Make sure that this unit and other ■ Connecting a CD player and a CD components are unplugged from the AC wall outlets. recorder/MD recorder Notes • When you connect your CD player via analog and digital connection, priority is given to the signal input at the DIGITAL indicates recommended connections INPUT jack. -
Page 22: Connecting A Yamaha Ipod™ Universal Dock Or Bluetooth™ Adapter
REMOTE This unit is equipped with the DOCK terminal on the rear +12V panel that allows you to connect a Yamaha iPod universal 15mA MAX. dock (such as YDS-10, sold separately) or Bluetooth adapter (such as YBA-10, sold separately). Connect a... -
Page 23: Using The Video Aux Jacks On The Front Panel
• A properly installed outdoor antenna provides clearer reception 1. DOCK than an indoor one. If you experience poor reception quality, 2. AUDIO install an outdoor antenna. Consult the nearest authorized Yamaha dealer or service center about outdoor antennas. VOLUME Outdoor AM antenna MAIN ZONE ON/OFF... -
Page 24: Connecting The Power Cable
Connections Connecting the wire of the AM loop antenna Connecting the power cable Insert Open the lever Close the lever Once all connections are complete, plug the power cable into the AC wall outlet. The wire of the AM loop antenna does not have any polarity and you can connect either end of the wire to AM or GND terminal. -
Page 25: Turning On And Off The Power
Connections Turning on and off the power ■ Turning on this unit Press A MAIN ZONE ON/OFF (or G POWER) to turn on this unit. When you turn on this unit, there will be a 4 to 5-second delay before this unit can reproduce sound. ■... -
Page 26: Front Panel Display
(see pages 45 to 47). 2 DOCK indicator 7 96/24 indicator • Lights up when you station your iPod in a Yamaha Lights up when a DTS 96/24 signal is input to this unit. iPod universal dock (such as YDS-10, sold separately) -
Page 27: Using The Remote Control
Connections ■ Using the remote control D CINEMA DSP indicator Lights up when you select a sound field program (see The remote control transmits a directional infrared ray. page 41). Be sure to aim the remote control directly at the remote control sensor on this unit during operation. -
Page 28: Optimizing The Speaker Setting For Your Listening Room
Optimizing the speaker setting for your listening room Optimizing the speaker setting for your listening room This unit employs the YPAO (Yamaha Parametric Room Acoustic Optimizer) technology which lets you avoid troublesome listening-based speaker setup and achieves highly accurate sound adjustments automatically. The supplied optimizer microphone collects and this unit analyzes the sound your speakers produce in your actual listening environment. - Page 29 Optimizing the speaker setting for your listening room Press 7 ENTER to start the setup Make sure that “SETUP” is set to “AUTO” and the pointer is pointing at “START”. procedure. This unit starts the auto setup procedure. Loud test tones are output from each speaker during the auto You can also select the following setup methods.
- Page 30 Optimizing the speaker setting for your listening room The display changes as follows. Press 8 k and 8 ENTER to display the setup results in detail. AUTO SETUP SETUP;;;;;;;AUTO . START Press 8 l / h repeatedly to toggle between Automatic the setup result displays.
- Page 31 Optimizing the speaker setting for your listening room ■ If “WARNING” appears Press 7 n and then press 7 l / h to select When this unit detects potential problems during the “AUTO SETUP” procedure, “WARNING” appears in the “SET” or “CANCEL”. result display.
-
Page 32: Selecting The Scene Templates
SELECTING THE SCENE TEMPLATES Selecting the SCENE templates This unit is equipped with 16 preset SCENE templates for various situations of using this unit. As the initial factory Press RINPUT l / h (or press 4AMP and setting, the following SCENE templates are assigned to then press 7l / h) to select the desired each SCENE button: template. - Page 33 Game Playing Note When iPod is connected to the Yamaha iPod universal dock or a Bluetooth component is connected to the Bluetooth adapter, this unit plays back the audio sources input at the DOCK terminal. You can create your original SCENE templates by editing the preset SCENE templates. See page 33 for details.
- Page 34 7ch Enhancer Dock Listening DOCK MUSIC ENHANCER Select this SCENE template when you play back music on your iPod stationed in a Yamaha iPod universal dock or 7ch Enhancer Bluetooth component that is connected to the Bluetooth adapter. USB Audio...
-
Page 35: Creating Your Original Scene Templates
Selecting the SCENE templates Creating your original SCENE Press 4AMP and then 7 k / n to select the templates desired parameter of the SCENE template and then 7 l / h to select the desired value You can create your original SCENE templates for each of the selected parameter. -
Page 36: Using Remote Control On The Scene Feature
Selecting the SCENE templates Using remote control on the SCENE feature ■ Controlling the input source ■ Setting input source of the customized components in the SCENE mode SCENE template on the remote control You can operate both this unit and the input source If you customize the input source of the selected SCENE component by using the remote control. -
Page 37: Playback
PLAYBACK Playback Caution Rotate LVOLUME (or press Extreme caution should be exercised when you play LVOLUME +/–) to adjust the volume to the back CDs encoded in DTS. If you play back a CD desired output level. encoded in DTS on a DTS-incompatible CD player, you will only hear some unwanted noise that may Press OPROGRAM l / h repeatedly (or damage your speakers. -
Page 38: Selecting Audio Input Jacks (Audio Select)
Playback Selecting audio input jacks Selecting the MULTI CH INPUT (AUDIO SELECT) component This unit comes with a variety of input jacks. Use this Use this feature to select the component connected to the feature (audio input jack select) to switch between input MULTI CH INPUT jacks (see page 19) as the input jacks when more than one input jack is assigned to as the source. -
Page 39: Displaying The Current Status Of This Unit On A Video Monitor
Playback Displaying the current status of Using your headphones this unit on a video monitor Connect a pair of headphones with a stereo You can display the operating information of this unit on a analog audio cable plug to the PHONES jack on video monitor. -
Page 40: Playing Video Sources In The Background Of An Audio Source
Playback ■ Audio information Playing video sources in the background of an audio source Information Descriptions FORMAT Signal format. When this unit cannot detect a You can combine a video image from a video source with digital signal, it automatically switches to sound from an audio source. -
Page 41: Using The Sleep Timer
Playback Using the sleep timer Use this feature to automatically set the main zone to the standby mode after a certain amount of time. Press 4AMP and then press RSLEEP repeatedly to set the amount of time. Each time you press RSLEEP, the front panel display changes as shown below. -
Page 42: Sound Field Programs
SOUND FIELD PROGRAMS Sound field programs This unit is equipped with a variety of precise digital Notes decoders that allow you to enjoy multi-channel playback • When you select an input source, this unit automatically selects from almost any stereo or multi-channel sound source. the last sound field program used with the corresponding input source. -
Page 43: Enjoying Unprocessed Input Sources
Sound field programs ■ Enjoying 2-channel sources using the ■ Using sound field programs without standard decoders surround speakers (Virtual CINEMA DSP) Signals input from 2-channel sources can also be played back on multi-channels. Virtual CINEMA DSP allows you to enjoy the CINEMA DSP programs without surround speakers by creating Press 4AMP and then press OSUR. - Page 44 Sound field programs ■ Editing sound fields parameters Initial settings are indicated in bold under each parameter. You can enjoy good quality sound with the factory default parameters. Although you do not have to change the initial For Pop/Rock, Hall, Jazz, Game, TV Sports, settings, you can change some of the parameters to better Movie Spacious and Movie Dramatic: suit the input source or your listening room.
-
Page 45: Using Audio Features
USING AUDIO FEATURES Using audio features Enjoying high quality sound Adjusting the speaker level Use the DIRECT mode to enjoy the high quality sounds of You can adjust the output level of each speaker while the selected source. When the DIRECT mode is activated, listening to a music source. -
Page 46: Selecting The Night Listening Mode
Using audio features Selecting the night listening mode The night listening modes are designed to improve listenability at lower volumes or at night. Press 4AMP and then PNIGHT repeatedly to select “NIGHT:CINEMA” or “NIGHT:MUSIC”. Choices: NIGHT:CINEMA, NIGHT:MUSIC, OFF • Select “NIGHT:CINEMA” when watching films to reduce the dynamic range of film soundtracks and make dialog easier to hear at lower volumes. -
Page 47: Fm/Am Tuning
FM/AM TUNING FM/AM tuning There are 2 tuning methods: automatic and manual. Automatic tuning is effective when station signals are strong and there is no interference. If the signal from the station you want to select is weak, tune into it manually. You can also use the automatic and manual preset tuning features to store up to 40 stations. -
Page 48: Automatic Preset Tuning
FM/AM tuning Automatic preset tuning Manual preset tuning You can use the automatic preset tuning feature to store You can also store up to 40 stations (A1 to E8: 8 preset FM stations with strong signals up to 40 (A1 to E8: 8 station numbers in each of the 5 preset station groups) preset station numbers in each of the 5 preset station manually. -
Page 49: Selecting Preset Stations
FM/AM tuning Selecting preset stations Exchanging preset station You can tune into any desired station simply by selecting You can exchange the assignments of two preset stations the preset station group and number under which it was with each other. The example below describes the stored. -
Page 50: Radio Data System Tuning (Europe And Russia Models Only)
RADIO DATA SYSTEM TUNING (EUROPE AND RUSSIA MODELS ONLY) Radio Data System tuning (Europe and Russia models only) Radio Data System is a data transmission system used by FM stations in many countries. This unit can receive various Radio Data System data such as PS (program service), PTY (program type), RT (radio text), CT (clock time), and EON (enhanced other networks) when receiving Radio Data System broadcasting stations. -
Page 51: Selecting The Radio Data System Program Type (Pty Seek Mode)
Radio Data System tuning (Europe and Russia models only) Selecting the Radio Data System Press 7PRESET/CH k / n on the remote program type (PTY SEEK mode) control to select the desired program type. The name of the selected program type appears in the Use this feature to select the desired radio program by front panel display. -
Page 52: Using The Enhanced Other Networks (Eon) Data Service
Radio Data System tuning (Europe and Russia models only) Using the enhanced other Press 0PTY SEEK START on the remote networks (EON) data service control to start searching for all the available Radio Data System preset stations. Use this feature to receive the EON (enhanced other The name of the selected program type flashes and networks) data service of the Radio Data System station the PTY HOLD indicator lights up in the front panel... -
Page 53: Using A Usb Memory Device Or A Usb Portable Audio Player
USING A USB MEMORY DEVICE OR A USB PORTABLE AUDIO PLAYER Using a USB memory device or a USB portable audio player Use this feature to enjoy WAV (PCM format only), MP3 and WMA files saved on your USB memory device or USB portable audio player connected to the USB port on the front panel of this unit. - Page 54 Using a USB memory device or a USB portable audio player ■ The function of the play information Press 7 k / n / l / h on the remote control display to select the desired file. k / n to select the desired file/folder. •...
-
Page 55: Using Ipod
Using iPod™ Once you have stationed your iPod in a Yamaha iPod universal dock (such as YDS-10, sold separately) connected to the DOCK terminal of this unit (see page 20), you can enjoy playback of your iPod using the supplied remote control. You can also use the Compressed Music Enhancer mode of this unit to improve the sound quality of the compression artifacts (such as the MP3 format) stored on your iPod (see page 20). - Page 56 • Operations cannot be done with the controls on your iPod. • Select “One” to set this unit to repeat one song. • The Yamaha logo appears in the display window of your iPod. • Select “All” to set this unit to repeat a sequence of •...
-
Page 57: Using Bluetooth™ Components
Using Bluetooth™ components You can connect a Yamaha Bluetooth adapter (such as YBA-10, sold separately) to the DOCK terminal of this unit and enjoy the music contents stored in your Bluetooth component (such as a portable music player) without wiring between this unit and the Bluetooth component. -
Page 58: Recording
RECORDING Recording Recording adjustments and other operations are performed from the recording components. Refer to the operating instructions for those components. Notes • When this unit is set to the standby mode, you cannot record between other components connected to this unit. •... -
Page 59: Set Menu
SET MENU SET MENU You can use the following parameters in “SET MENU” to adjust a variety of system settings and customize the way this unit operates. Change the initial settings (indicated in bold under each parameter) to reflect the needs of your listening environment. -
Page 60: Using Set Menu
DIGITAL INPUT jacks when you turn on the power of this unit. D)PARAM. INI Initializes the parameters of a group of sound field programs. Pair the connected Yamaha Bluetooth adapter (such as YBA-10, sold separately) with a E)BLUETOOTH SET Bluetooth component (see page 55). -
Page 61: Sound Menu
SET MENU 1 SOUND MENU Woofer section of a speaker is 16 cm (6.5 in) or larger: large Use this menu to manually adjust any speaker settings or Woofer section of a speaker is smaller than 16 cm compensate for video signal processing delays when using (6.5 in): small LCD monitors or projectors. - Page 62 SET MENU Surround left/right speakers SUR. L/R SP LFE Bass out LFE/BASS OUT Choices: NONE, SML, LRG Use this feature to select the speakers that output the LFE (low-frequency effect) and the low-frequency signals. Choices: SWFR, FRNT, BOTH 1 SOUND MENU A)SPEAKER SET 1 SOUND MENU SUR.
- Page 63 SET MENU ■ Speaker level Crossover CROSS OVER B)SP LEVEL Use this feature to select the crossover frequency of all the Use this feature to manually adjust the output level of each speakers set to “SML” (or “SMALL”) in “SPEAKER speaker.
- Page 64 SET MENU ■ Speaker distance ■ Center speaker equalizer C)SP DISTANCE D)CENTER GEQ Use this feature to manually adjust the distance of each Use this feature to adjust the built-in 5-frequency band speaker and the delay applied to the respective channel. (100Hz, 300Hz, 1kHz, 3kHz and 10kHz) graphic Ideally, each speaker should be the same distance from the equalizer for the center channel so that the tonal quality of...
- Page 65 SET MENU ■ Dynamic range Maximum volume MAX VOL. F)DYNAMIC RANGE Use this feature to select the amount of dynamic range Use this feature to set the maximum volume level. This compression to be applied to your speakers or feature is useful to avoid the unexpected loud sound by headphones.
- Page 66 1 SOUND MENU EXTD SUR.;;;;;;AUTO H)HDMI SET [ ]/[ ]:Select SUPPORT AUDIO: [ENTER]:Return RX-V563 [ ]/[ ]:Select Extended decoder select mode [ENTER]:Return Use this feature to designate the extended decoder mode for the input sources connected to the DIGITAL INPUT Support audio SUPPORT AUDIO jacks when you turn on the power of this unit.
-
Page 67: Input Menu
SET MENU For OPTICAL OUTPUT jack 4 2 INPUT MENU OPTICAL OUT (4) Choices: (4) MD/CD-R, DTV/CBL, V-AUX, DVR Use this menu to reassign the input jacks, select the decoder mode or rename the input source. 2 INPUT MENU ;MANUAL SETUP A)I/O ASSIGNMENT OPTICAL OUT . - Page 68 Note You can only adjust the value for DOCK when your iPod is V-AUX/DOCK stationed in the Yamaha Universal Dock connected to this unit. ■ Decoder mode D)DECODER MODE Press 4 AMP and then press 7 l / h on the remote control to place the “_”...
-
Page 69: Option Menu
SET MENU ■ Multi channel input setup 3 OPTION MENU E)MULTI CH SET Use this menu to adjust the optional system parameters. 2 INPUT MENU E)MULTI CH SET BGV;;;;;;;;;LAST ;MANUAL SETUP ;MANUAL SETUP INPUT CH;;;;;6CH 3 OPTION MENU 3 OPTION MENU . - Page 70 SET MENU ■ Memory guard Front panel display scroll FL SCROLL B)MEMORY GUARD Use this feature to set whether to display the information Use this feature to prevent accidental changes to DSP (such as a song title or a channel name) in the front panel program parameter values and other system settings.
- Page 71 . START PAIRING 3 OPTION MENU D)PARAM. INI [ENTER]:Enter >NO Use this feature to start pairing the connected Yamaha Bluetooth adapter (such as YBA-10, sold separately) with [ ]/[ ]:Select your Bluetooth component. For details about the pairing, [ENTER]:Return refer to “Pairing the Bluetooth™ adapter and your •...
- Page 72 SET MENU ■ USB playback styles F)USB PLAY STYLE Use this feature to adjust the playback style according to your preference. You can shuffle files in a random order or repeat one specific file or a sequence of files. 3 OPTION MENU F)USB PLAY STYLE .
-
Page 73: Remote Control Features
Remote control features In addition to controlling this unit, the remote control can also operate other audiovisual components made by Yamaha and other manufacturers. To control your TV or other components, you must set up the appropriate remote control code for each input source (see page 73). -
Page 74: Controlling Other Components
Remote control features ■ Controlling other components Press one of the input selector buttons (3) or A to buttons to control other components. You must set the appropriate remote control code for each input source in advance (see page 73). The following table shows the BAND LEVEL MENU TITLE... -
Page 75: Setting Remote Control Codes
If this happens, repeat the setup procedure. TUNER Yamaha 5017 Note You may not be able to operate your Yamaha component even if a Yamaha remote control code is preset as listed above. In this case, try setting another Yamaha remote control code. -
Page 76: Using Multi-Zone Configuration
Yamaha dealer or service center about the Zone 2 connections that best meet your requirements. • Some Yamaha models are able to connect directly to the REMOTE jacks of this unit. If you own these products, you may not need to use an infrared signal emitter. -
Page 77: Controlling Zone 2
Press K ZONE CONTROL to control Zone 2. • Enjoying music stored on your iPod stationed in a The ZONE2 indicator flashes in the front panel display for Yamaha iPod universal dock (such as YDS-10 sold approximately 10 seconds. separately) connected to the DOCK terminal of this unit when “V-AUX”... - Page 78 Using multi-zone configuration ■ Controlling Zone 2 with the remote Operate the following operations after activating the Zone 2 control operation mode. Turning on Zone 2 Operating Zone 2 While pressing and holding 4 AMP, press Press RINPUT l / h to select the desired input G POWER.
-
Page 79: Advanced Setup
Press C SYSTEM OFF to set this unit to the • Select “ON” when the component connected to the standby mode. REMOTE OUT jack is the Yamaha component and has the capability of the SCENE control signals. This unit Press and hold N TONE CONTROL and... -
Page 80: Troubleshooting
Connect HDMI components that support the HDCP unit do not support the HDCP copy copy protection standards. protection standards. “SUPPORT AUDIO” is set to “Other” and Set “SUPPORT AUDIO” to “RX-V563” in “HDMI” audio signals are not being “MANUAL SETUP”. played back on this unit. - Page 81 Troubleshooting Problem Cause Remedy page The sound suddenly The protection circuitry has been activated Check that the speaker wires are not touching each — goes off. because of a short circuit, etc. other and then turn this unit back on. The sleep timer has turned off this unit.
-
Page 82: Front Panel
Troubleshooting Problem Cause Remedy page Dolby Digital or DTS The connected component is not set to Make an appropriate setting following the operating — sources cannot be output Dolby Digital or DTS digital instructions for your component. played. (Dolby Digital signals. - Page 83 Troubleshooting ■ Tuner Problem Cause Remedy page FM stereo reception is The characteristics of FM stereo Check the antenna connections. noisy. broadcasts may cause this problem Try using a high-quality directional FM — when the transmitter is too far away or antenna.
- Page 84 Troubleshooting ■ AUTO SETUP Before AUTO SETUP Error message Cause Remedy page Connect MIC! Optimizer microphone is not connected. Connect the supplied optimizer microphone to the OPTIMIZER MIC jack on the front panel. Unplug HP! Headphones are connected. Unplug the headphones. —...
- Page 85 • If the “ERROR” or “WARNING” screens appears, check the cause of the problem, then run “AUTO SETUP” again. • If a warning message “W-1”, “W-2”, or “W-3” appears, corrections are made, but they may not be optimal. • If an error message “E-9” occurs repeatedly, please contact a qualified Yamaha service center.
- Page 86 Troubleshooting ■ USB Problem Cause Remedy page The music files and The music files and directories are placed Place music files and directories in the FAT area. — directories in the USB in locations other than the FAT area. device cannot be You are attempting to browse directory Modify the data structure on your USB device.
- Page 87 Connect error There is a problem with the signal path Turn off this unit and reconnect the Yamaha iPod from your iPod to this unit. universal dock to the DOCK terminal of this unit. Try resetting your iPod.
- Page 88 The Bluetooth component is disconnected from the Yamaha Bluetooth adapter (such as YBA-10, sold separately). No BT adapter The Bluetooth adapter is not connected to Connect the Yamaha Bluetooth adapter (such as the DOCK terminal. YBA-10, sold separately) to the DOCK terminal.
-
Page 89: Remote Control
Troubleshooting ■ Remote control Problem Cause Remedy page The remote control Wrong distance or angle. The remote control functions within a maximum does not work nor range of 6 m (20 ft) and no more than 30 degrees off- function properly. axis from the front panel. -
Page 90: Glossary
Based on a wealth of actually measured matrix decoder that derives 3 surround channels from the data, Yamaha CINEMA DSP uses Yamaha original sound 2 in the original recording. For the best results, Dolby field technology to combine Dolby Pro Logic, Dolby... - Page 91 Glossary ■ Dolby Surround ■ LFE 0.1 channel Dolby Surround uses a 4-channel analog recording system This channel reproduces low-frequency signals. The to reproduce realistic and dynamic sound effects: 2 front frequency range of this channel is from 20 Hz to 120 Hz. left and right channels (stereo), a center channel for dialog This channel is counted as 0.1 because it only enforces a (monaural), and a surround channel for special sound...
- Page 92 ■ SILENT CINEMA Yamaha has developed a natural, realistic sound effect DSP algorithm for headphones. Parameters for headphones have been set for each sound field so that accurate representations of all the sound field programs can be enjoyed on headphones.
-
Page 93: Specifications
Specifications Specifications AUDIO SECTION • Signal Level Composite ..............1 Vp-p/75 Ω • Minimum RMS Output Power for Front, Center, Surround, S-video ......1 Vp-p/75 Ω (Y), 0.286 Vp-p/75 Ω (C) Surround Back Component ....1 Vp-p/75 Ω (Y), 0.7 Vp-p/75 Ω (P [U.S.A. -
Page 94: Index
AUTO SETUP, Error message .... 82 Auto setup error message ....82 Connection, Automatic preset tuning, E-3:SBR->SBL, Yamaha iPod universal dock ...20 FM/AM tuning ......... 46 Auto setup error message ....82 Controlling a TV ........71 Automatic tuning, FM/AM tuning ..45... - Page 95 Index Exchange, Preset station, iPod connected, OPTICAL IN (2), Input assignment ..65 FM/AM tuning ......... 47 iPod controlling status message ..85 OPTICAL IN (3), Input assignment ..65 Extended surround, Sound menu ..64 iPod control, Status message ....85 OPTICAL INPUT assignment, External decoder connection ....
- Page 96 Support audio, HDMI set .....64 ■ SCIENCE, Radio Data System SUR. L/R SP, Speaker settings ....60 program type ........49 Surround back left/right speakers, Yamaha iPod universal dock, Selection, Audio input jacks ....36 Speaker settings .......60 Connection ........20 Selection, Surround left/right speakers, Yamaha Parametric Room Acoustic MULTI CH INPUT component ..
- Page 97 (http://www.yamaha-hifi.com/ or http://www.yamaha-uk.com/ for U.K. resident). The product is guaranteed to be free from defects in workmanship or materials for a period of two years from the date of the original purchase. Yamaha undertakes, subject to the conditions listed below, to have the faulty product or any part(s) repaired, or replaced at Yamaha’s discretion, without any charge for parts or labour.
- Page 98 Yamaha no se hará con la basura doméstica. responsable de ningún daño debido al uso de esta unidad con Le rogamos que haga caso de la una tensión diferente de la especificada.
- Page 99 SET MENU ............57 Conexión de otros componentes......17 Conexión de componentes de audio ......19 Utilización SET MENU........... 58 Conexión de un acoplador universal Yamaha 1 SOUND MENU............ 59 iPod™ o un adaptador Bluetooth™ ....20 2 INPUT MENU............65 Uso de los jacks REMOTE IN/OUT .......
-
Page 100: Características
“96/24” es una marca de fábrica de DTS, Inc. registradas de Dolby Laboratories. Bluetooth™ Bluetooth es una marca registrada de Bluetooth SIG que Yamaha usa según un acuerdo de licencia. “SILENT CINEMA” es una marca de fábrica de Yamaha Corporation. -
Page 101: Primeros Pasos
Primeros pasos Primeros pasos ■ Accesorios suministrados ■ Instalación de las pilas en el mando a distancia Verifique que ha recibido todos los componentes siguientes. ❏ Mando a distancia ❏ Pilas (2) (AAA, R03, UM-4) ❏ Micrófono optimizador ❏ Antena de cuadro de AM ❏... -
Page 102: Guía De Inicio Rápido
Guía de inicio rápido Guía de inicio rápido Los pasos siguientes describen la forma más sencilla de disfrutar Preparación: Verifique los elementos de la reproducción de películas de DVD en su cine de casa. Altavoz delantero Prepare los elementos siguientes. Altavoz de derecho Monitor de vídeo... - Page 103 Guía de inicio rápido Asegúrese de conectar correctamente el canal Paso 1: Instalación de sus izquierdo (L), el canal derecho (R), “+” (rojo) y “–” (negro). altavoces Altavoces delanteros y central Coloque sus altavoces en la habitación y conéctelos a esta unidad.
- Page 104 ☞ P. 19 DVD DIGITAL INPUT o un decodificador externo Jack COAXIAL • Conexión de un acoplador Yamaha ☞ P. 20 iPod/Bluetooth Conecte el cable de vídeo al jack de salida de • Conexión de los jacks REMOTE IN/OUT vídeo compuesto de su reproductor DVD y al...
-
Page 105: Paso 3: Pulse El Botón Scene 1
Pulse T SCENE 1. Si conecta un producto Yamaha con capacidad para señales de control SCENE, esta unidad puede activar el componente e iniciar Esta unidad se enciende. “DVD Viewing” aparece en la reproducción automáticamente. -
Page 106: Qué Quiere Hacer Con Esta Unidad
Guía de inicio rápido ■ Después de usar esta unidad... ¿Qué quiere hacer con esta Pulse A MAIN ZONE ON/OFF en el panel unidad? delantero para poner esta unidad en el modo de espera. ■ Personalización de las plantillas SCENE ☞... -
Page 107: Conexiones
Conexiones Conexiones Panel trasero SPEAKERS COAXIAL OPTICAL DTV/CBL MD/CD-R MD/CD-R DIGITAL DTV/CBL OUTPUT HDMI DIGITAL INPUT DOCK REMOTE COMPONENT VIDEO ANTENNA DTV/CBL SURROUND BACK/BI-AMP SURROUND SINGLE MONITOR OUT +12V VIDEO VIDEO 15mA MAX. AC OUTLETS SWITCHED UNBAL. TRIGGER MONITOR MONITOR S VIDEO DTV/CBL DTV/CBL... -
Page 108: Colocación De Los Altavoces
Altavoz de subgraves (SW) La utilización de un altavoz de subgraves con amplificador incorporado como, por ejemplo, el Yamaha Active Servo Processing Subwoofer System, no sólo es eficaz para reforzar las frecuencias de los graves de cualquier canal o todos ellos, sino que también lo es para reproducir sonido de alta fidelidad del canal LFE (efecto de frecuencia baja) incluido... -
Page 109: Conexión De Altavoces
Conexiones Conexión de altavoces Asegúrese de conectar correctamente el canal izquierdo (L), el canal derecho (R), “+” (rojo) y “–” (negro). Si las conexiones tienen defectos, esta unidad no podrá reproducir bien las fuentes de entrada. Precaución • Antes de conectar los altavoces, asegúrese de que la clavija de alimentación de CA esté desconectada de la toma de CA. •... - Page 110 Conexiones ■ Antes de conectar al terminal ■ Uso de la conexión de biamplificación SPEAKERS Precaución Un cable de altavoz consiste realmente en un par de cables Quite las barras o puentes de cortocircuito para separar aislados uno junto al otro. Los cables son de color o forma los filtros separadores LPF (filtro pasabajos) y HPF diferente, tal vez tienen una franja, ranura o resaltos.
-
Page 111: Información Sobre Jacks Y Clavijas De Cables
Conexiones Información sobre jacks y clavijas de cables Conecte uno de los tipos de jacks de audio y/o jacks de vídeo con los que están equipados sus componentes de entrada. Jacks de audio y clavijas de cables Jacks de vídeo y clavijas de cables COMPONENT VIDEO AUDIO DIGITAL AUDIO... -
Page 112: Información Activada Hdmi
Conexiones Información activada HDMI™ ■ Compatibilidad HDMI con esta unidad ■ Jack HDMI y clavija de cable Tipos de Formatos de Componentes HDMI señales de señales de HDMI audio audio compatibles PCM lineal de 2ch, 32-192 kHz, CD, DVD-Vídeo, 2 canales 16/20/24 bit DVD-Audio, etc. -
Page 113: Flujo De Señales De Audio Y Vídeo
Conexiones Flujo de señales de audio y vídeo ■ Flujo de señales de audio ■ Flujo de señales de vídeo Entrada Salida Entrada Salida HDMI HDMI DIGITAL AUDIO (COAXIAL) DIGITAL AUDIO COMPONENT (OPTICAL) VIDEO AUDIO S VIDEO Salida digital VIDEO Pasante Salida analógica Conversión de vídeo ON (vea la página 67) -
Page 114: Conexión De Componentes De Vídeo
Conexiones Conexión de componentes de vídeo Conecte su TV (o proyector) al jack HDMI OUT, a los Notas jacks COMPONENT VIDEO MONITOR OUT, al jack S VIDEO MONITOR OUT o al jack VIDEO MONITOR • Algunos monitores de vídeo conectados a esta unidad mediante OUT de esta unidad. -
Page 115: Conexión De Otros Componentes
Conexiones Conexión de otros componentes • Cuando “VIDEO CONV.” se pone en “ON” (vea la página 67), las señales de vídeo convertidas sólo salen por los jacks Asegúrese de que esta unidad y otros MONITOR OUT. Para grabar una fuente tendrá que hacer los componentes estén desenchufados de mismos tipos de conexiones de vídeo entre cada componente. - Page 116 Conexiones ■ Conexión de una grabadora DVD, PVR o videograbadora DTV/CBL MD/CD-R MD/CD R DIGITAL DTV/CBL OUTPUT HDMI DIGITAL INPUT REMOTE COMPONENT VIDEO COMPONENT VIDEO DTV/CBL MONITOR OUT +12V VIDEO VIDEO VIDEO VIDEO 15mA MAX. TRIGGER MONITOR MONITOR DVR OUT DVR OUT S VIDEO S VIDEO...
-
Page 117: Conexión De Componentes De Audio
Conexiones Conexión de componentes de audio Conecte los componentes de audio de la forma siguiente. Asegúrese de que esta unidad y otros ■ Conexión de un reproductor CD y una componentes estén desenchufados de las tomas de CA. grabadora CD/grabadora MD Nota •... -
Page 118: Conexión De Un Acoplador Universal Yamaha Ipod™ O Un Adaptador Bluetooth
SCENE de los componentes. Yamaha Acoplador universal • Si el componente conectado al jack REMOTE OUT no es el iPod o adaptador Bluetooth producto Yamaha, ponga “SCENE IR” en el menú de ajuste avanzado en “OFF” (vea la página 77). -
Page 119: Uso De Los Jacks Video Aux Del Panel Delantero
Si tiene problemas con la recepción, 1. DOCK instale una antena exterior. Consulte al centro de servicio o 2. AUDIO concesionario Yamaha autorizado acerca de las antena exteriores. VOLUME MAIN ZONE Antena de AM... -
Page 120: Conexión Del Cable De Alimentación
Conexiones Conexión del cable de la antena de cuadro de AM Conexión del cable de alimentación Insertar Abra la palanca Cierre la palanca Una vez completadas las conexiones, enchufe el cable de alimentación en la toma de CA. El cable de la antena de cuadro de AM no tiene ninguna polaridad, pudiendo usted conectarlo por cualquiera de sus extremos al terminal AM o GND. -
Page 121: Encendido Y Apagado De Esta Unidad
Conexiones Encendido y apagado de esta unidad ■ Encendido de esta unidad Pulse A MAIN ZONE ON/OFF (o G POWER) para encender esta unidad. Cuando encienda esta unidad habrá un retardo de 4 a 5 segundos hasta que esta unidad pueda reproducir sonidos. ■... -
Page 122: Visualizador Del Panel Delantero
Se enciende cuando se introduce una señal DTS 96/24 en • Se enciende cuando usted coloca su iPod en un esta unidad. acoplador universal Yamaha iPod (tal como el YDS-10, 8 Indicador MUTE e indicador de nivel VOLUME vendido separadamente) conectado al terminal DOCK •... - Page 123 Conexiones ■ Utilización del mando a distancia D Indicador CINEMA DSP Se enciende cuando usted selecciona un programa de El mando a distancia transmite un rayo infrarrojo campo acústico (vea la página 41). direccional. Asegúrese de apuntar directamente el mando a distancia al Indicador VIRTUAL sensor de mando a distancia de esta unidad durante el Se enciende cuando está...
-
Page 124: Optimización De Los Ajustes De Los Altavoces Para Su Habitación De Escucha
Optimización de los ajustes de los altavoces para su habitación de escucha Esta unidad emplea la tecnología YPAO (Yamaha Parametric Room Acoustic Optimizer) para evitar tener que realizar el molesto ajuste de los altavoces basándose en la escucha del sonido y para poder hacer automáticamente unos ajustes del sonido muy precisos. - Page 125 Optimización de los ajustes de los altavoces para su habitación de escucha Pulse 7 ENTER para iniciar el Asegúrese de que “SETUP” esté en “AUTO” y el puntero esté apuntando a “START”. procedimiento de ajuste. Esta unidad inicia el procedimiento de ajuste. Durante el procedimiento de ajuste automático salen También puede seleccionar los métodos de ajuste siguientes.
- Page 126 Optimización de los ajustes de los altavoces para su habitación de escucha La visualización cambia de la forma siguiente. Pulse 8 k y 8 ENTER para ver detalladamente los resultados del ajuste. AUTO SETUP SETUP;;;;;;;AUTO . START Pulse repetidamente 8 l / h para cambiar Automatic entre las visualizaciones de los resultados Processing...
- Page 127 Optimización de los ajustes de los altavoces para su habitación de escucha ■ Si aparece “WARNING” Pulse 7 n y luego 7 l / h para seleccionar Cuando esta unidad detecta posibles problemas durante el procedimiento “AUTO SETUP”, “WARNING” aparece “SET”...
-
Page 128: Selección De Plantillas Scene
SELECCIÓN DE PLANTILLAS SCENE Selección de plantillas SCENE Esta unidad está equipada con 16 plantillas SCENE de Pulse R INPUT l / h (o pulse 4 AMP y preajuste para varias situaciones de uso de esta unidad. Como ajuste inicial de fábrica se han asignado las luego 7l / h) para seleccionar la plantilla siguientes plantillas SCENE a cada botón SCENE: deseada. - Page 129 Game Playing Nota Cuando el iPod esté conectado al acoplador universal Yamaha iPod o un componente Bluetooth esté conectado al adaptador Bluetooth, esta unidad reproducirá las fuentes de audio introducidas por el terminal DOCK. Puede crear sus plantillas originales SCENE editando las plantillas SCENE de preajuste. Vea la página 33 para conocer detalles.
- Page 130 FM o AM. 7ch Enhancer Dock Listening DOCK MUSIC ENHANCER Seleccione esta plantilla SCENE cuando reproduzca música en su iPod colocado en un acoplador universal Yamaha iPod o 7ch Enhancer en un componente Bluetooth conectado al adaptador Bluetooth. USB Audio MUSIC ENHANCER Compruebe esta plantilla SCENE cuando reproduzca música...
-
Page 131: Creación De Sus Plantilas Scene Originales
Selección de plantillas SCENE Creación de sus plantilas SCENE Pulse 4 AMP y luego 7 k / n para originales seleccionar el parámetro deseado de la plantilla SCENE y luego 7 l / h para Puede crear sus plantillas SCENE originales para cada seleccionar el valor deseado del parámetro botón SCENE. -
Page 132: Utilización Del Mando A Distancia Con La Función Scene
Selección de plantillas SCENE Utilización del mando a distancia con la función SCENE ■ Control de los componentes fuente de ■ Ajuste de la fuente de entrada de la entrada en el modo SCENE plantilla SCENE personalizada en el Con el mando a distancia puede controlar esta unidad y el mando a distancia componente fuente de entrada. -
Page 133: Reproducción
REPRODUCCIÓN Reproducción Precaución Gire L VOLUME (o pulse L VOLUME +/–) Deberá tener mucho cuidado cuando reproduzca CDs para ajustar el volumen al nivel de salida codificados en DTS. Si reproduce un CD codificado en deseado. DTS en un reproductor CD incompatible con DTS, sólo oirá... -
Page 134: Selección De Jacks De Entrada De Audio (Audio Select)
Reproducción Selección de jacks de entrada de Selección del componente audio (AUDIO SELECT) MULTI CH INPUT Esta unidad dispone de una variedad de jacks de entrada. Use esta característica para seleccionar el componente Use esta función (selección de jack de entrada de audio) conectado a los jacks MULTI CH INPUT (vea la para cambiar entre los jacks de entrada cuando hay más de página 19) como fuente de entrada. -
Page 135: Visualización Del Estado Actual De Esta Unidad En Un Monitor De Vídeo
Reproducción Visualización del estado actual de Uso de sus auriculares esta unidad en un monitor de vídeo Conecte un par de auriculares con clavija de cable de audio analógico o estéreo al jack Puede visualizar la información de funcionamiento de esta PHONES del panel delantero. -
Page 136: Reproducción De Fuentes De Vídeo Como Fondo De Una Fuente De Audio
Reproducción ■ Información de audio Reproducción de fuentes de vídeo como fondo de una fuente de audio Información Descripciones FORMAT Formato de señal. Cuando esta unidad no Puede combinar una imagen de una fuente de vídeo con el puede detectar una señal digital se pone sonido de una fuente de audio. -
Page 137: Utilización Del Temporizador Para Dormir
Reproducción Utilización del temporizador para dormir Utilice esta función para poner automáticamente la zona principal en el modo de espera después de pasar ciento tiempo. Pulse 4 AMP y luego pulse repetidamente R SLEEP para poner el tiempo. Cada vez que pulsa R SLEEP, el visualizador del panel delantero cambia como se muestra más abajo. -
Page 138: Programas De Campos Acústicos
PROGRAMAS DE CAMPOS ACÚSTICOS Programas de campos acústicos Esta unidad está equipada con una variedad de Notas decodificadores digitales precisos que le permiten • Cuando selecciona una fuente de entrada, esta unidad selecciona disfrutar de la reproducción de múltiples canales de casi automáticamente el último programa acústico utilizado con la cualquier fuente de sonido estéreo o multicanal. - Page 139 Programas de campos acústicos ■ Para disfrutar de fuentes de 2 canales ■ Uso de programas de campos acústicos usando los decodificadores estándar sin altavoces surround (Virtual CINEMA DSP) Las señales introducidas desde fuentes de 2 canales también se pueden reproducir en múltiples canales. Virtual CINEMA DSP le permite disfrutar de los programas CINEMA DSP sin altavoces surround porque Pulse 4 AMP y luego pulse repetidamente...
- Page 140 Programas de campos acústicos ■ Edición de parámetros de campos Los ajustes iniciales se indican en negrilla bajo cada parámetro. acústicos Con los parámetros predeterminados en fábrica se puede Para Pop/Rock, Hall, Jazz, Game, TV Sports, disfrutar de un sonido de buena calidad. Aunque no Movie Spacious y Movie Dramatic: necesita cambiar los ajustes iniciales, si podrá...
-
Page 141: Uso De Las Características De Audio
USO DE LAS CARACTERÍSTICAS DE AUDIO Uso de las características de audio Para disfrutar de sonido de alta Ajuste de nivel de los altavoces calidad Puede ajustar el nivel de salida de cada altavoz mientras escucha una fuente de música. Esto también es posible Use el modo DIRECT para disfrutar del sonido de alta cuando se reproducen fuentes introducidas por los jacks calidad de la fuente seleccionada. -
Page 142: Selección Del Modo De Escucha Nocturna
Uso de las características de audio Selección del modo de escucha nocturna Los modos de escucha nocturna han sido diseñados para facilitar la escucha a volúmenes bajo durante la noche. Pulse 4 AMP y luego pulse repetidamente P NIGHT para seleccionar “NIGHT:CINEMA” o “NIGHT:MUSIC”. -
Page 143: Sintonización De Fm/Am
SINTONIZACIÓN DE FM/AM Sintonización de FM/AM Hay 2 métodos de sintonizar: automático y manual. La sintonización automática es eficaz cuando las señales de emisoras son intensas y no hay interferencias. Si la señal de la emisora que selecciona es débil, sintonícela manualmente. También puede utilizar las funciones de presintonización automática y manual para guardar hasta 40 emisoras. -
Page 144: Presintonización Automática
Sintonización de FM/AM Presintonización automática Presintonización manual Puede utilizar la función de presintonización automática También puede guardar manualmente hasta 40 emisoras para guardar hasta 40 emisoras de FM de señal intensa (A1 a E8: 8 números de emisoras presintonizadas en cada (A1 a E8: 8 números de emisoras presintonizadas en cada uno de los 5 grupos de emisoras presintonizadas). -
Page 145: Selección De Emisoras Presintonizadas
Sintonización de FM/AM Selección de emisoras Intercambio de emisora presintonizadas presintonizada Puede sintonizar simplemente cualquier emisora deseada Puede intercambiar las asignaciones de dos emisoras seleccionando el grupo de emisoras presintonizadas y el presintonizas entre ellas. El ejemplo de abajo describe el número bajo el cual fue guardada. -
Page 146: Sintonización Del Sistema De Datos De Radio (Modelos De Europa Y Rusia Solamente)
SINTONIZACIÓN DEL SISTEMA DE DATOS DE RADIO (MODELO DE EUROPA Y RUSIA SOLAMENTE) Sintonización del sistema de datos de radio (Modelo de Europa y Rusia solamente) El sistema de datos de radio es un sistema de transmisión de datos de emisoras FM de muchos países. Esta unidad puede recibir varios datos del sistema de datos de radio como PS (servicio de programas), PTY (tipo de programa), RT (texto de radio), CT (hora) y EON (otras redes mejoradas) cuando se reciben emisoras del sistema de datos de radio. -
Page 147: Selección Del Tipo De Programa Del Sistema De Datos De Radio (Modo Pty Seek)
Sintonización del sistema de datos de radio (Modelo de Europa y Rusia solamente) Selección del tipo de programa del Pulse 7 PRESET/CH k / n en el mando a sistema de datos de radio distancia para seleccionar el tipo de programa deseado. -
Page 148: Uso Del Servicio De Datos De Otras Redes Mejoradas (Eon)
Sintonización del sistema de datos de radio (Modelo de Europa y Rusia solamente) Uso del servicio de datos de otras Pulse 0 PTY SEEK START en el mando a redes mejoradas (EON) distancia para empezar a buscar todas las emisoras del sistema de datos de radio Use esta función para recibir el servicio de datos EON (otras presintonizadas disponibles. -
Page 149: Uso De Un Dispositivo De Memoria Usb O Un Reproductor De Audio Portátil Usb
USO DE UN DISPOSITIVO DE MEMORIA USB O UN REPRODUCTOR DE AUDIO PORTÁTIL USB Uso de un dispositivo de memoria USB o un reproductor de audio portátil USB Use esta función para disfrutar de los archivos WAV (formato PCM solamente), MP3 y WMA guardados en su dispositivo de memoria USB o reproductor de audio portátil USB conectado al puerto USB del panel delantero de esta unidad. - Page 150 Uso de un dispositivo de memoria USB o un reproductor de audio portátil USB ■ La función de visualización de Pulse 7 k / n / l / h en el mando a distancia información de la reproducción para seleccionar el archivo deseado. •...
-
Page 151: Utilización Ipod
“iPod” en “Solución de problemas” en la página 85. • Una vez colocado su iPod en un acoplador universal Yamaha iPod, esta unidad empieza a transmitir señales con su iPod. • Una vez completada la conexión entre su iPod y esta unidad, “iPod connected” aparece en el visualizador del panel delantero y el indicador DOCK se enciende en el visualizador del panel delantero. - Page 152 • Las operacioens no se pueden hacer con los controles de su iPod. • Seleccione “One” para repetir una canción en esta unidad. • El logotipo Yamaha aparece en la ventana de visualización de su iPod. • Seleccione “All” para repetir una serie de canciones en esta unidad.
-
Page 153: Utilización De Componentes Bluetooth
UTILIZACIÓN DE COMPONENTES BLUETOOTH™ Utilización de componentes Bluetooth™ Puede conectar un adaptador Yamaha Bluetooth (como el YBA-10, vendido separadamente) al terminal DOCK de esta unidad y disfrutar del contenido musical guardado en su componente Bluetooth (reproductor de música portátil, por ejemplo) sin tener que usar cables entre esta unidad y el componente Bluetooth. -
Page 154: Grabación
GRABACIÓN Grabación Los ajustes de grabación y otras operaciones se realizan en los componentes de grabación. Consulte las instrucciones de manejo de esos componentes. Notas • Cuando esta unidad se ponga en el modo de espera, usted no podrá grabar entre otros componentes conectados a esta unidad. •... -
Page 155: Set Menu
SET MENU SET MENU Para realizar una variedad de ajustes del sistema y personalizar el funcionamiento de esta unidad puede utilizar los parámetros siguientes en “SET MENU”. Cambie los ajustes iniciales (en negrita debajo de cada parámetro) para reflejar las necesidades de su ambiente de escucha. ■... -
Page 156: Utilización Set Menu
D)PARAM. INI Inicializa los parámetros de un grupo de programas de campos acústicos. Vincule el adaptador Yamaha Bluetooth conectado (tal como el YBA-10, vendido E)BLUETOOTH SET separadamente) con un componente Bluetooth (vea la página 55). F)USB PLAY STYLE Ajusta el estilo de reproducción de una fuente USB. -
Page 157: Sound Menu
SET MENU 1 SOUND MENU La sección del altavoz de graves de un altavoz es 16 cm o más: grande Use este menú para regular manualmente los ajustes de La sección del altavoz de graves de un altavoz es cualquier altavoz o compensar los retardos en el 16 cm o menos: pequeño procesamiento de las señales de vídeo cuando se usan Altavoces delanteros FRONT SP... - Page 158 SET MENU Salida de graves LFE LFE/BASS OUT Altavoces surround derecho/izquierdo SUR. L/R SP Use esta función para seleccionar los altavoces que dan salida al LFE (efecto de baja frecuencia) y a las señales de Opciones: NONE, SML, LRG baja frecuencia. Opciones: SWFR, FRNT, BOTH 1 SOUND MENU 1 SOUND MENU...
- Page 159 SET MENU ■ Nivel de altavoces Crossover CROSS OVER B)SP LEVEL Use esta función para seleccionar la frecuencia de cruce Use esta función para ajustar manualmente el nivel de de todos los altavoces puestos en “SML” (o “SMALL”) en salida de cada altavoz. “SPEAKER SET”...
-
Page 160: Distancia De Altavoces
SET MENU ■ Distancia de altavoces ■ Ecualizador para altavoz central C)SP DISTANCE Utilice esta función para ajustar manualmente la distancia D)CENTER GEQ de cada altavoz y el retardo aplicado al canal respectivo. Use esta función para ajustar el ecualizador gráfico de 5 Lo ideal sería que cada altavoz estuviese a la misma bandas (100Hz, 300Hz, 1kHz, 3kHz y 10kHz) del canal distancia de la posición de escucha principal. - Page 161 SET MENU ■ Gama dinámica Volumen máximo MAX VOL. F)DYNAMIC RANGE Use esta función para seleccionar la compresión de gama Use esta función para ajustar el nivel de sonido máximo. dinámica que va a ser aplicada a sus altavoces o Esta función es útil para evitar el sonido alto inesperado auriculares.
- Page 162 1 SOUND MENU EXTD SUR.;;;;;;AUTO H)HDMI SET [ ]/[ ]:Select SUPPORT AUDIO: [ENTER]:Return RX-V563 [ ]/[ ]:Select Modo de selección de decodificador extendido [ENTER]:Return Use esta función para designar el modo de decodificador extendido para las fuentes de entrada conectadas a los Audio de soporte SUPPORT AUDIO jacks DIGITAL INPUT cuando conecte la alimentación de...
-
Page 163: Input Menu
SET MENU Para el jacka OPTICAL OUTPUT 4 2 INPUT MENU OPTICAL OUT (4) Opciones:(4) MD/CD-R, DTV/CBL, V-AUX, DVR, Utilice este menú para reasignar los jacks de entrada, seleccionar el modo de decodificador o cambiar los nombres de las fuentes de entrada. 2 INPUT MENU A)I/O ASSIGNMENT OPTICAL OUT... - Page 164 Nota MD/CD-R TUNER Sólo puede ajustar el valor para DOCK cuando iPod está colocado MULTI CH IN en el acoplador universal Yamaha conectado a esta unidad. DTV/CBL ■ Modo de decodificador D)DECODER MODE V-AUX/DOCK 2 INPUT MENU...
-
Page 165: Option Menu
SET MENU ■ Ajuste de entrada de múltiples canales 3 OPTION MENU E)MULTI CH SET Use este menú para ajustar los parámetros del sistema opcionales. 2 INPUT MENU E)MULTI CH SET BGV;;;;;;;;;LAST ;MANUAL SETUP ;MANUAL SETUP INPUT CH;;;;;6CH 3 OPTION MENU 3 OPTION MENU . - Page 166 SET MENU ■ Protección de la memoria Desplazamiento de la visualización del panel delantero FL SCROLL B)MEMORY GUARD Utilice esta función para elegir si se va a visualizar la Utilice esta función para impedir los cambios por error en información (título de una canción o nombre de un canal, los valores de los parámetros de programas DSP y en otros por ejemplo) en el visualizador del panel delantero de ajustes del sistema.
- Page 167 Opciones:NO, YES [ENTER]:Enter 3 OPTION MENU Use esta función para iniciar la vinculación del adaptador D)PARAM. INI Yamaha Bluetooth conectado (tal como el YBA-10, >NO vendido separadamente) con su componente Bluetooth. Para conocer detalles de la vinculación, consulte [ ]/[ ]:Select “Vinculación del adaptador Bluetooth™...
- Page 168 SET MENU ■ Estilos de reproducción USB F)USB PLAY STYLE Use esta función para ajustar el estilo de reproducción según sus preferencias. Puede cambiar archivos aleatoriamente o repetir un archivo específico o un grupo de archivos. 3 OPTION MENU F)USB PLAY STYLE .
-
Page 169: Funciones Del Mando A Distancia
Además de controlar esta unidad, el mando a distancia también puede controlar otros componentes audiovisuales hechos por Yamaha y otros fabricantes. Para controlar su TV u otros componentes deberá preparar el código de mando a distancia apropiado para cada fuente de entrada (vea la página 73). -
Page 170: Control De Otros Componentes
Funciones del mando a distancia ■ Control de otros componentes Pulse uno de los botones selectores de entrada (3) o A a para controlar otros componentes. Deberá poner de antemano el código de mando a distancia apropiado para cada fuente de entrada (vea la BAND LEVEL TITLE MENU... -
Page 171: Puesta De Los Códigos De Mando A Distancia
TUNER Yamaha 5009 TUNER Yamaha 5017 Nota Tal vez no pueda controlar su componente Yamaha aunque se preajuste un código de fabricante Yamaha listado arriba. En este caso, intente poner otros códigos de mando a distancia Yamaha. -
Page 172: Uso De La Configuración Multizona
Yamaha autorizado más cercano acerca de las conexiones Zone 2 más adecuadas para usted. • Algunos modelos Yamaha se pueden conectar directamente a los jacks REMOTE de esta unidad. Si tiene estos productos tal vez no necesite usar un emisor de señales infrarrojas. -
Page 173: Control Zone 2
• Disfrute de música guardada en su iPod acoplado a un El indicador ZONE2 parpadea en el visualizador del panel acoplador universal Yamaha iPod (como el YDS-10 delantero durante unos 10 segundos. opcional) conectado al terminal DOCK de esta unidad cuando “V-AUX”... - Page 174 Uso de la configuración multizona ■ Control de la Zone 2 con el mando a Haga las operaciones siguientes después de activar el modo distancia de operación de la Zone 2. Encendido de Zone 2 Operación de la Zone 2 Mientras mantiene pulsado 4 AMP, pulse Pulse R INPUT l / h para seleccionar la fuente G POWER.
-
Page 175: Ajuste Avanzado
• Seleccione “ON” cuando el componente conectado al jack unidad en el modo de espera. REMOTE OUT es el componente Yamaha y éste tiene la capacidad de las señales de control SCENE. Esta unidad Mantenga pulsado N TONE CONTROL y envía automáticamente las señales del mando a distancia... -
Page 176: Solución De Problemas
Consulte la tabla de abajo cuando esta unidad no funcione correctamente. Si el problema que usted tiene no está en la lista de abajo o las instrucciones no sirven de ayuda, apague esta unidad, desconecte el cable de alimentación y póngase en contacto con el centro de servicio o concesionario Yamaha autorizado. ■ Generaliades... - Page 177 Solución de problemas Vea la Problema Causa Remedio página El sonido se apaga El circuito de protección se ha activado Verifique que los cables de los altavoces no se toquen — repentinamente. debido a un cortocircuito, etc. entre sí y luego vuelva a encender esta unidad. El temporizador para dormir ha apagado Encienda esta unidad y reproduzca de nuevo la —...
- Page 178 Solución de problemas Vea la Problema Causa Remedio página Las fuentes Dolby El componente conectado no está ajustado Haga el ajuste apropiado siguiendo las instrucciones — Digital o DTS no se para dar salida a las señales digitales de su componente. pueden reproducir.
- Page 179 Solución de problemas ■ Sintonizador Vea la Problema Causa Remedio página La recepción estéreo Las características de las emisiones Verifique las conexiones de la antena. por FM tiene ruido. estéreo de FM pueden causar este Intente utilizar una antena de FM direccional —...
-
Page 180: Panel Delantero
Solución de problemas ■ AUTO SETUP Antes de AUTO SETUP Vea la Mensaje de error Causa Remedio página Connect MIC! El micrófono optimizador no está Conecte el micrófono optimizador conectado. suministrado al jack OPTIMIZER MIC del panel delantero. Unplug HP! Hay auriculares conectados. - Page 181 • Si aparece el mensaje de advertencia “W-1”, “W-2” o “W-3” se hacen las correcciones, pero éstas tal vez no sean óptimas. • Si aparece repetidamente un mensaje de error “E-9”, póngase en contacto con un centro de servicio Yamaha cualificado.
- Page 182 Solución de problemas ■ USB Vea la Problema Causa Remedio página Los archivos y Los archivos y directorios de música están Ponga los archivos y directorios de música en el área — directorios de música en otros lugares que no son el área FAT. FAT.
- Page 183 Connect error Hay un problema con la trayectoria de Apague esta unidad y vuelva a conectar el acoplador señal de su iPod a esta unidad. universal Yamaha iPod al terminal DOCK de esta unidad. Intente reponer su iPod. — Unknown iPod El iPod que está...
- Page 184 El componente Bluetooth está desconectado del adaptador Yamaha Bluetooth (como el YBA-10, vendido separadamente). No BT adapter El adaptador Bluetooth no está conectado Conecte el adaptador Yamaha Bluetooth (tal como el al terminal DOCK. YBA-10, vendido separadamente) al terminal DOCK.
-
Page 185: Mando A Distancia
Solución de problemas ■ Mando a distancia Vea la Problema Causa Remedio página El mando a distancia Distancia o ángulo equivocados. El mando a distancia funcionará dentro de una no funciona bien. distancia de 6 m y sin exceder un ángulo de 30 grados a partir del eje central del panel delantero. -
Page 186: Dolby Digital
2 de la grabación original. Para obtener los mejores DSP utiliza una tecnología de campo acústico original resultados, Dolby Digital EX deberá utilizarse con pistas Yamaha para combinar sistemas Dolby Pro Logic, Dolby de sonido de películas grabadas con Dolby Digital Digital y DTS que proporcionan la experiencia Surround EX. - Page 187 Glosario ■ Dolby Surround ■ Canal 0.1 LFE Dolby Surround utiliza un sistema de grabación analógica de Este canal reproduce señales de baja frecuencia. La gama de 4 canales para reproducir efectos de sonido reales y dinámicos: frecuencias de este canal es de 20 Hz a 120 Hz. Este canal se 2 canales delanteros derecho e izquierdo (estéreo), un canal cuenta como 0.1 porque sólo impone una gama de frecuencias central para el diálogo (mono) y un canal surround para efectos...
- Page 188 ■ SILENT CINEMA Yamaha ha desarrollado un algoritmo DSP de efectos de sonido reales para los auriculares. Los parámetros para los auriculares han sido establecidos para cada campo acústico...
- Page 189 Especificaciones Especificaciones SECCIÓN DE AUDIO • Nivel de señal Compuesto ..............1 Vp-p/75 Ω • Potencia de salida RMS mínima para los altavoces delanteros, S-vídeo ......1 Vp-p/75 Ω (Y), 0,286 Vp-p/75 Ω (C) central, surround y surround trasero Componente ....1 Vp-p/75 Ω (Y), 0,7 Vp-p/75 Ω (P [Modelos de EE.UU.
- Page 190 Altavoz, Gama dinámica ...... 63 Conexión, Acoplador universal Distancia de altavoces, Ajuste automático ..27 Altavoz, Nivel de efectos de baja Yamaha iPod ........20 Distancia de altavoces, Menú de sonido ..62 frecuencia ........62 Conexión, Antena de FM .....21 Distancia de altavoz, Resultado del Ancho central, Parámetro de campo...
- Page 191 Índice alfabético ■ E-1:NO FRONT SP, Mensaje de error Indicador ENHANCER ......24 de ajuste automático ......82 Indicador EON ........25 M.O.R. M, Tipo de programas del E-2:NO SURR.SP, Mensaje de error Indicador HDMI ........24 sistema de datos de radio ....49 de ajuste automático ......
- Page 192 ........38 SUR. L/R SP, Ajustes de los altavoces ..60 Reproductor CD, Conexión ....19 Surround expandido, Menú de sonido ..64 Yamaha Parametric Room Acoustic Retardo de audio, Ajustes de audio ..63 Optimizer ......... 26 ■...
- Page 193 (o piezas) que tenga defectos, o a sustituirlo, a discreción de Yamaha, sin cobrar ningún honorario por las piezas o la mano de obra. Yamaha se reserva el derecho de reemplazar un producto por otro de clase y/o precio y condiciones similares, en el caso de que éste no se fabrique más o se considere que las reparaciones resultan poco económicas.
- Page 194 请将本机放置在顶部最少留有余地 30 cm,左右最少留 指定电压电源造成的一切损害,Yamaha 将不负任何责任。 有余地 20 cm,后部最少留有余地 20 cm 的通风良好的 13 为了防止雷击,在打雷闪电时,请将插头从墙上的电源 地方。 插座拔出。 3 将本机远离其他电器,马达或变压器放置,以避免产生 14 不要试图修理或改造本机。当需要维修时,请与有资格 蜂鸣噪声。 的 Yamaha 维修人员联系。没有任何理由打开机壳。 4 不要将本机突然从低温环境转移到高温环境,也不要将 15 当计划长时间 (比如,假期)不使用本机时,请将电源 其置于高湿场所 (例如,放置有加湿器的房间) ,以防 插头从墙壁上的插座上拔下。 止机器内部结露。结露可能导致触电,火灾,机器损坏 16 在电源插座附近或容易插入电源插头的地方安装本机。 甚至人员伤害。 17 在做出机器故障的结论之前,请务必参考通常操作的 5 不要将本机放置于异物容易落入的场所,也不要放置在...
- Page 195 连接视频组件机 ......16 2 INPUT MENU ......65 连接其他组件机 ......17 3 OPTION MENU ......67 连接音频组件机 ......19 遥控器功能 ......71 连接 Yamaha iPod 多用平台或 操作本机,电视机,或其他组件机 ..71 蓝牙 (Bluetooth ) 适配器 ..... 20 设置遥控器代码 ......73 使用 REMOTE IN/OUT 插孔 ....20 使用多区域配置...
- Page 196 特性 特性 内置 7 声道功率放大器 DOCK 端子 最小 RMS 输出功率 DOCK 端子用于连接 Yamaha iPod 多用平台 (比如 YDS-10, [ 美国和加拿大型号 ] 另售)或 Bluetooth 适配器 (比如 YBA-10,另售) (1 kHz, 0.9% THD, 8 Ω) USB 功能 90 W/ch [ 其它型号 ] USB 接口可连接到 USB 存储卡或 USB 便携音频播放机...
- Page 197 开始 开始 提供的配件 安装遥控器电池 请检查您收到了下列所有的部件。 遥控器 干电池 (2) (AAA, R03, UM-4) 优化器麦克风 AM 环形天线 室内 FM 天线 VOLTAGE SELECTOR (仅限亚洲和通用型号) 警告 在您将电源插头插入墙壁的交流电源之前,本机后 部面板上的 VOLTAGE SELECTOR 必须要根据您当地 的主电压设置。 不妥当的 VOLTAGE SELECTOR 设置 打开电池舱盖。 将会损坏本机并可能造成火灾。 使用平板螺丝刀顺时针或逆时针旋转 VOLTAGE 请按照位于电池舱内侧的极性标记 (+ 和 -),插 SELECTOR。 入两节随机附带的电池...
-
Page 198: 快速开始指南
快速开始指南 快速开始指南 以下步骤介绍如何在您的家庭影院欣赏 DVD 电影播放 准备: 检查所需物品 的最简单方法。 准备好下列物品。 右前扬声器 视频监视器 超低音扬声器 扬声器 左前扬声器 右环绕声扬声器 前扬声器 ......x 2 中央扬声器 .......x 1 环绕声扬声器 .....x 4 选择磁屏蔽的扬声器。 扬声器的配置要求至少 有两个前扬声器。 其他扬声器按需求的优先度 顺序列表如下 : 中央扬声器 后环绕声右扬声器 1. 两个环绕声扬声器 2. 中央扬声器 DVD 播放机 后环绕声左扬声器 3. 一个 (或两个)后环绕声扬声器 主动超低音扬声器... - Page 199 快速开始指南 请确保正确连接左声道 (L) ,右声道 (R) , 步骤 1: 设置您的扬声器 “+” (红)和 “-” (黑) 。 前和中央扬声器 在室内安置您的扬声器并把它们连接到本机。 SPEAKERS SPEAKERS COAXIAL OPTICAL 松开 插入 拧紧 DTV/CBL MD/CD-R MD/CD-R DIGITAL DTV/CBL HDMI DIGITAL INPUT OUTPUT DOCK REMOTE COMPONENT VIDEO ANTENNA DTV/CBL SURROUND BACK/BI-AMP SURROUND BACK/BI-AMP SURROUND SURROUND...
- Page 200 • 连接 CD 播放机和 CD 刻录机 /MD 录音机 数码同轴音频输 出插孔 第 19 页 • 连接多格式播放机或外部解码器 第 19 页 • 连接 Yamaha iPod/Bluetooth 平台 第 20 页 • 连接 REMOTE IN/OUT 插孔 第 20 页 数码同轴音频缆线 DVD DIGITAL INPUT • 使用在前面板的 VIDEO AUX 插孔...
- Page 201 步骤 3: 按 SCENE 1 按钮 仅按下 SCENE 按钮,您就可以打开本机,呼出 SCENE 模板对应的自己喜欢的输入源以及声场程序,这些事 先都分配给 SCENE 按钮。 SCENE 模板由输入源和声场 程序的组合而成。 打开视频监视器,然后设置视频监视器的输入选 择开关到本机。 如果您连接具有 SCENE 控制信号的 Yamaha 产品,本机可自 动开启组件机并播放。 有关详情请参阅 DVD 播放机的使用说 按 T SCENE 1。 明书。 本机打开。 “DVD Viewing”出现在前部面板显示 器中,本机自动优化自己的状态,以适应 DVD 使用其他 SCENE 按钮...
-
Page 202: 您想使用本机做什么
快速开始指南 使用本机之后 ... 您想使用本机做什么? 按下前面板上的 A MAIN ZONE ON/OFF,关闭 定制 SCENE 模板 本机。 • 使用各种 SCENE 模板 第 30 页 • 建立自己独特的 SCENE 模板 第 33 页 使用各种输入源 • 本机的基本控制 第 35 页 • 欣赏 FM/AM 广播节目 第 45 页 •... -
Page 203: 后部面板
连接 连接 后部面板 SPEAKERS COAXIAL OPTICAL DTV/CBL MD/CD-R MD/CD-R DIGITAL DTV/CBL OUTPUT HDMI DIGITAL INPUT DOCK REMOTE COMPONENT VIDEO ANTENNA DTV/CBL SURROUND BACK/BI-AMP SURROUND SINGLE MONITOR OUT +12V VIDEO VIDEO 15mA MAX. AC OUTLETS SWITCHED UNBAL. TRIGGER MONITOR MONITOR S VIDEO DTV/CBL DTV/CBL CENTER... -
Page 204: 放置扬声器
前扬声器用于主音源的声音加效果声音。 将这些扬声器放置在和理想收听位置等距处。 每个扬声器到视频监视器的 每边的距离应该是相同的。 中央扬声器 (C) 中央扬声器用于中央声道的声音 (对话,语音等) 。 如果因为某些原因不能使用中央扬声器,没有它也能用 此系统。 但是,要获得最佳效果,还是需要完整的系统。 环绕声左右扬声器 (SL 和 SR) 环绕声扬声器用于效果和环绕声。 环绕声后左右扬声器 (SBL 和 SBR) 后环绕声扬声器作为环绕声扬声器的补充,提供更具现场感的由前到后的声效转换。 超低音扬声器 (SW) 使用有内置放大器的超低音扬声器,例如 Yamaha 主动伺服处理超低音扬声器系统,不仅对加强来自任一或所 有声道的低音频率有效,而且对高保真再现包含在 Dolby Digital 和 DTS 音源内的 LFE (低频效果)声道也很 有效。 超低音扬声器的位置不是很要紧,因为低音并非是高度方向性的。 但最好将它放置在靠近前扬声器 附近。 将它略微朝向房间的中央,以减少墙的反射。... -
Page 205: 连接扬声器
连接 连接扬声器 请确保正确连接左声道 (L) ,右声道 (R) , “+” (红)和 “-” (黑) 。 如果连接错误,本机将不能正确再 现输入的音源。 警告 在连接扬声器之前,请确认交流电源插头从墙壁插座上拔下。 • 请勿让裸露的扬声器导线互相接触或让它们接触到本机的任何金属部分。 这可能损坏本机和/或扬声器。 • 如果扬声器的导线短路,当您打开本机时, “CHECK SP WIRES”出现在前部面板显示器上。 使用磁屏蔽的扬声器。 如果此类型的扬声器仍然会对监视器造成干扰,请将扬声器远离监视器。 • 当您使用单个环绕声后扬声器 时, 连接扬声器到左 SURROUND BACK 端子 (SINGLE) 。 后环绕声扬声器 环绕声扬声器 右 左 右 左... - Page 206 连接 连接到 SPEAKERS 端子之前 使用双重放大连接 扬声器导线实际上是一对并列的绝缘的导线。 导线的 警告 颜色或形状不同,例如有条纹,凹槽或隆起。 将有条 去掉短接棒或短接桥,分离 LPF (低音通过过 纹 (凹槽等)的导线连接到本机和您的扬声器的 滤器)和 HPF (高音通过过滤器)分频。 “+” (红色)端子。 将普通的那条导线连接到 “-” (黑色)端子。 本机允许您对于一个扬声器系统进行双重放大连接。 检查您的扬声器系统是否支持双重放大。 从各个扬声器缆线端部剥去大约 10 mm 的绝缘皮,然 要进行双重放大连接,如下所示,使用 FRONT 和 后拧紧裸露的导线以防短路。 SURROUND BACK 端子。 要激活双重放大连接,在 “高级设置”将 “BI-AMP”设置到 “ON” (请参阅第 10 mm 77 页)...
-
Page 207: 插孔和缆线插头的有关信息
连接 插孔和缆线插头的有关信息 连接您的输入组件机配备的音频插孔和 / 或视频插孔中的一种。 音频插孔和缆线插头 视频插孔和缆线插头 COMPONENT VIDEO DIGITAL AUDIO AUDIO DIGITAL AUDIO VIDEO S VIDEO COAXIAL OPTICAL ( 白色 ) ( 红色 ) ( 橘红色 ) ( 黄色 ) ( 红色 ) ( 蓝色 ) ( 绿色 ) 左右模拟音频... -
Page 208: Hdmi Tm 的有关信息
连接 HDMI 的有关信息 HDMI 与本机兼容 HDMI 插孔和缆线插头 音频信号类型 音频信号格式 兼容 HDMI 装置 HDMI 2 声道线性 PCM 2声道, 32-192 kHz, CD, DVD- 视频 , 16/20/24 bit DVD- 音频等 多声道线性 PCM 8声道, 32-192 kHz, DVD- 音频等 16/20/24 bit 数位流 杜比数码 , DTS DVD- 视频等... -
Page 209: 音频和视频信号流向
连接 音频和视频信号流向 音频信号流向 视频信号流向 输入 输出 输入 输出 HDMI HDMI DIGITAL AUDIO (COAXIAL) DIGITAL AUDIO COMPONENT (OPTICAL) VIDEO AUDIO S VIDEO 数码输出 VIDEO 通过 模拟输出 视频转换 ON ( 请参阅第 67 页 ) 注 注 • 当 “SUPPORT AUDIO”设置到 “Other”时,通过 HDMI IN •... -
Page 210: 连接视频组件机
连接 连接视频组件机 将您的电视机 (或投影仪)连接到本机的 HDMI OUT 注 插孔, COMPONENT VIDEO MONITOR OUT 插孔, S VIDEO MONITOR OUT 插孔或 VIDEO MONITOR OUT 插孔。 • 通过 DVI 连接到本机的某些视频监视器, 如果它们在待机模 式,就不能辨认正在输入的 HDMI 音频 / 视频信号。 在此 情形下,HDMI 指示器不规则地闪烁。 • 当您通过HDMI方式连接您的电视监视器或投影仪时, OSD不 确认本机和其他装置没有连接到墙 出现。 在此情形下,可通过分量,S 视频或视频方式连接 壁上的交流电源插座。... -
Page 211: 连接其他组件机
连接 连接其他组件机 • 当 “VIDEO CONV.”被设置为 “ON” (请参阅第 67 页)时, 转换的视频信号仅从 MONITOR OUT 插孔输出。 要录制视听 源时,您必须在每个装置之间进行同类的视频连接。 确认本机和其他装置没有连接到墙 • 要以数码方式连接默认分配的组件机以外的组件机到 壁上的交流电源插座。 DIGITAL INPUT 插孔时,在 “I/O ASSIGNMENT”中为 “OPTICAL IN”或 “COAXIAL IN” 选择相应的设置 (请参阅第 65 页) 。 • 当您连接 DVD 播放机到 DIGITAL INPUT (OPTICAL) 和 注... - Page 212 连接 连接 DVD 刻录机,PVR 或 VCR DTV/CBL MD/CD-R MD/CD R DIGITAL DTV/CBL OUTPUT HDMI DIGITAL INPUT REMOTE COMPONENT VIDEO COMPONENT VIDEO DTV/CBL MONITOR OUT +12V VIDEO VIDEO VIDEO VIDEO 15mA MAX. TRIGGER MONITOR MONITOR DVR OUT DVR OUT S VIDEO S VIDEO DTV/CBL DTV/CBL...
-
Page 213: 连接音频组件机
连接 连接音频组件机 如下,连接音频组件机。 确认本机和其他装置没有连接到墙 连接 CD 播放机和 CD 刻录机 /MD 录音机 壁上的交流电源插座。 注 • 当您连接 CD 播放机到模拟和数码连接插孔时, 从 DIGITAL INPUT 插孔输入的信号拥有优先权。 • 要以数码方式在各 DIGITAL INPUT 插孔连接默认分配的组 指示推荐的连接 件机以外的组件机时,在 “I/O ASSIGNMENT”中选择相应 的设置 (请参阅第 65 页) 。 指示可选的连接 COAXIAL OPTICAL OPTICAL DTV/CBL MD/CD-R MD/CD-R DIGITAL... -
Page 214: 连接 Yamaha Ipod
DOCK ANTENNA DTV/CBL 装置 播放机等 ) SURROUND BAC • 如果装置具有 SCENE 控制信号功能, 当您使用 SCENE 按钮之 一时,本机可自动开启对应的装置并开始播放。 有关 SCENE 控制信号功能的详情,请参考相应装置的用户手册。 • 如果连接到 REMOTE OUT 插孔的装置不是 Yamaha 产品, 在高 Yamaha iPod 多用平台或 Bluetooth 适配器 级设置菜单中,设置 “SCENE IR”到 “OFF” (请参阅第 77 页) 。... -
Page 215: 在前面板上使用 Video Aux 插孔
• AM 环形天线应始终连接,即使本机连接了一个室外 AM • 要在这些插孔再现音源信号,请选择 “V-AUX”作为输入 天线。 音源。 • 正确安装的室外天线提供比室内天线更清晰的接收。 如果 • 当视频信号通过背部的 AUDIO 插孔和 DOCK 插孔输入时, 接收效果差,您可以安装室外天线。 有关室外天线情况, 输入信号的优先顺序如下: 请咨询离您最近的 Yamaha 经销商或服务中心。 1. DOCK 2. AUDIO 外部 AM 天线 VOLUME 使用 5 到 10 m 的塑料 MAIN ZONE AM 环形天线... -
Page 216: 连接电源线
连接 连接 AM 环状天线的导线 连接电源线 打开舌片 插入 关闭舌片 一旦所有连接完成,将电源插头插入墙壁的交流电源 插座。 AM 环形天线不具有极性,所以可以连接任何一端到 AM 或 GND 端子。 组装附带的 AM 环形天线 AC OUTLETS AC OUTLETS SWITCHED SWITCHED 电源线 AC OUTLET(S) (SWITCHED) 澳大利亚型号 ......1 个插座 注 韩国型号 ........无 其它型号 ......2 个插座 根据机型不同,所提供的... -
Page 217: 打开和关闭本机电源
连接 打开和关闭本机电源 打开本机 按下 A MAIN ZONE ON/OFF ( 或 G POWER), 打开本机。 当您打开本机时,在本机能够再现声音之前将有 4 到 5 秒钟 延迟。 将本机设置为待机模式 按下 A MAIN ZONE ON/OFF ( 或 H STANDBY),设置本机到待机模式。 在待机模式,本机消耗少量电力,以接收来自遥控器 的红外线信号。 按下 C SYSTEM OFF 可以将主区域和区域 2 同时设置为待 机模式。... -
Page 218: 前面板显示器
(请参阅第 14 页) 。 (请参阅第 45 到 47 页) 。 2 DOCK 指示器 7 96/24 指示器 当您在连接到本机的 DOCK 端子的 Yamaha iPod 多用 当 DTS 96/24 信号被输入到本机时点亮。 • 平台 ( 比如 YDS-10,另售 ) 上驳接 iPod 时点亮 8 MUTE 指示器和 VOLUME 水平指示器... - Page 219 连接 D CINEMA DSP 指示器 使用遥控器 遥控器发射一道有方向性的红外线光束。 当您选择了一个声场程序时点亮 (请参阅第 41 页) 。 在操作期间,请确保遥控器直接对准本机上的遥控器 传感器。 VIRTUAL 指示器 当启用 Virtual CINEMA DSP 时点亮 (请参阅第 41 页) 。 SILENT CINEMA 指示器 当连接了耳机和选择了一个声场程序时点亮 (请参阅第 41 页) 。 30º 30º 大约 6 m E 多信息显示 当调节或改变设置时,显示当前声场程序名称和其它...
-
Page 220: 为您的听音室优化扬声器设置
为您的听音室优化扬声器设置 为您的听音室优化扬声器设置 本机使用 YPAO (Yamaha Parametric Room Acoustic Optimizer) 技术,它可以帮您避免繁琐的听音环境的扬 声器设置,并自动获得高准确度的音响调节。 随机提供的优化器麦克风可以收集并分析您的实际听音环境中 的扬声器产生的音响。 使用 AUTO SETUP 连接随机提供的优化器麦克风到前部面板上的 OPTIMIZER MIC 插孔。 注 OPTIMIZER MIC • 请注意,在 “AUTO SETUP”步骤中输出很响的测试音调是 ZONE O/MAN'L CONTROL 正常的。 • 要达到最佳效果,在 “AUTO SETUP”步骤进行时,请务必 保持房间尽量安静。如果有太多环境噪音,结果可能不令 VIDEO AUX VIDEO AUDIO AUDIO SELECT 人满意。... - Page 221 为您的听音室优化扬声器设置 按下 7 ENTER,开始设置过程。 务必将 “SETUP”设置为 “AUTO” ,并将指针指 向 “START” 。 本机开始自动设置过程。 在自动设置过程,响亮 地测试音调将从每个扬声器输出。 一旦所有项目 被设置,结果显示出现在 OSD。 您也可以选择以下设置模式。 在此情形下,按下 7 选择 “SETUP”, 按下 7 l / h 选择下列选择之一, 注 然后选择 “START” 。 • 在自动设置过程,在本机上不进行任何操作。 选择: AUTO, RELOAD, UNDO, DEFAULT • 在自动设置过程,我们建议离开该房间。 对于本机, 要自动运行整个...
- Page 222 为您的听音室优化扬声器设置 显示变化如下。 按下 8 k 和 8 ENTER 显示设置的详细结果。 AUTO SETUP 反复按下 8 l / h,切换设置结果显示。 SETUP;;;;;;;AUTO . START Automatic 扬声器连接和配线的结果 Processing of all item [ ]/[ ]:Up/Down [ENTER]:Start 从收听位置到扬声器的距离 的结果 AUTO SETUP INITIALIZING . WIRING/LEVEL DISTANCE SIZE WAITING;;; 扬声器尺寸的结果 ;;;;;;;;;;...
- Page 223 为您的听音室优化扬声器设置 如果 “WARNING”出现 按下 7 n 然后按下 7 l / h 选择 “SET”或 在 “AUTO SETUP”过程中,当本机探测到潜在的问题 时,在结果显示画面上出现 “WARNING” 。 请检查该 “CANCEL” 。 警告信息,以纠正您的扬声器设置。 选择: SET, CANCEL 选择 “SET” ,确定 “AUTO SETUP”结果。 • 注 选择 “CANCEL” ,取消 “AUTO SETUP”结果。 • 警告不同于错误,在于警告不取消 “AUTO SETUP”步骤。 按...
-
Page 224: 选择 Scene 模板
选择 SCENE 模板 选择 SCENE 模板 本机具有 16 种预设 SCENE 模板,可用于各种不同 按下 R INPUT l / h ( 或按下 4 AMP 然后按 场合。 在工厂初始设置,以下 SCENE 模板被分配给各 个 SCENE 按钮: 下 7l / h) 选择期望的模板。 DVD Movie Viewing SCENE 1: INPUT Music Disc Listening SCENE 2: TV Viewing... - Page 225 或 Bluetooth DOCK Dock Listening 组件机 USB 存储器或 USB 便携 USB Audio Listening 式音频播放机 电视节目 DTV/CBL TV Viewing TV Sports Viewing 视频游戏 V-AUX Game Playing 注 当 iPod 被连接到Yamaha iPod多用平台或 Bluetooth组件机被连接到Bluetooth 适配器时, 本机播放来自DOCK端子的音频输 入源。 通过编辑预设的 SCENE 模板,您可以制作自己独特的 SCENE 模板。有关详情请参阅第 33 页。...
- Page 226 MUSIC ENHANCER 当您欣赏 FM 或 AM 广播节目时选择此 SCENE 模板。 7ch Enhancer Dock Listening DOCK MUSIC ENHANCER 当您在驳接在 Yamaha iPod 多用平台上的 iPod 上播放音 乐源 , 或 Bluetooth 组件机连接到 Bluetooth 适配器时, 7ch Enhancer 选择 SCENE 模板。 USB Audio Listening MUSIC ENHANCER 当您在 USB 存储器或 USB 便携式音频播放机上播放音乐...
-
Page 227: 建立自己独特的 Scene 模板
选择 SCENE 模板 建立自己独特的 SCENE 模板 按下 4 AMP, 然后按 7 k / n, 选择 SCENE 模板 中期望的参数,然后按 7 l / h,为选择的参 通过编辑预设的 SCENE 模板,您可以制作自己独特的 数值选择期望的数值。 SCENE 按钮。 您可以参考预设的 16 个 SCENE 模板, 您可以调节 SCENE 模板的以下参数 : 制作自己独特的 SCENE 模板。 定制预设... -
Page 228: 在 Scene 功能上使用遥控器
选择 SCENE 模板 在 SCENE 功能上使用遥控器 在 SCENE 模式控制输入源装置 在遥控器上设置定制的 SCENE 模板的输入源 使用遥控器,您可以操作本机和输入源装置双方。 在 如果您定制了选择的 SCENE 模板的输入源,您必须在 高级配置,您必须为各个输入源设置妥当的遥控器 遥控器上设置该 SCENE 模板的输入源,以便正确地操 代码 (请参阅第 73 页) 。 作输入源装置。 按遥控器上期望的 5 SCENE。 按住 5 SCENE 按钮和期望的输入选择按钮 ( 3 ) 3 秒钟。 在下图的 * 区域,按下期望的按钮,来控制所选 择的... -
Page 229: 基本操作
播放 播放 警告 旋转 L VOLUME (或按下 L VOLUME +/–) , 当您播放以 DTS 编码的 CD 时,务必遵循严重警告。 如果您 调节音量到期望的输出水平。 在不兼容 DTS 的 CD 播放机上播放以 DTS 编码的 CD,您将只 能听到一些您不想听的噪音,并且可能会损坏您的扬声器。 请检查您的 CD 播放机是否支持以 DTS 编码的 CD。 还有,在 反复按下 O PROGRAMl / h (或按下 您播放以... -
Page 230: 选择视频输入插孔 (Audio Select)
播放 选择视频输入插孔 选择 MULTI CH INPUT 组件机 (AUDIO SELECT) 使用此功能选择连接在 MULTI CH INPUT 插孔上的组 件机作为输入源 (请参阅第 19 页) 。 本机带有一系列输入插孔。 当多个输入插孔被指定为 同一个输入源时,使用该性能 (音频输入插孔选择) 反复按 R INPUTl / h ( 或按 4 AMP,然后按 切换输入插孔。 D MULTI CH IN) 选择 MULTI CH。 “MULTI CH”出现在前面板显示器中。... -
Page 231: 在视频监视器上显示本机的当前状态
播放 在视频监视器上显示本机的当前 使用您的耳机 状态 将具有立体声模拟音频缆线插头的耳机连接到前面板 您可以在视频监视器上显示本机的操作信息。 上的 PHONES 插孔。 打开连接到本机的视频监视器。 按 M DISPLAY。 当前状态显示出现在 OSD 上。 STATUS VOL:-40dB DVD Movie Viewing MOVIE Movie Spacious INPUT: A.SEL: HDMI NIGHT:CINEMA (MID) [DISPLAY]:STATUS OFF 使用 “OPTION MENU”中的 “OSD-AMP”参数 (请参阅第 68 页) ,您可以选择在 OSD 上当前状态显示的 当您选择了一个声场程序,SILENT CINEMA 模式被自动激活... -
Page 232: 在音源背景中播放视频源
播放 音频信息 在音源背景中播放视频源 信息 说明 您能将视频源中的视频图像和音频源中的声音进行合 FORMAT 信号格式。 当本机不能探测一个数码信号 并。 例如,您能在视频监视器中观赏来自视频源的美 时,它自动切换到模拟输入。 丽风景的同时,欣赏古典音乐。 SAMPLING 从连续信号中为了制作离散信号每秒钟的取 样数量。 按下输入选择按钮 ( 4 ) 以选择一个视频源,然后选 CHANNEL 输入信号的源声道数目 (前 / 环绕声 / 择一个音频源。 LFE) 。 例如,一个多声道的声轨,有 3 个前 声道,2 个环绕声道和 LFE,显示为 “3/2/0.1” 。 BITRATE 每秒钟通过给定点的比特数量。 音频源... -
Page 233: 使用睡眠定时器
播放 使用睡眠定时器 使用此特性以自动设置主区域在一定时间之后进入待 机模式。 按下 4 AMP,然后反复按下 R SLEEP,设置 时间量。 每次您按 R SLEEP,前部面板显示器如下改变。 SLEEP 120min SLEEP 90min SLEEP OFF SLEEP 30min SLEEP 60min 当您切换睡眠定时器的时间量时,SLEEP 指示器闪 烁。 当睡眠定时器被设置后,SLEEP 指示器在前面板 显示器中点亮,显示器返回到选择的声场程序。 • 要取消睡眠定时器时, 按下 4 AMP 然后反复按 R SLEEP, 直到 “SLEEP OFF”在前面板显示器上出现。 •... -
Page 234: 声场程序
声场程序 声场程序 本机配备有一系列的精确数码解码器,使您能欣赏来 注 自几乎任何立体声或多声道声源的多声道播放。 • 当您选择了一个输入源时,本机自动选择相应的输入源最 后使用过的声场程序。 按 O PROGRAM l / h( 或按 4 AMP,然后反复 • 当连接到 MULTI CH INPUT 插孔的组件机被选择为输入源 按 A PROG l / h)。 (请参阅第 36 页)时,音场程序不能被选择。 所选的声场程序名称出现在前面板显示器中。 • 当输入的PCM信号的取样率高于48 kHz时, 本机自动设置到 “STRAIGHT”模式 ( 请参阅第 41 页 )。 请根据您的收听喜好来选择一个声场程序,而不仅仅是根据... - Page 235 声场程序 使用标准解码器欣赏 2 声道音源 没有环绕声扬声器时使用的声场程序 双声道声源输入的信号也可以在多声道上播放。 (Virtual CINEMA DSP) Virtual CINEMA DSP 使得您能在没有环绕声扬声器的 按 4 AMP,然后反复按 O SUR. DECODE,选择 情况下,通过所产生的虚拟扬声器,享受 CINEMA DSP 程序。 解码器。 如果您设置 “SUR. L/R SP”到 “NONE” (请参阅第 根据正在播放的音源的类型和您的个人喜好,您能从 60 页) ,当选择一个 CINEMA DSP 声场程序时, 下列解码器中选择。 Virtual CINEMA DSP 会自动开启 (请参阅第 40 页) 。 解码器...
- Page 236 声场程序 编辑声场参数 各参数的初始设置以黑体字表示。 使用工厂默认参数,您能欣赏到高质量的声音。 尽管 您不必改变初始设置,但是您可以改变一些参数以更 对于 Pop/Rock, Hall, Jazz, Game, TV Sports, 好地适应您的输入声源或收听房间。 Movie Spacious 和 Movie Dramatic: DSP 水平 DSP LEVEL 在收听一个音源时,按下 4 AMP,然后 功能: 调节效果水平。 按 Q PARAMETER。 选择: MIN, MID, MAX 按下 7k / n,选择您想要改变的参数。 对于 2ch Enhancer 和 7ch Enhancer 效果水平...
-
Page 237: 使用音频功能
使用音频功能 使用音频功能 欣赏高质量音响 调节扬声器水平 使用 DIRECT 模式,欣赏所选择音源的高质量音响。 当收听音乐声源时,您能调节每个扬声器的输出 当 DIRECT 模式被激活,本机以最短线路播放选择的 水平。 当播放在 MULTI CH INPUT 插孔输入的声源时 音源。 也可以这样做。 注 按 Q DIRECT( 或按 4 AMP,然后按 C DIRECT),选择 “DIRECT” 。 此操作将覆盖在 “AUTO SETUP” (请参阅第 26 页)和 “SP LEVEL” (请参阅第 61 页)中进行的水平调节。 注... -
Page 238: 选择夜间收听模式
使用音频功能 选择夜间收听模式 夜间收听模式用于提高在低音量或夜间的可听度。 按下 4 AMP 然后反复按 P NIGHT 选择 “NIGHT:CINEMA”或 “NIGHT:MUSIC” 。 选择: NIGHT:CINEMA, NIGHT:MUSIC, OFF 观看电影时选择 “NIGHT:CINEMA” ,可以减小 • 电影声轨的动态范围,便于在低音量时听到 对话。 聆听音乐音源时选择 “NIGHT:MUSIC” ,可以 • 保留所有声音的易听性。 如果您不想使用该功能,请选择 “OFF” 。 • 当选择夜间收听时,前面板显示器上的 NIGHT 指示器点 亮。 在 “NIGHT:CINEMA”或 “NIGHT:MUSIC”显示在 前面板时,按下 7 l / h 以调节效果水平。 Effect.Lvl:MID 选择:... -
Page 239: Fm/Am 调谐
FM/AM 调谐 FM/AM 调谐 有 2 种调谐方法: 自动和手动。 自动调谐在电台信号较强且无干扰时有效。 如果您想要选择的电台信号较 弱,请手动调谐该电台。 您也可以使用自动和手动设置调谐功能存储最多 40 个电台。 自动调谐 手动调谐 自动调谐在电台信号较强且无干扰时有效。 如果您想要选择的电台接收的信号较弱,请手动调谐 该电台。 反复按 RINPUT l / h,则 “TUNER”在前面 注 板显示器上出现。 手动调谐到一个 FM 电台会将调谐自动切换为单声道以增强 信号质量。 按 E BAND,选择接收波段 (FM 或 AM) 。 反复按 RINPUT l / h,则 “TUNER”在前面 按... -
Page 240: 自动预设调谐
FM/AM 调谐 自动预设调谐 手动预设调谐 您还可以使用自动或手动预设功能按次序储存最多 您也能手动储存多达 40 个电台 (A1 到 E8: 5 个预 40 个信号较强的 FM 电台 (A1 到 E8: 5 个预设组, 设组,每组 8 个预设电台) 。 每组 8 个预设电台) 。 您以后只要选择预设电台的号 码,就能轻易地唤出任意预设电台。 自动或手动调谐到一个电台。 有关调谐说明请参阅第 45 页。 反复按 RINPUT l / h,则 “TUNER”在前面 板显示器上出现。... -
Page 241: 选择预设电台
FM/AM 调谐 选择预设电台 交换预设电台 您只需选择储存的预设电台组和号码,就能调谐到任 您能将两个预设电台的分配位置互相交换。 下面的例 何一个想要的电台。 子说明了预设电台 “E1”和 “A5”互相交换的步骤。 通过使用 F A/B/C/D/E 当使用遥控器进行此操作时,按下 4 TUNER,选择 和 G PRESET/TUNING/CH l / h 选择预设 “TUNER”当作输入源。 电台 “E1” 。 反复按下 F A/B/C/D/E(或 7 A/B/C/D/E l / h) , 参见本页 “选择预设电台” 。 选择期望的预设电台组... -
Page 242: 无线电数据系统调谐 ( 仅限欧洲和俄国型号 )
无线电数据系统调谐 ( 仅限欧洲和俄国型号 ) 无线电数据系统调谐 ( 仅限欧洲和俄国型号 ) 无线电数据系统是一种在许多国家使用的 FM 电台的数据传送系统。 本机可以在接收无线电数据系统电台广播 的同时,接收各种无线电数据系统数据,比如 PS (节目服务) ,PTY (节目类型) ,RT (无线文字) , CT (时钟时间)以及 EON (加强其他网络)等。 显示无线电数据系统信息 调谐到期望的无线电数据系统广播电台。 我们推荐使用自动预设调谐来调谐到无线电数 • 使用此功能显示 4 种类型的无线电数据系统信息: 据系统广播电台 (请参阅第 46 页) 。 PS ( 节目服务 ), PTY ( 节目类型 ), RT ( 无线文字 ) 您也可以使用... -
Page 243: 选择无线电数据系统节目类型 (Pty Seek 模式
无线电数据系统调谐 ( 仅限欧洲和俄国型号 ) 选择无线电数据系统节目类型 按下遥控器的 7 PRESET/CH k / n 以选择期 (PTY SEEK 模式) 望的节目类型。 所选的节目类型名称出现在前面板显示器中。 使用此功能从所有预设无线电数据系统广播电台的节 目类型选择期望的无线电程序。 POP M 使用自动预设调谐功能来预设无线电数据系统广播电台 (请参阅第 46 页) 。 点亮 按下遥控器的 3 TUNER 来选择 “TUNER”作为 输入源。 节目类型 说明 按下遥控器的 0 PTY SEEK MODE,设置本机 NEWS 新闻... -
Page 244: 使用加强的其他网络 (Eon)数据服务
无线电数据系统调谐 ( 仅限欧洲和俄国型号 ) 使用加强的其他网络 (EON)数 按下遥控器的 0 PTY SEEK START 开始搜索 据服务 所有可能的无线电数据系统预设电台。 当本机在搜索电台时,前面板上节目类型名称闪 使用此功能以接收无线电数据系统电台网络的 EON 烁,PTY HOLD 指示器点亮。 (加强其他网络)数据服务。 当您选择 4 种无线电数 据系统节目类型 (NEWS, AFFAIRS, INFO, 或 SPORT) 之一,本机自动搜索在一定时间段的所有预定播放所 POP M PTY HOLD 选择节目类型的 EON 数据服务的预设电台。 当预定的 EON 数据服务开始,本机自动切换到当地的播放 EON 数据服务的电台,当... -
Page 245: 使用 Usb 存储卡或 Usb 便携式音频播放机
使用 USB 存储卡或 USB 便携式音频播放机 使用 USB 存储卡或 USB 便携式音频播放机 使用此功能可以欣赏保存在 USB 存储卡或 USB 便携式音频播放机的 WAV( 仅限于 PCM 格式 ), MP3 和 WMA 文件, 可通过本机前面板的 USB 接口连接这些装置。 支持的 USB 装置 播放操作 本机支持使用 FAT16 或 FAT32 格式的 USB 大容量级别 的存储器 (不包括 USB 硬盘驱动器) 。 按照以下步骤,欣赏保存在... - Page 246 使用 USB 存储卡或 USB 便携式音频播放机 显示播放信息的功能 按下遥控器的 7 k / n / l / h 以选择期望的 文件。 [Play] 按 7 k / n 选择想要的文件 / 文件夹。 • Frankie Zipper 按下 7 ENTER 或 7 h 进入选择的文件夹。 • Made-to-orderaaaaaAA ;Road to IndiaaaAAAA 按下...
-
Page 247: 使用 Ipodtm 插孔
使用 iPodTM 插孔 使用 iPod 插孔 当驳接您的 iPod 到连接在本机 DOCK 端子的 Yamaha iPod 多用平台 (比如 YDS-10,另售)时 (请参阅第 20 页) , 您可以使用附带的遥控器欣赏 iPod 的播放。 您还可以使用本机的 Compressed Music Enhancer 模式来减轻保存在 iPod 的音乐中的压缩缺陷 (比如 MP3 格式)改善音响质量 (请参阅第 20 页) 。 注 • 仅支持具有 iPod (Click and Wheel) ,iPod nano,iPod mini 的 iPod。... - Page 248 您可以选择 iPod 菜单在 OSD 上显示的时间长度。 反复 Repeat 注 使用该功能设置本机重复一首歌曲或一系列歌曲。 选择: Off, One, All • 不能使用您的 iPod 上的控制按钮来操作。 选择 “Off ”使该功能无效。 • • Yamaha 徽标显示在您的 iPod 的窗口上。 选择 “One”设置本机重复一首歌曲。 • • 有些字符也许不能在本机的前面板显示器或 OSD 上显示。 选择 “All”设置本机重复一系列歌曲。 这些字符被下划线 “_”取代。 • • “Settings”参数仅能在 OSD 上改变或调节。 反复按下...
-
Page 249: 使用蓝牙 (Bluetooth
使用蓝牙 (BluetoothTM)组件机 使用蓝牙 (Bluetooth )组件机 您可以连接 Yamaha Bluetooth 适配器 (比如 YBA-10,另售)到本机的 DOCK 端子来欣赏保存在 Bluetooth 组件机 ( 比如便携式音乐播放机 ) 中的音乐内容而不需要在本机和 Bluetooth 组件机之间连线。 您必须事先 对所连接的 Bluetooth 适配器和 Bluetooth 组件机进行 “配对” 。 配对蓝牙 (Bluetooth )适配器 注 和蓝牙 (Bluetooth )组件机 如果 Bluetooth 适配器没有连接到本机的 DOCK 端子,... - Page 250 录制 录制 录制调节和其它操作是由录制组件机进行的。 请参阅那些组件机的使用说明书。 注 • 当本机设为待机模式时,您不能在连接到本机的其它组件机之间进行录制。 • TONE CONTROL(请参阅第 43 页)和 VOLUME 设置,扬声器水平(请参阅第 43 页)和声场程序(请参阅第 40 页)的设置不影 响录制的材料。 • 连接到本机的 MULTI CH INPUT 插孔的信号源不能被录制。 • 在 DIGITAL INPUT 插孔输入的数码信号不会输出到模拟的 AUDIO OUT (REC) 插孔去用于录制。 因此, 如果您连接的信号源组 件机仅提供数码信号,您不能录制该输入源。 • S 视频和复合视频信号独立地通过本机的视频电路。 因此, 当录制或复制来自仅提供 S 视频或复合视频信号的视频源组件机 的视频信号时,您仅能录制...
-
Page 251: Set Menu
SET MENU SET MENU 您能使用下列 “SET MENU”中的参数以调节一系列系统设置并定制本机的操作方式。 改变初始设置 (在每个 参数下以粗体指示)以反映您的收听环境的需要。 自动设置 AUTO SETUP 使用此功能可以自动调节扬声器和系统参数 (请参阅第 26 页) 。 手动设置 MANUAL SETUP 使用此功能可以手动调节扬声器和系统参数。 音响菜单 1 SOUND MENU 参数 特性 页 选择每个扬声器的尺寸,低频信号输出的扬声器,分频频率以及连接在 A)SPEAKER SET FRONT B 端子上的前扬声器的位置。 调节每个扬声器的输出水平。 B)SP LEVEL 调节每个扬声器的滞后时间。 C)SP DISTANCE 调节中央扬声器的音调质量。... -
Page 252: 使用 Set Menu
B)MEMORY GUARD 指定打开本机电源时,连接在 DIGITAL INPUT 插孔的输入源的缺省音频输入插 C)AUDIO SELECT 孔选择的设置。 初始化一组声场程序的参数。 D)PARAM. INI 给所连接的 Yamaha Bluetooth 适配器 ( 比如 YBA-10, 另售 ) 和 Bluetooth E)BLUETOOTH SET 组件机进行配对 ( 请参阅第 55 页 )。 调节 USB 音源的播放风格。 F)USB PLAY STYLE 信号信息 SIGNAL INFO 使用此功能可以检查音频信号信息... -
Page 253: Sound Menu
SET MENU 1 SOUND MENU 扬声器的超低音扬声器部分为 16 cm 或更大 : 大 扬声器的超低音扬声器部分小于 16 cm: 小 使用此菜单可以手动调节任何扬声器设置,或在使用 液晶显示监视器或投影机时补偿视频信号处理延时。 前扬声器 FRONT SP 选择: SMALL, LARGE ;MANUAL SETUP ;MANUAL SETUP 1 SOUND MENU 1 SOUND MENU 1 SOUND MENU . A)SPEAKER SET . F)DYNAMIC RANGE B)SP LEVEL G)AUDIO SET A)SPEAKER SET... - Page 254 SET MENU 左 / 右环绕声扬声器 SUR. L/R SP LFE 低音输出 LFE/BASS OUT 选择: NONE, SML, LRG 使用该功能选择输出 LFE (低频效果)和低频信号扬 声器。 选择: SWFR, FRNT, BOTH 1 SOUND MENU A)SPEAKER SET 1 SOUND MENU SUR. L/R SP A)SPEAKER SET LFE/BASS OUT NONE >SML SWFR FRNT>BOTH 当环绕声扬声器大时...
- Page 255 SET MENU 分频 CROSS OVER 扬声器水平 B)SP LEVEL 使用此功能手动调节各扬声器的输出水平。 使用此功能,在 “SPEAKER SET” (请参阅第 59 页 ),为 控制范围: -10 到 +10 dB 设置为 “SML”( 或 “SMALL”) 的所有扬声器选择转折频 控制步距: 1 dB 率。 低于所选频率的所有频率将被送到超低音扬声器, 初始设置: 0 dB 或根据 “SPEAKER SET”的 “LFE/BASS OUT”设置,送到 前扬声器 ( 请参阅第 59 页 )。 选择:...
- Page 256 SET MENU 扬声器距离 中央扬声器均衡器 C)SP DISTANCE D)CENTER GEQ 使用此特性以手动调节每个扬声器的距离,以及施加 使用该特性调节内置的中央声道的 5 频率波段 到相应声道的延时。 理想的情况是,每个扬声器应该 (100Hz, 300Hz, 1kHz, 3kHz 和 10kHz) 图形均衡 和主要收听位置的距离是相同的。 但是,这在大多数 器,以便中央扬声器的音调质量与前扬声器的音调质 的家庭情况下是不可能的。 因此,必须给每个扬声器 量匹配。 您可以在聆听当前选择的信号源组件机或测 施加一定数量的延时,使得所有声音到达收听位置时 试音调时进行调节。 的时间相同。 控制范围: -6.0 到 +6.0 dB 控制步距: 0.5 dB 初始设置: 0 dB 1 SOUND MENU 1 SOUND MENU C)SP DISTANCE...
- Page 257 SET MENU 动态范围 最大音量 MAX VOL. F)DYNAMIC RANGE 使用该性能选择要用于您的扬声器或耳机的动态范围 使用此功能设置最大音量水平。 此功能被用于避免由 压缩量。 此设置仅在本机解码 Dolby Digital 和 DTS 于过失产生的过大声音。 例如,初始音量范围是 信号时有效。 -80 dB 到 +16 dB。 但是,如果 “MAX VOL.”被设置 为 -5 dB,音量范围变为 -80 dB 到 -5 dB。 控制范围: -30 dB 到 +10 dB, +16 dB 1 SOUND MENU 控制步距:...
- Page 258 I)EXTD SUR. 使用该性能选择装置以播放 HDMI 音频信号。 1 SOUND MENU I)EXTD SUR. 1 SOUND MENU >AUTO LAST EXTD SUR.;;;;;;AUTO H)HDMI SET SUPPORT AUDIO: RX-V563 [ ]/[ ]:Select [ENTER]:Return [ ]/[ ]:Select [ENTER]:Return 扩展解码器选择模式 使用该性能指定打开本机电源时连接到 DIGITAL 支持音频 SUPPORT AUDIO INPUT 插孔的输入源的扩展解码器模式。 使用此功能选择是在本机播放 HDMI 音频信号,还是...
-
Page 259: Input Menu
SET MENU 对于 OPTICAL OUTPUT 插孔 4 2 INPUT MENU OPTICAL OUT (4) 选择:(4) MD/CD-R, DTV/CBL, V-AUX, DVR 使用此菜单可以再设置输入插孔,选择输入模式或重 新命名输入源。 2 INPUT MENU ;MANUAL SETUP A)I/O ASSIGNMENT OPTICAL OUT . (4);;;;;MD/CD-R 2 INPUT MENU (MD/CD-R ) . A)I/O ASSIGNMENT B)INPUT RENAME C)VOLUME TRIM D)DECODER MODE [ ]/[ ]:Select... - Page 260 ;;;;;0.0dB [ ]/[ ]:Adjust [RETURN]:Exit MD/CD-R TUNER MULTI CH IN 或 注 DTV/CBL 当您的 iPod 驳接在连接到本机上的 Yamaha 多用平台时,您 V-AUX/DOCK 才可以调节 DOCK 的数值。 解码器模式 D)DECODER MODE 按下 4 AMP,然后按下遥控器的 7 l / h,将 2 INPUT MENU “_” (下划线)置于您期望编辑的空格或字符 之下。 D)DECODER MODE >AUTO...
-
Page 261: Option Menu
SET MENU 多声道输入设置 3 OPTION MENU E)MULTI CH SET 使用此菜单可以调节可选的系统参数。 2 INPUT MENU E)MULTI CH SET BGV;;;;;;;;;LAST ;MANUAL SETUP ;MANUAL SETUP INPUT CH;;;;;6CH 3 OPTION MENU 3 OPTION MENU . A)DISPLAY SET . F)USB PLAY STYLE [ ]/[ ]:Select B)MEMORY GUARD C)AUDIO SELECT D)PARAM. - Page 262 SET MENU 前面板显示器滚动 FL SCROLL 存储器保护 B)MEMORY GUARD 使用此特性以防止意外地改变 DSP 程序参数值和其它 使用此功能来设置,当 “DOCK”被选择作为输入源 系统设置。 时,是否在前面板显示器上显示这样的信息 (比如歌 选择: OFF, ON 曲标题或声道名称) ,以连续的方式显示或首先显示 14 个字符,其余字符依次滚动出现。 选择: CONT, ONCE 3 OPTION MENU 选择 “CONT” ,在前面板显示器上连续显示操作 • B)MEMORY GUARD 状态。 >OFF 选择 “ONCE” ,在前面板显示器上滚动显示操作 •...
- Page 263 3 OPTION MENU 选择:NO, YES E)BLUETOOTH SET START PAIRING 3 OPTION MENU D)PARAM. INI [ENTER]:Enter >NO 使用此功能,给所连接的 Yamaha Bluetooth 适配器 ( 比如 YBA-10, 另售 ) 和 Bluetooth 组件机进行配对。 [ ]/[ ]:Select 有关配对详情,请参考第 55 页上的 “配对蓝牙 [ENTER]:Return (Bluetooth )适配器和蓝牙 (Bluetooth )组...
- Page 264 SET MENU USB 播放风格 F)USB PLAY STYLE 使用此功能,根据您的喜好调节播放风格。 您可以随 机播放文件或反复播放一个文件或一系列文件。 3 OPTION MENU F)USB PLAY STYLE REPEAT..OFF . SHUFFLE..OFF [ ]/[ ]:Up/Down [ ]/[ ]:Select 反复 REPEAT 使用该功能设置本机重复一个文件或一系列文件。 选择: OFF, SINGLE, ALL 选择 “OFF”使该功能无效。 • 选择 “SINGLE” ,设置本机重复一个文件。 • 选择 “ALL”设置本机重复一系列文件。 •...
-
Page 265: 遥控器功能
遥控器功能 遥控器功能 除了控制本机之外,此遥控器还能操作其它的由 Yamaha 和其它厂商制造的视听组件机。 要操作您的电视机或 其他组件机时,您必须为各个输入源设置妥当的遥控器代码 (请参阅第 73 页) 。 操作本机,电视机,或其他组件机 控制本机 操作电视机 按 4 AMP 控制本机。 按下 3 DTV/CBL 操作电视机。 要操作电视机,您必须 为 DTV/CBL 设置相应的遥控器代码 (请参阅第 73 页) 。 POWER POWER STANDBY POWER POWER POWER STANDBY POWER MUTE MUTE... - Page 266 遥控器功能 控制其它组件机 按下输入选择器按钮 ( 3 )或 A 到 按钮之一,控 制其他组件机。 在高级配置,您必须为各个输入源设 置妥当的遥控器代码 (请参阅第 73 页) 。 下表显示 各个控制按钮的功能,这些控制按钮用来操作分配到 BAND LEVEL MENU VOLUME TITLE 各输入选择按钮的其他组件机。 请注意有些按钮可能 POWER POWER STANDBY POWER MUTE ENTER 不能正确操作选中的组件机。 MD/CD-R TUNER RETURN DISPLAY TV CH MEMORY DTV/CBL •...
- Page 267 是,如果不成功 “RemoteSetup NG”出现在前部 Yamaha 2011 面板显示器中。 TUNER Yamaha 5012 注 TUNER Yamaha 5009 • 如果您的装置的厂商有一个以上的代码,请逐一尝试直到 您找到了正确的那个。 TUNER Yamaha 5017 • 如果您在步骤2中的30秒钟内没有按下任何按钮, 则设置过 程被取消。 在此情形下,再次进行设置过程。 TUNER Yamaha 5009 TUNER Yamaha 5017 注 即使预设了上面所列的 Yamaha 遥控器代码,您仍然可能无 法操作您的 Yamaha 组件机。 在这种情况下,请尝试设置另 外的 Yamaha 遥控器代码。...
- Page 268 • 主区域内的红外线发射机。 该发射机将第二区域中通过遥控器发出的红外信号传送给主区域的 CD 播放机或 • DVD 播放机。 第二个区域的放大器和扬声器。 • • 由于在多个区域安装的情况下连接和使用本机可能有多种方法,如何进行 Zone 2 连接才能最好的满足您的要求,我们建议 您咨询最近的 Yamaha 授权经销商或服务中心。 • 有些 Yamaha 型号能直接连接到本机的 REMOTE 插孔。 如果您拥有这些产品, 您可能不需要红外线发射机。 如下所示, 能连接 多达 6 个 Yamaha 组件机。 REMOTE REMOTE REMOTE REMOTE 红外线信号接收机 本机 Yamaha 装置...
- Page 269 启动 Zone 2 操作模式 45 页)时调谐到 FM 或 AM。 按 K ZONE CONTROL 以控制 Zone 2。 当 “V-AUX”被选择为输入源 (请参阅第 53 页)时 • 欣赏驳接到连接在本机 DOCK 端子的 Yamaha iPod ZONE2 指示器在前面板显示器中闪烁大约 10 秒钟。 多用平台 (比如 YDS-10,另售)上的 iPod 中保存 的音乐。 ZONE2 当 “V-AUX”被选择为输入源 (请参阅第 55 页)...
- Page 270 使用多区域配置 使用遥控器控制 Zone 2 启动 Zone 2 操作模式之后,进行以下操作。 打开 Zone 2 操作 Zone 2 按住 4 AMP 的同时,按下 G POWER。 当 ZONE2 在前部面板显示器上闪烁时,按下 R INPUTl / h,选择期望的输入源。 选择“TUNER” 作为输入源以便在 Zone 2 使用 TUNER 在按住的同时 • 功能。 关于 TUNER 操作的详情,参见第 45 页上的 POWER “FM/AM 调谐”...
- Page 271 SCENE IR 代码设置 SCENE IR 当本机处于 SCENE 模式时,使用该功能在 REMOTE OUT 按下 C SYSTEM OFF,设置本机到待机模式。 插孔自动输出遥控信号。 选择: ON, OFF 当连接到 REMOTE OUT 插孔的组件机是 Yamaha 组件机 按住 N TONE CONTROL,然后按 A MAIN • 并具有 SCENE 控制信号功能,选择 “ON” 。 本机自 ZONE ON/OFF 打开本机。 动传送遥控信号到该装置。...
- Page 272 故障排除 故障排除 当本机工作不正常时,请参阅下面的表。 如果您遇到的问题没有列在下面,或如果下面给出的指导不起作用, 请将本关闭,断开电源导线,并联络距离您最近的 Yamaha 经销商或服务中心。 一般 问题 原因 措施 参考页码 电源打开后本机不能启 电源导线没有连接或插头没有完全插 请稳固连接电源导线。 — 动且立即进入待机 入。 模式。 保护电路被启用。 请确保在本机上的以及所有扬声器上的所有扬声 器线路连接是稳固的,且每根连接的电线不接触 到其相关连接之外的任何物体。 本机曾被暴露在强烈的外部电击 将本机设为待机模式,断开电源导线,过 30 秒 — (例如闪电或强烈的静电) 。 钟后再次插回,然后正常使用。 无声音。 输入或输出电缆连接不正确。 请正确连接导线。 如果问题仍然存在,导线可能 13-19 有故障。 没有设置妥当的音频输入插孔选择。 设置妥当的音频输入插孔选择。 音频输入插孔选择设置在 “HDMI” ,...
- Page 273 故障排除 问题 原因 措施 参考页码 声音突然关闭。 由于短路等原因,保护电路被启用。 检查扬声器导线没有互相接触,然后再重新打开 — 本机。 睡眠定时器关闭了本机。 打开本机,并再次播放信号源。 — 按下 I MUTE 或 L VOLUME +/– 以恢复音频输 声音被静音。 出。 只有一侧的扬声器中能 导线连接不正确。 请正确连接导线。 如果问题仍然存在,导线可能 11-19 听到音响。 有故障。 “SP LEVEL”的设置不正确。 调节 “SP LEVEL”设置。 仅中央扬声器输出了 当使用 CINEMA DSP 程序播放单声道声 这不是故障。...
- Page 274 故障排除 问题 原因 措施 参考页码 Dolby Digital 或 DTS 连接的组件机不设为输出 Dolby 遵照使用说明书,为您的组件机进行适当的 — 信号源不能被播放。 Digital 或 DTS 数码信号。 设置。 ( 前部面板显示器中的 音频输入插孔选择设置在 “ANALOG” 。 设置音频输入插孔选择到 “AUTO” 。 Dolby Digital 或 DTS 指示器不点亮。 ) 能听到蜂鸣声。 导线连接不正确。 请稳固连接音频导线。 如果问题仍然存在,导线 — 可能有故障。 不能增加音量,或声音 您试图设置比最大音量水平还要大的...
- Page 275 故障排除 调谐器 问题 原因 措施 参考页码 FM 立体声接收很嘈杂。 当发射器太远或天线输入不佳时, 检查天线连接。 FM 立体声广播的特性可能导致了这 尝试使用高质量的方向性 FM 天线。 — 个问题。 使用单声道调谐方式。 存在失真,而且即便使用 存在多路干扰。 调节天线位置以消除多路干扰。 — 好的 FM 天线也不能获得清 晰的接收。 使用自动调谐模式不能调 信号太微弱。 使用高质量的方向性 FM 天线。 — 谐到想要的电台。 使用单声道调谐方式。 先前预设的电台不能再被 本机断电时间较长。 设置预设电台。 调谐到。 使用自动调谐模式不能调 信号微弱或天线连接较松。 紧固...
- Page 276 故障排除 AUTO SETUP AUTO SETUP 前 出错讯息 原因 措施 参考页码 Connect MIC! 优化器麦克风未连接。 连接随机提供的优化器麦克风到前面板 上的 OPTIMIZER MIC 插孔。 Unplug HP! 耳机被连接。 拔去耳机。 — AUTO SETUP 中 出错讯息 原因 措施 参考页码 E-1:NO FRONT SP 前左 / 右声道信号未探测到。 检查前左右扬声器连接。 E-2:NO SUR.SP 没有探测到环绕声声道信号。 检查环绕声扬声器连接。...
- Page 277 离超过可调节范围。 W-3:LEVEL ERROR 各个扬声器之间的音量电平差异过大。 如果 “SWFR:TOO LOUD”或 “SWFR:TOO 26, 61 ( 没有进行水平纠正。) LOW”出现,调节超低音扬声器的输出 音量。 重新调节扬声器安装,以便所有扬声器 — 放置的位置情况相似。 检查扬声器连接。 使用类似质量的扬声器。 — 注 • 如果 “ERROR”或 “WARNING”屏幕出现,请检查问题的原因,然后再次运行 “AUTO SETUP” 。 • 如果警告讯息 “W-1”, “W-2”, 或 “W-3”出现 ,则已进行校正,但是可能并未到达最优。 • 如果反复出现 “E-9”错误讯息,请联系授权的 Yamaha 服务中心。...
- Page 278 故障排除 问题 原因 措施 参考页码 USB 装置中的音乐文件 音乐文件和目录被放置在 FAT 区域以 将音乐文件和目录放置在 FAT 区域。 — 和目录不能观看。 外的地方。 您正在尝试浏览 8 级以上层次的目录 更改您的 USB 装置上的数据构造。 — 或具有超过 500 个文件的目录。 USB 装置不被认可。 连接的 USB 装置属于 USB 存储器或 USB 本机只认可 USB 存储器 (USB 硬盘驱动器除外) 便携式音频播放机这样的 USB 大容量 或...
- Page 279 本机不支持正在使用的 iPod。 仅支持具有 iPod (Click and Wheel) , — iPod nano,iPod mini 的 iPod。 iPod connected 您的 iPod 正常地驳接到连接在本机 DOCK 端子的 Yamaha iPod 多用平台 (YDS-10,另售)上,本机与 iPod 之 间的连接完成。 Disconnected 您的 iPod 从连接在本机 DOCK 端子的 将您的 iPod 驳接到连接在本机 DOCK 端子的 Yamaha iPod 多用平台 (YDS-10,...
- Page 280 Yamaha Bluetooth 适配器 ( 比如 YBA-10, 另售 ) 和 Bluetooth 组件机的 连接成立。 Disconnected Bluetooth 组件机从 Yamaha Bluetooth 适配器 ( 比如 YBA-10,另售 ) 上断 开。 No BT adapter Bluetooth 适配器没有连接到 DOCK 连接 Yamaha Bluetooth 适配器 ( 比如 YBA-10, 端子。 另售 ) 到 DOCK 端子。...
- Page 281 故障排除 遥控器 问题 原因 措施 参考页码 遥控器不能正常工作或 距离或角度错误。 遥控器在最大为 6 m 的范围内起作用,且不能偏 起作用。 离前面板轴心超过 30 度。 直射阳光或光照 (来自逆变器型荧 重新放置本机。 — 光灯)影响了本机的遥控器传感器。 电池微弱。 更换所有电池。 没有正确设置遥控器代码。 请参阅本说明书末尾的 “遥控器代码列表”正确 设置遥控代码。 使用本说明书最后的 “遥控器代码列表”设置相 同厂家的另一个遥控器代码。 即使遥控代码是正确的,有些型号也 不回应遥控器。 系统复位 注 使用该功能复位本机的所有参数到工厂初始设置。 • 该过程完全复位本机的所有参数,包括 “SET MENU” 按下前面板的 C SYSTEM OFF,设置本机到待 参数。...
- Page 282 院中能感受到最佳效果。 由于家庭的条件,例如房间 尺寸,墙面材料,扬声器数量等可能有很大的不同, Dolby Digital EX 创建来自 5.1 声道信号源的 6 个完 听到的声音也不可避免地有所不同。 根据实际测量到 整波段输出声道。 使用能从原始录音的 2 个环绕声中 的大量数据,Yamaha CINEMA DSP 使用 Yamaha 原始声 导出 3 个环绕声声道的一个矩阵解码器,能做到这 场技术以联合 Dolby Pro Logic,Dolby Digital 和 点。 要获得最佳结果,对于用 Dolby Digital DTS 系统用来在您自己家中的收听房间中,提供影院 Surround EX 录制的电影声轨,应该使用 Dolby 般的视觉和听觉享受。...
- Page 283 术语 Dolby Surround LFE 0.1 声道 Dolby Surround 使用 4 声道模拟录制系统,以再现富 该声道再现低频信号。 此声道的频率范围是 20 Hz 到 有现场感的动态声音效果 : 2 个前左和右声道 120 Hz。 此声道被算作 0.1 声道,因为在 Dolby (立体声) ,一个中央声道用于对话 (单声道) , Digital 或 DTS 5.1/6.1 声道系统中,相比其它 一个环绕声声道用于特殊声音效果 (单声道) 。 环绕 5/6 声道再现的完整范围,它仅增强低频范围。 声声道再现一个狭窄频率范围内的声音。Dolby Surround 被几乎所有视频磁带,光盘以及许多电视机...
- Page 284 在耳机中欣赏所有声场程序的精确再现。 S 视频信号 使用 S 视频信号系统时,使用针口导线,通常将视频 信号通过 S 视频导线分隔和传输,Y 信号用于亮度, C 信号用于色度。 使用 S VIDEO 插孔消除视频信号传 输中的损耗,能录制和播放更美丽的图像。 Virtual CINEMA DSP Yamaha 开发了 Virtual CINEMA DSP 算法,使您能使 用虚拟环绕声扬声器,在没有任何环绕声扬声器的情 况下,欣赏 DSP 声场的环绕声效果。 也可在不包含中 央扬声器而最少只有两个扬声器的系统中,欣赏 Virtual CINEMA DSP。 是 Windows 标准音频文件格式,它定义了通过转换音 频信号获得的数码数据的录制方法。 它不指定压缩...
- Page 285 规格 规格 音频部分 • 信号水平 复合视频 ........ 1 Vp-p/75 Ω • 前声道,中央声道,环绕声声道和后环绕声声道的最小 RMS 输 S 视频 ..1 Vp-p/75 Ω (Y), 0.286 Vp-p/75 Ω (C) 出功率 分量 ..1 Vp-p/75 Ω (Y), 0.7 Vp-p/75 Ω (P [ 美国和加拿大型号 ] 1 kHz, 0.9% THD, 8 Ω ......90 W •...
- Page 286 选择 , 无线电数据系统节目类型 ..49 调谐器 (FM/AM) ,故障排除 ... 81 连接,VCR ..........18 选择,MULTI CH INPUT 装置 .... 36 调谐器频率步长,高级设置 ..... 77 连接,Yamaha iPod 多用平台 ...20 选择,音频输入插孔 ......36 调谐器指示器 ........24 连接,电源线 ........22 选择,预设电台,FM/AM 调谐 ..47 动态范围,音响菜单 ......63 连接,多格式播放机...
- Page 287 索引 遥控器,故障排除 ......87 CLASSICS, FM 天线 ..........21 夜间收听模式 ........44 无线电数据系统节目类型 ....49 FM 天线连接 ........21 音调质量调节 ........43 COAXIAL IN (1),输入分配 ....65 FRONT B 扬声器设置 ......59 音量微调,输入菜单 ......66 COAXIAL INPUT 插孔 ......65 FRONT B 扬声器设置,扬声器设置 ... 59 音频插孔...
- Page 288 无线电数据系统调谐 ..... 49 WIRING/LEVEL ........27 PTY, 无线电数据系统信息 ....48 WIRING/LEVEL,自动设置 ....27 PTY 指示器 .......... 25 Yamaha iPod 多用平台,连接 ...20 PVR 连接 ..........18 Yamaha Parametric Room Acoustic Radio Data System 指示器 ....25 Optimizer ........26 REMOTE IN/OUT 插孔 ......20 YPAO ............26...
- Page 289 Front panel/Panel delantero/ 前部面板 VOLUME MAIN ZONE ON/OFF SYSTEM OFF OPTIMIZER MIC ZONE 2 EDIT ZONE ON/OFF PRESET/TUNING BAND A/B/C/D/E PRESET/TUNING/CH MEMORY TUNING AUTO/MAN'L CONTROL SCENE VIDEO AUX PROGRAM INPUT VIDEO AUDIO SPEAKERS PHONES TONE CONTROL STRAIGHT DIRECT AUDIO SELECT A/B/OFF SILENT CINEMA EFFECT...
- Page 290 Remote control/Mando a distancia/ 遥控器 POWER POWER STANDBY POWER MUTE MD/CD-R TUNER TV CH DTV/CBL V-AUX/DOCK TV VOL TV INPUT TV MUTE SCENE BAND LEVEL VOLUME TITLE MENU ENTER DISPLAY RETURN MEMORY FREQ/TEXT MODE - PTY SEEK - START PROG h ENHANCER SUR.
-
Page 291: List Of Remote Control Codes
2072 Wharfedale 2074 Humax 2123 2078 Xlogic 2074 Hush 2132 CD player Medion 2072 Yakumo 2077 iBUYPOWER 2132 Yamaha 5000, 5013 Micromaxx 2072 Yamada 2077 2126, 2127 Micromedia 2073 Yamaha 2000, 2001, 2003, Linksys 2132 CD Recorder Microstar 2072 2030, 2101... - Page 292 Admiral 0058, 0205, 0206, Broksonic 0138 ELECTRO TECH Hampton 0200, 0207 0210, 0211 Bruns 0205 0208 Hanseatic 0203, 0207, 0208, Adyson 0200, 0207 0215 Electroband 0059 0213, 0215, 0217 Agashi 0200 0209, 0218 Electrohome 0059, 0060, 0061 Hantarex 0204, 0208 Agazi 0206 Bush...
- Page 293 Kingsley 0200, 0207 0060, 0061, 0128, Philips Magnavox Samsung 0029, 0030, 0031, Kloss Novabeam 0200 0124 0032, 0044, 0045, 0062 Multi System 0217 Phoenix 0200, 0205, 0213, 0046, 0047, 0060, Kneissel 0203 Multitech 0062, 0127, 0128, 0217 0061, 0065, 0068, Kolster 0213 0200, 0207, 0208,...
- Page 294 White Westinghouse Amstrad 1042 1045 Tatung 0127, 0204, 0207, 0200, 0207, 0217 Anitech 1050 Goodmans 1042, 1045, 1050, 0213, 0217, 0237 Yamaha 0000, 0001, 0002, 1045, 1046 1069 0206, 0208 0003, 0004, 0005, Asha 1002, 1014 Gradiente 1005 Teac 0127...
- Page 295 1027, 1052, 1068, White Westinghouse Montgomery Ward 1070 1013 1008 Sanky 1008 XR-1000 1004, 1005, 1006 Sansui 1007, 1011, 1013, Yamaha 1000, 1001, 1007 Motorola 1004, 1008 1002, 1014 1043 Yamishi 1050 Multitech 1002, 1005, 1006, Sanyo 1001, 1002, 1014,...
- Page 296 YAMAHA ELECTRONICS (UK) LTD. YAMAHA HOUSE, 200 RICKMANSWORTH ROAD WATFORD, HERTS WD18 7GQ, ENGLAND YAMAHA SCANDINAVIA A.B. J A WETTERGRENS GATA 1, BOX 30053, 400 43 VÄSTRA FRÖLUNDA, SWEDEN YAMAHA MUSIC AUSTRALIA PTY. LTD. LEVEL 1, 99 QUEENSBRIDGE STREET, SOUTHBANK, VIC 3006, AUSTRALIA...
- Page 297 RTKAGLEF RX-V563 The circled numbers and alphabets correspond to those in the Owner’s Manual. Les nombres et lettres dans un cercle correspondent à ceux du mode d’emploi. Die umkreisten Zahlen und Buchstaben entsprechen denen in der Bedienungsanleitung. Inringade nummer och bokstäver motsvarar de som anges i bruksanvisningen.
- Page 298 ■ Remote control/Boîtier de télécommande/Fernbedienung/Fjärrkontrollen/ Telecomando/Mando a distancia/Afstandsbediening/Пульт ДУ/ 遥控器 / 리모콘 POWER POWER STANDBY POWER MUTE MD/CD-R TUNER TV CH DTV/CBL V-AUX/DOCK TV VOL TV MUTE TV INPUT SCENE BAND LEVEL VOLUME TITLE MENU ENTER DISPLAY RETURN MEMORY FREQ/TEXT MODE - PTY SEEK - START PROG h ENHANCER...