
Related Manuals for Kohler K-3900X-2


Summary of Contents for Kohler K-3900X-2
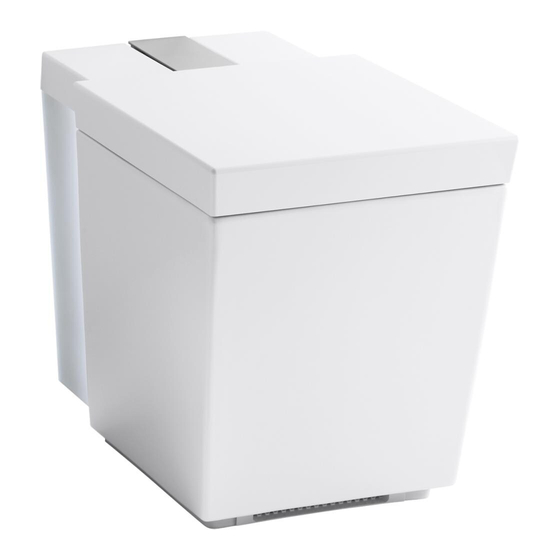
- Page 1 คู ่ ม ื อ แนะนำ � ก�รติ ด ตั ้ ง สุ ข ภั ณ ฑ์ ช ิ ้ น เดี ย วพร้ อ มระบบชำ � ระล้ � งอั ต โนมั ต ิ K-3900X-2 English page 1-17 ภาษาไทย หน้ า 18-33 ©2015 Kohler Co. 1195109-X2-A...
-
Page 2: Grounding Instructions
All information in this manual is based upon the latest product information available at the time of publication. At Kohler, we constantly strive to improve the quality of our products. We reserve the right to make changes in product characteristics, packaging or availability at any time without notice. -
Page 3: Tools And Materials
5/16" Lag Bolt Anchors 2 PCS 4 PCS Other Parts Universal 4.5x45DING Shut-off Valve UX6 x 35 Adapter Lag Bolts Lag Bolt Anchors 2 PCS 2 PCS Docking Remote Control Station Floor Flange Accessory Pack Supply Hose Clip Kohler Co. 1195109-X2-A... -
Page 4: Before You Begin
(2) 4.5 x 45 DING Lag Bolts ¨ User Guidelines Homeowner’s Guide ¨ Installation Guide ¨ Quick Reference Guide ¨ Toilet Installation Template ¨ Other Parts (1) Supply Hose ¨ (1) Clip ¨ (1) Adapter ¨ (1) Shut-off Valve ¨ (1) Floor Flange Accessory Pack ¨ 1195109-X2-A Kohler Co. - Page 5 The toilet is equipped with a motion sensor to automatically open the ring when the light is interrupted. ¨ The sensor is located on the right side of the toilet. This sensor has a maximum range of 20 cm. Keep this area free of obstructions. 1/2″ OD compression supply stop outlet is required unless an adapter is used. ¨ Kohler Co. 1195109-X2-A...
-
Page 6: Prepare The Site
ELCB, within 142 cm of the back of the toilet. Install External Speaker Wires (optional) If external speakers will be used, install the speaker wires at this time with RCA plug installed at line-end ¨ (not presented). 1195109-X2-A Kohler Co. - Page 7 Slide the bare end of the wires into the correct port (see Fig. #3) according to the color and tighten each screw ¨ to secure the wires in place, connect the cover plate plug. Snap the cover plate back into place. ¨ Remove the screw and tape from the cover plate and secure the cover plate with the screw to the docking ¨ station. Kohler Co. 1195109-X2-A...
-
Page 8: Prepare The Installation Location
Confirm the left/right position of the toilet left or right so that an equal amount of shaded area is visible ¨ on each side of the template. Directly under the screw holes on each side of the toilet, accurately mark the bottom edge of the base. ¨ The mark should intersect the lines labeled ″C″ and ″A″ or ″B″ on each side of the template. 1195109-X2-A Kohler Co. - Page 9 ¨ Position a mounting block in the area indicated on the left side of the template. Align the outside edge of the ¨ mounting blocks with the inside line. Then move parallel 2 mm to the inside. Kohler Co. 1195109-X2-A...
- Page 10 If anchors will be used, insert one of the supplied anchors in each of the holes. ¨ Remove the template. ¨ Floor Flange Gasket Install the Floor Flange Position floor flange on the floor. Mark three anchor holes on the floor with pencil. ¨ Drill 10 mm anchor holes. Insert the anchors. ¨ Place the gasket under the floor flange. Position floor flange on the floor. ¨ Tighten the screws. ¨ 1195109-X2-A Kohler Co.
- Page 11 CAUTION: Risk of property damage. It is critical that the supply hose be firmly secured by the clip. The supply hose could be displaced when under pressure if the clip is not correctly installed, resulting in water damage. IMPORTANT! Confirm the clip is firmly holding the supply hose in place. The clip will be able to rotate freely with no significant resistance when properly installed. Kohler Co. 1195109-X2-A...
- Page 12 Connect the power by universal adapter. ¨ Turn on the water supply. ¨ Check for Leaks NOTE: Once the power is connected, the toilet will automatically enter start-up mode. This process takes several minutes. NOTE: If there is a failure during start-up mode, follow the directions on the remote control. Once the start-up sequence has been completed flush the toilet using the manual buttons on the side of the ¨ toilet. Let the toilet fully refill and check for leaks. ¨ 1195109-X2-A Kohler Co.
- Page 13 Battery Box Cover Install Battery Box Pull out the connecting wire under the battery box. ¨ Press the buckle and pull it down, and take out the battery box from the rear panel (as shown in figure). ¨ Unscrew the screw with a cross screwdriver and remove the battery box cover. ¨ Eight AA batteries are loaded correctly according to the mark on the battery box. ¨ Tighten the screw on the battery box cover. ¨ Insert the battery box properly into the slot according to the mark on the battery box cover, and push the ¨ battery box until it is clamped. Kohler Co. 1195109-X2-A...
- Page 14 Remote Control Setup - Set the Language NOTE: If the remote control has not charged enough to be removed from the docking station, perform these steps with remote control attached to the docking station. NOTE: Chinese is the default language. Skip this step if Chinese is the desired language. Changing the On-Screen Language Select [settings]. ¨ Select [system settings]. ¨ Select [languages]. ¨ NOTE: If the language you desire does not appear on the screen, move the scroll bar down to see additional language options. Select the radio button for your desired language. The screen icons will immediately change. ¨ Select [home] to return to the main screen or [back] to return to the previous screen. ¨ 1195109-X2-A Kohler Co.
- Page 15 ¨ Select [system settings]. ¨ Select [set time]. ¨ Select the radio button for the [12 hr.] or [24 hr.] option. ¨ Use the up and down indicators to adjust the hour and minute. ¨ Select the radio button for the [am] or [pm] option. ¨ Select [home] to return to the main screen or [back] to return to the previous screen. ¨ Kohler Co. 1195109-X2-A...
- Page 16 Remote Control Setup - Connect the Remote Control NOTE: This setting can be used to connect a new or a second remote control. Select [settings]. ¨ Select [maintenance]. ¨ Select [learn remote]. ¨ Follow the instructions on the remote screen. When complete select [yes]. ¨ 1195109-X2-A Kohler Co.
-
Page 17: Complete The Installation
12:34 am flush-eco flush-full seat cover close front rear dryer music heating lighting users stop settings Complete the Installation Press the flush button on the remote control. Confirm the toilet flushes. ¨ Remove the protective film from the toilet and remote. ¨ Apply caulk around the base of the toilet following the caulk manufacturer’s instructions. ¨ Kohler Co. 1195109-X2-A... - Page 18 ดั ง นั ้ นบริ ษ ั ท ฯ ขอสงวนสิ ท ธิ ์ ใ นการเปลี ่ ย นแปลงข้ อ มู ล ผลิ ต ภั ณ ฑ์ แ ละบรรจุ ภ ั ณ ฑ์ ท ี ่ ม ี อ ยู ่ โ ดยมิ ต ้ อ งแจ้ ง ให้ ท ราบล่ ว งหน้ า ขอขอบพระคุ ณ ที ่ ท ่ า นเลื อ กใช้ ส ุ ข ภั ณ ฑ์ โ คห์ เ ลอร์ 1195109-X2-A Kohler Co.
- Page 19 หั ว แปลงปลั � ก ไฟ วาล์ ว เปิ ด-ปิ ดนํ �า สกรู 4.5 x 45 2 ชิ �น (สากล) 2 ชิ �น แท่ น ชาร์ จ รี โ มทคอนโทรล สายนํ �าดี ชุ ด หน้ า แปลน คล ิ ป Kohler Co. 1195109-X2-A...
- Page 20 หั ว แปลงปลั ๊ ก ไฟ (สากล) ¨ วาล์ ว เปิ ด-ปิ ดน� ้า จ� า นวน 1 ชิ ้น ¨ ชุ ด อุ ป กรณ์ ห น้ า แปลนยึ ด โถสุ ข ภั ณ ฑ์ จ� า นวน 1 ชิ ้น ¨ 1195109-X2-A Kohler Co.
- Page 21 ของโถสุ ข ภั ณ ฑ์ แ ละมี ร ะยะจั บ สั ญ ญาณเซ็ น เซอร์ ป ระมาณ 20 ซม. โปรดให้ บ ริ เ วณพื ้นที ่ น ี ้ปลอดจากวั ต ถุ ส ิ ่ ง ของต่ า งๆ วาล์ ว เปิ ด-ปิ ดน� ้ามี เ กลี ย วมาตรฐานขนาด 1/2 นิ ้ว หากจ� า เป็ น อาจใช้ อ ะแด็ ป เตอร์ แ ทนได้ ¨ Kohler Co. 1195109-X2-A...
- Page 22 หากต้ อ งการใช้ ล � า โพงภายนอก ให้ ต ิ ด ตั ้ งสายล� า โพงเข้ า กั บ ปลั ๊ ก อาร์ ซ ี เ อ (RCA) ในขั ้ นตอนนี ้ (อุ ป กรณ์ เ สริ ม ไม่ ร วมอยู ่ ใ นชุ ด สุ ข ภั ณ ฑ์ ) ¨ 1195109-X2-A Kohler Co.
- Page 23 ปิ ดฝาครอบแท่ ่ น ชาร์ จ เข้ า กั บ แท่ น ชาร์ จ ¨ ลอกเทปกาวที ่ ต ิ ด สกรู บ นฝาครอบออก จากนั ้ นจึ ง ขั น สกรู ย ึ ด แท่ น ชาร์ จ กั บ ฝาครอบแท่ ่ น ชาร์ จ ให้ แ น่ น ¨ Kohler Co. 1195109-X2-A...
- Page 24 ก� า หนดต� า แหน่ ง รู เ จาะของสกรู ท ั ้ งสองข้ า งของโถสุ ข ภั ณ ฑ์ บ นพื ้น โดยก� า หนดต� า แหน่ ง ขอบใต้ โ ถสุ ข ภั ณ ฑ์ ใ ห้ ถ ู ก ต้ อ ง ต� า แหน่ ง ที ่ ¨ ถู ก ก� า หนดจะตรงตามเส้ น ต� า แหน่ ง “C” และต� า แหน่ ง “A” หรื อ ต� า แหน่ ง “B” ที ่ ร ะบุ ไ ว้ บ นกระดาษแม่ แ บบ 1195109-X2-A Kohler Co.
- Page 25 จั ด ต� า แหน่ ง อุ ป กรณ์ ย ึ ด โถสุ ข ภั ณ ฑ์ ท ี ่ ต ิ ด ตั ้ งที ่ ร ะบุ ไ ว้ บ นด้ า นซ้ า ยของกระดาษแม่ แ บบ โดยจั ด ต� า แหน่ ง ขอบด้ า นนอกของอุ ป กรณ์ ย ึ ด ¨ โถสุ ข ภั ณ ฑ์ ใ ห้ ช ิ ด เส้ น ด้ า นใน จำกนั ้ น เลื ่ อ นเข้ ำ มำด้ ำ นในอี ก 2 มม. Kohler Co. 1195109-X2-A...
- Page 26 เจาะรู พ ุ ก 10 มม และจึ ง สวมพุ ก ¨ วางประเก็ น ไว้ ด ้ า นล่ า งหน้ า แปลน จั ด ต� า แหน่ ง หน้ า แปลนบนพื ้น ¨ ขั น สกรู ย ึ ด ให้ แ น่ น ¨ 1195109-X2-A Kohler Co.
- Page 27 ข้ อ ส� ำ คั ญ ! ให้ แ น่ ใ จว่ า สวมคลิ ป ครอบสายน� ้าดี ใ ห้ ต รงต� า แหน่ ง หากประกอบสายน� ้าดี ถ ู ก ต้ อ ง สายน� ้าดี จ ะสามารถหมุ น ได้ อ ย่ า งอิ ส ระ Kohler Co.
- Page 28 เมื ่ อ ระบบเริ ่ ม การท� า งานเสร็ จ สิ ้น ให้ ท � า การช� า ระล้ า งสุ ข ภั ณ ฑ์ โ ดยกดปุ่ มแมนนวลที ่ ด ้ า นข้ า งโถสุ ข ภั ณ ฑ์ ¨ เมื ่ อ น� ้าเติ ม เข้ า สุ ข ภั ณ ฑ์ แ ล้ ว จากนั ้ นจึ ง ตรวจสอบการรั ่ ว ซึ ม ¨ 1195109-X2-A Kohler Co.
- Page 29 ใส่ ก ล่ อ งรางถ่ า นเข้ า กั บ ช่ อ งกล่ อ งรางถ่ า นตามสั ญ ลั ก ษณ์ บ นกล่ อ งรางถ่ า น ดั น กล่ อ งรางถ่ า นเข้ า ไปจนกระทั ่ ง เข้ า ล็ อ ค ¨ Kohler Co. 1195109-X2-A...
- Page 30 เลื อ กค� า สั ่ ง กลั บ สู ่ ห น้ ำ จอหลั ก [home] เพื ่ อ กลั บ ไปสู ่ ห น้ า จอหลั ก หรื อ เลื อ กค� า สั ่ ง ย้ อ นกลั บ [back] เพื ่ อ กลั บ ไปยั ง หน้ า จอก่ อ นหน้ า นี ้ ¨ 1195109-X2-A Kohler Co.
- Page 31 เลื อ กค� า สั ่ ง กลั บ สู ่ ห น้ ำ จอหลั ก [home] เพื ่ อ กลั บ ไปสู ่ ห น้ า จอหลั ก หรื อ เลื อ กค� า สั ่ ง ย้ อ นกลั บ [back] เพื ่ อ กลั บ ไปยั ง หน้ า จอก่ อ นหน้ า นี ้ ¨ Kohler Co. 1195109-X2-A...
- Page 32 ปฎิ บ ั ต ิ ต ามค� า แนะน� า ที ่ แ สดงบนหน้ า จอรี โ มทคอนโทรล เมื ่ อ ปฏิ บ ั ต ิ ต ามค� า สั ่ ง ทุ ก ขั ้ นตอนเรี ย บร้ อ ยแล้ ว ให้ เ ลื อ กค� า สั ่ ง ใช่ [yes] ¨ 1195109-X2-A Kohler Co.
- Page 33 น� า ฟิ ล ์ ม ป ้ องกั น รอยออกจากสุ ข ภั ณ ฑ์ แ ละรี โ มทคอนโทรล ¨ ยาซิ ล ิ โ คนใต้ ฐ านสุ ข ภั ณ ฑ์ โ ดยรอบ และปฏิ บ ั ต ิ ต ามค� า แนะน� า การใช้ ง านซิ ล ิ โ คนจากผู ้ ผ ลิ ต ¨ Kohler Co. 1195109-X2-A...
- Page 34 1195109-X2-A Kohler Co.
- Page 35 Kohler Co. 1195109-X2-A...
- Page 36 KOHLER (THAILAND) PUBLIC COMPANY LIMITED FL. Jasmine City Bldg., 2 Soi Sukhumvit 23, Sukhumvit Road, Wattana, Bangkok 10110 Thailand Call Center Tel. +(66) 2204 6222 Fax. +(66) 2204 6224 บริ ษ ั ท โคห์ เ ลอร์ (ประเทศไทย) จำ � กั ด (มห�ชน) ชั...