
Related Manuals for Dimplex DCP11MULTI


Summary of Contents for Dimplex DCP11MULTI
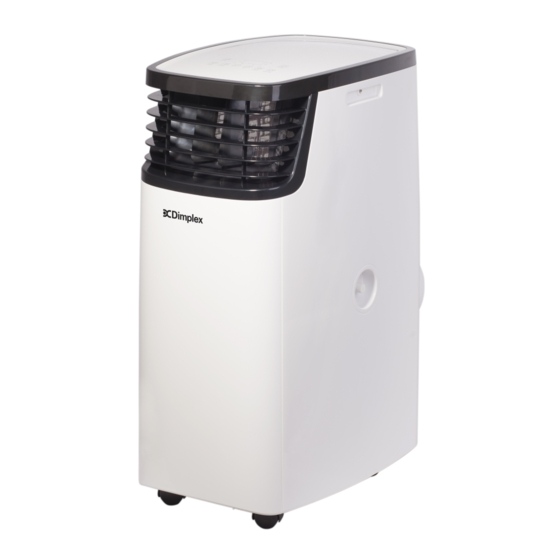
- Page 1 INSTRUCTION MANUAL Multidirectional Portable Air Conditioner Model: DCP11MULTI & DCP14MULTI For domestic household use only.
- Page 2 IMPORTANT THESE INSTRUCTIONS SHOULD BE READ CAREFULLY AND RETAINED FOR FUTURE REFERENCE. Note also the information presented on the appliance CAUTION: FAILURE TO FOLLOW THESE INSTRUCTIONS MAY CAUSE INJURY AND/OR DAMAGE AND MAY INVALIDATE YOUR WARRANTY Please read the operating instructions carefully before using your Portable Air Conditioner for the first time and keep them in a safe place.
- Page 3 may lead to a risk of fire or electric shock. • Only operate this appliance with a minimum of 50cm clearance all around i.e. away from walls, furniture and overhanging objects such as curtains or a shelf. • WARNING: To avoid danger of suffocation please remove all packaging materials particularly plastic and EPS and keep these away from vulnerable people, children and babies.
- Page 4 Exposed to the Near water If the power cable weather outdoors wires are frayed or cut Where small children If an extension Where the power may be left unattended lead may become cable may be overloaded damaged On a slope or Where there is risk Where it may be uneven surface...
-
Page 5: Specification
Specification Model no. DCP11MULTI DCP14MULTI Colour White/Black Power supply 220-240V~, 50Hz Operating temperature 5-43°C Thermostat range 17-30°C Rated Input Power 1.28kW 1.6kW Cooling Capacity 3.2kW Dehumidification Capacity (30°C, 80%RH) 50L/day 70L/day Noise Level Minimum (Lo) 69dB(A) Noise Level Maximum (Hi) - Page 6 Parts Control panel Cool air inlet Remote control receiver Cool air filter Hose adaptor Hot air inlet Exhaust hose Hot air filter Upper drainage hole (10) Lower drain hole 1 x Exhaust hose 1 x Window slider kit (with hole) 1 x Remote control 1 x Window slider kit (without hole)
-
Page 7: Control Panel
Control Panel Power button Speed button Function button Timer button Temp increase (+) button Sleep button Temp decrease (-) button Swing button LED display screen Indicator lights: *heating not applicable for all models. The light only will be lighten when the unit has heating function LED Display •... -
Page 8: Installation
Installation PREPARATION NOTE: All the illustrations in the manual are for explanatory purposes only. Your machine may be slightly different. The unit can be controlled by the control panel or with the remote control. EXHAUST HOSE The exhaust hose and adaptor must be installed or removed in accordance with the set FUNCTION. -
Page 9: Exhaust Hose Installation
Installation EXHAUST HOSE INSTALLATION 1. Rotating the exhaust hose according to the direction in Fig (1) will remove the hose from the unit. 2. Rotating the exhaust hose according to the direction in Fig (2) will attach the hose to the unit. 3. -
Page 10: Window Kit Installation
Installation WINDOW KIT INSTALLATION The window slider kit has been designed to fit most standard vertical and horizontal window applications, however it may be necessary for you to modify some aspects of the installation procedures for certain types of windows. The window slider kit can be fastened with screws (not supplied) if required. -
Page 11: Dehumidification Mode
Functions POWER Press the POWER button to turn the unit ON or OFF. FUNCTION Press the FUNCTION button to select between COOL, or DRY modes. COOLING MODE 1. The exhaust hose needs to be installed for this mode and the rubber cap should be fitted to the drainage hole. -
Page 12: Setting The Timer
Functions SWING Press the SWING button to begin the automatic swing function. Press again to turn the SWING function off. SETTING THE TIMER A timer can be set to automatically turn the appliance ON or automatically turn it OFF. To set the unit to automatically turn ON, follow the below instructions: 1. -
Page 13: Error Codes
Error Codes ERROR CODES E1 - Indicates open circuit or short circuit in temperature sensor and PCB. E2 - Indicates open circuit or short circuit in temperature sensor, copper tube and PCB. E4 - Indicates the internal water container is full. Refer to the Water Drainage section below. -
Page 14: Remote Control
Remote Control The remote control can be used to perform all functions. Refer to the below diagram and button description • AUTO = Automatic fan speed • HI = High fan speed • MID = Medium fan speed • LOW = Low fan speed •... - Page 15 Remote Control Using the Remote Control 1. Open the battery cover of the remote control, and insert 2 x AAA batteries. 2. Please point to the receiver and be withing 4m when using the remote control. 3. If the battery voltage is low, please open the battery cover as per the diagram and replace with a new batteries (2 x AAA).
-
Page 16: Safety Precautions
Cleaning SAFETY PRECAUTIONS • Always unplug the unit before cleaning or servicing. • DO NOT use flammable liquids or chemicals to clean the unit. • DO NOT wash the unit under running water. Doing so causes electrical danger. • DO NOT operate the machine if the power supply was damaged during cleaning. A damaged power cord must be replaced with a new cord from the manufacturer. -
Page 17: Maintenance
Warranty Please refer to the warranty card in the box for warranty information. For any troubleshooting advice, please contact the relative Customer Care Centre below. Glen Dimplex Australia Pty Ltd Glen Dimplex New Zealand Ltd 1340 Ferntree Gully Road, 38 Harris Road, East Tamaki,... - Page 18 Supplied by Glen Dimplex Australia 1340 Ferntree Gully Road, Scoresby, Victoria, 3179 © Glen Dimplex Australia. All rights reserved. Material contained in this publication may not be reproduced in whole or in part, without prior permission in writing of Glen Dimplex Australia.