Vulcan-Hart VC44GC Installation & Operation Manual
Vc series gas convection ovens
Hide thumbs
Also See for VC44GC:
- Installation and operation manual (49 pages) ,
- Specifications (2 pages) ,
- Installation & operation manual (53 pages)
Table of Contents
Advertisement
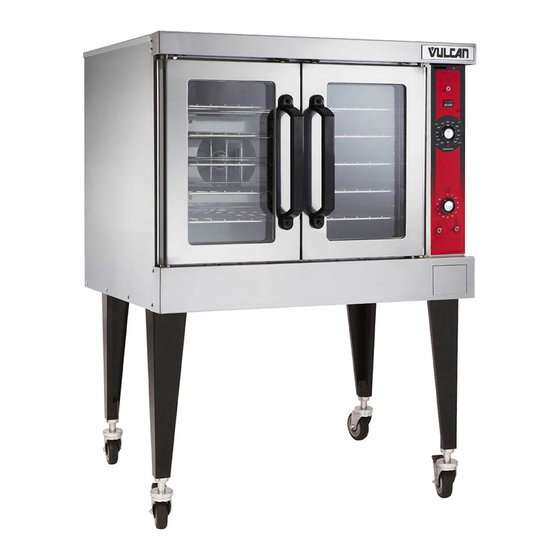
VC SERIES
GAS CONVECTION OVENS
MODELS
VC4GD
VC4GC
VC6GD
VC6GC
STACKED MODELS
VC44GD
VC44GC
VC66GD
VC66GC
For additional information on Vulcan-Hart or to locate an authorized parts
and service provider in your area, visit our website at www.vulcanhart.com
VULCAN-HART
DIVISION OF ITW FOOD EQUIPMENT GROUP, LLC
WWW.VULCANHART.COM
ML-126611
ML-136494
ML-126613
ML-136495
ML-126611
ML-136494
ML-126613
ML-136495
INSTALLATION &
OPERATION MANUAL
MODEL VC4GD
P.O. BOX 696
LOUISVILLE, KY 40201-0696
FORM 31123 Rev. J (Jan. 2009)
Advertisement
Table of Contents

Related Manuals for Vulcan-Hart VC44GC


Summary of Contents for Vulcan-Hart VC44GC
- Page 1 VC44GC ML-136494 VC66GD ML-126613 VC66GC ML-136495 For additional information on Vulcan-Hart or to locate an authorized parts and service provider in your area, visit our website at www.vulcanhart.com VULCAN-HART DIVISION OF ITW FOOD EQUIPMENT GROUP, LLC WWW.VULCANHART.COM INSTALLATION & OPERATION MANUAL...
-
Page 2: Important For Your Safety
IN THE EVENT OF A POWER FAILURE, DO NOT ATTEMPT TO OPERATE THIS DEVICE. © VULCAN-HART, 2009 IMPORTANT FOR YOUR SAFETY I m p r o p e r i n s t a l l a t i o n , a d j u s t m e n t ,... -
Page 3: Features And Options
Other options include: an open stand with lower storage rack, roast and hold, and a stacking kit for mounting one oven on top of another. Vulcan VC Series Gas Convection Ovens are produced with quality workmanship and material. Proper installation, usage and maintenance of your oven will result in many years of satisfactory performance. -
Page 4: Installation Codes And Standards
Before installing, verify that the electrical service and type of gas supply (natural or L.P.) agree with the specifications on the rating plate, located behind the top trim panel on the front of the oven. If the supply and equipment requirements do not agree, do not proceed with the installation. Contact your dealer or Vulcan-Hart Company immediately. -
Page 5: Installing Basic Oven
Remove two screws from the rear of the oven and install the tie-down strap shipped with the casters using these screws (Fig. 1). Attach the gas line strain relief to the tie-down strap at the rear of the oven (Fig. 1). -
Page 6: Assembling The Stand To The Oven
LEVELING Make sure that the oven racks are level in the final installed position. If the oven is installed on legs, turn the adjustable feet in or out to level the oven front-to-back and side-to-side. If the oven is installed on casters, loosen set screws and turn casters in or out to level the oven front-to-back and side-to-side. -
Page 7: Gas Connection
Gas supply connections and any pipe joint compound must be resistant to the action of propane gases. Location of the gas inlet is at the rear of the oven. Codes require that a gas shutoff valve must be installed in the gas line ahead of the oven. -
Page 8: Vent System
VENT SYSTEM DO NOT obstruct the flow of flue gases from the flue located on the rear of the oven. It is recommended that the flue gases be ventilated to the outside of the building through a ventilation system installed by qualified personnel. -
Page 9: Operation
ON — Turns oven control circuits on. OFF — Turns oven control circuits off. OVEN COOL — Allows the fan motor to run with the doors ajar to speed ovencooling. On Light (Amber) — Lit when Master Switch is ON. - Page 10 ON — Turns oven control circuits on. OFF — Turns oven control circuits off. OVEN COOL — Allows the fan motor to run with the doors ajar to speed ovencooling. On Light (Amber) — Lit when Master Switch is ON.
- Page 11 — Allows you to select HI or LOW Fan Speed. Lights Switch — Turns the oven lights ON or OFF. to 0. Oven does not turn off. Turn Timer to OFF to stop buzzer. When oven is not in use, keep timer in OFF position. – 11 –...
- Page 12 BEFORE FIRST USE Before using the oven for the first time, it must be "burned in" to release any odors that might result from heating the new surfaces in the chamber. 1. Using a clean, damp cloth, wipe the inside of the oven including the racks.
- Page 13 LIGHTING OVEN (Model VC4GD-SEF) (With standing pilot) 1. Turn on main gas supply. 2. With Master Switch in OFF position, lift access door in lower trim, light pilot while holding red button on control panel. 3. Keep holding button for 30 seconds after pilot ignites.
-
Page 14: Conserving Energy- All Models
Cooking 1. Open doors and load the product into the oven. Place pans in the center of the racks. Close doors. 2. Set the Timer. After the preset time lapses, turn Timer to OFF position to stop alarm. 3. When product is done, open doors and carefully remove cooked product from the oven. Care should be taken when wiping up spills, as oven is still hot. -
Page 15: Proper Utensils
OPERATING HINTS When using the convection oven for the first time with a particular food, check the degree of doneness periodically before the suggested time has elapsed. This will ensure the desired doneness is achieved. Record your temperature and time settings for various products. The convection oven can provide consistent and repeatable results. - Page 16 Indicates the oven is in the Roast & Hold Mode. R & H MODE Indicates the oven is preheated and ready for cooking. OVEN Indicates the oven is preheating or burners have cycled on to OVEN HEATING maintain temperature setting. Primary indicates menu items 1, 3 or 5.
-
Page 17: Manually Setting The Temperature And Cook Time
MANUALLY SETTING THE TEMPERATURE AND COOK TIME To Set the Temperature 1. Press the SET button. Press the TEMPERATURE button; StPt displays to indicate Setpoint. 2. Use the Up and Down arrow keys to increase or decrease the displayed temperature value. 3. - Page 18 Starting a Timed Cycle Using Programmed Individual Menu/Rack Number Cook Time(s) 1. After the set temperature is reached, open the door; door displays. Place product(s) in oven. 2. Close the door. The display returns to the set temperature or the GROWING BAR.
-
Page 19: Setting The Oven For Roast & Hold
RACK ARRANGEMENTS All models are supplied with five racks and have a maximum operating capacity of six racks per oven. The 11-position rack supports provide for maximum flexibility and proper rack spacing. The following arrangements are recommended. The position numbers are in numerical sequence starting at the bottom (Fig. -
Page 20: Special Procedures For Baking
3 times increase in volume, for best results. When baking pies in your convection oven, three or four pies should be put on an 18 x 26" (457 x 660 mm) sheet or bun pan. This procedure helps the bottom crust to bake, makes handling easier and reduces the possibility of boilover spoiling the appearance of the pies on the lower racks. -
Page 21: Recommended Temperatures And Times For Roasting
325°F (163°C) for fresh pork as recommended by USDA and American Meat Institute. A pan, approximately 12 x 20 x 1" (305 x 508 x 25 mm) full of water, may be placed in the oven bottom. This water supplies humidity to reduce shrinkage. Water should be added if necessary during roasting. - Page 22 RECOMMENDED TEMPERATURES, TIMES AND NUMBER OF RACKS FOR BAKING PRODUCT Cakes Sheet Cakes 18 x 26 x 1" (457 x 660 x 25 mm) pan Scaled 4 to 6 lb (2 to 2.7 kg)/pan Scaled 6 to 7 lb (2.7 to 3.4 kg)/pan Sheet Cakes 18 x 26 x 2"...
- Page 23 Fish Sticks & Portions Frozen Breaded, 1 oz (28 g) to 3 oz (71 to 85 g) Chicken Pieces Broiled or Oven Fried 2 to 2 lb (0.9 to 1.1 kg)/bird to 3 lb (1.1 to 1.4 kg)/bird Lobsters — 1 to 1 lb (0.45 to 0.7 kg)
-
Page 24: Guidelines For Maintaining Stainless Steel Surfaces
Be sure to thoroughly clean all cleansing solution off before using the oven again. It is also recommended that the oven be run at 400°F (204°C) for 20 minutes before using to burn off any cleaning solution that was not thoroughly rinsed from the snorkel. -
Page 25: Maintenance
LUBRICATION The fan motor comes with sealed bearings and requires no lubrication. VENT Periodically check the flue, when the oven is cool, to be sure it is free of obstructions. REPLACING LAMPS 1. Allow oven to cool. 2. Remove all racks by pulling forward, lifting up and out. -
Page 26: Troubleshooting
. s l SERVICE AND PARTS INFORMATION To obtain service and parts information concerning this model, contact the Vulcan-Hart Service Agency in your area (refer to our website, www.vulcanhart.com for a complete listing of Authorized Service and Parts depots). -
Page 27: Entretien
ENTRETIEN (1-09) fabrication, date série, fournir service, demande visiter autorisées, pièces Pour près. plus Vulcan-Hart l’entretien renseignement L’ENTRETIEN secondes. plus pendant alimentation Aucune demeure voyant élevée. trop Température dans d'eau Manque gauchies. Tôles renversent. - Page 28 pour Sheen) Super inoxydable. l’acier contenant nettoyants utiliser nettoyants doux détergent minéraux. dépôts éliminer inoxydable. l’acier rouille First Talc Cameo, à tampons d’utiliser racloirs métalliques suivantes sont corrosion INOXYDABLE minutes à four four. dans odeurs dégager vitre. voiler égratigner l’eau à...
- Page 29 à à à à à à à à à à à à à à à à à à à à à à à à à à à à à à à à à à à à à à à à à...
- Page 30 à à à à à à à à à à plaques 2(20) plaques 3(30) à à à à à à à à à à à à à à à à à à à à à à à à à à à...
- Page 31 pour résultats d’excellent personnels. seulement. d’exemple titre à suggérés devraient commandes réglages basse plus élevée plus °F) four, autre tout Comme standard. pour temps plus prendra à chaleur fournit forcé cuire résultats, traditionnel, four dans à cuit) bien à point (à...
- Page 32 Ainsi, dans quatre trois résultats. meilleurs pour volume four dans pulsé pulsé. à four dans Vulcan. l’entretien tenter automatique l’arrêt assure capte sécurité leur conservent produits risques manipuler, brioches. à moules dans groupe mettre pulsé,...
- Page 33 besoins. propres leurs à satisfaire quelques courantes, choses contenant récipient pour rôtis autres dindes hauteur. allant bacs dans rôtir aussi peut meringue. dans gâteaux pains Fig. GRILLES POSITION RACK POSITION PL-52806 flexibilité fournissent maximale d’opération capacité température seulement). (Garde-au-chaud) HOLD Laisser Garde-au-chaud.
- Page 34 refermée, puis secondes temps exemple, minutage fonctions toutes (marche-arrêt). STOP enfoncée maintenir appuyer touche appuyer éteindre Pour (marche-arrêt). cycle terminer pour secondes pendant sélectionnés. été aient grilles porte. porte, Ouvrir clignote. clignote grille porte. fermer cuit appuyer l’avertisseur, éteindre court plus cuisson numéros...
- Page 35 (marche-arrêt). STOP START grille. numéro pour STOP START touche Appuyer d’appuyer avant l’avance à grille. numéro tout touches servir etc. grille temps. pour Tine jusqu’à flèches avec menu article fois. seconde cuisson temps (avec cuisson menu. l’article CUISSON STOP START touche Appuyer Répéter...
- Page 36 RÉGLAGE température régler TEMPÉRATURE affichés temps diminuer pour haut Flèche SECONDARY Indique SECONDAIRE. PRIMARY Indique PRIMAIRE. température. pour fonctionnement HEATING OVEN préchauffe VOYANT READY OVEN cuisson. pour prêt PRÊT. VOYANT Garde-au-chaud. MODE four Indique & RÔTISSAGE MODE température Affiche heure.
- Page 37 D’UTILISATION pour profonds assez juste bacs bacs dans rapidement plus appropriés d’ustensiles APPROPRIÉS USTENSILES CYCLE PREMIÈRE PRÉCHAUFFAGE FIRST-STAGE PREHEAT OVEN FOUR INTO DANS PRODUIT PRODUCT CHARGEMENT LOAD EMMAGASINÉE CUISSON À COMPTE FOUR DISPLAY TIMER L’AFFICHAGE TEMPERATURE OVEN HOLD ROAST RÔTISSAGE...
- Page 38 L’ÉNERGIE CONSERVATION à à étapes prolongé derrière (situé robinet suffisamment four ventilateur pendant entrouverte OVEN à principal l’interrupteur (arrêt). à thermostat journée thermostat. réglage position à (fonction) Hold & Cook cycle arrêter brûleur lorsque fonctionne °F)
- Page 39 à hebdomadaire fonctionnement ventilateur. vitesse d’accès. veilleuse. l’allumage panneau rouge bouton garniture dans d’accès porte (arrêt). à électrique (arrêt). à (arrêt). à FOUR Sabbath. mode fonctionnement pour (marche) à ainsi désirée température porte fermer allumée, après secondes pendant appuyant tout soulever (arrêt), à...
- Page 40 désirée. préchauffage HEAT blanc voyant allumé. demeure s’allume plats. aliments CUISSON GUIDE pour approximativement minutes demeure s’allume (chauffage) fonctions (sans désirée s’allume, (marche) section à référer appeler principal Attendre (arrêt). (arrêt). à principal heures deux pendant four cuisson l’enceinte odeurs toutes –...
- Page 41 (arrêt). (marche) (basse). (élevée) pas. sert four lorsque (arrêt) à minuterie écoulé, temps lorsque avertisseur cuisson. cuisson. pendant chaleur. plus requiert (marche) position à fonctionner four permet four. commande four. commande FOUR D’ ÉCLAIRAGE INTERRUPTEUR CHAUFFAGE MARCHE/ARRÊT VOYANTS D’ALIMENTATION INTERRUPTEUR à...
- Page 42 Permet tension hors mise pour tension sous mise pour & & ARRÊT FONCTION MARCHE NORMAL NORMAL ÉCLAIRAGE & OVEN ARRÊT MASTER Rôtissage fonction avec Commande d’éclairage vitesse °F) (160 °C réglage Utilise & Normal Permet fonctions (arrêt) à...
- Page 43 SWITCH MASTER PUSH AVANT "ON" "ON" TURN L’ALLUMER INSTRUCTIONS INSTRUCTIONS ATTENDRE LIGHTING MINUTES ÉTEINDRE THERMOSTAT THERMOSTAT IGNITION HEAT COOL COOL OVEN ARRÊT SWITCH SWITCH MASTER fonction sans VC6GD entretien. chauds. sont composants FONCTIONNEMENT Commande d’éclairage ventilateur Permet Vitesse pour (arrêt)
- Page 44 – édition. dernière NFPA-70), (norme sûreté dispositif maximale Intensité circuit minimale Intensité ÉLECTRIQUES – Code Electrical National conformes fils)/50/3 240/415 fils)/50/3 220/380 VC6GC fils)/50/3 220/380 VC4GC 240/50/1 VC6GD 240/60/1 VC4GD 208/60/1 120/60/1 V/Hz/ph Modèles CARACTÉRISTIQUES Données...
- Page 45 à faire doit procurer vous pourrez vous qualifié. personnel l’extérieur à brûlés d’évacuation conduit dans Vulcan-Hart l’entretien flamme chambre pointe avec brûlent flammes cycle pendant flamme détacher fera d’air approvisionnement l’appareil, d’expédier avant à apposé...
- Page 46 l’appareil isoler psig), gaz. d’essais lors psig) l’air tout évacuer pour l’allumage. avant électromagnétique) fuite. aucune présentent savonneuse l’eau circuler naturel pour d’eau) régulateur utilisé. ci-dessus. données tableau avec fourni externe régulateur externe. régulateur à intégré régulateur requise l’élévation joints. à...
- Page 47 Fig. PL-53564 SUPERPOSITION D’ÉVACUATION CONDUIT FLUE STACKING Fig. PL-56178 GRILLE GUIDES GUIDE RACK SUPPORT RACK GRILLE SUPPORT FRONT AVANT ARRIÈRE BACK – – propane. à résister doivent conduite dessus (Fig. superposition positionnement. l’aligner soin prévu l’emplacement Enlever supérieur. (7/16 plancher boulons pattes quatre...
- Page 48 (Fig. Fixer immobile. garder débrayage à raccord sans l’appareil mouvement prendre plus, dispositifs rapide débrayage à raccord connecteurs conforme Vulcan) munir roulettes, circulation restreint support modulaire. support Mississauga, 100, Bureau auprès ci-dessus normes édition). (dernière l’électricité fonctionnant appareils d’installation...
- Page 49 été livraison responsable été appareil l’usine, quitter immédiatement. Vulcan installer pas, panneau derrière propane) (naturel l’installation, à procéder registre d’un Tous NOTA Council, Committee procurer Norme Codes CODES pièce.
- Page 50 BESOIN. ENTRETIEN – – Standard option Garde-au-chaud Pattes Rôtissage CARACTÉRISTIQUES suivre complet années. nombreuses entretien utilisation installation, fabriqués sont Vulcan superposition nécessaire d’une pourvu Support l’ouverture standard; 208/240 électriques spécifications standard profonde plus VC6GC modèles. tous pour additionnelles grilles grilles;...
- Page 51 COMPAGNIE PRINCIPAL D’ARRÊT ÉTEINDRE GAZ, IMPORTANT FOURNISSEUR CHEZ APPAREIL À SOINS PREMIERS MÊME CLIENT FONCTIONNANT PERSONNEL D’UN L’INTENTION SÉCURITÉ 2009 VULCAN-HART, FONCTIONNER PANNE ENTRETIEN. TOUT AVANT D’INSTALLATION, MORT. MÊME CAUSER L’ENTRETIEN L’INSTALLATION, APPAREIL. PROXIMITÉ LIQUIDE AUTRE RANGER L’ENTRETIEN. AVEC AVEC ROBINET D’ODEURS...
- Page 52 Vulcan-Hart SÉRIE PULSÉ MODE WWW.VULCANHART.COM ÉQUIPEMENT GROUPE DIVISION VULCAN-HART près, plus autorisé concernant détails amples plus ML-136495 VC66GC ML-126613 VC66GD ML-136494 VC44GC ML-126611 VC44GD MODÈLES ML-136495 VC6GC ML-126613 VC6GD ML-136494 VC4GC ML-126611 VC4GD MODÈLES À FOURS service Pour...