Table of Contents
Advertisement
Quick Links
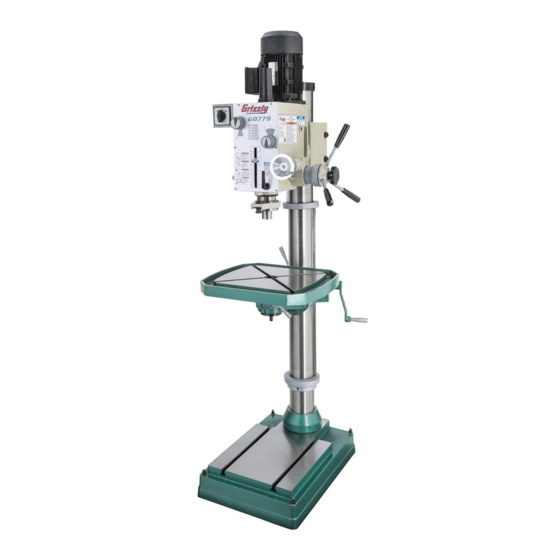
MODEL G0779
HEAVY-DUTY FLOOR MODEL
GEARHEAD DRILL PRESS
OWNER'S MANUAL
(For models manufactured since 09/14)
COPYRIGHT © MAY, 2015 BY GRIZZLY INDUSTRIAL, INC.
WARNING: NO PORTION OF THIS MANUAL MAY BE REPRODUCED IN ANY SHAPE
OR FORM WITHOUT THE WRITTEN APPROVAL OF GRIZZLY INDUSTRIAL, INC.
#WK17370 PRINTED IN CHINA
V1.05.15
Advertisement
Table of Contents

Related Manuals for Grizzly G0779


Summary of Contents for Grizzly G0779
- Page 1 (For models manufactured since 09/14) COPYRIGHT © MAY, 2015 BY GRIZZLY INDUSTRIAL, INC. WARNING: NO PORTION OF THIS MANUAL MAY BE REPRODUCED IN ANY SHAPE OR FORM WITHOUT THE WRITTEN APPROVAL OF GRIZZLY INDUSTRIAL, INC. #WK17370 PRINTED IN CHINA V1.05.15...
- Page 2 This manual provides critical safety instructions on the proper setup, operation, maintenance, and service of this machine/tool. Save this document, refer to it often, and use it to instruct other operators. Failure to read, understand and follow the instructions in this manual may result in fire or serious personal injury—including amputation, electrocution, or death.
-
Page 3: Table Of Contents
Operation Overview ........19 Positioning Table ......... 20 Positioning Headstock ......... 21 Installing/Removing Tooling ......22 Using Spindle Downfeed Controls ....24 Setting Depth Stop ........24 Spindle Speed..........25 Calculating Spindle Speed for Drilling ..26 Model G0779 (Mfd. Since 09/14) -
Page 4: Introduction
ID label (see below). This information is required for us to provide proper tech support, and it helps us determine if updated documenta- tion is available for your machine. Manufacture Date Serial Number Model G0779 (Mfd. Since 09/14) -
Page 5: Identification
Lever Depth Scale Downfeed & Pointer Selector Knob Quill Lock Fine Downfeed Lever Handwheel Quill & Spindle Table Elevation Crank Table To reduce your risk of serious injury, read this entire manual BEFORE using machine. Model G0779 (Mfd. Since 09/14) -
Page 6: Controls & Components
N. Table Rotation Lock Handle: Allows table G. Downfeed Selector Knob: Engages/disen- to rotate. gages fine downfeed handwheel. O. Table Elevation Crank: Changes elevation H. Fine Downfeed Handwheel: Provides fine of table assembly. control over vertical spindle travel. Model G0779 (Mfd. Since 09/14) -
Page 7: Machine Data Sheet
Machine Data Sheet MACHINE DATA SHEET Customer Service #: (570) 546-9663 · To Order Call: (800) 523-4777 · Fax #: (800) 438-5901 MODEL G0779 23‐3/8" HEAVY‐DUTY FLOOR MODEL GEARHEAD DRILL PRESS Product Dimensions: Weight................................706 lbs. Width (side-to-side) x Depth (front-to-back) x Height................25 x 33 x 80 in. - Page 8 The information contained herein is deemed accurate as of 8/19/2019 and represents our most recent product specifications. Model G0779 PAGE 2 OF 2 Model G0779 (Mfd. Since 09/14) Due to our ongoing improvement efforts, this information may not accurately describe items previously purchased.
-
Page 9: Section 1: Safety
Never operate under the influence of drugs or injury or blindness from flying particles. Everyday alcohol, when tired, or when distracted. eyeglasses are NOT approved safety glasses. Model G0779 (Mfd. Since 09/14) - Page 10 Make sure they are properly installed, you experience difficulties performing the intend- undamaged, and working correctly BEFORE ed operation, stop using the machine! Contact our operating machine. Technical Support at (570) 546-9663. Model G0779 (Mfd. Since 09/14)
-
Page 11: Additional Safety For Drill Presses
SECURING BIT/CUTTING TOOL. Firmly secure inspect bits/cutting tools for sharpness, chips, or bit/cutting tool in chuck so it cannot fly out of cracks before each use. Replace dull, chipped, or spindle during operation or startup. cracked bits/cutting tools immediately. Model G0779 (Mfd. Since 09/14) -
Page 12: Section 2: Power Supply
To reduce the risk of these hazards, avoid over- loading the machine during operation and make sure it is connected to a power supply circuit that meets the specified circuit requirements. -10- Model G0779 (Mfd. Since 09/14) - Page 13 Minimum Gauge Size ......14 AWG all local codes and ordinances. Maximum Length (Shorter is Better)..50 ft. -11- Model G0779 (Mfd. Since 09/14)
-
Page 14: Section 3: Setup
IMPORTANT: Save all packaging materials until you are completely satisfied with the machine and have resolved any issues between Grizzly or the shipping agent. You MUST have the original pack- aging to file a freight claim. It is also extremely helpful if you need to return your machine later. -
Page 15: Inventory
If you cannot find an item on this list, care- fully check around/inside the machine and packaging materials. Often, these items get lost in packaging materials while unpack- ing or they are pre-installed at the factory. Figure 5. Model G0779 toolbox contents. -13- Model G0779 (Mfd. Since 09/14) -
Page 16: Cleanup
Repeat Steps 2–3 as necessary until clean, then coat all unpainted surfaces with a quality metal protectant to prevent rust. -14- Model G0779 (Mfd. Since 09/14) -
Page 17: Site Considerations
Only install in an Shadows, glare, or strobe effects that may distract access restricted location. or impede the operator must be eliminated. 33" 25" Minimum 30" For Maintenance Figure 7. Minimum working clearances. -15- Model G0779 (Mfd. Since 09/14) -
Page 18: Lifting & Placing
With another person to help to steady machine, lift it just enough to clear pallet and any floor obstacles, then place it in its final position on shop floor. -16- Model G0779 (Mfd. Since 09/14) -
Page 19: Arbor/Chuck Assembly
Figure 10. Arbor/chuck assembly. Attempt to separate drill chuck and arbor by hand —if they separate, repeat Steps 3–4. -17- Model G0779 (Mfd. Since 09/14) -
Page 20: Test Run
Rotate spindle switch to RIGHT to turn machine ON. Verify motor operation, then turn machine OFF. The motor should run smoothly and without unusual problems or noises. Repeat with switch set to LEFT. -18- Model G0779 (Mfd. Since 09/14) -
Page 21: Section 4: Operations
Puts on required safety glasses and face ects. Regardless of the content in this sec- shield. tion, Grizzly Industrial will not be held liable for accidents caused by lack of training. Connects machine to power. Selects spindle RPM with speed control levers and rotates spindle direction switch to turn machine ON. -
Page 22: Positioning Table
Pivot table to desired location. Note: Ensure rack (see Figure 11) moves smoothly around column without binding in upper/lower guide rings. Hex Nuts (2 of 3) Retighten lock handles. Figure 13. Table tilt controls. Retighten hex nuts. -20- Model G0779 (Mfd. Since 09/14) -
Page 23: Positioning Headstock
Positioning Use head elevation crank shown in Figure 15 to adjust headstock height. Headstock Head Elevation The Model G0779 headstock moves vertically, Crank pivots 360° around the column, and tilts 90° left or right. Tools Needed Wrench 24mm ........... 1 Wrench 22mm ........... -
Page 24: Installing/Removing Tooling
It can also use MT#3 or MT#2 Loosen three tilt-lock hex nuts (see Figures tooling with the included adapter sleeves. 17–16). The Model G0779 includes the following spindle tools (see Figure 18): Headstock Hex Nut Cover Plate... - Page 25 Working from the top, thread drawbar into tool by hand until it is snug, then use a 19mm wrench to tighten it. Note: overtighten drawbar. Overtightening makes tool removal difficult and will damage arbor and threads. Re-install drawbar cap. -23- Model G0779 (Mfd. Since 09/14)
-
Page 26: Using Spindle Downfeed Controls
Loosen thumb screw on rim surface of handwheel dial, turn dial until "0" lines up with index line, then retighten thumb screw. Rotate handwheel to move quill/spindle up or down. Each complete revolution equals 0.1". -24- Model G0779 (Mfd. Since 09/14) -
Page 27: Spindle Speed
Also, there are a large number of easy-to-use spindle speed calculators that can be found on the internet. These sources will help you take into account the applicable variables in order to deter- mine the best spindle speed for the operation. -25- Model G0779 (Mfd. Since 09/14) -
Page 28: Calculating Spindle Speed For Drilling
Always clamp the Often, when drilling materials other than wood, workpiece to the table to prevent injuries. some type of lubrication is necessary. Figure 24. Drilling speed chart. -26- Model G0779 (Mfd. Since 09/14) -
Page 29: Section 5: Accessories
Features ⁄ " T-Nuts & ⁄ " bolts. recommended for this machine by Grizzly. NOTICE Refer to our website or latest catalog for additional recommended accessories. G5753—Drill Press Vise - 6" If you use a drill press and value your fingers, you need one of these. - Page 30 Buy in bulk and save with 5-gallon quantities. T23962 T23963 T26685 Figure 31. ISO 68 and ISO 32 machine oil. Figure 29. Model G1064 Cross-Sliding Vise. -28- Model G0779 (Mfd. Since 09/14)
- Page 31 ⁄ ", ⁄ ", ⁄ ", ⁄ ", include ⁄ ", and ⁄ ". Patented in the US! Figure 33. Model T10169 Adjustable Circle Cutter. Figure 35. Model H8203 Professional Drill Bit Sharpening Machine. -29- Model G0779 (Mfd. Since 09/14)
- Page 32 0.001". Set includes collect chuck, ⁄ ", ⁄ ", ⁄ ", ⁄ ", ⁄ ", ⁄ ", and 1" collets, spanner wrench, and moulded plastic case. Figure 37. T26688 R-8 Quick Change Collet 8 pc. Set -30- Model G0779 (Mfd. Since 09/14)
-
Page 33: Section 6: Maintenance
DISCONNECT MACHINE FROM POWER BEFORE PERFORMING LUBRICATION! NOTICE Follow reasonable lubrication practices as outlined in this manual. Failure to do so could lead to premature failure of your machine and will void the warranty. -31- Model G0779 (Mfd. Since 09/14) - Page 34 Drain Pan (2-Gallon or Larger) ......1 To change headstock oil: Run spindle at 670 RPM for approximately 10 minutes to warm headstock oil. DISCONNECT MACHINE FROM POWER! Remove fill plug (see Figure 39). -32- Model G0779 (Mfd. Since 09/14)
- Page 35 Use clean brushes to apply oil to the grooves of the column rack. Move each component through the entire path of travel several times to distribute the lubricant. Note: Take care not to remove the quill rack grease without re-applying it. -33- Model G0779 (Mfd. Since 09/14)
-
Page 36: Section 7: Service
4. Tighten/replace. floor. 5. Tighten mounting bolts; relocate/shim machine. 6. Motor or spindle bearings at fault. 6. Test by rotating shaft; rotational grinding/loose shaft requires bearing replacement. 7. Centrifugal switch is at fault. 7. Replace. -34- Model G0779 (Mfd. Since 09/14) - Page 37 1. Poorly adjusted return spring. return to highest 2. Worn return spring. 2. Replace return spring. position. 1. Calibrate depth stop (Page 36). Depth stop pro- 1. Depth stop not calibrated. ducing inaccurate results. -35- Model G0779 (Mfd. Since 09/14)
-
Page 38: Tensioning Return Spring
45) out enough so notches just clear roll pin. HOLD SPRING COVER TIGHTLY during this step, or force of spring will cause cover to Figure 46. Calibrating depth stop. spin out of your hands. -36- Model G0779 (Mfd. Since 09/14) -
Page 39: Section 8: Wiring
Technical Support at (570) 546-9663. The photos and diagrams included in this section are best viewed in color. You can view these pages in color at www.grizzly.com. -37- Model G0779 (Mfd. Since 09/14) -
Page 40: Electrical Components
Electrical Components Motor Junction Motor Spindle Switch Figure 48. Motor junction box wiring. Figure 49. Switch box wiring. Figure 47. Electrical component wiring overview. -38- Model G0779 (Mfd. Since 09/14) -
Page 41: Wiring Diagram
Wiring Diagram 220V Motor Ground Start Capacitor Capacitor 6-15 Plug 20MFD 150MFD (Included) 450VAC 250VAC V1 U2 Ground Spindle Switch Left Right Side Side Ground READ ELECTRICAL SAFETY -39- Model G0779 (Mfd. Since 09/14) ON PAGE 37! -
Page 42: Section 9: Parts
SECTION 9: PARTS We do our best to stock replacement parts when possible, but we cannot guarantee that all parts shown are available for purchase. Call (800) 523-4777 or visit www.grizzly.com/parts to check for availability. Headstock 7-10 7-13 7-12 7-11... - Page 43 KEY 5 X 5 X 25 P0779080 SET SCREW M6-1 X 12 P0779031 IDLER SHAFT P0779081 SPACER P0779032 GEAR 29T P0779082 WORM GEAR P0779033 GEAR 35T P0779083 PINION SHAFT P0779034 GEAR 21T P0779084 LEVER HUB -41- Model G0779 (Mfd. Since 09/14)
- Page 44 CAP SCREW M5-.8 X 20 P0779125 DRAWBAR 7/16-20 P0779104 ROLL PIN 3 X 15 P0779126 POWER CORD 14G 3W 80" 6-15 P0779105 LOCK LEVER SHAFT P0779127 MOTOR CORD 14G 3W 12" P0779106 INSIDE LOCK PLUNGER -42- Model G0779 (Mfd. Since 09/14)
-
Page 45: Column
Column -43- Model G0779 (Mfd. Since 09/14) - Page 46 P0779220 T-BOLT M12-1.75 X 45 P0779252 FLAT WASHER 14MM P0779221 FLAT WASHER 12MM P0779253 HEX NUT M14-2 P0779222 HEX NUT M12-1.75 P0779254 CAP SCREW M6-1 X 12 P0779223 FLAT WASHER 12MM P0779255 COOLANT DRAIN -44- Model G0779 (Mfd. Since 09/14)
-
Page 47: Accessories
DRILL CHUCK KEY 5/16" STD 11T SD-5/8" P0779304 DRILL CHUCK ARBOR R8-B16 P0779311 DRILL CHUCK 1-13MM B16 P0779305 WRENCH 17 X 19MM OPEN-ENDS P0779312 DRIFT KEY P0779306 WRENCH 22 X 24MM OPEN-ENDS P0779313 BOTTLE FOR OIL P0779307 HEX WRENCH 5MM -45- Model G0779 (Mfd. Since 09/14) -
Page 48: Labels
FOR GRIZZLY MACHINES ONLY! DO NOT REPRODUCE OR CHANGE THIS ARTWORK G0779 Machine Labels B WITHOUT WRITTEN APPROVAL! Grizzly will not accept labels changed without approval. • 1:1 Sizing (Labels are COPYRIGHT © GRIZZLY INDUSTRIAL, INC. artwork changes are required, contact us immediately at manuals@grizzly.com... - Page 49 Would you recommend Grizzly Industrial to a friend? _____ Yes _____No Would you allow us to use your name as a reference for Grizzly customers in your area? Note: We never use names more than 3 times. _____ Yes _____No 10.
- Page 50 FOLD ALONG DOTTED LINE Place Stamp Here GRIZZLY INDUSTRIAL, INC. P.O. BOX 2069 BELLINGHAM, WA 98227-2069 FOLD ALONG DOTTED LINE Send a Grizzly Catalog to a friend: Name_______________________________ Street_______________________________ City______________State______Zip______ TAPE ALONG EDGES--PLEASE DO NOT STAPLE...
-
Page 51: Warranty & Returns
WARRANTY & RETURNS Grizzly Industrial, Inc. warrants every product it sells for a period of 1 year to the original purchaser from the date of purchase. This warranty does not apply to defects due directly or indirectly to misuse, abuse, negligence, accidents, repairs or alterations or lack of maintenance.