Crestron TSR-310 Supplemental Manual
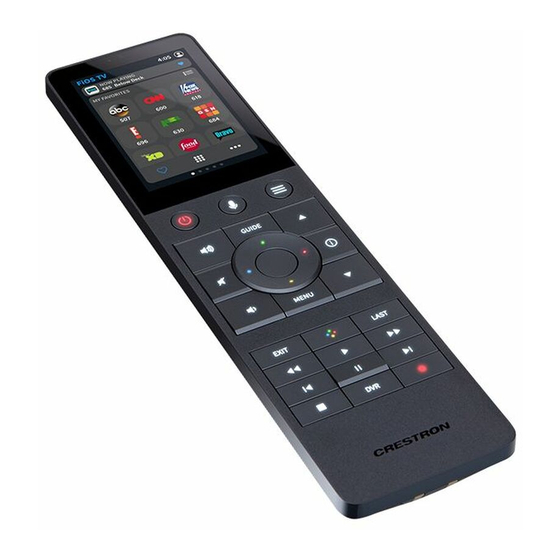
Handheld touch screen remote
Hide thumbs
Also See for TSR-310:
- Do manual (2 pages) ,
- User manual (52 pages) ,
- Supplemental manual (52 pages)

Related Manuals for Crestron TSR-310


Summary of Contents for Crestron TSR-310
- Page 1 TSR-310 Handheld Touch Screen Remote Supplemental Guide Crestron Electronics, Inc.
- Page 2 Crestron disclaims any proprietary interest in the marks and names of others. Crestron is not responsible for errors in typography or photography.
-
Page 3: Table Of Contents
Contents Introduction ........................... 1 Commission the TSR-310 ......................2 Access the Setup Screens ......................4 Configure the TSR-310 ....................... 6 Display Setup .............................. 6 Wireless Setup ............................7 Wireless Details ........................... 8 Select an Access Point ........................8 Manage WAPs ........................... 13 IP Settings ............................ - Page 4 Appendix A: Load Firmware via USB ..................47 Appendix B: Set Up Voice Control Services ................49 ii • Contents Supplemental Guide – DOC. 8226D...
-
Page 5: Introduction
Movement sensing wakes the remote when it is handled so that it is always ready to be used. The TSR-310 may also be paired with Crestron Pyng® OS 2 and other Crestron control solutions for complete control over audio, video, lighting, shades, and other amenities. -
Page 6: Commission The Tsr-310
Crestron Toolbox™ software after upgrading the device to the latest firmware. For more information, refer to the Performance UI for TSR-310 Operations Guide (Doc. 8410). Tap SETUP to enter the device setup screens and to connect the TSR-310 to a Wi-Fi network. - Page 7 No System Configured Screen The TSR-310 may be set up to run the built-in Performance UI software or a custom Smart Graphics® technology project. To use the built-in Performance UI software, pair the TSR-310 to an existing • Crestron Pyng OS 2 system via the Crestron Pyng configuration app. For more information, refer to the Performance UI for TSR-310 Operations Guide (Doc.
-
Page 8: Access The Setup Screens
Access the Setup Screens The setup screens enable basic configuration prior to regular operation of the TSR-310. To access the setup screens during regular operation, press the power (1), microphone (2), home (3), and raise volume (4) buttons twice in sequence (1, 2, 3, 4, 1, 2, 3, 4) within five seconds. - Page 9 There is also a button to toggle system messages on or off and an About button that provides information about the TSR-310. Additionally, the setup screen displays the signal level of the wireless connection and the battery level of the TSR-310.
-
Page 10: Configure The Tsr-310
Configure the TSR-310 Refer to the following sections for information about each TSR-310 setup screen. Display Setup On the setup screen, tap Display Setup to display the Display Setup screen. Display Setup Screen Use the Display Setup screen to adjust LCD backlight and hard button backlight... -
Page 11: Wireless Setup
The functions of each Wireless Setup button are described in the following sections. NOTE: For more information on configuring WAP settings for optimal device performance, refer to the TSR-310 Wireless Access Points Configuration Guide (Doc. 8309). Supplemental Guide – DOC. 8226D... -
Page 12: Wireless Details
Use the Wireless Details screen to view various wireless connection details for the TSR-310 and the current WAP. A Link indicator is also provided to indicate the status of the wireless connection. (Green indicates that the wireless connection is active.) Tap <... - Page 13 Select Access Point Screen Use the Select Access Point screen to connect the TSR-310 to an existing WAP that is in range or to configure a new WAP. NOTE: The TSR-310 alerts the user if the desired WAP is not included in Crestron's list of recommended WAP brands.
- Page 14 5. Tap SAVE to save the access point name or CANCEL to discard any changes. 6. Tap the Security field on the Confirm Info screen. The Encryption screen is displayed. 10 • TSR-310: Handheld Touch Screen Remote Supplemental Guide – DOC. 8226D...
- Page 15 11. Tap SAVE to save the password or CANCEL to discard any changes. 12. Tap Assign Access Point on the Confirm Info screen once all access point information is entered. The WAP Connect screen is displayed. WAP Connect Screen Supplemental Guide – DOC. 8226D TSR-310: Handheld Touch Screen Remote • 11...
- Page 16 WAP may be deleted, or tap < DONE to cancel adding the new WAP. For more information, refer to "Manage WAPs" on the next page. Tap < DONE to return to the Wireless Setup screen. 12 • TSR-310: Handheld Touch Screen Remote Supplemental Guide – DOC. 8226D...
-
Page 17: Manage Waps
Use the Manage WAPs screen to manage settings for up to four saved WAPs. Tap one of the listed WAPs to display buttons for managing the selected WAP. NOTE: For most applications, Crestron does not recommend using more than one saved WAP at any given time. Manage WAPs Screen - WAP Selected Supplemental Guide –... -
Page 18: Ip Settings
• Remove Preferred to remove the selected WAP as preferred. NOTES: ∙ The TSR-310 attempts to establish a connection to the preferred WAP by default. ∙ A star icon displays to the left of the preferred WAP on the Manage WAPs screen to indicate that the WAP is selected as preferred. - Page 19 • Tap Save to save a new entry or tap Cancel to discard any changes. The display • returns to the Static IP screen. Supplemental Guide – DOC. 8226D TSR-310: Handheld Touch Screen Remote • 15...
- Page 20 On the Static IP screen, tap < BACK to return to the IP Settings screen. On the IP Settings screen, tap Set Hostname to enter the TSR-310 hostname. IP Settings Screen - Enter Hostname Tap the text field underneath Enter Hostname to display a keyboard. Enter the hostname using the keyboard, and then tap Save to save the new hostname or Cancel to cancel editing the hostname.
-
Page 21: Ip Table Setup
Use the IP Table Setup screen to view and edit the IP table settings for connecting the TSR-310 to a control system. The IP Table Setup screen also provides an Online indicator for the IP table entry. (Green indicates that the control system is online.) To add or edit an entry, tap Add/Edit. - Page 22 If no changes are made, tap < BACK to return to the IP Table Setup screen. Tap < BACK again to return to the main setup screen. 18 • TSR-310: Handheld Touch Screen Remote Supplemental Guide – DOC. 8226D...
-
Page 23: Voice Control
The Voice Control screen is used to pair the TSR-310 with a voice services provider if a Smart Graphics program has been loaded to the remote. If the TSR-310 is in Performance UI mode, voice control is set up through Performance UI. For more information, refer to the Performance UI for TSR-310 Operations Guide (Doc. - Page 24 For more information, refer to "Appendix B: Set Up Voice Control Services," starting on page 49. If voice services are enabled, tap Unpair to unpair the TSR-310 from the voice control provider. An "Unregistration successful" message displays if the unpair is successful.
-
Page 25: Standby Timeout
On the setup screen, tap Timeouts to display the Standby Timeout screen. Standby Timeout Screen Use the Standby Timeout screen to set the standby timeout settings for the TSR-310. Tap Docked Timeouts to display the Docked Timeout screen. Docked Timeout Screen Supplemental Guide –... - Page 26 Tap the up and down arrows under Standby to increase or decrease the standby • timeout duration when the TSR-310 is not docked from 0 to 120 seconds. Tap the up and down arrows under Power Down to increase or decrease the •...
-
Page 27: Diagnostics
Diagnostics On the setup screen, tap Diagnostics to display the Diagnostics screen. Diagnostics Screen Use the Diagnostics screen to access various diagnostic test screens for the TSR-310. Each test screen is described in the sections that follow. Keypad Test On the Diagnostics screen, tap Keypad Test to display the Keypad Test screen. - Page 28 Pressing any of the buttons shown in the first Keypad Test screen switches the screen back to displaying the upper buttons. Tap < BACK to return to the Diagnostics screen. 24 • TSR-310: Handheld Touch Screen Remote Supplemental Guide – DOC. 8226D...
-
Page 29: System Info
System Info On the Diagnostics screen, tap System Info to display the System Info screen. System Info Screen Use the System Info screen to view the TSR-310 CPU temperature and available memory. Tap < BACK to return to the Diagnostics screen. -
Page 30: Test Patterns
Use the Test Patterns screen to display any of the available test patterns. Tap one of the buttons on the screen to load its respective test pattern. Tap < BACK to return to the Diagnostics screen. 26 • TSR-310: Handheld Touch Screen Remote Supplemental Guide – DOC. 8226D... -
Page 31: Touch Test
Use the touch test screen to test the touch functionality of the display. When a location button is tapped, its respective indicator lights on the screen. Tap < Back to return to the Diagnostics screen. Supplemental Guide – DOC. 8226D TSR-310: Handheld Touch Screen Remote • 27... -
Page 32: Battery
If the TSR-310 is receiving external power through the dock, an orange lightning • bolt icon is shown. If the TSR-310 is receiving power from its battery, a green battery icon is shown. If the TSR-310 battery is charging, a green charging battery icon is shown. If the •... -
Page 33: Mic Diag
MIC Diag. Screen Use the MIC Diag. screen to test the TSR-310 built-in microphone and the voice recognition feature. A Voice Recognition Link indicator is also provided to indicate the status of the voice recognition feature. (Green indicates that the feature is active.) During a microphone test, the TSR-310 microphone records sound until a word or phrase is recognized. -
Page 34: Dock
Not Docked icon displays. Tap On under Docking Alert Message to turn on displaying docking message alerts on the TSR-310. Tap Off to turn off displaying docking message alerts on the TSR-310. Tap < BACK to return to the Diagnostics screen. -
Page 35: Wi-Fi Test
The Wi-Fi Diag. screen also provides controls to test the connection to the default router. Tap On to begin the test and Off to end the test. During the router test, the TSR-310 pings the default router. If the router is communicating with the TSR-310, connection data displays below the ping test controls within five seconds. -
Page 36: Suspend Test
Suspend Test Screen During a suspend test, the TSR-310 enters suspend mode. To exit suspend mode, pick up the TSR-310, tap any of the hard buttons, or touch the LCD display. The TSR-310 wakes and returns to the Diagnostics screen. -
Page 37: About
On the setup screen, tap About to display the About screen. About Screen Use the About screen to view information about the TSR-310, including the loaded firmware, the operating system versions, and the device RNDIS address (if the TSR-310 is connected to a computer via USB). -
Page 38: Configuration Via Web Interface
Configuration via Web Interface The TSR-310 may be monitored and configured using the included web configuration interface. The configuration interface is accessible from a web browser if the TSR-310 IP address is known. To access the configuration interface: Open a web browser. -
Page 39: Actions Menu
The Actions menu provides the following selections. Reboot Click Reboot to reboot the TSR-310. After Reboot is selected, a dialog box is displayed asking whether the TSR-310 should be rebooted. Select Yes to reboot the device or No to cancel the reboot. Restore Click Restore to restore the TSR-310 configuration settings to their default values. -
Page 40: Firmware Upgrade
Click Browse, and then navigate to the firmware PUF on the host computer. 2. Select the firmware PUF, and then click Open. 3. Click Load to load the PUF to the TSR-310. The upload progress is shown in the dialog box. -
Page 41: Project Upload
Click Browse, and then navigate to the project .vtz file on the host computer. 2. Select the project .vtz file, and then click Open. 3. Click Load to load the project .vtz file to the TSR-310. The upload progress is shown in the dialog box. -
Page 42: Status
Model: The TSR-310 model name • NOTE: If the TSR-310 is in Performance UI mode, the model name reports as "TSR-310-P." If the TSR-310 is not in Performance UI mode, the model name reports as "TSR-310." Firmware Version: The firmware version loaded onto the TSR-310 •... -
Page 43: Network
Network Click Network to view the status of the network settings for the TSR-310. Status Tab - Network The following Network information is displayed: Host Name: The TSR-310 hostname • Domain Name: The TSR-310 domain name • DNS Servers: The DNS (domain name server) addresses used to resolve the •... -
Page 44: Network Diagnostics
Link Quality: The qualitative value of the signal strength and signal interference • (A green check icon indicates that the link quality is optimal, while a red x icon indicates that the link quality is suboptimal.) 40 • TSR-310: Handheld Touch Screen Remote Supplemental Guide – DOC. 8226D... - Page 45 Wake on Wireless Counts in last hour: The number of occurrences where the • TSR-310 was woken by the wireless LAN over the last hour (A green check icon indicates that the number of occurrences is optimal, while a red x icon indicates that the number of occurrences is suboptimal.)
-
Page 46: Settings
TSR-310 settings. Settings Selections Each selection is described in the sections that follow. System Setup Click System Settings to configure general network and TSR-310 settings. Settings Tab - System Setup (continued on following page) 42 • TSR-310: Handheld Touch Screen Remote... - Page 47 • NOTE: If DHCP is enabled, IP does not function until a reply has been received from the server. The TSR-310 broadcasts requests for an IP address periodically. IP Address: Enter the TSR-310 IP address on the network. • Supplemental Guide – DOC. 8226D...
- Page 48 Subnet Mask: Enter the TSR-310 subnet mask address on the network. • Default Gateway: Enter the gateway router address on the network. • Device Display • Auto Brightness: Toggle the switch to turn automatic brightness control for the TSR-310 LCD display on or off.
-
Page 49: Configure Date/Time
Time Server. Time Configuration • Time Zone: Select a time zone for the TSR-310 using the drop-down menu. Time(24hr Format): Select the time for the TSR-310 (in 24-hour format) using the pop-up menu that is displayed. Date: Select the date for the TSR-310 using the pop-up calendar that is displayed. -
Page 50: Auto Update
• network for firmware updates if the updates are not pushed to the device. Click Update Now to check the file server for new firmware and to update the TSR-310 immediately if new firmware is available. 46 • TSR-310: Handheld Touch Screen Remote... - Page 51 Place the TSR-310 on a clean, soft surface with the screen side facing down. Use care to avoid scratching the front surface of the TSR-310. 2. Align the t-pin tool (included with the TSR-310) with the small hole on the rear of the TSR-310.
- Page 52 9. Slide the battery cover up and into the remote until the cover snaps into place. 48 • TSR-310: Handheld Touch Screen Remote Supplemental Guide – DOC. 8226D...
- Page 53 The procedures in the appendix are required only if a Smart Graphics program has been loaded to the remote. If the TSR-310 is in Performance UI mode, no custom programming is necessary to activate voice control services. For more information, refer to the Performance UI for TSR-310 Operations Guide (Doc.
- Page 54 Navigate to https://voicereg-g-na.crestron.io for Google accounts in the North America region. 4. Enter the control system MAC address in the Enter Control System ID text field, and tap Submit. 50 • TSR-310: Handheld Touch Screen Remote Supplemental Guide – DOC. 8226D...
- Page 55 5. Click Register at the bottom of the Registration column to display a six-digit registration code. Record the code for later use. Crestron Admin Portal - Status (Not Registered) 6. Open the SIMPL Debugger tool in Crestron Toolbox software. Supplemental Guide – DOC. 8226D TSR-310: Handheld Touch Screen Remote • 51...
- Page 56 9. Return to the control system registration portal, and click the link at the bottom of the Linked Account column to register the control system with the chosen voice services provider. The page for registering with an Amazon account is shown below. 52 • TSR-310: Handheld Touch Screen Remote Supplemental Guide – DOC. 8226D...
- Page 57 Business accounts are not supported by the TSR-310.) ∙ If an Amazon Alexa™ device will be used in addition to the TSR-310, register the control system with an Amazon account. If a Google Assistant device will be used in addition to the TSR-310, register the control system with a Google account.
- Page 58 IP ID assigned to the TSR-310 in the voice registration program. 13. Navigate to Voice Control in the TSR-310 setup screens. 14. Tap Pair to pair the TSR-310 with the voice control provider. If the registration is successful, a "Registration successful" message displays, and the Enabled indicator on the top right of the screen turns green.
- Page 59 Voice Control Screen - Registration Successful NOTE: If a registration error displays, ensure that the TSR-310 is connected to the control system over IP, that the control system is connected to the voice services provider, that the voice registration program is running and has been programmed correctly, and that the time zone has been set correctly.
- Page 60 Crestron Electronics, Inc. Supplemental Guide – DOC. 8226D 15 Volvo Drive, Rockleigh, NJ 07647 (2049523) Tel: 888.CRESTRON 02.19 Fax: 201.767.7576 Specifications subject to www.crestron.com change without notice.