Crestron TSR-310 User Manual
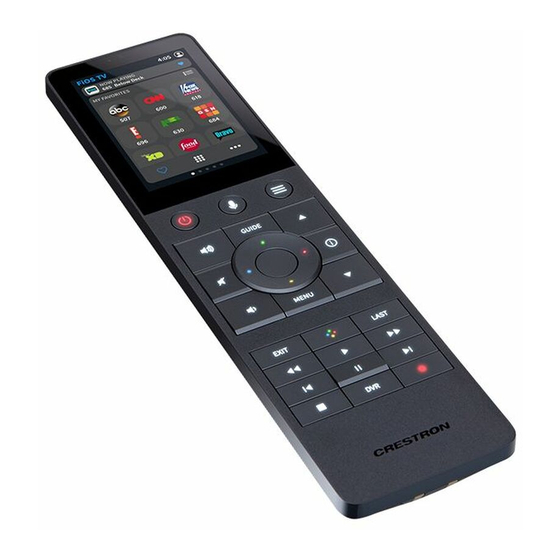
Handheld touch screen remote
Hide thumbs
Also See for TSR-310:
- Do manual (2 pages) ,
- Supplemental manual (60 pages) ,
- Supplemental manual (52 pages)
Table of Contents
Advertisement
Advertisement
Table of Contents

Related Manuals for Crestron TSR-310


Summary of Contents for Crestron TSR-310
- Page 1 TSR-310 Handheld Touch Screen Remote User Guide Crestron Electronics, Inc.
- Page 2 Crestron disclaims any proprietary interest in the marks and names of others. Crestron is not responsible for errors in typography or photography.
-
Page 3: Table Of Contents
Contents Introduction ........................... 1 Overview............................2 Hard Button Controls ..........................2 Touch Screen Controls ..........................3 TSR-310 User Interface ......................6 Now Playing..............................6 Media ................................9 Cable TV/DVR ............................ 10 Blu-ray Disc Players .......................... 14 Streaming Video Players ......................... 15 Streaming Music Players ......................... -
Page 5: Introduction
This document describes the Crestron user interface that is provided for controlling a Crestron Pyng® OS 2 system. The user interface on your TSR-310 may look different if your dealer has provided you with a custom program for system control. -
Page 6: Overview
The following sections describe the functions of the TSR-310 hard buttons and touch screen controls. Hard Button Controls Refer to the table below for the TSR-310 hard button functions. The button control functions may vary depending on the selected media device. NOTE:... -
Page 7: Touch Screen Controls
The primary touch screen controls for the user interface are described in the following sections. When the media system is turned on in the room, the TSR-310 displays the media screen for the currently playing media source by default. - Page 8 4. Shades 5. Climate NOTE: If one of the subsystems above has not been added to the Crestron Pyng system, the associated screen is removed from the user interface. The order of the remaining screens is unchanged. An information bar at the top of each screen displays the current subsystem or media device, the time, the TSR-310 battery level, and the active user profile.
- Page 9 "Now Playing" on page 6. NOTE: When the media system is off, the NOW PLAYING panel is not displayed on any of the control screens. User Guide – DOC. 8421A TSR-310: Handheld Touch Screen Remote • 5...
-
Page 10: Tsr-310 User Interface
TSR-310 User Interface The TSR-310 user interface contains various screens for controlling and configuring the media system. Each screen is described in the sections that follow. Now Playing A NOW PLAYING panel is always shown at the top of each operational page when the media system is on. - Page 11 For other cable/satellite TV and DVR devices, as well as for other media devices • (such as Blu-ray Disc® player devices and streaming video players), only the source name and icon is provided. User Guide – DOC. 8421A TSR-310: Handheld Touch Screen Remote • 7...
- Page 12 Sonos® streaming music player is shown below as an example. NOW PLAYING Panel - Streaming Music Player Tap inside the expanded NOW PLAYING panel to collapse the selection. 8 • TSR-310 Handheld Touch Screen Remote User Guide – DOC. 8421A...
-
Page 13: Media
The following sections describe the touch screen controls that are provided for common media sources. The TSR-310 hard buttons also adapt to the media source and may be used for control. For more information, refer to "Hard Button Controls" on page 2. -
Page 14: Cable Tv/Dvr
To view the MY FAVORITES menu in list form, tap the list icon on the upper • right of the screen. The MY FAVORITES menu switches to a list view. 10 • TSR-310 Handheld Touch Screen Remote User Guide – DOC. 8421A... - Page 15 A check icon next to a channel name indicates that it will appear on the MY FAVORITES menu, while an empty circle indicates that the channel will not appear on the MY FAVORITES menu. User Guide – DOC. 8421A TSR-310: Handheld Touch Screen Remote • 11...
- Page 16 NUMBER PAD menu for the cable TV provider or DVR. The NUMBER PAD menu provides a number pad that is used to select a channel manually. 12 • TSR-310 Handheld Touch Screen Remote User Guide – DOC. 8421A...
- Page 17 Media Screen - ADDITIONAL FUNCTIONS Menu Swipe up or down through the ADDITIONAL FUNCTIONS menu to view all of the additional controls that may be selected for the device. User Guide – DOC. 8421A TSR-310: Handheld Touch Screen Remote • 13...
-
Page 18: Blu-Ray Disc Players
NUMBER PAD menu for the Blu-ray Disc player. The NUMBER PAD menu provides a number pad for use with the device. Media Screen - NUMBER PAD Menu 14 • TSR-310 Handheld Touch Screen Remote User Guide – DOC. 8421A... -
Page 19: Streaming Video Players
The media screen for an Apple TV® streaming video player is shown below. Media Screen - Apple TV User Guide – DOC. 8421A TSR-310: Handheld Touch Screen Remote • 15... -
Page 20: Streaming Music Players
NOTE: Some device functions for streaming music players, such as search functions that require a keyboard, are not supported on the TSR-310. If an unsupported function is attempted on the TSR-310, an alert screen is displayed. Perform these functions on another control device in the home (such as a touch screen). -
Page 21: Quick Actions
Quick Actions If quick actions have been created for the Crestron Pyng system, swipe through the operational screens until the QUICK ACTIONS screen is displayed. NOTE: If all media and environmental subsystems are active in the Crestron Pyng system, the QUICK ACTIONS screen is the second screen from the left as indicated by the navigation dots on the bottom of the screen. - Page 22 Once the quick action has completed, a green check icon is displayed to the left of the quick action name. The check icon is shown for a few seconds before reverting to the lightning bolt icon. QUICK ACTIONS Screen - Action Complete 18 • TSR-310 Handheld Touch Screen Remote User Guide – DOC. 8421A...
-
Page 23: Lighting
LIGHTING Screen Use the LIGHTING screen to recall light scenes for the room where the TSR-310 is paired or for the whole house. The LIGHTING screen also provides master raise and lower controls for programmed dimmable lights in the room. - Page 24 Once the light scene has completed, a green check icon is displayed to the left of the light scene name. The check icon is displayed until another scene is played that overwrites the existing scene. LIGHTING Screen - Scene Complete 20 • TSR-310 Handheld Touch Screen Remote User Guide – DOC. 8421A...
-
Page 25: Shades
SHADES Screen Use the SHADES screen to recall shade scenes for the room where the TSR-310 is paired or for the whole house. The SHADES screen also provides master raise and lower controls for programmed shade motors or groups in the room. - Page 26 Once the shade scene has completed, a green check icon is displayed to the left of the shade scene name. The check icon is displayed until another scene is played that overwrites the existing scene. SHADES Screen - Scene Complete 22 • TSR-310 Handheld Touch Screen Remote User Guide – DOC. 8421A...
-
Page 27: Climate
CLIMATE Screen Use the CLIMATE screen to adjust the temperature of a thermostat from the room where the TSR-310 is paired. The CLIMATE screen also shows the status of the thermostat and provides controls for changing the thermostat mode. The current room temperature is displayed in the center of the screen. - Page 28 SCHEDULE: Select the behavior of the programmed thermostat schedule: • Tap HOLD to stop the thermostat schedule. Tap RUN to resume the thermostat schedule. Once a new setting is selected, the configuration menu closes automatically. 24 • TSR-310 Handheld Touch Screen Remote User Guide – DOC. 8421A...
- Page 29 To change the thermostat that is controlled by the TSR-310, tap the thermostat name on the CLIMATE screen. A SWITCH THERMOSTAT screen is displayed. CLIMATE Screen - SWITCH THERMOSTAT Menu A filled button icon is displayed to the left of the selected thermostat.
-
Page 30: User-Triggered Screens
User-Triggered Screens The following user-triggered screens may be accessed at any time with the appropriate hard buttons on the TSR-310. User-triggered screens provide additional options for system control. Media System Power Press the power button on the TSR-310 to power off the selected media device. -
Page 31: Voice Commands
TSR-310 to display a screen for issuing voice commands. NOTE: To use voice commands, your dealer must configure voice control on the TSR-310. Contact your dealer for more information. Voice Commands Screen - Command Prompt If no command is spoken and the microphone button is released, a list of common voice commands is displayed on the screen. - Page 32 Voice Commands Screen - Command Complete If the TSR-310 recognizes the command but it unable to process it in the system, a message indicating this information is displayed. Voice Commands Screen - Unsupported Command 28 •...
- Page 33 Voice Commands Screen - Command Not Recognized Press the microphone button to dismiss this message, and then attempt to reissue the voice command. If voice control is disabled on the TSR-310, a message indicating this information is displayed. Voice Recognition Disabled Screen Tap OK to dismiss the notification.
-
Page 34: My Sources
My Sources Press the home button on the TSR-310 to display the MY SOURCES screen. MY SOURCES Screen The MY SOURCES screen lists all the available media sources for the room. The source that is currently playing is highlighted in blue. -
Page 35: System Screens
Each screen is explained in the sections that follow. System Alert Screens If the TSR-310 is attempting to establish a connection to the control system, a "connecting to system" alert is displayed. Connecting to System Alert Screen This alert is closed automatically once a connection to the control system is established. - Page 36 If the TSR-310 is no longer in range of the wireless access point or if the wireless access point is not functioning, a "Wi-Fi out of range" alert is displayed. Wi-Fi Out of Range Alert Screen This alert is closed automatically once the TSR-310 is back in range of the wireless access point.
-
Page 37: Battery Low
Battery Low When the TSR-310 battery level has reached 20%, a screen is displayed to alert that the TSR-310 should be placed on its charging dock. Battery Low Screen Tap OK to dismiss the notification. If the remote is not placed on the charging dock, additional alert screens are displayed when the battery level reaches 10% and 5%. -
Page 38: Battery Charging
Battery Charging When the TSR-310 is placed in its charging dock, a screen with a charging battery image and the current battery level is displayed to alert that the battery is charging. Battery Charging Screen Tap OK to dismiss the notification. Otherwise, this screen is closed automatically after three seconds. -
Page 39: Volume
Volume When the system volume is adjusted on the TSR-310 using the volume raise volume lower hard buttons, a VOLUME panel is displayed. VOLUME Panel The blue bar underneath the volume icon adjusts in real time to show the approximate volume level. -
Page 40: Configuration
Tap DONE to save and exit the settings screens. Room Use the ROOM selection to change the room that the TSR-310 is associated with in the Crestron Pyng system. Tap the arrow button next to the currently selected room to display the ROOM screen. -
Page 41: Lcd Brightness
Tap DONE to save and exit the settings screens. LCD Brightness Use the LCD BRIGHTNESS selection to adjust the brightness of the TSR-310 touch screen display. Use the slider to adjust the LCD brightness level from 0 to 100%. -
Page 42: Standby Timeout
Use the STANDBY TIMEOUT selection to adjust the standby timeout duration for the touch screen display when the TSR-310 is undocked. After the TSR-310 is inactive for the set duration, the touch screen display switches to a black screen to conserve battery life. -
Page 43: Voice
Voice Use the VOICE selection to enable or disable voice registration for the TSR-310. NOTE: To use voice commands, your dealer must configure voice control on the TSR-310. Contact your dealer for more information. Tap the arrow button next to the currently selected voice registration setting to display the VOICE screen. - Page 44 VOICE Screen - Registration In Progress If the registration is successful, a success message is displayed. VOICE Screen - Registration Successful To disable voice registration on the TSR-310, tap DISABLED under VOICE • REGISTRATION. The TSR-310 attempts to unregister with the voice control provider that is associated with the Crestron Pyng system.
-
Page 45: Edit Quick Actions
Tap the back arrow icon to return to the previous screen. Tap RESET to save any changes and to reset the TSR-310 with the new settings applied. Edit Quick Actions Use the QUICK ACTIONS selection to edit the quick actions that are displayed on the QUICK ACTIONS screen. - Page 46 Tap the back arrow icon to return to the previous screen. Tap DONE to save and exit the settings screens. 42 • TSR-310 Handheld Touch Screen Remote User Guide – DOC. 8421A...
-
Page 47: Legal
PRIVACY POLICY MENU Screen Tap either of the provided links to display a screen that provides more information about the link. The screen for the Terms of Use For Crestron Mobile Apps link is shown below. Terms of Use Screen Enter the provided link into a web browser to view the legal statement. -
Page 48: Appendix A: Create User Profiles
The TSR-310 user interface features user profiles to give each household member customized control over the media system. The user profiles created for cable TV providers or DVR (digital video recorder) devices in the Crestron Pyng system are paired with the TSR-310 automatically. - Page 49 3. Tap the user profile selection on the bottom left of the screen to open the Edit Profile menu. RC65X IR - Edit Profile 4. Tap + New Profile. A text field for entering a new user name is displayed. User Guide – DOC. 8421A TSR-310: Handheld Touch Screen Remote • 45...
- Page 50 To edit an existing user name, select the user from the list, and then tap the pencil icon that is displayed on the upper right of the menu. A text field for editing the user name is displayed. 46 • TSR-310 Handheld Touch Screen Remote User Guide – DOC. 8421A...
- Page 51 This page is intentionally left blank. User Guide – DOC. 8421A TSR-310: Handheld Touch Screen Remote • 47...
- Page 52 Crestron Electronics, Inc. User Guide – DOC. 8421A 15 Volvo Drive, Rockleigh, NJ 07647 (2053078) Tel: 888.CRESTRON 12.18 Fax: 201.767.7576 Specifications subject to www.crestron.com change without notice.