
Related Manuals for DataCard 150i


Summary of Contents for DataCard 150i
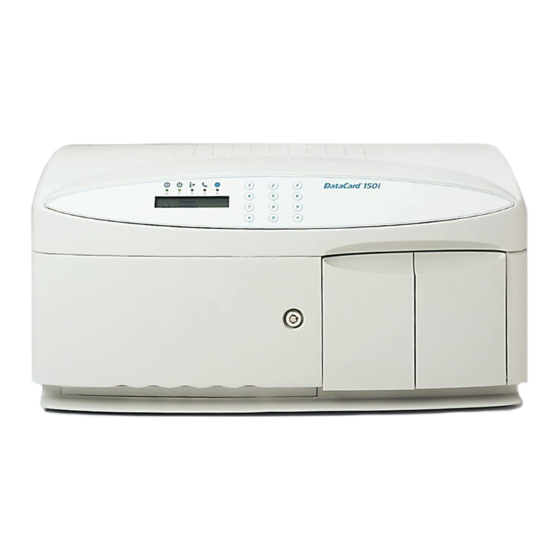
- Page 1 Datacard 150i Desktop ® Card Personalization System Owner’s Manual February 2008 Part No. 539782-001, Rev A...
- Page 2 Liability Statement This product has been built to the high standards of Datacard Group. Please do not attempt to operate or repair this equipment without adequate training. Any use, operation, or repair in contravention of this document is at your own risk.
-
Page 3: Table Of Contents
Contents Chapter 1: Introduction ____________________________________________________________ 1 Overview of the 150i System ___________________________________________________________1 Internal Components of the 150i System________________________________________________2 Rear Components of the 150i System __________________________________________________3 Financial Card Access ________________________________________________________________4 Supplies/Options _____________________________________________________________________4 Chapter 2: Procedures _____________________________________________________________ 5 Powering On the 150i System __________________________________________________________5... - Page 4 Revision Log 150i Desktop Card Personalization System Owner’s Manual Revision Date Description of Changes February 2008 Replaces Administrator’s Guide, Part No. 526638-001. Regulatory Compliance Notice for USA (FCC Notice) This equipment generates, uses, and can radiate radio frequency energy. If it is not installed and used in accordance with this instruction manual, it may interfere with radio communications.
- Page 5 Safety All Datacard products are built to strict safety and reliability specifications in accordance with UL60950-1 and CUL requirements; therefore, safety issues pertaining to operation and repair of Datacard equipment are primarily environmental and human interface. The following basic safety tips are given to ensure safe installation, operation and maintenance of Datacard equipment and are not to be considered as comprehensive on all matters of safety.
-
Page 7: Chapter 1: Introduction
The Datacard® 150i Desktop Card Personalization System delivers high quality, ready-to-use cards in a fast, secure, single pass operation. This manual describes the components of the 150i System and the basic operating procedures. Information on troubleshooting, obtaining service and ordering supplies is also included. -
Page 8: Internal Components Of The 150I System
Internal Components of the 150i System The assemblies inside the 150i system include the following Modules. Card Transport Module Input Hopper • • Embossing Module Magnetic Stripe Encoding Module • • • Rear Indent Printing Module • Reject Tray •... -
Page 9: Rear Components Of The 150I System
Rear Components of the 150i System The following components are located on the back of the 150i system. On/Off Switch • Communication Ports • • Host • Service • Smart Card 1 (Option) • Power Receptacle • 150i Desktop Card Personalization System... -
Page 10: Financial Card Access
Financial Card Access The 150i system contains security features to restrict the generation of financial cards during shipment. If the security requirements are not met, the system will display an error. Your Datacard Authorized Service provider will assist in ensuring that the security requirements are correctly enabled for your application. -
Page 11: Chapter 2: Procedures
Use the following procedures to operate the 150i System. Powering On the 150i System Connect the power cord from the wall outlet socket to the 150i system. To power ON the 150i system, switch the on/off switch to ON. •... -
Page 12: Changing The Password
*100005555. In this example, the keystrokes to open the Top Cover again using the new password would be *05555. If you do not remember your current password, use the key or contact your Datacard Service Representative to reset it. Owner’s Manual... -
Page 13: Opening The Top Cover
Opening the Top Cover The Top Cover can be opened with either a four-digit password or a key. The default password shipped from the factory for the 150i system is *00000. This password should be changed upon receipt of the machine. -
Page 14: Loading Blank Cards In The Input Hopper
Insert up to 100 blank cards in the Input Hopper, with the front of the card up and the top edge of the card toward the rear of the 150i system. If you are encoding Magnetic Stripe cards, place the Magnetic Stripe face down and oriented toward the rear of the 150i system. -
Page 15: Loading A Single Card
Loading a Single Card A single card loaded in the Single Card Track will be personalized by the 150i system before any cards loaded in the Input Hopper. To manually load a single card, perform the following steps: The 150i system must be in the Ready Mode before loading a single card. Do not insert a card while the 150i system is processing cards. -
Page 16: Loading A Pre-Embossed Card
Place a pre-embossed card on the Single Card Track, with the front of the card up and the top edge of the card toward the back of the 150i system. Close the Single Card Access Door. The pre-embossed card is the next card in the stack to be personalized. -
Page 17: Unloading Completed Cards
Remove completed cards from the 150i system by opening the Output Door and removing the card(s). The Output Tray can hold up to 15 cards. The 150i system will not process cards when the Output Door is open. Do not open the Output Door while a card is being processed. -
Page 18: Unloading Reject Cards
Unloading Reject Cards The Reject Tray holds up to 10 rejected cards. To remove rejected cards from the 150i system, perform the following steps: Unlock and lift up the Top Cover. Remove all rejected cards from the Reject Tray. Close the Top Cover. -
Page 19: Removing Or Inserting The Topper Cassette
Unlock and lift up the Top Cover. Lift the Topper Cassette Release Ring and pull the Topper Cassette out of the Topper Module (toward the front of the 150i System). Lift the Topper Cassette Release Ring and insert the new Topper Cassette in the Topper Module until it is firmly in place. -
Page 20: Replacing The Topping Foil
Unlock and lift the Top Cover. Lift the Topper Cassette Release Ring and pull the Topper Cassette out of the Topper Module (toward the front of the 150i system). Pull the Take-up Pin out of the Topper Cassette and remove any used Topping Foil from the Take-up Spool. -
Page 21: Replacing The Front Indent Ribbon
Tape the edge of the ribbon, dull side out, to the core (innermost part of the ribbon). Place the core on the Take-up Spool, as shown below and slide the Take-up Retainer on the Take-up Spool until it clicks in place. Close the Top Cover. 150i Desktop Card Personalization System... -
Page 22: Replacing The Rear Indent Ribbon
Replacing the Rear Indent Ribbon The Rear Indent Module is located behind the Embossing Wheel. This procedure is necessary only if the Rear Indent Module has been purchased. To replace the Rear Indent Ribbon, perform the following steps: Unlock and lift the Top Cover. Remove the Take-up Retainer and full Take-up Spool. - Page 23 150i Desktop Card Personalization System...
- Page 24 Owner’s Manual...
-
Page 25: Chapter 3: Troubleshooting
The system administrator for the 150i system performs the following troubleshooting procedures. Identifying Errors Using Indicators Use the indicators above the display on the front of the 150i system to identify its current condition. Power Indicator When the 150i system is ON, the power indicator is illuminated. -
Page 26: Identifying Errors Using Error Codes
The messages displayed by the host application are not as specific as the error codes displayed on the LCD. Recording of the error code displayed on the LCD of the 150i system by the operator provides the most accurate representation of system malfunction when it occurs. -
Page 27: General System Errors
Stepper Error reject tray XXYY0C find home wheel could embossing wheel is not jammed position. not verify and can spin by turning it manually. home position before embossing a card 150i Desktop Card Personalization System... - Page 28 Error Error Status Code Card Possible Corrective Action Message Code Meaning Sent to Processing Cause (Operator) (LCD) (LCD) Application Status Embossing XXYY0D The upper or Two cards in Remove cards from carriage or any D = Wheel Card moved to Error lower emboss card carriage...
- Page 29 Full processed blocked. cards XXYY2E The topper Pending Shut down 150i system and allow it N = Topper Jam Card jammed in Temperature temperature is electrical to cool at least 5 minutes. Then topper module. Error too high.
- Page 30 Error Error Status Code Card Possible Corrective Action Message Code Meaning Sent to Processing Cause (Operator) (LCD) (LCD) Application Status XXYY30 The topper Pending Shut down system and allow it to N = Topper Jam Card jammed in Temperature temperature is electrical cool at least 5 minutes.
-
Page 31: Magnetic Stripe Errors
System unable to compare BBJ_ERROR MS 091A Faulty magnetic stripe on Inspect card magnetic stripes for magnetic stripe data written card visible flaws. Replace bad card to magnetic stripe data read stock. 150i Desktop Card Personalization System... -
Page 32: Communication Errors
Error Error Message Corrective Action Code Meaning Possible Cause (LCD) (Operator) (LCD) System unable to compare PARITY_ERROR MS 091B Faulty magnetic stripe on Inspect card magnetic stripes for magnetic stripe data written card visible flaws. Replace bad card to magnetic stripe data read stock System unable to compare LRC ERROR... -
Page 33: Troubleshooting Tips
Resend data and/or reinitialize the system to attempt recovery. If a card is loose in the 150i system: • Check the inside of the 150i system for cards that may have fallen from the Card Transport Module. • Remove the cards and attempt to resume printing. -
Page 34: Service Required Errors
Service Required Errors When the Service indicator is illuminated, an error requiring service has occurred. Note the Error Code and message from the 150i system LCD display and contact your Datacard Service Representative to perform the repair. Do not attempt to correct the problem on your own. - Page 35 Supplies Guarantee Guarantee of supply quality and performance with the matched supply item we offer. For Datacard systems is backed with a full (12) month supplies you, that means high security and warranty. exceptional performance. Worldwide...
- Page 36 Certified Supplies. You can ® ® count on Datacard for all your supply needs. We engineer superior performance and reliability into 11111 Bren Road West every system-matched supply item we offer. For you, that means high security and exceptional Minnetonka, MN 55343-9015 +1 952 933 1223 performance.